How to Create a Contemporary Garden That Transforms Your Space

Contemporary gardens represent the perfect marriage of form and function, combining sleek aesthetics with practical living spaces. Unlike traditional garden styles that rely heavily on historical references, contemporary design embraces clean lines, innovative materials and purposeful planting to create outdoor spaces that feel fresh and relevant.

The beauty of contemporary garden design lies in its flexibility and adaptability. These gardens work equally well in compact urban settings and expansive rural properties, making them an excellent choice for homeowners seeking a timeless yet modern approach to outdoor living.

What is a Contemporary Garden?

A contemporary garden is characterised by its clean, uncluttered aesthetic and emphasis on geometric shapes and modern materials. These gardens prioritise simplicity over ornamentation, creating spaces that feel calm, organised and purposeful. Unlike minimalist gardens that strip away almost everything, contemporary designs strike a balance between simplicity and visual interest.

Key characteristics of contemporary gardens include structured plantings, bold architectural elements and innovative use of materials like steel, concrete and composite decking. Water features often appear as sleek rectangular pools or linear rills rather than traditional fountains. Lighting plays a crucial role, with carefully positioned LED strips and sculptural fixtures creating drama after dark.

The contemporary approach also embraces sustainability, incorporating eco-friendly materials, drought-tolerant plants and efficient irrigation systems. This makes contemporary gardens not only beautiful but also environmentally responsible and cost-effective to maintain.

History of Contemporary Garden Design

Contemporary garden design emerged during the mid-20th century as designers began moving away from traditional cottage garden and formal Victorian styles. The movement gained momentum in the 1960s and 1970s, influenced by modernist architecture and changing lifestyles that demanded more functional outdoor spaces.

The Chelsea Flower Show played a pivotal role in showcasing contemporary design to British audiences. Gardens featuring bold geometric patterns, architectural plants and modern materials began appearing regularly, challenging traditional notions of what an English garden should look like.

Climate change and environmental awareness have further shaped contemporary garden design. Modern designers increasingly focus on creating gardens that work with natural weather patterns, incorporating native plants and sustainable practices that reduce environmental impact whilst maintaining visual appeal.

Famous Contemporary Garden Designers

Several influential designers have shaped the contemporary garden movement. Dan Pearson is renowned for his naturalistic approach to contemporary design, creating gardens that feel both modern and in harmony with their surroundings. His work demonstrates how contemporary principles can be applied whilst respecting local ecology and natural beauty.

Tom Stuart-Smith has gained recognition for his bold use of perennial plantings combined with strong architectural elements. His designs prove that contemporary gardens can be both structured and wildly beautiful, incorporating meadow-like plantings within geometric frameworks.

Christopher Bradley-Hole revolutionised contemporary garden design with his minimalist approach and masterful use of repetition. His gardens feature carefully selected plant palettes repeated throughout the space, creating unity and visual rhythm that feels both sophisticated and serene.

Elements of a Contemporary Garden

Contemporary gardens rely on several key design elements working together to create their distinctive aesthetic. Clean lines form the foundation, whether expressed through straight-edged paths, rectangular planting beds, or linear water features. These geometric shapes provide structure and help define different areas within the garden.

Material selection plays a crucial role in achieving the contemporary look. Modern materials like cor-ten steel, polished concrete, and composite decking create sleek surfaces that contrast beautifully with soft plantings. These materials also offer practical benefits, requiring minimal maintenance whilst providing long-lasting durability.

Repetition and rhythm create visual harmony throughout contemporary gardens. This might involve repeating the same plant in blocks, using identical planters throughout the space, or incorporating repeated architectural elements like screens or sculptures. This repetition creates a sense of unity that ties the entire design together.

What to Consider When Planning Your Contemporary Garden

Position and Environment

Assess your garden’s orientation and microclimate before beginning any design work. Contemporary gardens work best when designed to respond to specific environmental conditions. South-facing gardens might benefit from pergolas or screening to provide shade, whilst north-facing spaces might focus on reflective surfaces to maximise available light.

Consider how your contemporary garden will relate to your home’s architecture. The most successful contemporary gardens create seamless transitions between indoor and outdoor spaces, often extending interior flooring materials onto terraces or using similar colour palettes throughout.

Style and Function

Determine how you want to use your garden before finalising the design. Contemporary gardens excel at creating distinct zones for different activities – entertaining areas with built-in seating, quiet contemplation spaces with water features, or productive areas with raised vegetable beds integrated into the overall design.

Think about storage needs early in the planning process. Contemporary gardens hide practical elements like bins, tools and garden equipment behind sleek screens or within purpose-built structures that complement the overall aesthetic.

Maintenance Requirements

Contemporary gardens often require less maintenance than traditional styles, but they demand different types of care. Hard landscaping materials need occasional cleaning to maintain their appearance, whilst structural plantings require precise pruning to preserve their architectural qualities.

Plan for seasonal interest when selecting plants and materials. Contemporary gardens should look good year-round, relying on evergreen structure, interesting bark textures and carefully planned seasonal colour rather than short-lived flower displays.

Plants for Contemporary Gardens

1. Miscanthus sinensis ‘Gracillimus’

This ornamental grass provides vertical structure and movement, creating beautiful silhouettes against clean backgrounds. Its narrow leaves and feathery plumes add texture without overwhelming other design elements.

2. Buxus sempervirens (Box)

Perfect for creating geometric shapes and defined edges, box responds well to clipping and maintains its form throughout the year. Use it to create low hedges, topiary shapes, or structural blocks within planting schemes.

3. Astelia chathamica

This striking architectural plant features sword-like silver leaves that create bold focal points. It thrives in coastal conditions and adds dramatic texture to contemporary plantings.

4. Phormium tenax (New Zealand Flax)

Available in various colours and sizes, phormiums provide strong architectural presence and work particularly well in large planters or as specimen plants within gravel gardens.

5. Lavandula angustifolia ‘Hidcote’

This compact lavender variety offers fragrance, colour, and structure. Plant in blocks or linear drifts to create contemporary interpretations of traditional lavender borders.

6. Cortaderia selloana ‘Pumila’

A more compact pampas grass variety that provides dramatic texture and seasonal interest without overwhelming smaller gardens. Its architectural form works perfectly in contemporary settings.

7. Verbena bonariensis

This see-through perennial adds height and purple colour whilst maintaining the clean lines essential to contemporary design. It self-seeds readily, creating natural drifts over time.

8. Heuchera ‘Palace Purple’

Provides reliable evergreen groundcover with attractive burgundy foliage that complements modern materials like steel and concrete. Plant in blocks for maximum contemporary impact.

9. Festuca glauca ‘Elijah Blue’

This compact blue-grey grass creates perfect spherical mounds that work beautifully repeated throughout contemporary plantings. It requires minimal maintenance and provides year-round structure.

10. Allium hollandicum ‘Purple Sensation’

These architectural bulbs create perfect purple spheres that complement contemporary design principles. Plant in geometric patterns or naturalistic drifts for spring interest.

Essential Design Features

Contemporary gardens incorporate several key design features that define their character. Geometric water features create focal points whilst adding movement and sound to the space. Consider linear rills, rectangular reflecting pools or sculptural fountains that complement rather than compete with the overall design.

Outdoor lighting transforms contemporary gardens after dark, highlighting architectural plants and creating dramatic shadows on walls and surfaces. LED strip lighting concealed within seating or along pathways provides subtle illumination, whilst uplighting creates sculptural effects with specimen trees and large grasses.

Built-in seating integrates seamlessly with contemporary garden design, often doubling as retaining walls or planters. Materials like concrete, steel or composite timber create comfortable seating that requires no additional furniture and maintains the clean aesthetic year-round.

Screening plays a vital role in contemporary gardens, creating privacy whilst maintaining openness where desired. Modern screening materials include cor-ten steel panels, living walls or precisely clipped hedging that provides structure whilst softening hard edges.

Advantages and Disadvantages of Contemporary Gardens

Contemporary gardens offer numerous advantages for modern homeowners. They typically require less maintenance than traditional gardens once established, as they rely on structural plants and quality hard landscaping rather than labour-intensive flower borders. The clean aesthetic works well with modern architecture and creates a sense of calm that many find appealing.

These gardens also adapt well to changing needs. The flexible design approach allows for modifications without compromising the overall aesthetic, making them perfect for growing families or evolving lifestyles.

However, contemporary gardens do have some limitations. The initial installation costs can be higher due to quality materials and precise construction requirements. Some people find the aesthetic too stark or miss the cottage garden charm of traditional English gardens. Seasonal interest can also be more challenging to achieve without relying on traditional flower borders.

The structured nature of contemporary gardens means that maintenance, whilst less frequent, must be precise. Hedge clipping, grass cutting and material cleaning must be done regularly to maintain the crisp appearance that defines the style.

Bringing Your Contemporary Garden Vision to Life

Creating a successful contemporary garden requires careful planning, quality materials, and precise execution. Start by developing a clear vision of how you want to use your space, then work with the natural characteristics of your site to create a design that feels both modern and appropriate to its setting.

Remember that contemporary garden design is about creating spaces that enhance your lifestyle whilst respecting the environment. Choose plants that thrive in your specific conditions, select materials that will age gracefully, and design layouts that will continue to function well as your needs evolve.

Take inspiration from the great contemporary designers but adapt their ideas to suit your unique space and requirements. The most successful contemporary gardens feel personal and purposeful, reflecting their owners’ lives whilst contributing to the broader landscape.

Consider seeking professional advice for complex installations or if you’re unsure about plant selections and material choices. A well-designed contemporary garden represents a significant investment in your property and quality of life, making professional guidance a worthwhile consideration.

Plan your contemporary garden transformation today and create an outdoor space that brings you joy for years to come. Start with small changes if budget or time is limited – even simple updates like adding geometric planters or incorporating modern materials can begin your journey toward contemporary garden style.

Further Details: Creating a Cottage Garden, Creating a Perfect Coastal Garden, A Guide to Prairie Planting, Creating Harmony with Nature Naturalistic Garden Design

For Daily Inspiration- Follow Us on Instagram 💚

How to Plant a Hedge: Growing Natural Boundaries

Creating a hedge transforms your outdoor space into something truly special. Whether you’re seeking privacy, defining boundaries or attracting wildlife, planting a hedge offers a natural solution that grows more beautiful with each passing year.

Unlike fencing or walls, hedges provide living boundaries that change with the seasons, support local wildlife and can last for generations with proper care. The process requires patience and planning, but the rewards extend far beyond simple garden dividers. You’ll create habitats for birds, natural windbreaks and stunning features that enhance your property’s value and character.

Why Plant a Hedge?

Hedges offer remarkable versatility for any outdoor space. They create natural privacy screens that grow denser over time, providing year-round screening that no fence can match. Many homeowners discover that hedges actually increase property values whilst reducing noise pollution from neighbouring areas.

Wildlife benefits enormously from hedge planting. Native species provide nesting sites for birds, shelter for small mammals and nectar sources for pollinators. A well-established hedge becomes a miniature ecosystem supporting biodiversity right in your garden.

The environmental advantages continue with natural windbreaks that protect more delicate plants, reduced air pollution through natural filtration, and carbon absorption that helps combat climate change. Hedges also offer practical benefits like reduced maintenance costs compared to replacing fencing panels and the ability to trim to any desired height or shape.

Essential Planning Considerations

Choosing the Perfect Position

Location determines your hedge’s success more than any other factor. Survey your boundaries carefully, noting existing structures, utility lines and drainage patterns. Consider your neighbours’ perspectives and local planning restrictions, particularly if you’re planting along shared boundaries.

Measure the available space precisely, allowing room for the hedge to reach its mature width. Most hedges require 1-2 metres of growing space, though this varies significantly between species. Check for underground cables or pipes before marking your planting line.

Understanding Weather Elements

British weather presents unique challenges for hedge establishment. Prevailing winds, frost pockets and rainfall patterns all influence plant selection and positioning. Exposed sites require hardy species that can withstand strong winds, whilst shaded areas need plants that thrive in lower light conditions.

Consider seasonal variations in sunlight, particularly the winter sun’s lower angle. South-facing hedges receive maximum light but may require more watering during dry spells. North-facing positions suit shade-tolerant species but may experience slower establishment.

Selecting Plant Types

Native species typically establish more successfully and support local wildlife better than exotic alternatives. Popular choices include:

Deciduous Options:

  • Beech: Retains bronze leaves through winter
  • Hornbeam: Similar to beech but more tolerant of wet conditions
  • Hawthorn: Fast-growing with spring flowers and autumn berries

Evergreen Choices:

  • Yew: Dense, long-lived and highly versatile
  • Privet: Quick-establishing with glossy foliage
  • Laurel: Broad leaves providing excellent screening

Mixed Species Benefits:
Creating mixed hedges provides extended flowering periods, varied wildlife habitats, and natural disease resistance. Combine complementary species with similar growth rates and maintenance requirements.

How to Plant Your Hedge

Soil Preparation

Begin preparation at least six weeks before planting. Clear weeds and grass from a strip 1 metre wide along your intended hedge line. Double-dig the soil, incorporating well-rotted compost or manure to improve structure and fertility.

Test soil pH using a simple testing kit. Most hedge plants prefer slightly acidic to neutral conditions (pH 6.0-7.0). Heavy clay soils benefit from added grit or sharp sand for drainage, whilst sandy soils need organic matter for moisture retention.

Planting Techniques

Plant bare-root specimens between November and March when plants are dormant. Container-grown plants can be planted year-round but establish best in spring or autumn.

Space plants according to their mature spread, typically 30-60cm apart depending on species. Dig holes slightly wider than root systems but no deeper than the original planting depth. Position plants at the same level they grew previously, identifiable by the soil mark on stems.

Water thoroughly after planting, ensuring soil settles around roots without air pockets. Apply a 5cm layer of organic mulch around plants, keeping it away from stems to prevent pest problems.

Growth Expectations

Hedge establishment varies significantly between species and growing conditions. Fast-growing varieties like privet or leylandii can achieve 60-90cm height annually, whilst slower species like yew may grow only 15-30cm per year.

First-year growth focuses primarily on root establishment rather than height. Expect limited vertical growth during this period, but strong root development creates the foundation for future vigorous growth. Most hedges require 3-5 years to reach effective screening height.

Caring for Your Hedge

Year One: Foundation Building

Focus entirely on establishment during the first growing season. Water regularly during dry periods, providing approximately 2.5cm weekly. Avoid fertilising newly planted hedges, which can encourage soft growth susceptible to winter damage.

Remove weeds competing for nutrients and water. Hand-weeding or careful hoeing prevents root damage that cultivation tools might cause. Monitor for pest problems or disease symptoms, addressing issues promptly to prevent establishment problems.

Years Two to Five: Shaping the Future

Year Two:
Light trimming encourages bushier growth. Remove only the soft growing tips, never cutting into older wood. This formative pruning creates the hedge’s basic shape whilst maintaining vigour.

Year Three:
Begin proper shaping, creating the desired profile. Trim sides more heavily than the top to encourage upward growth whilst maintaining density at the base. Cut evergreens in late spring after frost danger passes.

Year Four:
Establish regular trimming patterns. Most hedges benefit from two cuts annually—late spring and late summer. Create slightly tapered sides, wider at the bottom to ensure light reaches lower branches.

Year Five:
Your hedge should reach near-mature dimensions. Continue regular maintenance trimming, adjusting frequency based on growth rate and desired formality. Well-established hedges may require only annual trimming.

Professional Hedge Cutting

Once established, proper trimming maintains health, shape and density. Sharp tools produce clean cuts that heal quickly, preventing disease entry points. Hand shears provide precision for detailed work, whilst powered trimmers handle large areas efficiently.

Timing depends on species and desired formality. Formal hedges require more frequent cutting—potentially three times annually for species like privet. Informal hedges need less frequent attention, often just once yearly after flowering.

Cut in dry conditions when possible, allowing wounds to seal before wet weather arrives. Never remove more than one-third of growth in a single session, which can stress plants severely.

Benefits and Considerations

Advantages of Hedge Planting

Living boundaries provide unmatched privacy that improves annually. Unlike artificial screens, hedges become more attractive with age, developing character and supporting wildlife communities. They offer excellent noise reduction, particularly when planted in multiple rows with varying heights.

Property values typically increase with mature hedge plantings, especially native species that require minimal long-term maintenance. The environmental benefits include air purification, carbon storage, and habitat creation that supports local ecosystems.

Potential Disadvantages

Hedge establishment requires patience, with several years needed to achieve full screening. Initial costs can be substantial, particularly for large properties or premium species. Ongoing maintenance represents a lifetime commitment that some property owners find challenging.

Space requirements may limit options for smaller gardens. Mature hedges can reduce light levels in adjacent areas and compete with other plants for nutrients and water. Some fast-growing species can become invasive if not properly managed.

Legal considerations include boundary disputes with neighbours and potential restrictions in conservation areas. Research local regulations before planting, particularly regarding height restrictions and protected species.

Growing Your Garden’s Future

Planting a hedge represents an investment in your property’s long-term beauty and functionality. These living boundaries reward patience with decades of service, growing more valuable each year whilst supporting wildlife and enhancing your outdoor space.

Start planning your hedge project by assessing your site conditions and browsing local nurseries for suitable species. Consider visiting established gardens to see mature examples of different hedge types in similar growing conditions.

Begin with proper soil preparation and choose quality plants from reputable suppliers. Remember that initial care determines long-term success, so commit to regular watering and monitoring during the establishment period.

Your hedge will become a cherished garden feature, providing privacy, wildlife habitat and natural beauty for generations to come. Take the first step towards creating your own living boundary and discover the lasting satisfaction of growing something truly worthwhile.

Further Reading: The Complete Guide to Planting and Caring for a Hedge, The Silent Invader Threatening UK Gardens – Box Blight,

Follow Us on Instagram for Daily Inspiration 💚

How to Create a Formal Garden

Dreaming of a garden with elegant lines, beautiful symmetry and a timeless sense of order? A formal garden might be the perfect choice for you. These stunning spaces transform an ordinary patch of land into a masterpiece of design, offering a peaceful and structured retreat.

What is a Formal Garden?

A formal garden is defined by its structure and symmetry. Unlike the relaxed, naturalistic style of a cottage garden, a formal garden uses geometric shapes, straight lines and balanced layouts to create a sense of order and harmony. Think of neatly clipped hedges, perfectly aligned flowerbeds and pathways that lead your eye to a central feature, like a fountain or statue.

The design is often organised along a central axis, with elements on one side mirroring the other. This creates a powerful visual balance that feels both grand and calming. The goal is to impose a deliberate and artistic design onto the natural landscape, showcasing human creativity and control over nature.

A Brief History of Formal Gardens

The story of the formal garden in the UK is a journey through centuries of art, culture and changing tastes. Its roots lie in the grand gardens of Persia and the classical designs of ancient Rome, but it was in 17th-century France that the style truly flourished.

The magnificent gardens of the Palace of Versailles, designed by André Le Nôtre for King Louis XIV, became the ultimate symbol of formal garden design. These gardens were a display of power and precision, with vast avenues, intricate parterres (ornamental flowerbeds), and grand water features, all arranged in a perfectly symmetrical layout.

This French influence quickly spread across Europe and arrived in Britain, where it was adapted to suit the UK’s landscapes and stately homes. Early English formal gardens embraced this geometric style, with designers like George London and Henry Wise creating elaborate layouts for the aristocracy. Their designs featured canals, topiary and maze-like patterns that were meant to impress and entertain.

However, the 18th century brought a dramatic shift in taste. A new movement, led by designers like William Kent and Lancelot “Capability” Brown, rejected the rigid formality of the previous era. They favoured a more naturalistic style that imitated the gentle curves and rolling hills of the idealised English countryside. Formal gardens were torn up and replaced with sweeping lawns, serpentine lakes, and artfully placed clumps of trees.

But the formal style was not gone for good. The Victorian era saw a revival of geometric beds and intricate patterns, fuelled by the availability of new and exotic plants from across the British Empire. Gardeners like Sir Charles Barry, the architect of the Houses of Parliament, reintroduced formal terraces and parterres to complement their grand buildings.

Today, formal garden design continues to inspire gardeners across the UK. It offers a timeless framework that can be adapted to gardens of all sizes, from large country estates to small urban courtyards.

Key Elements of a Formal Garden

To achieve a classic formal look, you need to incorporate several key design elements. These are the building blocks that create the structure, symmetry and elegance that define the style.

  • Geometric Shapes and Clean Lines: This is the foundation of formal design. Use squares, rectangles, circles and straight lines to define your garden beds, paths, and lawn areas. The layout should be clear and deliberate.
  • Symmetry and Balance: A formal garden is often built around a central axis. This could be a path, a water feature, or a line of sight from a main window of your house. The elements on either side of this axis should be mirror images of each other, creating a pleasing sense of balance.
  • A Clear Focal Point: Every formal garden needs a focal point to draw the eye and anchor the design. This could be a statue, a sundial, an urn, a birdbath or a beautiful fountain. The paths and sightlines should all lead towards this central feature.
  • Defined Edging and Borders: Crisp, clean edges are essential. Use box hedging (Buxus sempervirens), lavender or brick edging to clearly separate paths from planting beds. This reinforces the geometric structure of the garden.
  • Limited Colour Palette: Formal gardens often rely on a simple and harmonious colour scheme. Green is the dominant colour, provided by lawns and clipped hedges. Flowers are used as accents, typically in restrained palettes of white, blue, purple or pink.
  • Repetition: Repeating plants, shapes, and architectural elements throughout the garden creates rhythm and unity. For example, you might use identical clipped topiary shapes at regular intervals or repeat the same plant combination in symmetrical beds.

How to Design Your Formal Garden

Ready to start planning? Here are the practical steps to consider when designing your own formal garden.

Step 1: Assess Your Space

Before you pick up a spade, take time to understand your garden.

  • Position: Where does the sun fall throughout the day? A sunny spot is ideal for flowering plants and classic choices like roses and lavender. A shadier garden might be better suited to a design focused on green foliage and architectural plants.
  • Environment: What is your soil type? Is the garden exposed to strong winds? Choosing plants that will thrive in your specific conditions is crucial for success.
  • Style: Think about the style of your home. A formal garden should feel like an extension of your house. A classic Georgian or Victorian home provides a perfect backdrop for a traditional formal design, but the principles can also be adapted for more modern properties.

Step 2: Define the Layout

Grab a pencil and paper and start sketching. Begin by establishing a central axis. This line should ideally connect to a key feature of your house, such as the centre of the back door or a large window. Plan your paths and beds symmetrically around this axis. Think about creating distinct “rooms” within the garden using hedges or low walls.

Step 3: Choose Your Design Features

Now for the fun part! Select the features that will bring your design to life.

  • Paths and Paving: Paths should be straight and clearly defined. Materials like gravel, brick or flagstones work well. The width of your paths should be in proportion to the size of the garden.
  • Hedges and Topiary: Hedges are the walls of your garden rooms. Boxwood is the traditional choice for low hedging, while yew or hornbeam are excellent for taller screens. Topiary (clipping shrubs into geometric shapes like balls, cones, or spirals) adds a wonderful sense of fun and structure.
  • Water Features: A simple pond, fountain or rill (a narrow channel of water) can be a stunning focal point, adding sound and movement to the garden.
  • Structures: Arches, pergolas and gazebos can add height and create a sense of enclosure. Train climbing plants like roses or clematis over them for a romantic touch.

Step 4: Plan Your Planting

Your choice of plants will soften the hard lines of the design and add colour and texture.

  • Structure Plants: These are the evergreen shrubs that form the backbone of your garden, such as box, yew and holly.
  • Accent Plants: Use flowering plants to add seasonal interest. Plant in blocks of a single colour for the greatest impact.
  • Height: Add vertical interest with standard trees (trees with a clear stem and a ball of foliage on top) or climbing plants.

Step 5: Consider Maintenance

A formal garden requires regular upkeep to look its best. Hedges and topiary will need trimming at least once or twice a year. Beds will need to be kept weed-free and lawns must be neatly mown. Be realistic about how much time you can dedicate to maintenance when planning the complexity of your design.

Top Plants for a Formal Garden

Choosing the right plants is key to creating an authentic formal garden that thrives in the British climate. Here are ten excellent choices:

  1. Box (Buxus sempervirens): The classic choice for low hedges and intricate topiary. It’s slow-growing and its small leaves allow for precise clipping.
  2. Yew (Taxus baccata): A versatile evergreen, perfect for taller hedges and larger topiary. It is dense, dark green and tolerates hard pruning.
  3. Lavender (Lavandula angustifolia ‘Hidcote’): Its silvery-grey foliage and deep purple flowers make it a wonderful choice for fragrant, low-hedging along paths.
  4. Rose (Rosa): No formal garden is complete without roses. Choose classic hybrid teas or floribundas for elegant blooms. Climbing roses like ‘New Dawn’ are perfect for arches.
  5. Hornbeam (Carpinus betulus): A great alternative to yew for hedging, hornbeam is a hardy native tree that holds onto its brown leaves through winter, providing year-round screening.
  6. Alliums: These ornamental onions produce stunning spherical flower heads on tall, straight stems, adding a modern structural element in late spring. ‘Purple Sensation’ is a popular variety.
  7. Catmint (Nepeta x faassenii): A fantastic, low-maintenance alternative to lavender, producing clouds of soft blue flowers all summer long. It’s less woody and easier to manage.
  8. Lady’s Mantle (Alchemilla mollis): With its scalloped, velvety leaves that catch water droplets and frothy lime-green flowers, this plant is perfect for softening the edges of paths and beds.
  9. Iris (Iris germanica): The sword-like leaves and magnificent, intricate flowers of bearded irises provide strong vertical accents and a touch of drama.
  10. Holly (Ilex aquifolium): A classic evergreen for structure. Variegated varieties can brighten up shady corners, and the red berries provide winter interest.

Final Considerations

Before you begin, it is worth weighing the advantages and disadvantages of a formal garden.

Advantages

  • Timeless Beauty: The classic, elegant look of a formal garden never goes out of style.
  • Structure and Order: A formal design brings a sense of calm and harmony to your outdoor space, which can be very therapeutic.
  • Year-Round Interest: The strong “bones” of the garden, created by hedges and topiary, ensure it looks good even in the depths of winter.

Disadvantages

  • High Maintenance: Keeping those lines crisp and hedges sharp requires regular and precise work.
  • Initial Cost: Establishing a formal garden can be expensive, particularly if it involves hard landscaping like paving and walling.
  • Less Wildlife-Friendly: The structured nature and limited plant diversity can make formal gardens less attractive to pollinators and other wildlife compared to more naturalistic styles.

Begin Your Garden Journey

Creating a formal garden is a rewarding process that allows you to craft a truly special outdoor space. By blending historical principles with your own personal style, you can design a garden that is both a beautiful retreat and a work of art.

Start small, perhaps with a symmetrical pair of planters or a simple geometric bed. As your confidence grows, you can expand your vision. Plan a visit to one of the many historic formal gardens in our care for inspiration and see how the masters did it. With careful planning and a little patience, you can bring the timeless elegance of formal design to your own home.

Further Reading: Creating a Cottage Garden, Creating a Perfect Coastal Garden,

Follow Us on Instagram for Daily Inspiration 💚

How to create a Tropical Garden

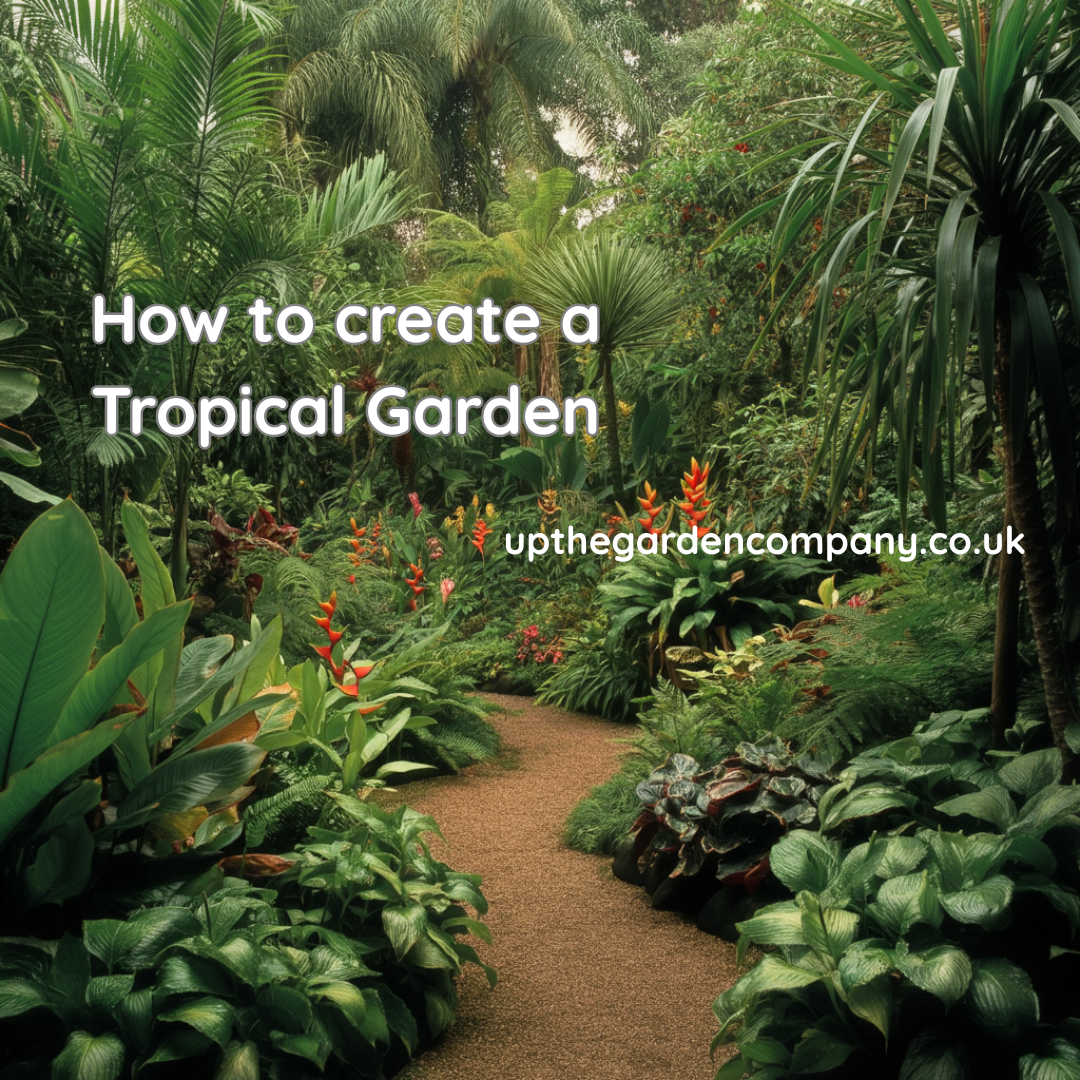
Imagine stepping outside your back door and being greeted by lush, vibrant foliage that transports you to an exotic paradise. With the right planning and plant choices, you can create your own tropical garden sanctuary, even in the UK’s temperate climate. A tropical garden offers an exciting opportunity to experiment with bold textures, dramatic colours and architectural plants that make a real statement. The key lies in understanding the essential elements that define tropical style and adapting them to suit your local conditions and personal preferences.

What is a Tropical Garden?

A tropical garden recreates the lush, abundant feel of equatorial regions through careful plant selection and thoughtful design. These gardens are characterised by their rich green foliage, exotic flowers and dramatic architectural plants that create a sense of being transported to far-off destinations.

The essence of tropical gardening lies in creating layers of vegetation that mimic natural rainforest environments. This includes tall canopy plants, mid-level shrubs, and ground-covering species that work together to form a cohesive, jungle-like atmosphere. The goal isn’t necessarily to replicate an authentic tropical ecosystem, but rather to capture the mood and visual impact that makes tropical landscapes so captivating.

Tropical gardens emphasise bold textures and striking leaf shapes over delicate flowers. Large, glossy leaves, dramatic architectural forms, and plants with interesting bark or stem patterns all contribute to the tropical aesthetic. The overall effect should feel abundant, slightly wild, and utterly immersive.

Essential Elements of a Tropical Garden

Understanding the key components that define tropical style will help you create an authentic-looking garden that captures that coveted exotic atmosphere.

Lush Foliage and Layered Planting

The foundation of any tropical garden is its foliage. Think big, bold leaves in various shades of green, from deep emerald to bright lime. Plants with interesting leaf shapes—heart-shaped, paddle-like, or deeply lobed—add visual interest and create the layered look that’s so characteristic of tropical environments.

Create depth by combining plants of different heights and growth habits. Tall architectural specimens form the backbone, while medium-height shrubs fill the middle layer, and low-growing groundcover plants complete the picture. This layering technique ensures your garden looks full and established, even when young plants are still developing.

Architectural Statement Plants

Every tropical garden needs at least one show-stopping architectural plant that serves as a focal point. These specimens typically have dramatic form, unusual growth habits, or particularly striking foliage that commands attention. Position these plants where they can be appreciated from multiple viewpoints and ensure they have adequate space to develop their natural shape.

Warm Colour Palette

While green dominates tropical gardens, strategic use of warm colours enhances the exotic feel. Think sunset hues—oranges, reds, deep pinks and golden yellows. These colours can come from flowers, coloured foliage or decorative elements like containers and garden ornaments.

Water Features

The sound of moving water adds another sensory dimension to tropical gardens. Whether it’s a simple bubbling fountain, a small pond, or even just water-filled containers, incorporating water elements helps create that humid, lush atmosphere associated with tropical climates.

Design Considerations for Your Tropical Garden

Successfully creating a tropical garden requires careful attention to several key factors that will determine both the initial impact and long-term success of your design.

Site Assessment and Microclimates

Start by thoroughly evaluating your garden’s conditions. Note which areas receive full sun, partial shade or deep shade throughout the day. Identify any microclimates—sheltered spots that stay warmer, areas that remain moist longer, or exposed locations that experience more wind.

Understanding your site’s drainage patterns is equally important. Many tropical-style plants prefer well-draining soil, while others thrive in consistently moist conditions. Map out these different zones so you can match plants to their preferred growing conditions.

Environmental Factors

Consider your local climate’s limitations and opportunities. In the UK, most truly tropical plants won’t survive winter outdoors, but many subtropical and hardy exotic plants can create similar visual effects while tolerating cooler temperatures.

Wind exposure is particularly important for tropical gardens, as many large-leaved plants can suffer damage from strong winds. Plan to create windbreaks or position vulnerable plants in naturally sheltered locations.

Maintenance Requirements

Be realistic about how much time you can dedicate to garden maintenance. Some tropical-style plants require regular pruning, feeding or protection during winter months. Others are remarkably low-maintenance once established.

Consider whether you’re prepared to lift tender plants for winter storage or if you prefer to focus on hardy alternatives that can remain outdoors year-round. Your maintenance preferences should strongly influence your plant choices and overall garden design.

Design Flow and Layout

Plan pathways and viewing points that allow visitors to experience your tropical garden fully. Curved paths that wind through the planting create mystery and make gardens feel larger than they actually are. Position seating areas where people can pause and appreciate particularly beautiful plant combinations or garden vistas.

Think about seasonal interest and how your garden will look throughout the year. While tropical gardens are often associated with summer abundance, incorporating evergreen plants and interesting bark or stem textures ensures year-round appeal.

Perfect Plants for UK Tropical Gardens

These carefully selected plants will help you achieve tropical style while thriving in British growing conditions.

1. Tree Fern (Dicksonia antarctica)

This magnificent fern creates instant tropical atmosphere with its enormous, lacy fronds emerging from a distinctive fibrous trunk. Hardy to approximately -5°C, tree ferns thrive in partial shade with consistent moisture. They make excellent architectural centrepieces and provide beautiful textural contrast.

2. Chusan Palm (Trachycarpus fortunei)

One of the hardiest palms available, the Chusan palm tolerates temperatures down to -15°C once established. Its fan-shaped leaves and distinctive hairy trunk immediately signal tropical style. Plant in a sheltered location with good drainage for best results.

3. Banana Plant (Musa basjoo)

Hardy banana plants produce enormous paddle-shaped leaves that epitomise tropical luxury. While the top growth dies back in winter, the plant returns vigorously each spring. Provide shelter from strong winds to prevent leaf damage.

4. Fatsia japonica

This glossy-leaved evergreen shrub produces dramatic hand-shaped leaves and tolerates a wide range of growing conditions. Extremely hardy and reliable, Fatsia provides year-round structure and works well in both sun and shade.

5. Gunnera manicata

For gardens with space and consistent moisture, Gunnera produces some of the largest leaves you’ll ever see—often reaching 2 metres across. This dramatic perennial creates incredible impact but requires protection during winter months.

6. Cordyline (Cordyline australis)

These architectural plants develop distinctive spiky crowns of sword-like leaves atop sturdy trunks. Available in green and burgundy forms, Cordylines tolerate coastal conditions and add vertical interest to tropical plantings.

7. Hardy Hibiscus (Hibiscus syriacus)

Producing large, colourful flowers in late summer, hardy hibiscus brings authentic tropical blooms to UK gardens. These deciduous shrubs are completely hardy and available in white, pink, blue and purple varieties.

8. Bamboo (Phyllostachys species)

Clumping bamboos provide instant height and create gentle rustling sounds that enhance the tropical atmosphere. Choose clumping rather than running varieties to avoid invasive spreading.

9. Canna Lily

These bold perennials produce broad leaves and exotic flowers in brilliant colours. While not hardy in most UK locations, Cannas can be lifted and stored indoors during winter or grown as annuals.

10. Acer palmatum (Japanese Maple)

Certain varieties of Japanese maple, particularly those with large or unusually shaped leaves, contribute tropical feeling while being completely hardy. Their autumn colour provides additional seasonal interest.

Tropical Garden Features to Consider

Beyond plants, several design elements can enhance your garden’s tropical atmosphere and create authentic exotic ambience.

Water Elements

Installing a water feature transforms your garden’s atmosphere instantly. Consider a tiered fountain for the soothing sound of cascading water or create a small pool surrounded by lush plantings. Even large decorative bowls filled with water and floating plants can add tropical sophistication.

Seating Areas

Create inviting spaces where you can relax and enjoy your tropical paradise. Comfortable seating positioned to take advantage of the best views encourages regular use and appreciation of your garden. Consider materials like teak or rattan that complement the tropical aesthetic.

Lighting Design

Strategic lighting extends your garden’s usability into evening hours and creates magical atmospheres after dark. Uplighting architectural plants creates dramatic silhouettes, while string lights or lanterns add festive tropical resort ambience.

Decorative Containers

Large containers allow you to grow tender plants that can be moved to protection during winter. Choose pots in natural materials like terracotta or glazed ceramics in warm earth tones that complement your planting scheme.

Pergolas and Structures

Overhead structures create defined spaces and provide support for climbing plants. A pergola draped with vigorous climbers mimics the canopy effect found in natural tropical environments.

Caring for Your Tropical Garden

Proper maintenance ensures your tropical garden remains healthy and beautiful throughout the growing season and beyond.

Seasonal Care Schedule

Spring marks the beginning of active growth for most tropical-style plants. Remove any winter protection, begin regular feeding programmes, and carry out necessary pruning. This is also the ideal time for planting new additions and dividing established perennials.

Summer requires consistent watering and regular feeding to support the rapid growth that characterises tropical plants. Monitor for pest and disease issues, which can develop quickly in warm, humid conditions.

Autumn preparation involves reducing feeding, collecting seeds from plants you want to propagate, and beginning winter protection for tender specimens. This is also an excellent time for planting hardy additions that will establish before winter.

Winter care focuses on protecting tender plants and maintaining garden structure. Mulch around plant bases, wrap vulnerable specimens, and ensure good drainage to prevent winter waterlogging.

Watering and Feeding

Most tropical-style plants prefer consistent moisture but not waterlogged conditions. Water deeply but less frequently to encourage strong root development. Mulching around plants helps retain moisture and suppress weeds.

Feed regularly during the growing season with balanced fertilisers. Plants in containers require more frequent feeding than those planted directly in the ground.

Pruning and Maintenance

Remove dead, damaged, or diseased material promptly to maintain plant health and appearance. Many tropical plants benefit from regular pruning to encourage bushy growth and prevent them from becoming too large for their allocated space.

Key Considerations Before Starting

Several important factors deserve careful consideration before beginning your tropical garden project.

Climate Limitations

Understand your local climate’s constraints and work within them rather than against them. Research average temperatures, frost dates, and typical weather patterns to make informed plant choices.

Budget Planning

Tropical gardens can be created on various budgets, but initial costs can be significant if you’re purchasing large architectural plants. Consider starting with smaller specimens that will grow into feature plants over time.

Long-term Commitment

Tropical gardens often require more maintenance than traditional British gardens, particularly during establishment phases. Ensure you’re prepared for the ongoing care requirements your chosen plants will need.

Space Requirements

Many tropical plants grow larger than typical garden plants and need adequate space to develop properly. Plan for mature sizes rather than current plant dimensions to avoid overcrowding issues later.

Advantages of Tropical Gardens

Creating a tropical garden offers numerous benefits that extend beyond simple aesthetic appeal.

The dramatic visual impact of tropical plantings creates stunning focal points and conversation pieces. These gardens provide opportunities to grow unusual and exotic plants that showcase your horticultural interests and skills.

Tropical gardens often attract diverse wildlife, including beneficial insects and birds drawn to the abundant shelter and food sources. The lush plantings create natural privacy screens and help establish distinct outdoor rooms within larger garden spaces.

Many people find tropical gardens particularly relaxing and therapeutic. The abundant green foliage and exotic atmosphere provide perfect spaces for unwinding and escaping everyday stresses.

Potential Disadvantages to Consider

Tropical gardens also present certain challenges that prospective creators should understand.

Higher maintenance requirements compared to traditional gardens can demand significant time investments. Many plants require winter protection or seasonal lifting and storage, adding to annual garden tasks.

Initial establishment costs can be substantial, particularly if you want immediate impact from larger specimen plants. Some tropical plants have specific soil or environmental requirements that may necessitate garden modifications.

In small spaces, vigorous tropical plants can quickly outgrow their allocated areas, requiring frequent pruning or replacement. Weather damage during storms can be more severe due to large leaves and architectural growth habits.

Transform Your Garden Into a Tropical Haven

Creating your own tropical garden paradise is an achievable goal that brings exotic beauty and year-round interest to any outdoor space. Start with careful planning and realistic plant choices suited to your local climate and maintenance preferences.

Focus on building strong garden bones with architectural plants and layered planting schemes that create authentic tropical atmosphere. Incorporate complementary features like water elements and appropriate lighting to enhance the overall effect.

Remember that successful tropical gardens develop over time. Begin with a solid foundation of hardy plants and gradually add more adventurous specimens as your confidence and experience grow. With patience and proper care, your tropical garden will become a stunning outdoor sanctuary that transports you to exotic destinations without leaving home.

Take the first step towards your tropical garden dream by assessing your current outdoor space and identifying the best locations for key plants. Start planning your plant list today and prepare to create your own slice of paradise.

Further Reading: Creating a Cottage Garden, Creating a Perfect Coastal Garden,

Follow Us on Instagram for Daily Inspiration 💚

Creating a Cottage Garden

The English cottage garden represents one of the most beloved and enduring garden styles in the world. With its romantic charm, abundant blooms and seemingly effortless beauty, this gardening approach has captured hearts for centuries. Whether you’re working with a small urban plot or a sprawling country garden, you can create your own slice of cottage garden paradise.

The cottage garden style emerged from necessity rather than fashion. Traditional English cottage gardens were practical spaces where working families grew vegetables, herbs and flowers together in small plots. Over time, this practical approach evolved into a distinctive aesthetic that celebrates abundance, natural beauty and the harmonious mixing of plants.

What Makes a Cottage Garden Special?

A cottage garden is characterised by its informal, abundant planting style that appears to have evolved naturally over time. Unlike formal gardens with rigid structures and careful planning, cottage gardens embrace a more relaxed approach where plants seem to tumble and flow together in delightful harmony.

The essence of cottage gardening lies in creating maximum impact with minimum fuss. Plants are packed closely together, self-seeding is encouraged and the overall effect should feel welcoming and lived-in rather than pristine. This style celebrates the beauty of imperfection and the charm of plants growing as they naturally would.

Cottage gardens traditionally served multiple purposes. They provided food for the table, herbs for medicine and cooking, and flowers for cutting and enjoying indoors. This practical foundation still influences modern cottage garden design, where beauty and utility work hand in hand.

Understanding Cottage Garden Planting Style

The planting style in a cottage garden follows several key principles that create its distinctive look and feel. Dense, layered plantings form the backbone of the design, with taller plants at the back gradually decreasing in height towards the front. However, this isn’t applied rigidly – the occasional tall plant towards the front adds interest and breaks up any sense of formality.

Mixed plantings are essential to the cottage garden aesthetic. Flowers, vegetables, herbs, and shrubs all grow together in happy profusion. You might find roses climbing through apple trees, lavender bordering vegetable beds and self-seeded poppies appearing wherever they choose to grow.

Repetition plays a crucial role in preventing the garden from looking chaotic. Key plants are repeated throughout different areas of the garden, creating visual links and a sense of unity. This might mean planting the same variety of rose in several locations or using the same edging plant throughout your borders.

The planting should feel generous and abundant. Bare soil should be minimal, with plants encouraged to fill every available space. This dense planting approach also helps suppress weeds naturally and creates beneficial microclimates for different plants.

Choosing Your Cottage Garden Colour Palette

Traditional cottage gardens favour soft, romantic colour schemes that create a sense of harmony and peace. Pastel shades form the foundation of most cottage garden palettes, with gentle pinks, lavenders, creams and pale yellows creating a dreamy atmosphere.

White flowers play a particularly important role in cottage gardens. They help tie together different coloured plants and create highlights that catch the eye. White roses, delphiniums, and sweet alyssum are classic choices that work beautifully in any cottage garden scheme.

Don’t be afraid to include some stronger colours for contrast and interest. Deep purple delphiniums, bright red poppies or vibrant orange marigolds can add punch to your palette when used thoughtfully. The key is to use these bolder colours as accents rather than dominant themes.

Consider how colours will work together throughout the growing season. Plan for a succession of blooms that will maintain your chosen colour scheme from spring through autumn. Early bulbs might provide soft yellows and whites, followed by summer perennials in pinks and purples, and finishing with autumn flowers in warmer tones.

Essential Plants for Your Cottage Garden

The plant selection in a cottage garden should include a good mix of perennials, annuals, bulbs, shrubs and climbers. Traditional favourites include roses, particularly old-fashioned varieties with strong fragrance and romantic blooms. David Austin English roses are excellent modern choices that capture the cottage garden spirit whilst offering improved disease resistance and repeat flowering.

Herbaceous perennials form the backbone of cottage garden borders. Delphiniums provide height and drama with their towering spikes of blue, pink or white flowers. Hollyhocks create vertical interest and self-seed readily, appearing in new locations each year. Hardy geraniums offer long-flowering ground cover in various colours, whilst catmint provides aromatic foliage and attracts beneficial insects.

Annual flowers add seasonal colour and fill gaps between perennials. Sweet peas climbing up wigwams or through shrubs bring fragrance and cutting flowers. Nigella, calendula, and cornflowers self-seed readily and help create that natural, unplanned look that’s so characteristic of cottage gardens.

Don’t forget to include herbs and edible plants. Lavender provides structure, fragrance and attracts pollinators. Rosemary, thyme and sage offer aromatic foliage and culinary uses. Fruit trees and berry bushes can provide height and seasonal interest whilst contributing to your kitchen garden.

Creating the Right Environment

Cottage gardens thrive in sunny locations with well-drained soil. Most cottage garden plants prefer at least six hours of direct sunlight daily, though some shade-tolerant varieties can work in partially shaded areas. If your garden has different light conditions, embrace this as an opportunity to create varied planting schemes.

Soil preparation is crucial for success. Cottage gardens traditionally grew in ordinary garden soil enriched with compost and well-rotted manure. You don’t need perfect conditions, but improving your soil with organic matter will help your plants establish and thrive. Good drainage is particularly important, especially for Mediterranean herbs and roses.

Wind protection can be beneficial, particularly for taller plants like delphiniums and hollyhocks. Consider planting some shrubs or installing trellis panels to create sheltered microclimates within your garden. This also provides support for climbing plants and adds vertical interest.

Water access is important, especially during establishment and dry spells. Position water butts to collect rainwater, and consider installing drip irrigation for areas that need regular watering. Mulching around plants helps retain moisture and suppress weeds.

Designing Your Cottage Garden Borders

Cottage garden borders should feel generous and overflowing rather than restrained. Traditional cottage garden borders were often quite narrow due to space constraints, but they were packed with plants that spilled out onto paths and grew up walls and fences.

Plan your borders with a good mix of plant types and sizes. Include some structural plants like box hedging or lavender to provide year-round interest and framework for seasonal plantings. Add medium-height perennials as your main planting, and fill gaps with annuals and bulbs.

The edges of your borders shouldn’t be rigid. Allow plants to spill forward onto paths and self-seed where they will. This natural informality is essential to the cottage garden aesthetic. If you need to maintain clear pathways, simply edit back the most vigorous spreaders whilst leaving others to create that characteristic tumbling effect.

Consider the view from your house and main seating areas when planning your borders. Position your most beautiful and fragrant plants where you’ll see and smell them most often. Create focal points with specimen plants or garden features, but keep these simple and in keeping with the cottage garden style.

Planning Your Garden Pathways

Pathways in cottage gardens should feel like natural routes through the planting rather than formal design elements. Traditional materials work best – weathered brick, natural stone, or simple gravel create the right atmosphere. Avoid materials that feel too modern or pristine.

Width is important for both practical and aesthetic reasons. Paths should be wide enough for comfortable walking but not so wide that they dominate the garden. Around 1.2 metres works well for main paths, with narrower secondary paths creating more intimate routes through the garden.

Allow plants to soften the edges of your paths. Low-growing plants like thyme, chamomile, or alyssum can be planted between paving stones or allowed to creep across path edges. This creates that characteristic cottage garden look where boundaries between planted areas and pathways become beautifully blurred.

Consider creating different types of paths for different areas of your garden. A more formal path might lead to your front door, whilst meandering grass paths could wind through more distant areas of the garden. Stepping stones through planted areas create charming routes without requiring formal path construction.

Essential Edging and Boundaries

Traditional cottage garden edging was often practical rather than purely decorative. Low box hedges, wooden boards, or simple stone edging helped define planting areas whilst being strong enough to contain enthusiastic plants.

Box hedging remains one of the most effective edging choices for cottage gardens. It provides year-round structure, can be clipped to maintain neat edges, and creates a perfect framework for informal planting. Alternative evergreen edging plants include lavender, santolina, or small hebe varieties.

Wooden edging using reclaimed scaffold boards or rustic timber creates an appropriate cottage garden feel. Ensure any timber is treated for outdoor use and consider allowing it to weather naturally rather than painting or staining it.

For boundaries, traditional cottage gardens often featured mixed hedges rather than fences. Hawthorn, blackthorn and field maple create authentic-looking boundaries that support wildlife. If you need immediate privacy, consider planting climbing roses or honeysuckle on simple post and wire structures.

Choosing Cottage Garden Accessories

Accessories in cottage gardens should feel authentic and useful rather than purely decorative. Traditional materials like weathered timber, wrought iron and natural stone work best. Avoid anything that feels too modern or mass-produced.

Plant supports are essential functional accessories. Hazel or willow wigwams provide natural-looking support for climbing beans or sweet peas. Wrought iron obelisks suit roses and clematis, whilst simple bamboo canes can support tall perennials.

Garden tools and containers become decorative elements in cottage gardens. Traditional wooden trugs, galvanised watering cans and hand tools with wooden handles all contribute to the authentic atmosphere. Display these items in natural locations where they might realistically be used.

Consider adding some traditional garden structures like rustic arches or simple pergolas. These provide support for climbing plants whilst creating focal points and height variation in your garden design.

Creating Comfortable Seating Areas

Seating in cottage gardens should feel integrated with the planting rather than standing apart from it. Position benches and chairs where they’ll be partially enclosed by plants, creating intimate spaces for enjoying your garden.

Wooden furniture works best in cottage gardens. Weathered teak, painted timber benches, or simple rustic furniture all suit the cottage garden aesthetic. Allow the furniture to develop a natural patina rather than keeping it looking new.

Create multiple seating areas if space allows. A bench positioned to catch the morning sun, a chair tucked into an arbour for afternoon shade, and perhaps a larger seating area for entertaining all serve different purposes and encourage you to enjoy different aspects of your garden.

Fragrant plants should surround your seating areas. Position roses, lavender, honeysuckle, and other scented plants where their perfume will be most appreciated. Evening-scented plants like night-scented stock or evening primrose work particularly well near seating areas used in the evening.

Adding the Perfect Finishing Touches

The finishing touches in your cottage garden should enhance the natural beauty of your planting without overwhelming it. Simple bird baths, sundials or small statues can create focal points whilst supporting garden wildlife.

Lighting should be subtle and practical. Solar-powered lights along pathways, simple lanterns for evening dining, or fairy lights threaded through climbing plants can extend the use of your garden into the evening hours.

Water features suit cottage gardens if they feel natural and unpretentious. A simple fountain, small pond, or even a half-barrel water garden can attract wildlife and add the soothing sound of water to your garden.

Consider adding some vertical growing space with simple trellis panels or pergolas. These structures provide support for climbing plants whilst creating additional planting opportunities and visual interest.

Weighing the Pros and Cons

Cottage gardens offer numerous advantages for gardeners seeking beauty, wildlife value, and relatively low maintenance. The dense planting naturally suppresses weeds, whilst the mixed plantings support beneficial insects and create resilient garden ecosystems. The informal style means that imperfections become part of the charm rather than problems to be solved.

The abundant flowering and self-seeding nature of cottage gardens provides excellent value for money. Once established, many plants will return year after year or self-seed to create new displays. This style also works well for gardens of all sizes, from tiny urban plots to large country gardens.

However, cottage gardens do require some specific considerations. The informal style can become genuinely messy without regular maintenance. You’ll need to deadhead spent flowers, edit out unwanted seedlings, and provide support for tall plants during the growing season.

Some cottage garden plants can be quite vigorous and may overwhelm smaller or more delicate neighbours. You’ll need to monitor plant growth and occasionally divide or relocate plants to maintain the right balance.

Creating Your Own Cottage Garden Paradise

An English cottage garden offers one of the most rewarding and beautiful gardening experiences available. By following the principles outlined in this guide, you can create your own abundant paradise that provides year-round interest, supports wildlife, and gives you endless pleasure.

Start small with a single border or area of your garden, and gradually expand your cottage garden plantings as your confidence grows. Remember that cottage gardens develop their character over time, so be patient and allow your garden to evolve naturally.

The key to success lies in embracing the cottage garden philosophy of abundance, informality, and the harmonious mixing of plants. Focus on creating generous plantings with traditional cottage garden plants, and don’t be afraid to let your garden develop its own personality through self-seeding and natural growth patterns.

With careful planning and thoughtful plant selection, your cottage garden will become a treasured retreat that provides beauty, fragrance and wildlife habitat for years to come.

Further Reading: Creating a Perfect Coastal Garden, A Guide to Prairie Planting, Creating Harmony with Nature Naturalistic Garden Design

Follow Us on Instagram for Inspiration, Blogs and our latest Garden Offers 

Creating a Perfect Coastal Garden

The sound of crashing waves, the feel of sea breeze on your skin and the sight of endless horizons make coastal living truly special. But these same elements that make seaside locations so appealing can present unique challenges for gardeners. Salt-laden winds, intense sunlight and sandy soils require a different approach to garden design than traditional inland spaces.

Creating a beautiful coastal garden isn’t just about choosing the right plants—it’s about understanding how to work with nature’s forces rather than against them. The key lies in embracing the coastal environment and designing a space that thrives in these conditions whilst capturing the relaxed, natural beauty of seaside living.

Whether you’re dealing with a clifftop plot, a beachside cottage garden or simply want to bring coastal charm to your outdoor space, this guide will help you create a garden that’s both stunning and resilient. You’ll discover which plants flourish in salty conditions, how to choose materials that withstand coastal weather and design principles that capture the essence of seaside style.

Understanding Coastal Garden Conditions

Coastal gardens face a unique set of environmental challenges that don’t exist in inland locations. Understanding these conditions is the first step towards creating a thriving seaside space.

Salt Spray and Wind Exposure

The most significant challenge for coastal gardens is salt spray carried by sea winds. This salt can damage plant foliage, causing leaf burn and stunted growth in sensitive species. The closer your garden is to the shoreline, the more intense this effect becomes.

Wind exposure is equally challenging. Coastal winds are often stronger and more persistent than inland breezes, causing physical damage to plants and increased water loss through transpiration. These winds can also carry sand and debris, further stressing your plants.

Intense Sunlight and Heat

Coastal locations often experience more intense sunlight due to reflection off water and sand. This increased UV exposure can scorch delicate plants and cause rapid soil drying. The combination of salt, wind and intense sun creates a harsh environment that requires careful plant selection.

Soil Conditions

Many coastal gardens have sandy, free-draining soils that are naturally low in nutrients. Whilst this provides excellent drainage, it also means plants can struggle to retain moisture and nutrients. Some coastal areas may also have elevated soil pH levels due to shell fragments and limestone presence.

Seasonal Weather Variations

Coastal weather can be unpredictable, with sudden storms bringing high winds and salt spray further inland. However, proximity to water also moderates temperature extremes, often providing frost protection in winter and cooling in summer.

What Defines Coastal Garden Style

Coastal garden design draws inspiration from natural seaside landscapes, creating spaces that feel organic and weather-beaten whilst maintaining structure and beauty. This style embraces informality and celebrates plants that thrive in maritime conditions.

Key Design Principles

The coastal style favours naturalistic plantings over formal arrangements. Plants are often allowed to grow into their natural shapes, creating the windswept appearance characteristic of seaside vegetation. Repetition of hardy plants creates rhythm and unity whilst ensuring resilience.

Layered plantings work particularly well, with taller, salt-tolerant shrubs providing shelter for more delicate plants behind them. This creates microclimates within your garden and allows you to grow a wider range of species.

Colour Palettes

Coastal gardens typically feature colours that echo the seaside environment. Blues and whites predominate, reflecting sky and foam, whilst silvers and greys mirror driftwood and weathered surfaces. Purple and pink flowers add gentle colour without competing with the natural backdrop.

Avoid intense, tropical colours that can look out of place in temperate coastal settings. Instead, embrace the subtle beauty of muted tones that harmonise with the natural environment.

Essential Plants for Coastal Gardens

Selecting the right plants is crucial for coastal garden success. Focus on species that naturally tolerate salt, wind and sun exposure.

Salt-Tolerant Trees and Large Shrubs

Tamarisk (Tamarix) provides excellent windbreak protection with its feathery foliage and pink flowers. These hardy trees actually prefer sandy soil and salt spray, making them ideal for exposed coastal positions.

Sea Buckthorn (Hippophae rhamnoides) offers silvery foliage and bright orange berries on female plants. It’s extremely salt tolerant and provides excellent wildlife value whilst creating effective wind protection.

Pine species, particularly Pinus nigra (Austrian Pine) and Pinus pinaster (Maritime Pine), naturally thrive in coastal conditions. Their needle-like leaves resist salt damage whilst their strong root systems anchor them against wind.

Olearia species, also known as daisy bushes, produce masses of white flowers and have naturally salt-resistant foliage. They’re excellent for creating informal hedging or specimen plantings.

Hardy Perennials and Grasses

Sea Holly (Eryngium maritimum) is the quintessential coastal plant, with spiky blue flowers and deeply cut silvery foliage. It thrives in poor, sandy soils and looks spectacular in naturalistic plantings.

Thrift (Armeria maritima) forms neat cushions of grass-like foliage topped with pink or white pompom flowers. It’s perfect for edging paths or creating drifts of colour in rockeries.

Ornamental grasses such as Festuca glauca (Blue Fescue) and Stipa tenuissima (Mexican Feather Grass) add movement and texture whilst tolerating salt and drought conditions.

Catmint (Nepeta) provides long-lasting purple-blue flowers and aromatic foliage. It’s extremely hardy and attracts beneficial insects whilst deterring pests.

Ground Cover and Rock Plants

Sedum species are perfect for coastal conditions, storing water in their succulent leaves and producing colourful flowers. Sedum spectabile and Sedum ‘Autumn Joy’ are particularly effective.

Rock Rose (Helianthemum) produces papery flowers in various colours and thrives in poor, well-drained soils. It’s excellent for covering banks or filling gaps between rocks.

Thyme varieties provide fragrant ground cover and attract pollinators. Thymus serpyllum creates dense mats perfect for pathways or rock gardens.

Surfaces and Materials for Coastal Gardens

Choosing appropriate surfaces and materials is essential for creating a garden that can withstand coastal conditions whilst maintaining its beauty over time.

Gravel and Stone

Gravel is an excellent choice for coastal gardens, providing excellent drainage whilst suppressing weeds. Choose rounded beach pebbles or crushed stone in colours that complement your planting scheme. Light-coloured gravels help reflect heat and prevent soil overheating.

The main advantage of gravel is its permeability and low maintenance requirements. However, it can be challenging to walk on and may require periodic topping up as it settles or spreads.

Natural stone creates beautiful, durable surfaces but can be expensive. Choose local stone where possible to ensure it harmonises with the surrounding landscape. Sandstone and limestone work particularly well in coastal settings.

Sand and Shell-Based Materials

Sand provides an authentic coastal feel but isn’t practical for high-traffic areas as it shifts underfoot and can blow around in windy conditions. It’s better used as a decorative mulch around plants or in dedicated beach garden areas.

Crushed shell creates attractive, pale surfaces that reflect the coastal environment. It provides good drainage and gradually breaks down to improve soil structure. However, it can be sharp underfoot and may increase soil pH levels.

Decking and Timber

Hardwood decking creates elevated surfaces perfect for seating areas and entertaining spaces. Choose naturally weather-resistant timbers or properly treated softwoods. Regular maintenance with appropriate oils or stains will extend the life of timber surfaces.

The main disadvantage of timber in coastal locations is its susceptibility to salt damage and weathering. However, the natural aging process can create attractive silvered surfaces that complement the coastal aesthetic.

Borders and Planting Design

Creating effective borders in coastal gardens requires understanding how plants interact with harsh environmental conditions and designing plantings that provide mutual protection.

Shelter Planting

The most important element in coastal garden design is creating effective windbreaks. Plant tough, salt-tolerant species on the seaward side of your garden to create shelter for more delicate plants behind.

Escallonia makes an excellent informal hedge, producing glossy leaves and pink or white flowers. It tolerates severe salt exposure whilst providing year-round structure.

Griselinia littoralis creates dense, evergreen screening with attractive apple-green foliage. It’s particularly effective in milder coastal areas and can be lightly pruned to maintain shape.

Elaeagnus varieties offer silvery foliage and excellent wind resistance. Elaeagnus × ebbingei is particularly useful, providing evergreen structure and fragrant autumn flowers.

Layered Planting Approach

Behind your shelter belt, create layers of planting that gradually transition from hardy coastal species to more delicate garden plants. This creates interesting visual depth whilst providing practical protection.

Place medium-height shrubs like Hebe species and Cistus (Rock Rose) in the middle layer. These plants bridge the gap between windbreak plants and smaller perennials whilst contributing flowers and interesting foliage.

Fill the foreground with hardy perennials and ornamental grasses that can tolerate some salt exposure but benefit from the protection of larger plants behind them.

Naturalistic Planting Style

Coastal gardens look best when plantings appear natural and unforced. Use repetition of key plants to create rhythm, but vary the spacing and grouping sizes to avoid regimented appearance.

Allow plants to grow into their natural shapes rather than forcing them into unnatural forms. The windswept, slightly dishevelled appearance of coastal vegetation is part of its charm.

Colour Schemes

Build your planting schemes around a limited palette of colours that work harmoniously together. Silver and grey foliage plants provide excellent backbone planting, whilst blue, white and purple flowers add gentle colour.

Use plants with interesting seed heads and winter structure to ensure year-round interest. Many coastal plants, such as Sea Holly and ornamental grasses, look spectacular when backlit by low winter sun.

Creating Seating and Entertainment Areas

Coastal gardens need carefully positioned seating areas that provide shelter from wind whilst taking advantage of views and sunshine.

Positioning Considerations

Look for naturally sheltered spots or create protection using plantings or screens. Areas that receive morning sun but are protected from prevailing winds often work well for breakfast seating.

Consider installing windbreak screens made from natural materials like woven willow or bamboo. These provide immediate protection whilst your shelter plantings establish.

Material Choices

Teak and other hardwoods weather naturally to attractive silver-grey colours that complement coastal gardens perfectly. They require minimal maintenance beyond occasional cleaning.

Metal furniture should be made from marine-grade materials like powder-coated aluminium or stainless steel to prevent corrosion. Avoid mild steel unless it’s properly galvanised and maintained.

Stone and concrete create permanent seating solutions that improve with age. Consider built-in benches using local stone or rendered blockwork that can incorporate planters for additional interest.

Accessories and Garden Art

Carefully chosen accessories can enhance the coastal theme whilst adding personality to your garden.

Natural Materials

Driftwood makes excellent sculptural elements and can be used to create informal borders or plant supports. Large pieces can become focal points, whilst smaller pieces can edge pathways.

Beach stones and pebbles can be arranged in patterns or used to create Japanese-inspired features like dry streams or meditation areas.

Rope and nautical elements should be used sparingly to avoid creating a theme park effect. Simple rope handrails or planters can add authentic coastal character.

Weather-Resistant Features

Choose garden art and accessories that can withstand salt spray and strong winds. Ceramic and stone pieces generally perform better than metal unless specifically designed for marine environments.

Glass elements like coloured bottles or specially designed garden glass can catch and reflect light beautifully whilst being completely unaffected by salt exposure.

Advantages and Challenges of Coastal Gardening

Understanding both the benefits and difficulties of coastal gardening will help you create realistic expectations and plan effectively.

Benefits of Coastal Gardens

Frost protection is one of the biggest advantages of coastal locations. The moderating effect of nearby water means coastal gardens often experience fewer hard frosts, allowing you to grow tender plants that wouldn’t survive inland.

Extended growing seasons are common in coastal areas, with plants often continuing to grow well into autumn and starting earlier in spring.

Unique plant opportunities exist in coastal gardens. Many salt-tolerant plants are uncommon in inland gardens, allowing you to create distinctive plantings that stand out from typical suburban landscapes.

Wildlife value is often exceptional in coastal gardens, as they provide important habitat corridors for migrating birds and support specialist insects adapted to maritime conditions.

Ongoing Challenges

Plant establishment can be difficult, with young plants particularly vulnerable to salt and wind damage. You may need to provide temporary protection whilst plants establish their root systems.

Maintenance requirements can be higher than inland gardens, with regular cleaning of salt deposits from hard surfaces and furniture necessary to prevent damage.

Limited plant palette means you’ll need to abandon dreams of growing certain plants. Roses, for example, often struggle with salt exposure, whilst tropical plants may suffer from salt burn.

Seasonal storm damage is an ongoing concern, requiring regular inspection and maintenance of plant supports and garden structures.

Making Your Coastal Garden Vision Reality

Creating a successful coastal garden requires patience, planning and acceptance that some experiments may not work. Start with the hardiest, most salt-tolerant plants and gradually expand your palette as you learn what thrives in your specific conditions.

Focus on building effective shelter first—this investment in windbreak planting will pay dividends by allowing you to grow a much wider range of plants in the protected areas behind. Remember that even salt-tolerant plants benefit from some protection, especially when young.

Embrace the natural beauty of coastal conditions rather than fighting against them. The weathered, natural appearance that develops in seaside gardens has a unique charm that can’t be replicated in protected inland locations.

Your coastal garden will become a sanctuary that celebrates the dramatic beauty of seaside living whilst providing a practical, enjoyable outdoor space for you and your family. With careful planning and appropriate plant choices, you can create a garden that thrives in challenging conditions whilst capturing the essence of coastal life.

Further Reading: A Guide to Prairie Planting, Creating Harmony with Nature Naturalistic Garden Design, Garden Design with Grasses

Follow Us on Instagram for Inspiration, Blogs and our latest Garden Offers 💚

A Guide to Prairie Planting

Imagine a garden filled with graceful grasses and vibrant perennials, swaying together in a gentle breeze. This relaxed, naturalistic style, known as prairie planting, brings the untamed beauty of a meadow right to your doorstep. While most effective in larger spaces, you can also capture this stunning effect in smaller gardens.

This style of planting creates a rich habitat for wildlife, offering nectar for pollinators and shelter for overwintering insects. Discover how to create your own prairie-style garden, a beautiful and evolving landscape that offers interest all year round.

What is Prairie Planting?

The term “prairie” traditionally refers to the vast grasslands of the American Midwest. In gardening, however, it has evolved to describe a style that combines grasses and flowering perennials requiring similar growing conditions.

While you could base a scheme on a South African meadow or Mediterranean maquis, a prairie-style garden doesn’t have to be geographically pure. You can successfully combine plants from different parts of the world, as long as they thrive in similar soil and climate conditions. This guide will walk you through creating these beautiful, naturalistic plantings, whether in a dedicated border or across a larger landscape where they have the most dramatic impact.

When to Establish a Prairie Planting

The best time to start your prairie garden is in March. As the soil begins to warm up, your plants will have the entire growing season to establish strong roots. While some planting can be done in September, this timing is not ideal for warm-season grasses.

If you’re starting from seed, the timing will depend on the specific mix you choose. Always select species with similar germination requirements so they can be sown together and grow in harmony.

How to Create a Prairie-Style Garden

There are two main approaches to creating a prairie-style garden, each resulting in a distinct look and feel.

  • Planting in drifts: This method involves planting established grasses and flowering perennials in flowing groups or blocks. The result is similar to a traditional border but with a more natural, evolving character.
  • Broadcast sowing: By sowing a mix of seeds directly onto the soil, you can create a true ecological community where plants compete and mingle naturally. This approach mimics a genuine prairie and changes continuously over the years.

Regardless of the method you choose, a site that receives full sun for most of the day is generally the best option.

1. Planting a Prairie-Style Border

This method is an excellent way to introduce the prairie look into your garden. It draws inspiration from traditional perennial borders, which have long featured prairie natives like phlox, goldenrod (Solidago), and asters. By incorporating ornamental grasses, you can create a space that truly captures the spirit of the prairie.

Advantages:

  • Ideal for smaller gardens where space is limited.
  • Using well-developed plants gives them a head start against pests.
  • Planting in defined drifts makes it easier to identify and remove weeds.

Disadvantages:

  • Requires as much maintenance as a traditional herbaceous border.
  • The planting is less dense than a seeded prairie, leaving more room for weeds to establish if not regularly maintained.

How to Prepare the Ground

Your success starts with thorough ground preparation.

  1. Ensure the area is completely free of perennial weeds like couch grass, ground elder, and bindweed.
  2. If you’re creating a new border, rotavate the ground to break up the soil.
  3. Incorporate a generous 7.5cm (3in) layer of well-rotted garden compost or manure to enrich the soil and improve its structure.

Design and Planting

With your canvas prepared, it’s time to select your plants.

  • Assess your site: Determine how much sun the area receives and identify your soil type.
  • Plan your display: Decide when you want the main floral display to be and how long it should last.
  • Create variety: Aim for a mix of flower shapes—daisies, spires, globes, and airy “see-through” plants—to add texture and interest.
  • Plant in drifts: In smaller areas, plant in informal drifts of at least five plants of the same species. This creates a more naturalistic impression than single specimens.
  • Consider the light: Use backlighting from the low sun to illuminate grasses and seed heads. Island beds work particularly well for this.
  • Layer your planting: Choose plants that provide interest throughout the seasons. Start with low-growing spring perennials, followed by taller plants that flower through summer and into autumn.
  • Repeat groupings: Repeating clusters of plants throughout the border creates a sense of rhythm and coherence.
  • Include annuals and bulbs: Don’t forget to add annuals, biennials, and bulbs for extra layers of colour and interest.

For larger spaces, consider using the matrix planting technique, championed by renowned garden designer Piet Oudolf. This involves:

  1. The matrix: A base layer of one or two species, often a grass, planted in large numbers to unify the design.
  2. Primary plants: Groups of strong, structural flowering plants planted within the matrix to provide the main interest.
  3. Scatter plants: A few “secondary” plants, like Verbascum, added randomly to give the planting a spontaneous, natural feel.

Aftercare

  • Mulch deeply: Once planted, apply a 7.5cm (3in) layer of mulch, such as bark chips or gravel, to suppress weeds and retain moisture.
  • Water regularly: Water thoroughly at least twice a week during the first two growing seasons to help plants establish.
  • Weed diligently: Remove weeds regularly before they have a chance to set seed.
  • Cut back in spring: Leave the foliage and seed heads standing over winter to provide structural interest and shelter for wildlife. Cut everything down in early spring before new growth appears. The old plant material will act as a natural mulch.

2. Prairie Plant Communities from Seed

For a truly naturalistic and low-maintenance garden, sowing seed is the ultimate approach. The goal is to establish a self-sustaining plant community where species intermingle and evolve over time. This method has been pioneered by designers like James Hitchmough and Nigel Dunnett, whose work can be seen at the Oxford Botanic Garden and the London Olympic Park.

Advantages:

  • Establishes a genuine plant community that is more resistant to weeds once mature.
  • More cost-effective than buying established plants.
  • Allows for a greater diversity of species, extending the flowering season.
  • Ideal for sites with low soil fertility.

Disadvantages:

  • Requires significant weeding and maintenance during the initial establishment phase.
  • Slugs and snails can be a major problem for young seedlings in the UK’s damp climate.

How to Prepare for Seed Sowing

This method requires meticulous preparation.

  1. The area must be completely clear of all existing vegetation, especially perennial weeds. Removing them by hand is the most organic method but can take a year or more.
  2. If the area was previously lawn, the soil is likely to be compacted. Dig or rotavate it to the depth of a spade’s blade, then level it carefully with a landscape rake.
  3. To prevent annual weed seeds in the soil from germinating, lay a 7.5cm (3in) deep layer of washed sharp sand over the surface before sowing.

Sowing

  1. Mark out your sowing area into a grid of one-metre squares to ensure even coverage.
  2. Mix your seed with a carrier, such as damp sawdust or kiln-dried sand, at a rate of 1-2g of seed per square metre.
  3. Broadcast the seed and carrier mix over the area, making two passes in different directions for good distribution.
  4. Gently rake the seed into the top layer of sand, again in two directions at right angles.
  5. You can lay open-weave jute netting over the area to protect it from being disturbed by cats or other animals.

You can also add a few mature, container-grown plants to the scheme before sowing. This is useful for perennials that are difficult to grow from seed or for introducing specific cultivars.

Aftercare

  • Water consistently: Water the entire area every few days during the first growing season.
  • Manage slugs: Implement a slug and snail deterrent programme to protect your seedlings.
  • Weed, weed, weed: In early summer, carefully identify and remove any weed seedlings. This is a crucial step.
  • Thin out dominant species: After the second year, you may need to thin out any species that are becoming too dominant. This requires careful observation to maintain a balanced plant community.

Ready to Create Your Own Prairie Garden?

Whether you choose to plant a carefully designed border or sow a wild, evolving meadow, prairie planting offers a wonderfully rewarding way to garden. It connects you with the changing seasons, supports local wildlife, and creates a breathtakingly beautiful landscape that will bring you joy for years to come.

Discover a new way of gardening and create a space that is both stunning and sustainable.

Further Reading: Creating Harmony with Nature Naturalistic Garden Design, Garden Design with Grasses

Follow us on Instagram for Daily Gardening Inspiration 💙

How to Create Raised Beds for Your Garden

Raised beds are a versatile and effective way to elevate your gardening game, quite literally! Raised beds can revolutionise the way you work with plants, offering improved conditions for growth and greater control over soil quality. So here is why raised beds are worth considering and how to create them step by step.


Why Have Raised Beds?

Raised beds are more than just a practical gardening solution; they’re a way to customise your growing space and make it work for you. Wondering why they’re so popular? Here are some compelling benefits.

1. Improved Growing Conditions

Raised beds allow you to create loose, nutrient-rich soil that drains well and warms up quicker in the spring. This means healthier roots for your plants and an extended growing season, especially in colder climates.

2. Control Soil Type

If your garden’s natural soil isn’t ideal for particular plants, raised beds give you the freedom to bring in the perfect soil mix. Match soil type to specific plants’ needs, whether you’re growing acidic-loving blueberries or vegetables that thrive in well-drained loam.

3. Nursery Beds for Germination

Use raised beds as nursery areas for starting seeds. The controlled environment makes it easier to monitor germination and care for seedlings before transplanting them elsewhere in your garden.

4. Perfect for Vegetables and Herbs

With a raised vegetable bed, it’s easier to plan crop rotation and keep pests like slugs at bay. They’re also great for compact herb gardens conveniently placed near your kitchen.

5. Space for Smaller Plants

Raised beds can serve as beautiful focal points for smaller plants like alpines and give these delicate species the better-draining conditions they crave.


Things to Consider Before Creating Raised Beds

Before you begin building raised beds, there are several important factors to keep in mind to make your project successful.

1. Aspect and Orientation

For sun-loving plants, position your raised beds to make the most of available light. A north-south orientation is ideal for maximising sunlight throughout the day.

2. Size and Depth

  • Width: Beds should be no wider than 1.5 metres, so you can comfortably reach the centre without stepping on the soil.
  • Depth: Opt for a depth of at least 30 cm, though deeper beds are better for root crops like carrots.
  • Pathways: Ensure pathways between beds are at least 45 cm wide for easy access, or 1 m wide if you need wheelchair accessibility or space for a wheelbarrow.

3. Materials

Raised beds can be made from various materials, each with their own advantages and drawbacks:

  • Brick
    • Pros: Durable, long-lasting, gives a polished look.
    • Cons: Higher cost and requires skilled labour for construction.
  • Timber
    • Pros: Affordable, easily accessible, natural look.
    • Cons: May rot over time; choose treated or rot-resistant wood like cedar.
  • Kits
    • Pros: Quick and easy to assemble, ideal for beginners.
    • Cons: May offer less customisation compared to DIY options.

Step-by-Step Guide to Building Raised Beds

Once you’ve decided on the location, size and materials, it’s time to get building. Follow these steps to create the perfect raised beds for your garden.

1. Prepare the Base

  • Start by clearing the site of weeds and grass. You can either dig them out manually or lay a layer of geotextile membrane to suppress regrowth.
  • If drainage is an issue, add a layer of gravel or stones to the bottom of your bed for improved water flow.

2. Build the Frame

  • Construct or assemble your chosen frame material (brick, timber or kit). Ensure the sides are sturdy and that corners are properly secured to prevent the frame from shifting over time.
  • Double-check that the structure is level to promote even water distribution.

3. Fill the Bed

  • Layer 1 (optional): Add organic materials like twigs, branches or shredded leaves to mimic a hugelkultur base.
  • Layer 2: Add a rich compost-soil mix. Aim for a 70-30 ratio of soil to compost to ensure good drainage and a steady nutrient supply.
  • Fill the bed to just below the rim, allowing space for watering without overflow.

4. Allow Soil to Settle

  • Water the soil generously and allow it to settle for a day or two. Top up with additional soil or compost if necessary before planting.

Optional FAQ

Do I need to line my raised beds?

You can line your beds with landscape fabric to prevent soil from escaping or use mesh to deter burrowing pests like moles. Avoid plastic lining as it may restrict drainage.

What’s the best soil mix for a raised bed?

A mix of loamy soil, compost and a bit of sand for drainage works well for most plants. Tailor the composition to suit specific crops if needed.

How do you maintain raised beds?

Annual maintenance includes replenishing soil with fresh compost and ensuring your bed structure remains sturdy. Regularly weed and mulch to retain moisture and control weeds.


Transform Your Garden with Raised Beds

Now that you know the benefits and steps for creating raised beds, it’s time to bring your gardening vision to life. Raised beds not only enhance the aesthetic appeal of your garden but also make growing plants easier, more efficient and accessible.

Further Reading: Caring for your Hanging Baskets, Thriller, Filler and Spiller, How to Choose the Perfect Flower Pot for Your Crops

For Daily Inspiration; Follow us on InstagramBlueSkyX , Pinterest or Threads.

Creating Harmony with Nature Naturalistic Garden Design

Imagine stepping into a garden that feels as though it has always been part of the landscape, blending seamlessly with the world around it. Naturalistic garden design is gaining popularity for its organic beauty, sustainability and ability to support biodiversity. But what exactly is this style of garden design, and how can you bring its magic into your outdoor space?

What is Naturalistic Garden Design?

At its core, naturalistic garden design mimics the patterns and aesthetics of nature itself. Unlike traditional landscaping, which may rely on symmetry, manicured lines, or exotic plant species, naturalistic gardens aim to recreate natural ecosystems.

Expect meandering pathways, plants with varying heights and textures, and a rich mix of perennials, grasses, and shrubs that look like they belong together. This approach is not about randomness; it’s about organised chaos, striking a balance between wildness and intention.

Benefits of Naturalistic Garden Design

Choosing a naturalistic garden design brings with it a host of rewards, both for you and the environment.

1. Supports Biodiversity

Naturalistic gardens are a haven for wildlife. By planting native species and creating diverse habitats, you can attract bees, butterflies, birds and other essential pollinators. It’s your personal contribution to preserving ecosystems.

2. Sustainable Gardening

This style of gardening often reduces the need for chemical fertilisers, pesticides and excessive watering. Native plants are typically more adapted to the local climate, which means they require less maintenance and fewer resources.

3. Aesthetic Appeal

There’s an understated beauty in a garden that looks like it has been shaped by the hand of nature. The interplay of colours, textures and movement (like swaying grasses in the breeze) creates a space that feels alive, timeless and restorative.

4. Low Maintenance

While it may appear wild, a well-designed naturalistic garden is relatively low maintenance. Once established, many native plants require little attention beyond the occasional weeding and seasonal pruning.

5. Mental Wellbeing

Spending time in a naturalistic garden can reduce stress levels and boost mental health. The organic flows and lush greenery create a calming environment, offering an escape from the pressures of daily life.

Are There Any Disadvantages?

While the benefits are plenty, naturalistic garden design isn’t without its challenges.

  • Initial Commitment: Designing a naturalistic garden involves detailed planning and research, especially if you’re new to the concept. Understanding plant pairings, blooming times and growth habits takes time.
  • Perceived Untidiness: To some, the wild look of a naturalistic garden may appear overgrown or unkempt, especially when compared to traditional, manicured gardens.
  • Space Limitations: Smaller gardens may be trickier to design naturally without overcrowding, but with thoughtful planning, they can still embody the essence of naturalistic design.
  • Seasonal Variability: These gardens change significantly with the seasons, meaning there may be periods when the garden looks less vibrant. However, with careful plant selection, you can build year-round interest.

Are Naturalistic Gardens Difficult to Maintain?

One of the great myths about naturalistic gardens is that they are hard to maintain. While some effort is required in the beginning, such as planting and ensuring plants establish themselves, maintenance over time is minimal.

Here’s why:

  • Native plants are naturally suited to the local environment, so they thrive without much intervention.
  • Minimal watering is needed once plants have rooted.
  • Leaves and decaying plant matter can often be left in place, enriching the soil naturally.

If you’re looking for a lower-effort approach, choosing a naturalistic garden design might be perfect for you.

Understanding Naturalistic Planting

At the heart of naturalistic garden design is the concept of naturalistic planting. This approach involves choosing plants that mimic the way they grow in the wild, creating harmonious plant communities.

Step 1 Research Native Plants

Find out which plants, flowers and grasses are native to your region. Native species are essential for supporting local wildlife and typically require less maintenance.

Step 2 Focus on Layers

Arrange your plants in layers, mimicking natural habitats. Include ground covers, upright perennials, shrubs and ornamental grasses to add height and depth to your garden.

Step 3 Select Long Bloomers

Choose plants that flower over extended periods or foliage that changes with the seasons to maintain interest throughout the year. For example, echinaceas and rudbeckias are known for their long-lasting appeal.

Step 4 Work with a Colour Palette

Decide on a natural colour palette that complements your outdoor setting. Think greens, whites, blues and soft purples for a serene look, or yellows and oranges for a more vibrant feel.

Step 5 Add Movement

Grasses like miscanthus or feather reed grass create dynamic movement in the garden. Watching these sway in the wind adds a touch of magic to any setting.

Step 6 Experiment with Density

Plant densely to create a full, lush garden that doesn’t leave gaps. The right density maximises visual impact and also helps in reducing weed growth.

Why is Naturalistic Garden Design Becoming Popular?

The rising popularity of naturalistic garden design can be attributed to several factors.

Environmental Awareness

With a growing focus on sustainability and biodiversity, more people are looking to make choices that positively impact the planet. Naturalistic gardens align perfectly with these values.

A Shift from Perfection

Traditional gardens often prioritise symmetry and perfection. However, people are now drawn to designs that feel more authentic, fluid, and in tune with the environment.

Health and Wellbeing Trends

The soothing qualities of naturalistic gardens resonate with individuals seeking mental and emotional rejuvenation. This style can turn any outdoor space into a restorative haven.

Instagram-Worthy Aesthetics

The organic charm and unintentional beauty of naturalistic gardens have made them a hit on social media platforms. The layered textures and thoughtful plant combinations create picture-perfect moments, inspiring others to follow suit.

Bring Your Garden to Life

If you’ve been inspired to explore the world of naturalistic garden design, taking the first step doesn’t have to be daunting. Start with a small area, experiment with native plants and allow nature to guide you.

Remember, the key to a naturalistic garden is balance. It’s about creating a space that feels wild yet welcoming, purposeful yet unrefined.

Whether you’re a seasoned gardener or a beginner, this design approach offers a way to reconnect with nature while creating a stunning outdoor retreat.

Further Reading: Garden Design with Grasses, Why Gardens Should Feed All of the Senses, Transform Your Garden into a Butterfly Haven

For Daily Inspiration – Follow us on Instagram 🦋

Why Gardens Should Feed All of the Senses

A garden is more than a collection of plants. It’s a living, breathing space brimming with opportunities to delight and nourish every sense. Imagine stepping into a garden where every detail has been designed to provide visual splendour, tantalising scents, delicious flavours, soothing sounds and incredible textures to touch. It’s not just a retreat; it’s an immersive experience that connects us deeply to nature.

The Role of the Five Senses in Gardens

Before we jump into the practicalities, it’s important to understand the role of the five senses. Humans use sight, smell, hearing, taste and touch to perceive the world around them. These senses guide us in connecting with our surroundings and gardens provide the perfect outlet for this connection.

When a garden is designed to engage all five senses, it transforms into more than a pretty space. It becomes a vibrant, dynamic environment that fosters well-being, relaxes the mind and sparks joy. Let’s explore how to bring this idea to life.

Design for the Eyes

A Visual Feast

The easiest way to engage sight is by creating a visually stunning space. Choose plants with vibrant colours that complement each other. Think radiant reds, sunny yellows, calming blues and verdant greens. Play with contrast by pairing light pastels with deep, dramatic shades for extra intrigue.

Height and Depth

Introduce varying heights and layers by combining tall trees, mid-height shrubs and low-growing ground covers. Adding levels to your garden naturally draws the eye across the space, creating visual interest. Climbers growing on trellises or arches add even more dimension.

Design Elements

Consider pathways, water features and seating areas as part of your design. Patterns in paving stones or gravel add structure, while artistic garden sculptures can act as focal points. Even a well-placed bench invites moments of pause, encouraging the eye to soak up the surroundings.

Plant for the Nose

Scented Blooms

Nothing stirs emotions like the scent of a garden in full bloom. Choose fragrant flowers such as roses, lavender, jasmine or honeysuckle to fill the air with lovely aromas. Plant these near pathways or seating areas for maximum impact.

Seasonal Scents

For year-round sensory appeal, select plants that bloom in different seasons. Daffodils can brighten the spring air, lilacs offer a sweet summer fragrance, autumn brings the musky smell of falling leaves and evergreen shrubs maintain freshness in winter.

Herbs and Aromatic Plants

Herbs like mint, basil and thyme aren’t just for cooking. Their wonderful fragrances are perfect for drawing visitors closer to brush their fingers against the leaves. Scatter them throughout your garden for subtle, aromatic surprises.

Engage the Ears

Sounds of Wildlife

Birdsong can bring a garden to life. Attract birds by adding feeders, bird baths and plants with berries. The buzzing of bees and chirping of insects also add to the garden’s natural symphony.

Wind and Water

The gentle rustle of leaves in the breeze is refreshing and calming. Opt for trees and tall grasses that amplify this effect, such as bamboo or silver birch. Water features are another excellent way to incorporate sound. A babbling stream or trickling fountain brings tranquillity and enhances relaxation.

Interactive Sounds

Think beyond nature and add sound elements that interact with the environment. Wind chimes, for example, can create enchanting melodies as the breeze passes through.

Create for the Taste Buds

Edible Gardens

What good is a garden without taste? Incorporate vegetables, fruits and herbs that you can harvest and enjoy. Plant cherry tomatoes, strawberries, or even a small apple tree for produce that’s not just delicious but also rewarding to grow.

Edible Flowers

Explore the culinary potential of your garden by planting edible flowers. Marigolds, nasturtiums and pansies add flavour and colour to salads and desserts. Plus, they can double as ornamental beauties in your flower beds.

Flavourful Herbs

Herbs like rosemary, oregano and chives aren’t just practical for cooking; they also add greenery and fragrance. Display them in pots near your kitchen door for easy access when whipping up a fresh meal.

Appeal to Touch

Tactile Textures

A garden that pleases the sense of touch is one that invites you to reach out and explore. Choose plants with a variety of textures, such as the soft velvet of lamb’s ear, the feathery feel of ornamental grasses, or the waxy smoothness of succulents.

Tree Bark

Don’t overlook trees! Experience the rugged texture of bark from species like oak or birch. These tactile elements instantly add depth and character to any garden.

Interactive Planting

Invite interaction with child-friendly plants like snapdragons or sensitive plants (Mimosa pudica) that curl up when touched. These elements make a garden particularly engaging for younger visitors.

Embark on Your Sensory Gardening Journey

A garden that engages all the senses is more than a place to admire from afar; it’s a space that invites you to fully immerse yourself. Whether you’re relaxing with the gentle trickle of a fountain, savouring the scent of lavender or picking herbs for dinner, every moment in such a garden becomes an experience that uplifts and rejuvenates.

Assess your current garden and explore how you can weave elements that speak to all five senses. The beauty of this approach is that it can be tailored to any space, whether it’s a sprawling yard or a compact balcony.

Start small, experiment and pay attention to the experiences that bring you the most joy. Soon, you’ll have a garden that feels as good as it looks.

Further Reading: Garden Design with Grasses, Transform Your Garden into a Butterfly Haven

For Daily Inspiration, Follow us on Instagram