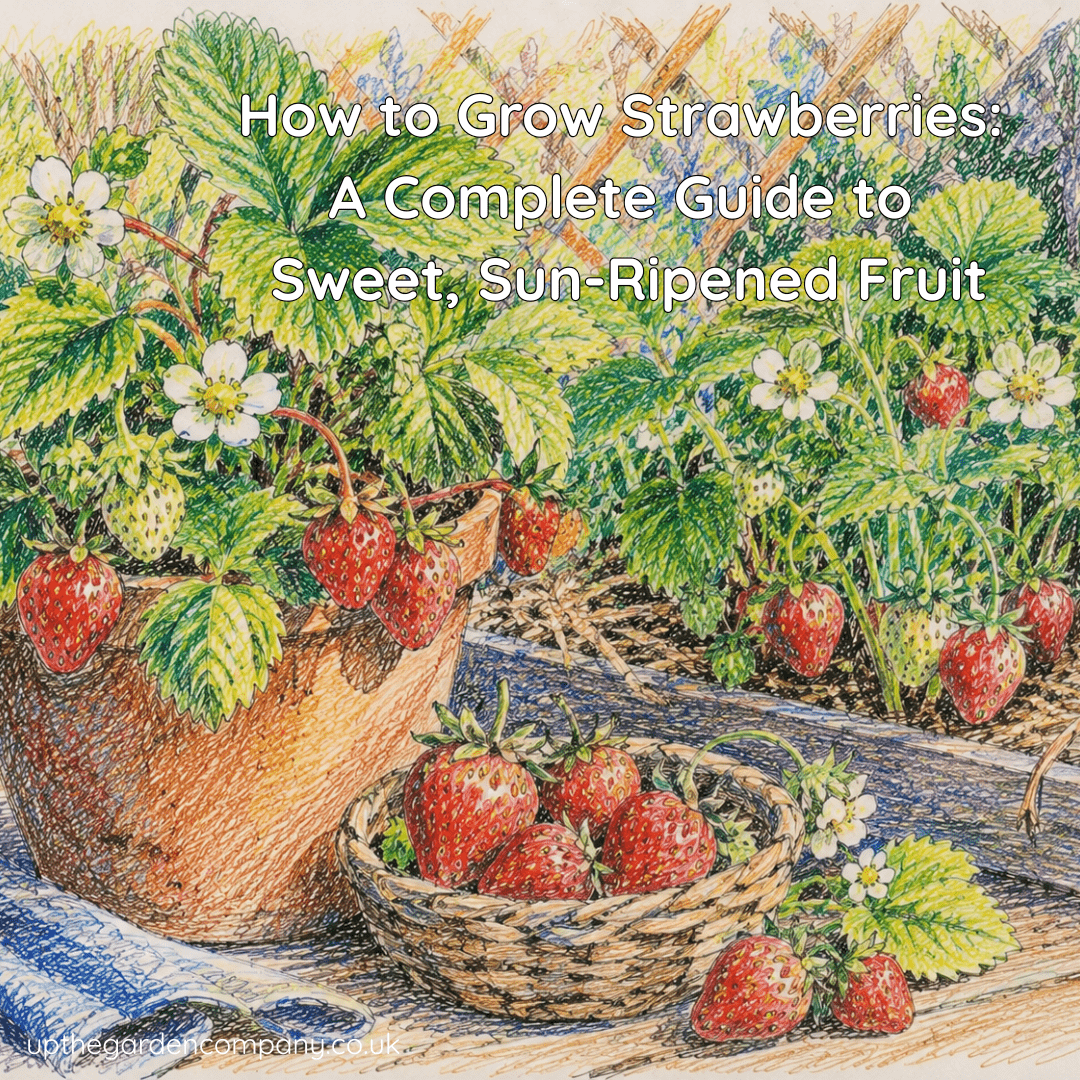
A Clean Start: The Importance of Garden Hygiene

Every gardener dreams of a thriving, healthy garden—full of flourishing plants and vibrant flowers. But did you know that a major part of achieving this lies in maintaining good garden hygiene? Cleaning your garden pots, seed trays and containers is an essential yet often overlooked task. It can make all the difference between lush greenery and struggling plants.

Disease-causing fungi, pests and other harmful organisms can linger in those old pots you’ve been saving. Without proper cleaning, your efforts to reuse them may inadvertently spread diseases, affect plant health or even damage new growth. But don’t worry—keeping things clean and sustainable doesn’t have to be difficult. With just a little care, you can start each gardening season with fresh, hygienic pots, ready to nurture your plants.

Image: Ornate Picture Frame with Image of Gardener Cleaning their Plant Pots

Why Cleaning Garden Pots Matters

Old pots often hold more than just memories of past blooms. Hidden in soil residues and cracks are potential problems for your new plants. Here’s why giving your pots a good scrub is so important:

1. Prevent the Spread of Disease

Old soil can harbour bacteria, fungi and viruses that might infect your fresh seedlings. Cleaning your pots reduces the risk of transferring these harmful pathogens, giving your plants a healthier start.

2. Stop Pests in Their Tracks

Did you know that insects and pests can overwinter in the old soil and surfaces of pots? Without cleaning, you might unknowingly provide a home for these intruders, putting your garden at risk.

3. Remove Mineral Buildup

Over time, salts from fertilised soil can accumulate in pots. This residue can damage or disrupt plant growth. Cleaning helps remove these deposits, ensuring your plants have a healthy growing environment.

4. Reduce Plastic Waste

Reusing pots is an excellent way to reduce waste and lower your environmental impact. But reusing only works when the pots are clean and free from potential hazards. By cleaning and maintaining your pots, you’re doing your bit for the planet and your plants.

How to Clean Garden Pots Like a Pro

Cleaning garden pots doesn’t have to be a chore. With a few simple steps, you can keep your containers spotless and ready for planting.

Step 1: Remove Dirt and Debris

First, use a stiff brush to eliminate any leftover soil, dirt, mildew or deposits from the surface of the pot. Ensure every crevice, especially in textured or grooved pots, is scrubbed free of unwanted residue.

Step 2: Disinfect for Added Protection

Prepare a solution of one part unscented household bleach and nine parts water. Submerge your pots in this solution for around 10 minutes to eliminate any remaining disease-causing organisms. For terracotta pots, follow this step with a soak in clear water for an additional 10 minutes to ensure the bleach is fully removed from the porous material.

Step 3: Tackle Mineral Deposits

For stubborn mineral salts, soak your pots in a mix of water and vinegar. The acidity of the vinegar helps dissolve the salt build-up, leaving your pots squeaky clean.

Step 4: Rinse Thoroughly

Ensure you rinse every pot thoroughly to remove any remaining cleaning solution, whether that’s bleach or vinegar.

Step 5: Dry in the Sun

Air drying your pots in the sunlight not only completes the cleaning process but also provides a natural form of sterilisation, as UV rays can help kill off residual bacteria and fungi.

Bonus Tip

If you’re cleaning terracotta pots, this step has an extra benefit – moistening the porous walls of the pot. Damp terracotta pots help prevent soil from drying out too quickly when you first transplant your seedlings, giving them a better chance to thrive.

Make It a Habit

Good garden hygiene doesn’t stop here. To avoid spreading issues from one growing season—or one plant—to another, try to clean every pot as soon as it’s emptied. Not only will this save you time later when you’re ready to replant, but it’s a great way to ensure your garden is always prepared for success.

A Cleaner Garden, A Brighter Future

By incorporating these cleaning habits into your gardening routine, you’re not only creating healthier conditions for your plants but also contributing to sustainable gardening practices. Reusing pots helps reduce waste, while clean pots ensure that your garden thrives season after season.

It’s these small yet impactful actions that bring us closer to creating beautiful, sustainable spaces for ourselves and future generations. Whether you’re an experienced gardener or just starting your journey, maintaining good garden hygiene sets the foundation for a flourishing outdoor sanctuary.

Now, with your spotless pots ready for their next occupants, it’s time to dream of new blooms, fresh growth, and vibrant greenery. Let’s start the season with a clean slate—literally! Happy gardening! 🌱

Further Reading: RHS Cleaning Hand Tools, Maintaining your Garden Tools

How to Grow Strawberries: A Guide to Sweet Success

Ever dreamed of plucking juicy, fragrant strawberries from your own garden, still warm from the sun? Whether you’re a seasoned gardener or a curious beginner, growing strawberries in the UK can be an immensely rewarding experience. With the right variety, tips and a dash of care, you’ll enjoy a bumper harvest of sweet, mouth-watering berries that’ll make shop-bought ones pale in comparison.

Ornate Picture Frame with Image of a strawberry patch and gardener attending to them.  In distance some country cottages.

Picking the Perfect Variety for the UK

Not all strawberries are created equal! For the best results in the UK’s temperate climate, it’s crucial to pick varieties that are well-suited to your conditions and needs. Here are some recommendations to get you started:

  • ‘Cambridge Favourite’: A classic choice for the UK, this reliable variety fruits early and is loved for its sweet flavour.
  • ‘Albion’ (Ever-bearer): Perfect if you want strawberries throughout the season, as it produces fruit continuously from late spring to autumn.
  • ‘Mara des Bois’: If you adore the taste of wild strawberries, this French variety offers a similar intense flavour with larger berries.
  • Alpine Strawberries (‘Wild Strawberries’): These are small but pack a punch in taste and are ideal for smaller spaces or as edging plants.

When selecting, think about how much space you have (compact varieties are available for pots!) and whether you prefer one big harvest (June-bearers) or berries all summer long (ever-bearers).

How to Grow Strawberries in the UK

Once you’ve chosen your ideal variety, it’s time to get planting! Follow these simple steps for a thriving strawberry patch:

Step 1: Choose the Right Location

Strawberries love the sun—choose a spot in your garden that gets at least 6–8 hours of sunlight a day. Well-drained, nutrient-rich soil is key, so consider adding compost or well-rotted manure before planting.

Step 2: Start Planting

The best time to plant strawberries outdoors in the UK is in late summer or early autumn, but you can also plant them in spring. Space each plant 30cm apart in rows, leaving 75cm between rows. Plant them so the crown (where the leaves meet the roots) is just above the soil surface.

If space is tight, no problem! Strawberries thrive in pots, hanging baskets, or even vertical planters—perfect for patio gardens or balconies.

Step 3: Water and Mulch

Keep the soil evenly moist (but not waterlogged) and apply a layer of straw or black plastic mulch around your plants. This keeps the fruit clean, conserved moisture and helps deter weeds.

Step 4: Feed and Maintain

During the growing season, feed your strawberry plants with a high-potassium fertiliser (like tomato feed) to encourage flowering and fruiting. Remove any weeds or runners unless you want to propagate new plants.

Harvesting a Bumper Crop of Tasty Strawberries

The wait is almost over—but how can you ensure a generous, flavourful harvest?

  • Pollination is Key: Strawberries are self-pollinating, but bees can help increase your yield. Encourage pollinators by planting flowers nearby.
  • Pinch for Performance: If planting in early spring, pinch off the flowers for the first few weeks to allow the plant to direct energy into root growth. You’ll be rewarded with bigger fruits later in the season.
  • Pick at the Perfect Time: Harvest strawberries when they are fully red—this is when they are at their sweetest. Pick them regularly to keep berries coming.

Preventing Diseases, Viruses, and Pests

Everything’s going smoothly until disease or pests decide they like your strawberries as much as you do. Don’t worry—here are tried-and-tested methods to protect your plants:

  • Avoid Overcrowding: Proper spacing ensures good air circulation and helps prevent fungal issues like botrytis (grey mould).
  • Water from Below: Wet leaves can lead to diseases, so water at the base of the plant in the morning.
  • Watch Out for Pests: Birds love strawberries, so cover plants with netting. If slugs or snails are an issue, use copper tape or organic pellets.
  • Choose Disease-Resistant Varieties: Some varieties are less prone to common issues like verticillium wilt.
  • Rotate Crops: Avoid planting strawberries in the same spot for more than 3 years to minimise soil-borne diseases.

Why Grow Strawberries in the UK?

Growing strawberries isn’t just a treat for your taste buds—it’s also incredibly satisfying to produce your own fresh, chemical-free fruit. Plus, with the UK’s mild climate, strawberries are one of the easiest and most rewarding fruits to grow, even in smaller gardens. Imagine sitting in the sunshine on a warm summer day, a basket of your own stunning, sun-ripened berries at your side. It’s the stuff of gardening dreams—and it can be your reality.

Further Reading: RHS How to Grow Strawberries, How to Grow Grapes in the UK, A Guide to Growing Figs in the UK, The Incredible Benefits of Growing Your Own Food

How to Grow Grapes in the UK

Ever dreamt of transforming your garden into a delightful vineyard oasis? Imagine lush vines heavy with clusters of sweet, sun-kissed grapes, ready for picking. Good news—you don’t need to own a Mediterranean estate to make this vision a reality! With the right know-how, you can grow beautiful, bountiful grapes right here in the UK.

Ornate Picture Frame with an Imavge of Grapes growing.

Why Grow Grapes in the UK?

Grape growing isn’t just for warmer climates—thanks to resilient grape varieties and a bit of preparation, vineyards are thriving even in Britain’s cooler weather. Whether you’re eager to craft home-grown wine, produce fresh table grapes or simply add a splash of natural elegance to your garden, grapevines are a rewarding choice. Plus, they’re easier to grow than you might think!

Step 1: Choose the Right Grape Variety

The key to success lies in selecting grapes suited to Britain’s climate. Look for varieties known for their hardiness and ability to thrive with less sunlight. Some fantastic options include:

  • ‘Solaris’ (great for white wine)
  • ‘Pinot Noir’ (perfect for sparkling wine lovers)
  • ‘Regent’ (for rich red wines)
  • ‘Muscat of Alexandria’ (amazing as table grapes)

For beginners, go for hardy, disease-resistant varieties—you’ll thank yourself later!

Step 2: Find the Perfect Location

Grapevines love warmth and sunshine, so choose a south-facing spot in your garden where they can soak in as much light as possible. They thrive in well-drained soil, so avoid areas that can get waterlogged. Growing against a sunny wall or fence not only provides support but acts like a cosy blanket, capturing heat to keep your vines happy.

Quick Tip:

If space is tight, growing grapes in large containers is also an excellent option. Portable vineyards? Yes, please!

Step 3: Prepare Your Soil Like a Pro

Healthy vines grow in healthy soil. Grape plants love well-draining, slightly chalky or sandy soil, but they’re adaptable. If you’re working with clay or heavy soil, simply mix in compost and a bit of grit to improve drainage. Test your soil’s pH level too—it should be slightly acidic to neutral, ideally between 5.5 and 7.

Fertiliser? Grapes are pretty self-sufficient, but a good organic compost at planting and a yearly top-up can provide a nice boost.

Step 4: Plant Your Grapevines Like a Pro

Plant your grapevines either in the autumn or early spring—just avoid frost! Start by digging a hole that’s about twice the width of the root ball and deep enough for the roots to spread comfortably. Rest the vine at the bottom, gently fill in with soil, pat it down, and water thoroughly.

Allow 1.5m spacing between each vine to give them room to breathe and grow. If you’re planting multiple rows, leave about 2m between rows.

Step 5: Train and Prune Your Grapes

Here’s where the magic begins! Grapevines need support to grow vigorously. Install a sturdy trellis, wire frame, or train them along a wall or fence. Tie the shoots loosely to your chosen support structure and guide the growth.

When it comes to pruning, don’t hold back—grapes thrive on structure, not chaos. During winter dormancy, prune away weak or excess shoots to focus the plant’s energy on producing top-quality grapes. Aim for 2-4 strong shoots per vine, and you’ll see the difference come harvest time.

Step 6: Care Throughout the Seasons

  • Spring: Watch for new growth and frost. Cover young shoots if frost is forecast.
  • Summer: Water vines in dry weather (especially if in containers) and thin bunches of grapes for maximum flavour.
  • Autumn: Get ready to harvest! This is the moment you’ve been waiting for—pick your grapes when they’re plump, juicy, and bursting with sweetness.
  • Winter: Protect dormant vines by mulching the base and pruning carefully to prepare for next season’s growth.

Step 7: Tackling Common Challenges

Even the most enthusiastic gardeners can run into issues. Look out for pests like aphids or caterpillars and treat them promptly with gentle, natural solutions. For diseases like mildew, well-spaced vines and good airflow can go a long way to prevent problems.

Why You’ll Love the Results

Picture yourself biting into the freshest, juiciest grapes picked straight from your garden. Even better, imagine uncorking a bottle of wine made with your very own harvest! Grapevines bring elegance and rewards to your outdoor space, all while creating a sense of accomplishment you’ll love sharing with friends and family.

Get Growing Today!

There’s no better time to begin your grape-growing adventure. Whether it’s luscious table grapes or a homemade vintage you’re after, the process is more accessible and rewarding than you’d believe.

Start small, dream big and soon, your garden could rival a vineyard in the south of France. Grab your gloves, select those grape varieties, and get growing—you’ll be raising a glass to your own success in no time! Cheers to your vineyard dream! 🍇

Further Reading: RHS How to Grow Grape, How to Plan and Create a Forager’s Garden, The Incredible Benefits of Growing Your Own Food

A Guide to Growing Figs in the UK

Picture this—a quiet moment in your garden, the sun kissing your skin, and the sweet scent of ripe figs wafting through the air. Growing figs in the UK might sound like a Mediterranean daydream, but with the right know-how, you can bring this vision to life in your own garden.

Image:  Regal Picture frame with photo of fig Plant.

How to Grow Figs in the UK

Figs are surprisingly hardy and can thrive in many corners of the UK with a bit of TLC. Start by choosing a sunny, south-facing spot in your garden or patio—figs love warmth. Plant them in well-draining soil mixed with compost to ensure their roots don’t sit in water. If you’re tight on space, don’t worry! Figs grow beautifully in large containers, making them ideal for courtyards or balconies.

A key tip for UK growers is to restrict their root growth, which encourages better fruit production. You can achieve this by planting your fig tree in a pot that sits in the ground or by using brick rubble or slate to line the planting pit, limiting root spread.

Selecting the Best Fig Variety

Not all figs are created equal—some varieties are better suited to Britain’s climate than others. Look for types like ‘Brown Turkey’, celebrated for its hardiness and deliciously sweet fruit, or ‘Brunswick’, which copes well with cooler conditions. For those with smaller gardens, the compact ‘Little Miss Figgy’ is an excellent choice. Whichever variety you choose, ensure it has been bred for cooler climates to maximise your success.

Caring for Your Fig Plant

Figs reward attentive care with their abundant harvest. Regular watering is essential during dry spells, especially for potted plants, but beware of overwatering, as it can lead to root rot. Feed your fig with a balanced fertiliser in early spring and again in midsummer to boost growth.

Pruning will keep your fig tree in tip-top shape. Cut back any damaged branches in winter, once the tree is dormant. Aim to maintain an open structure, which helps sunlight reach the fruits and prevents fungal diseases.

How Figs Develop and When They Ripen

Watching figs develop is a gardener’s joy. It begins with tiny green buds that gradually swell into plump fruit. Be patient—figs can take months to mature! Depending on your variety, you can expect to start harvesting from late summer to early autumn.

The fruit only ripens on the tree, so don’t pick them too early. A ripe fig will be soft to the touch, have a sweet aroma and may ooze a drop of nectar from its base.

The Fascinating World of Fig Pollination

Here’s where it gets really interesting—figs are pollinated in a way that feels closer to science fiction than gardening. Tiny wasps called fig wasps play a crucial role in pollination, but most UK-friendly varieties like ‘Brown Turkey’ are self-pollinating, so you won’t need to worry about wasps. However, their development is still fascinating and reminds us of nature’s ingenious complexities.

Common Fig Diseases and How to Prevent Them

Unfortunately, fig trees can sometimes fall victim to pests and diseases. Keep an eye out for fig rust, which causes yellowing leaves or scale insects, which can sap your tree’s vitality. Regularly inspect your plant, prune any diseased sections, and ensure good airflow around the branches to reduce the risk of infection. Potted figs are less susceptible to soil-borne diseases but should still be monitored for signs of stress.

Propagating Your Fig Tree

Want to grow even more figs? It’s easier than you might think! Figs can be propagated through cuttings. Simply take a 20–30cm hardwood cutting from your tree in winter, plant it in a container with moist compost, and keep it in a sheltered spot. Before long, you’ll have a new fig tree to expand your garden—or gift to a fellow fig lover!

Getting Creative With Figs and Their Leaves

The possibilities are endless with your fig harvest. From fresh figs paired with goat cheese or prosciutto to homemade fig jams and tarts, their versatile sweetness makes them a favourite in the kitchen. You can even use fig leaves to infuse stews, soups, or syrups for a subtle, nutty flavour.

Your fig leaves can also be used as eco-friendly wraps for grilling fish or meat, adding aroma and reducing waste. Talk about making the most of your plant!

Why Grow Figs?

Figs are more than just a beautiful addition to your garden. By growing them, you’re getting closer to nature, reducing the carbon footprint of imported fresh fruit, and enjoying the unbeatable taste of homegrown produce. Their ornamental beauty and luscious fruit will make your garden feel that little bit more Mediterranean, right here in the UK.

Are You Feeling Inspired?

Now’s the perfect time to plant your first fig tree and kickstart your fig-growing adventure! Picture picking your very own fresh figs and tasting the results of your dedication. What are you waiting for? Happy gardening, and may your fig trees flourish! 🌱

Further Reading: RHS Growing Figs, The Incredible Benefits of Growing Your Own Food, How to Plan and Create a Forager’s Garden

Homemade Fertilisers for Your Garden

Turning your garden into a lush, thriving green sanctuary doesn’t have to drain your wallet or harm the environment. Homemade fertilisers are an excellent, budget-friendly way to nourish your plants while staying eco-conscious. By utilising everyday materials, you can create nutrient-rich fertilisers that promote healthy growth without relying on synthetic alternatives.

Before we explore these natural options, it’s important to note that soil testing is essential. Understanding your soil’s composition and your plants’ specific needs ensures you apply the right amount of the right fertilisers. Remember, moderation is key—applying too much fertiliser can harm your plants rather than help them.

Here’s a guide to some of the best homemade fertilisers, their benefits and how to use them effectively.

1. Comfrey Tea

Nutrients: potassium, potassium, nitrogen

How to Prepare: Steep well-rotted compost in water for 24–48 hours. Use a ratio of 1 part compost to 5 parts water.

How to Use: Dilute further if needed and pour around the base of your plants to improve soil fertility and encourage healthy growth.

See our Blog on Comfrey Tea here

2. Animal Manure

Nutrients: nitrogen, phosphorus, potassium, organic matter

How to Prepare: Use well-aged manure (such as cow, horse, or chicken manure) to avoid burning your plants.

How to Use: Spread a thin layer over your garden soil and lightly dig it in. Avoid contact with plant leaves.

3. Banana Skins

Nutrients: potassium and phosphorus

How to Prepare: Chop up banana peels and bury them directly in the soil near the roots of flowering plants. Alternatively, soak them in water for 24 hours to create a banana peel tea.

How to Use: Add to soil for naturally boosted blooms and stronger root systems.

4. Seaweed

Nutrients: potassium, growth hormones

How to Prepare: Rinse seaweed to remove excess salt and soak it in water for a week.

How to Use: Use the strained liquid as a foliar spray or soil conditioner to improve plant strength and resilience.

5. Epsom Salts

Nutrients: magnesium and sulphur

How to Prepare: Dissolve 1 tablespoon of Epsom salts in a gallon of water.

How to Use: Water plants or spray on leaves to boost photosynthesis and aid nutrient absorption.

6. Bone Meal

Nutrients: Phosphorus and calcium

How to Prepare: Crush clean, dry bones into a powder.

How to Use: Sprinkle it sparingly into the soil around your plants to support root and flowering development.

7. Fish Emulsion

Nutrients: nitrogen, potassium, trace elements

How to Prepare: Purchase or make your own by blending fish scraps with water. Allow it to sit for a few days before use.

How to Use: Dilute the emulsion in water and apply as a soil drench to encourage vigorous growth.

8. Molasses

Nutrients: potassium, iron, calcium and sugars to feed soil microbes

How to Prepare: Mix 1–2 tablespoons of unsulfured molasses into a gallon of water.

How to Use: Water your plants or add to compost piles to accelerate decomposition and promote healthy microorganisms.

9. Coffee Grounds

Nutrients: nitrogen, organic matter

How to Prepare: Allow used coffee grounds to dry.

How to Use: Sprinkle them around acid-loving plants like azaleas, hydrangeas, and blueberries. Avoid overuse, as they can increase soil acidity.

10. Tea Leaves

Nutrients: Nitrogen and tannic acid

How to Prepare: Save used tea leaves or bags and dry them out.

How to Use: Mix into the soil to increase fertility or add to your compost pile.

11. Grass Clippings

Nutrients: nitrogen

How to Prepare: Collect fresh grass clippings and allow them to dry slightly before use.

How to Use: Spread them thinly over soil as mulch or compost them for a slow-releasing nitrogen source.

12. Eggshells

Nutrients: calcium

How to Prepare: Crush rinsed eggshells into small pieces.

How to Use: Scatter around plants to improve soil structure and provide calcium for healthy plant cells.

13. Wood Ash

Nutrients: Potassium and calcium carbonate

How to Prepare: Use ash from untreated wood. Avoid charcoal or ash with additives.

How to Use: Sprinkle lightly over the soil, especially around fruiting plants. Use sparingly to avoid altering the soil pH too drastically.

14. Stinging Nettle Tea

Nutrients: Nitrogen, phosphorus, iron

How to Prepare: Harvest nettles (using gloves), chop them, and soak them in water for 1–2 weeks.

How to Use: Strain out the solids and dilute the liquid before watering your plants or using it as a foliar spray.

15. Vegetable Cooking Water

Nutrients: Trace vitamins and minerals from cooked vegetables

How to Prepare: Save the water used to boil vegetables, making sure it is unsalted.

How to Use: Once cooled, water your plants to give them a gentle nutrient boost.

16. Old Aquarium Water

Nutrients: nitrogen and trace nutrients from fish waste

How to Prepare: Save the water when cleaning out a freshwater aquarium.

How to Use: Use as-is to water plants, avoiding delicate leaves. It’s an easy way to recycle nutrient-rich water.

Sustainable Gardening Practices

Homemade fertilisers are kinder to the planet, your wallet, and your plants. By making use of natural, everyday materials, you eliminate the need for synthetic products, reduce waste, and create a more eco-friendly approach to gardening.

Always remember:

  • Test your soil before applying fertilisers to determine what’s needed.
  • Use in moderation—too much of a good thing can harm your plants.
  • Consider your plants’ specific nutrient requirements to ensure your fertiliser choices match their needs.

By incorporating these natural materials into your gardening routine, you can create a thriving, sustainable garden filled with happy, healthy plants. Give these DIY fertilisers a try, and watch your garden flourish while doing your part for the planet.

Further Reading:  How to Start Composting

Follow us on Instagram for daily gardening inspiration!

Happy gardening! 🌱

Why Bees Are Essential to Our Gardens

Picture a summer garden alive with colour and movement—flowers in full bloom, the hum of insects filling the air. Among these busy creatures, bees are the quiet heroes working tirelessly to bring your garden to life.

What Are Bees?

Bees are small, hard-working insects belonging to the order Hymenoptera and are closely related to wasps and ants. With over 20,000 species worldwide, bees come in various shapes, sizes and behaviours, from honeybees and bumblebees to solitary species like the mason bee.

Most importantly, bees are pollinators. When they buzz from flower to flower collecting nectar and pollen, they transfer pollen grains from one bloom to another, enabling plants to fertilise and produce seeds. This seemingly simple process is vital for ecosystems, agriculture and, of course, our gardens.

Why Are Bees Important?

Bees are a keystone species, meaning their role in the environment is disproportionately large relative to their size. They are directly responsible for pollinating 75% of the crops that feed the world. Without bees, our plates would look alarmingly empty—a world with fewer fruits, vegetables, seeds and nuts is not one we want to face.

But it’s not just about food production. Bees ensure biodiversity thrives by pollinating wild plants, supporting habitats for countless other animal species. They provide a delicate balance in ecosystems, linking plants and wildlife together in a web of life.

Simply put, bees are essential for both environmental and human health.

Why Are Bees Important in the Garden?

For gardeners, bees are nothing short of magic. They both work for you and with you to create a flourishing growing space, pollinating plants as they go about their day. Here’s how bees help elevate your garden:

  1. Pollination Champions

Whether it’s your tomatoes, courgettes or apple trees, bees ensure these crops are pollinated, yielding a greater—and healthier—harvest. Tomatoes, for instance, rely on a process called “buzz pollination,” which only bees can perform by vibrating their bodies to release pollen.

  1. Encouraging Biodiversity

A bee-friendly garden becomes a sanctuary for other species too. Birds, butterflies and beneficial insects flock to spaces rich in pollinator activity, creating a more balanced and thriving ecosystem.

  1. Stronger Plants and Vibrant Blooms

Better pollination doesn’t just result in more fruit—flowers also thrive. Pollinated blooms are larger, healthier and last longer, adding vibrancy to your garden.

When bees thrive in your garden, they elevate its productivity and beauty, leaving nature’s fingerprints on everything they touch.

What Can Gardeners Do to Encourage and Help Bees Thrive?

Want to roll out the (floral) red carpet for bees in your garden? Here’s how you can create a bee haven that hums with life.

1. Plant Bee-Friendly Flowers

Fill your garden with nectar- and pollen-rich plants! Choose single-flower varieties like lavender, foxglove and cosmos, as these are easier for bees to access than double-Petal blooms. Aim for a mix of flowers that bloom at different times of the year, so bees always have food available.

2. Avoid Pesticides

Many pesticides are toxic to bees. Opt for natural alternatives like garlic spray or soap water to manage pests without harming these vital pollinators.

3. Create Shelter

Support solitary bees with a bee hotel! These structures mimic natural habitats, giving solitary bees a safe place to nest and lay eggs. Hedge lines and undisturbed corners of your garden can also serve as natural shelters.

4. Provide Water

Bees get thirsty too! Leave out shallow dishes of water with some pebbles or floating corks they can land on safely to drink.

5. Say Yes to Weeds

Some flowering “weeds” like dandelions and clover are actually bee superfoods. Allow these plants to grow in moderation—they’re a quick energy boost for bees, especially in early spring.

6. Join the Buzzing Community

Get involved with local beekeeping or conservation groups. You’ll meet like-minded enthusiasts while learning how to create larger-scale impact for your local pollinator population.

Together, We Can Save the Bees

Every garden, no matter how big or small, has the potential to become a haven for bees. By creating a welcoming space for these tireless workers, not only do you help protect a vital part of the ecosystem, but you also ensure your garden flourishes in return.

What are you waiting for? Start planting those bee-friendly flowers today and join the global movement to protect our buzzing friends. After all, a world without bees is a world without beauty, colour and life as we know it. Let’s make sure that’s never the case. Happy gardening! 🐝🌸

Further Reading: RHS – Bees in your Garden, Top 10 Garden Birds in the UK (and How to Spot Them), Helping Wildlife This Winter, How to Create and Maintain a Garden Pond

How to Choose the Perfect Garden Shed for Your Needs

Introduction to Garden Sheds

Garden sheds provide a blend of functionality and aesthetic appeal, enhancing both the practical and visual aspects of any outdoor space. A shed can serve multiple purposes, from storing garden tools and equipment to creating a personal sanctuary where you can unwind or focus on hobbies. The presence of a well-designed shed can significantly contribute to your overall wellbeing, as spending time in nature has been shown to boost mental health.

Moreover, choosing a garden shed made from sustainable materials and sourced from environmentally responsible manufacturers ensures that you are contributing to the preservation of our natural spaces. This not only supports ecological balance but also promotes a healthier environment for future generations. In addition, garden sheds can be customised to suit various needs and styles, making them a versatile addition to any garden.

The wide array of choices available allows you to find a shed that perfectly complements your garden’s existing design, while also providing a functional space that meets your specific requirements. Whether you need extra storage or a cosy retreat, the right garden shed can become an invaluable part of your outdoor living experience.

Framed Picture of a Sketched "Dream" Shed with Solar Panels, Potting Bench and Windows

Factors to Consider Before Buying

Before committing to a garden shed, it’s essential to evaluate your garden’s layout and how the shed will integrate with its surroundings. The shed should complement the existing landscape, providing both functionality and aesthetic appeal without overwhelming the space.

Budget is another crucial factor; garden sheds vary widely in price, so establishing a financial plan will help you make an informed decision. Keep in mind that a higher initial investment in quality materials and construction can offer long-term benefits, reducing the need for frequent repairs and replacements.

Additionally, think about the climate in your area and how it might affect the shed. Opting for weather-resistant materials and ensuring proper insulation can make a significant difference in durability and comfort. Accessibility should also be considered, especially if you’ll be frequently retrieving items or using the shed as a workspace.

Ideal Shed Placement

The location of your garden shed can greatly influence its usability and aesthetic integration with your garden. When considering placement, it’s beneficial to evaluate how the shed will interact with the existing garden layout and plantings. If you prefer easy access for storing tools and garden equipment, placing the shed closer to your home can be convenient. However, for those seeking a peaceful retreat, situating the shed in a more secluded part of the garden may provide a tranquil escape. It’s important to think about natural light as well; positioning the shed where it can receive ample sunlight can enhance its usability, particularly if you intend to use it as a workspace or relaxation area. Additionally, ensure that the site has proper drainage to prevent water damage and consider the impact of seasonal changes such as leaf fall and snow. Proper shed placement not only enhances functionality but also contributes to the overall enjoyment of your garden space. By thoughtfully selecting a location, you can create a harmonious balance between utility and the natural beauty of your garden, fostering a healthier outdoor environment.

Identifying Shed Purpose

Identifying the purpose of your garden shed is crucial for making an informed choice. If you’re looking for a practical storage solution for garden tools and equipment, opt for a design that offers ample shelving and hooks. For those who envision a personal retreat, consider a setup that allows for comfort, such as insulation and cosy seating. This can serve as a perfect spot for unwinding or engaging in hobbies. Families often need additional storage for outdoor toys or seasonal items, so think about versatile options that cater to multiple uses. A shed intended as a garden office might benefit from windows that allow natural light, fostering a productive environment. Knowing precisely how you plan to use your shed will help you select features and layouts that maximise its functionality and enhance your outdoor experience.

Selecting the Appropriate Size

Choosing the right size for your garden shed requires careful consideration of your storage needs and the available garden space. Begin by evaluating what you plan to store—whether it’s gardening tools, outdoor furniture, or seasonal decorations. Measuring larger items in advance can help you visualise the required space. Additionally, consider any future needs you might have, as it’s often more cost-effective to invest in a slightly larger shed now than to upgrade later.

Keep in mind the overall layout of your garden. A well-proportioned shed should fit harmoniously without overwhelming the space. Use a tape measure and stakes to mark out the shed’s footprint in your garden, giving you a clearer idea of how it will fit. This can also help you plan for easy access and ensure that the shed doesn’t obstruct pathways or garden beds.

If your shed will serve multiple purposes, such as a storage and work area, factor in the need for additional space to move around comfortably. For those using the shed as a retreat or office, allowing extra room for furnishings and personal items can make the space more functional and enjoyable.

Finally, check local regulations regarding shed size, as some areas have restrictions that might influence your decision. By carefully planning and considering these aspects, you can select a shed size that perfectly complements your garden and meets your needs.

Picking the Suitable Style

When choosing the style of your garden shed, think about how it aligns with the overall aesthetic of your garden and your personal preferences. Practical sheds often feature straightforward designs that focus on functionality, making them ideal for storage and utility purposes. Alternatively, a summerhouse-style shed or one with glass windows can offer a more elegant and inviting appearance, perfect for a garden office or a relaxation spot.

Consider architectural features that might enhance the shed’s visual appeal and usability. Windows can introduce natural light, creating a brighter, more welcoming interior. Doors with unique designs or finishes can also add character and improve accessibility. The roof style is another aspect to think about—whether you prefer a classic gable roof or a more contemporary flat roof, the choice will affect both the shed’s appearance and how well it blends with your garden’s design.

Material choice is crucial too. Wooden sheds offer a traditional and natural look, blending seamlessly with outdoor spaces, while metal or plastic sheds provide modern alternatives with low maintenance requirements. By thoughtfully selecting a style that suits your garden’s design and your intended use, you can create a harmonious and functional outdoor haven.

Securing Your Shed

To ensure your garden shed remains secure, it’s wise to invest in robust locks and additional security features. Selecting a high-quality padlock and reinforcing door hinges can make a significant difference. For sheds containing valuable items, consider installing a shed alarm to alert you of any unauthorised access.

Location plays a vital role in security. Positioning your shed within view of your home can act as a deterrent to would-be intruders. Additionally, installing motion-sensor lights around the shed can provide an added layer of security by illuminating the area if movement is detected.

Consider incorporating security grills on windows or opting for shatterproof glass to further enhance protection. Regularly inspect your shed for any signs of tampering or wear that might compromise its security. By taking these precautionary measures, you can protect your belongings and maintain the shed’s functionality as a valuable part of your garden space.

Keeping the Shed in Good Condition

Regular upkeep of your garden shed ensures it remains a functional and attractive part of your outdoor space. For wooden sheds, applying a high-quality preservative will shield the timber from harsh weather conditions, helping to prevent rot and decay. This simple step can significantly extend the lifespan of your shed, maintaining its structural integrity and appearance.

Inside the shed, organisation is crucial for maximising utility. Incorporating shelves, hooks, and storage bins allows you to keep tools and other items neatly arranged and easily accessible. This not only enhances the shed’s functionality but also makes it a more pleasant space to work or relax in. Periodically decluttering the shed will help you maintain order and make the most of the available space.

Ventilation is another important aspect to consider, as it helps prevent dampness and mould, particularly in sheds used for storage. Ensuring that your shed has adequate airflow will contribute to a healthier and more durable environment for your belongings. You might also consider installing a moisture barrier or a small dehumidifier if your area is particularly prone to humidity.

It’s also beneficial to perform routine inspections for any signs of wear and tear, such as leaks, broken fittings, or rust. Addressing these issues promptly will prevent them from escalating into more significant problems. For metal or plastic sheds, periodic cleaning with appropriate solutions can remove grime and deter corrosion, keeping the shed looking its best.

By dedicating a little time to regular maintenance, you can enjoy the benefits of a well-cared-for garden shed that continues to serve your needs and enhance your outdoor living experience.

Further Reading: The Smart Garden, Creating Slow Life Areas  , The World of Allotments and Their Future

Follow us on Instagram for Daily Gardening Inspiration

When to Cut Back a Forsythia (and Tips for Keeping it Thriving!)

Few plants usher in the arrival of spring quite like the glorious forsythia. Renowned for its profusion of bright yellow blooms, this vibrant shrub is a true spectacle in any garden, adding a sunny burst of colour just as winter fades away. But while it’s mesmerising to look at, forsythia thrives best with a little TLC—particularly when it comes to timely pruning. Whether you’ve recently planted one or are looking for ways to revitalise an old favourite, here’s everything you need to know about when and how to cut back a forsythia, alongside some bonus tips for keeping your plant in top shape.

Framed Image of Forsythia 
Bright Yellow Flowered Shrub

What is a Forsythia?

Forsythia is a deciduous shrub that gardeners love for its rapid growth and dazzling cascade of yellow flowers that emerge in late winter or early spring. Depending on the variety (and there are plenty to choose from!), forsythia can grow anywhere between 3 to 10 feet, making it a versatile choice for hedges, borders or standalone features.

Their flowers bloom on branches formed during the previous year, which makes the timing and technique of pruning particularly important to ensure a colourful display next year. But don’t worry! Caring for a forsythia doesn’t need to be complicated – it’s a hardy, forgiving plant that rewards even small efforts with spectacular results.

When Should You Cut Back a Forsythia?

Timing is everything when pruning a forsythia. The best time to cut back your shrub is right after it finishes flowering, usually in late spring or early summer. Why? Because forsythia blooms on old wood—meaning the buds for next year’s flowers start forming shortly after the current year’s blossoms fade. Delaying pruning beyond early summer risks cutting off next spring’s buds before they’ve had a chance to develop.

Quick Tip

Mark your calendar! A good rule of thumb is to prune your forsythia within 4-6 weeks after its flowers fade.

Now, what if your forsythia looks overgrown or unruly? Don’t panic. Forsythias are tough plants. You can rejuvenate old or neglected shrubs with a more significant pruning every few years, but remember to do it right after flowering to avoid sacrificing next year’s blooms.

How to Cut Back Your Forsythia

Pruning a forsythia is far from intimidating—it’s actually an incredibly satisfying task. Here’s a step-by-step guide to ensure your plant stays healthy and gorgeous year after year:

1. Start with Old, Scraggly Branches

Look for any branches that are dead, damaged, or crossing each other. Using sharp pruning shears, cut these out at their base. Removing old wood encourages the plant to send out fresh, vigorous shoots.

2. Thin Out Excess Growth

Forsythia can get quite dense over time, which can limit airflow and light from reaching the centre of the shrub. Thin out 1/4 to 1/3 of the oldest stems each year, cutting them all the way back to ground level. This keeps the plant tidy and stimulates new growth.

3. Shape It Up

Step back and assess the overall shape of your shrub. If it’s looking uneven, trim back any excessively long or straggly stems to maintain a natural, arching form. Avoid creating a boxy look—forsythias look best when their growth is allowed to flow naturally.

4. Tame the Hedges (If Needed)

If you use forsythias as part of a hedge, you can lightly trim the outside for a neater appearance after doing your main pruning. Just keep this minimal to preserve future blooms.

Tools You’ll Need:

  • A good pair of sharp pruning shears or loppers for thicker branches
  • Gardening gloves to protect against scrapes
  • A tarp or garden bag to collect the clippings

Additional Tips for a Thriving Forsythia

Pruning isn’t the only way to ensure your forsythia remains the vibrant star of your garden. Here are a few bonus tips to keep yours thriving:

1. Feed Your Forsythia

After pruning, give your plant a boost with a slow-release fertiliser or compost. This helps fuel the new growth and ensures a healthy plant.

2. Mulch for Moisture

Apply a layer of mulch around the base of the shrub to help retain moisture, regulate soil temperature, and suppress weeds. Just be sure to keep the mulch a few inches away from the stems to avoid rot.

3. Water During Dry Spells

Although forsythias are fairly drought-tolerant, watering them during prolonged dry spells (especially in summer) helps them produce lush growth.

4. Keep an Eye Out for Pests

Forsythias are hardy and relatively pest-free, but you should still keep an eye out for aphids or scale insects. If you notice any, treat the plant with insecticidal soap or neem oil.

5. Rejuvenate Older Shrubs if Needed

If your forsythia is neglected or overgrown, consider a “hard prune” to reset it. Cut the entire shrub to about 4 inches from the ground after flowering—just remember this approach means sacrificing flowers for the next season. However, the regained health and vigour are worth it in the long run!

The Joy of a Vibrant Forsythia

A well-pruned forsythia is a gardener’s delight—a burst of life and colour that announces the arrival of spring like no other plant. With a little care and timely attention, you can ensure yours remains a dazzling showcase year after year.

Happy pruning, and may your garden flourish! 🌼

Further Reading: RHS – Royal Horticultural Society,

Take a look at our other Blogs: Unveiling the Beauty of Lily of the Valley, Celebrating the Primrose, The Enigmatic Beauty of the Hellebores

Unveiling the Beauty of Lily of the Valley

Elegant, fragrant and steeped in timeless lore—lily of the valley or Convallaria majalis, is a flower of delicate charm and historical significance that continues to captivate gardeners and flower enthusiasts alike. Whether you’re cultivating a verdant corner of your garden, seeking a touch of nostalgia or simply love plants with a story to tell, this bloom is an irresistible treasure to grow and admire.

Framed Picture of Lily of the Valley.
Pretty Fluted Bell Shape Flowers with Lush Green Spire Leaves

What is the Lily of the Valley

The lily of the valley (Convallaria majalis) is a perennial plant famed for its delicate, white, bell-shaped flowers and intoxicatingly sweet fragrance. Native to the cooler regions of Europe, Asia and North America, it thrives in lush woodlands, often blanketing the forest floor in spring with its charming blooms.

This plant’s botanical name, majalis, means “belonging to May” in Latin—an ode to its traditional flowering month. It’s no wonder this delightful flower has become a symbol of spring’s renewal and fresh beginnings!

A Bloom with History and Lore

Did you know that the lily of the valley has been cherished for centuries? Its history is as rich as its fragrance.

Historical Notes

Lily of the valley was first cultivated in the Middle Ages, often grown in monastery gardens for its association with humility, purity and spirituality. It also featured prominently in royal celebrations, becoming a favourite flower of French kings and brides alike. To this day, lily of the valley is celebrated in France on May 1st, known as “La fête du Muguet” (Lily of the Valley Day), where it symbolises good luck and happiness.

Fascinating Folklore

This fairytale-like bloom is steeped in myths and stories. According to legend, lily of the valley sprang from the tears of the Virgin Mary as she wept at the crucifixion of Christ, earning it the nickname Our Lady’s Tears. Another tale tells of the flower blossoming from St. Leonard’s blood as he battled a dragon, cementing its reputation as a symbol of resilience and rebirth.

Its other endearing names—like “May bells” and “ladder to heaven”—only add to its poetic allure.

Where Does Lily of the Valley Grow Best?

If you’re thinking about adding this classic gem to your garden, here’s the good news—it’s surprisingly easy to cultivate!

Lily of the valley thrives in partial to full shade, making it perfect for those shaded spots under trees or alongside walls. It prefers moist, well-drained soil rich in organic matter, mimicking the forest floor it calls home. With the right care, this resilient plant will reward you with a carpet of enchanting blooms year after year!

How to Care for Lily of the Valley

  • Planting: This perennial grows from rhizomes called “pips.” Plant these about 1–2 inches below the soil in autumn or early spring.
  • Watering: Keep the soil consistently moist but not waterlogged. If it’s dry, your lily of the valley will thank you for a drink.
  • Spreading: Be mindful—this beauty can be a bit of a wanderer! Use barriers or pots to prevent it from spreading too aggressively.
  • Mulching: A layer of mulch helps protect the roots and retain soil moisture.

Lily of the valley is remarkably low-maintenance once established—it practically grows itself!

Benefits of Lily of the Valley

Beyond its breathtaking beauty, the lily of the valley brings a host of benefits to those who cultivate it.

1. A Fragrance Like No Other

The exquisite scent of its flowers is used in perfumes and aromatherapy, with its delicate aroma often symbolising elegance and romance.

2. Medicinal Uses

Historically, lily of the valley has been used in traditional medicine for heart health, though it is toxic if ingested without proper preparation. Always seek professional advice before considering any therapeutic use.

3. Wildlife Friendly

While the plant is toxic to humans if consumed, its blossoms attract pollinators such as bees, bringing life to your garden.

4. Decorative Appeal

From wedding bouquets to table arrangements, lily of the valley is a perennial favourite for floral decorations, bringing an air of timeless sophistication to any occasion.

Why Grow Lily of the Valley in Your Garden?

Imagine kneeling down in your shaded yard, the earthy scent of damp soil filling the air as you plant these delicate pips. Fast forward to spring and your garden is alive with tiny white bells swaying gently in the breeze, their subtle perfume conjuring joy with every whiff.

Few flowers inspire such effortless elegance and nostalgia, making lily of the valley a must-grow for any gardener or flower enthusiast looking to add timeless beauty to their outdoor space.

Your Garden, Your Story

Have you fallen in love with lily of the valley yet? Whether you’re drawn by its history, folklore or irresistible charm, we’re certain your garden will never be the same once you welcome this enchanting bloom.

Now it’s your turn—make space in your garden, nurture these magical flowers, and create a little woodland sanctuary right at home! Happy planting! 🌿

Further reading: RHS (Royal Horticultural Society), Celebrating the Primrose, Bluebells: A Deep Dive into Nature’s Most Charming Blooms, The Enigmatic Beauty of the Hellebores

Identifying and Managing Common Weeds for British Gardeners

Weeds—the uninvited guests of your garden. We’ve all been there, kneeling down to inspect a cherished flower bed, only to find an army of stubborn weeds threatening to take over. But fear not! This guide will help you identify the most common weeds found in UK gardens and provide you with practical tips for keeping them in check.

What is a weed? A plant whose virtues have never been discovered.

Ralph Waldo Emerson

Why Weeds Need Tackling

Weeds might seem harmless at first glance, but they’re fierce competitors for sunlight, water, and nutrients. Left unchecked, they can smother your prized plants and disrupt your carefully crafted garden. The good news? With a little knowledge and the right approach, you can fend them off and restore harmony to your green sanctuary.

Framed Picture of Garden Weeds

Spotting the Culprits

To tackle weeds effectively, you first need to know who you’re dealing with. Here’s how to identify some of the most common troublemakers in UK gardens.

1. Dandelion (Taraxacum officinale)

With its iconic fluffy seed heads and taproot system, the dandelion is practically the poster plant for weeds. Its cheerful yellow flowers may look harmless, but they spread rapidly and dig deep into the soil.

How to Control:

  • Dig out individual plants, making sure to remove the long taproot completely.
  • Avoid disturbing the fluffy seed heads to prevent further spread.

2. Bindweed (Convolvulus arvensis)

Bindweed is the clingy friend your garden never asked for. Its twisting vines can strangle plants, and its white trumpet-shaped flowers look innocent enough, but don’t be fooled.

How to Control:

  • Pull out the vines by hand, tracing them back to their roots.
  • Consider smothering it with a garden membrane as it thrives on disturbed soil.

3. Creeping Buttercup (Ranunculus repens)

A glance might tell you “buttercup = cute,” but this cheeky weed spreads like wildfire across damp, compacted soil. Its golden-yellow flowers and sprawling runners rapidly colonise your lawn and beds.

How to Control:

  • Improve soil drainage to make conditions less appealing.
  • Remove the runners and roots manually to stop it in its tracks.

4. Chickweed (Stellaria media)

This small, pale-green plant seems harmless, but chickweed grows quickly and produces seeds with astonishing speed. It thrives in the cooler months, making early spring and autumn prime time for its takeover efforts.

How to Control:

  • Pull it up before it flowers to curb seed production.
  • Mulch bare soil to suppress future growth.

5. Ground Elder (Aegopodium podagraria)

Known as “the bane of gardeners,” ground elder forms a dense mat of pretty light-green leaves, choking out any competition. While its young leaves are technically edible, it’s best kept out of your borders.

How to Control:

  • Dig deep to remove all root fragments.
  • Persist, as any small piece left behind can regrow.

Weed Control That Works

Now that you know your foes, it’s time to gear up for battle! Here are some effective strategies for keeping weeds under control:

1. Smother Them

Cover bare soil with mulch, landscape fabric or even cardboard to block sunlight and prevent weed seeds from germinating.

2. Hand Weeding

There’s something deeply satisfying about pulling out weeds by the root. Just make sure to strike after a rainfall, when the soil is soft, to get roots out cleanly.

3. Use a Hoe

For those weeds sprouting in open patches of soil, a sharp hoe can slice them down at the base—quick, effective and oddly enjoyable!

4. Improve Soil Health

Healthy, well-draining soil creates an environment where your ornamental plants can thrive but weeds struggle to gain a foothold.

5. Try Weed Membranes

Lay down weed-suppressing membranes when planting new beds. They allow water and nutrients through while seriously dampening weed growth.

Prevention is Key

The best defence against weeds is a proactive approach. Keep an eye out for early growth and nip it in the bud (literally). And don’t forget—creating dense planting schemes can crowd out weeds before they get a chance to take root.

Make Weeding a Breeze

Weeding doesn’t need to be a dreaded chore. By identifying and targeting the right weeds, and using smart strategies, you’ll keep your garden in tip-top shape.

Grab your gloves, arm yourself with knowledge and reclaim your garden from those pesky invaders. Your daisies, dahlias and daffodils will thank you!

Want More Expert Tips?

Subscribe to our newsletter for seasonal advice, gardening hacks, and more tips for tackling stubborn weeds. Happy gardening!

Further Reading: How to Weed your Garden

Take a look at our weeding tools here

Get Daily Gardening Inspiration: Follow us on Instagram