
Microgreens are one of the easiest, fastest, and most rewarding ways to start growing your own food at home. Packed with flavour, colour, and powerful nutrients, these tiny greens can transform everyday meals—and you can grow them in just 7–14 days.
If you’re new to gardening or short on space, microgreens are the perfect place to start.
What Are Microgreens?
Microgreens are young vegetable and herb seedlings harvested just after their first true leaves develop. They sit somewhere between sprouts and mature plants, offering intense flavour and concentrated nutrition.
Popular in restaurants and increasingly in home kitchens, microgreens are now a go-to choice for anyone interested in:
- Healthy eating
- Sustainable living
- Growing food at home
Nutritional Benefits of Microgreens
Microgreens are often described as “small but mighty”—and for good reason.
Why They’re So Good for You:
- Up to 40x more nutrients than mature plants
- High in vitamin C (immune support)
- Rich in vitamin E (skin and cell health)
- Contain vitamin K (bone health)
- Loaded with antioxidants
- Provide essential minerals like iron, potassium, and zinc
Adding just a handful to your meals is an easy way to boost your daily nutrition.
Best Microgreens to Grow at Home
Choosing the right seeds makes all the difference. Here are some of the most popular options:
Easy & Beginner-Friendly:
- Pea shoots – sweet, crisp, fast-growing
- Sunflower – nutty and filling
Bold & Flavourful:
- Radish – spicy and vibrant
- Rocket – peppery and fresh
- Mustard – strong, punchy flavour
Nutrient Powerhouses:
- Broccoli – mild taste, high in antioxidants
- Kale – rich and slightly earthy
Colour & Variety:
- Beetroot – deep red stems
- Amaranth – striking colour
- Basil & coriander – aromatic and fresh
💡 Tip: Mix varieties for better flavour and visual appeal.
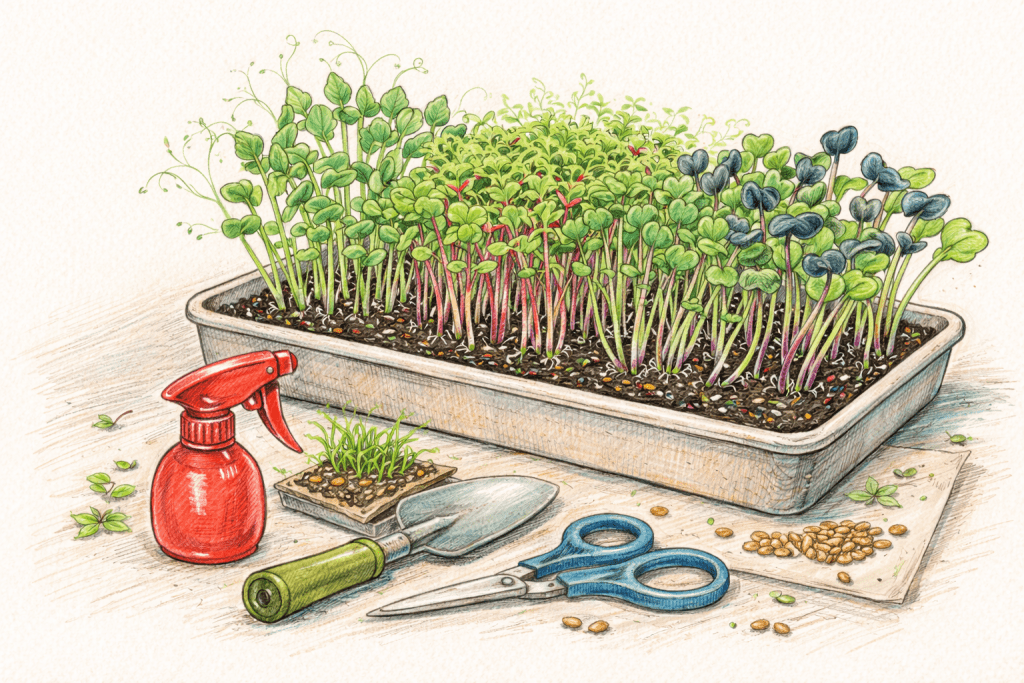
How to Grow Microgreens at Home (Step-by-Step)
You don’t need a garden—just a windowsill.
What You’ll Need:
- A shallow tray or container
- Good-quality compost
- Microgreen seeds
- Water spray bottle
- Natural light or grow light
Step 1: Prepare Your Tray
Fill your container with 3–5 cm of compost. Level it gently.
Step 2: Sow Seeds Evenly
Scatter seeds across the surface—dense but not overcrowded.
Step 3: Lightly Press & Water
Press seeds gently into the soil and mist with water.
Step 4: Place in Light
Position on a bright windowsill. Light is key to strong growth.
Step 5: Water Daily
Mist lightly to keep soil moist (not soaked).
Step 6: Watch Them Grow
Seeds germinate in 2–5 days.
Step 7: Harvest
Cut after 7–14 days when leaves appear.
Top Tips for Growing Microgreens Successfully
Want better results? Focus on these:
- Don’t overwater – the #1 cause of failure
- Ensure airflow – prevents mould
- Use fresh seeds – improves germination
- Give enough light – avoids weak, leggy growth
- Harvest early – best flavour and texture
How to Harvest and Store Microgreens
- Use clean scissors
- Cut just above soil level
- Handle gently
- Store in the fridge in a breathable container
- Best eaten fresh (within a few days)
💡 For continuous harvests, sow new seeds every 7–10 days.
Common Problems (and Easy Fixes)
| Problem | Cause | Solution |
|---|---|---|
| Mould | Too much moisture | Reduce watering, improve airflow |
| Thin growth | Not enough light | Move to brighter spot |
| Poor germination | Old seeds | Use high-quality seeds |
| Uneven growth | Inconsistent care | Rotate tray, water evenly |
Why Microgreens Are Perfect for Beginners
- No garden needed
- Ready in under 2 weeks
- Minimal cost and equipment
- Highly nutritious
- Great for small spaces
Start Growing Your Own Today 🌱
Microgreens are the easiest way to begin your grow-your-own journey. With just a small space and a few simple tools, you can enjoy fresh, nutritious greens all year round.
Further Reading: Grow Your Own Eco-Friendly Sponges: A Guide to Luffas, Transform Your Space with Vertical Veg and Edible Walls, Why You Should Consider Growing Your Own Food
Inspiration: Follow Us on Instagram, Threads, BlueSky, Twitter, TikTok and Pinterest.