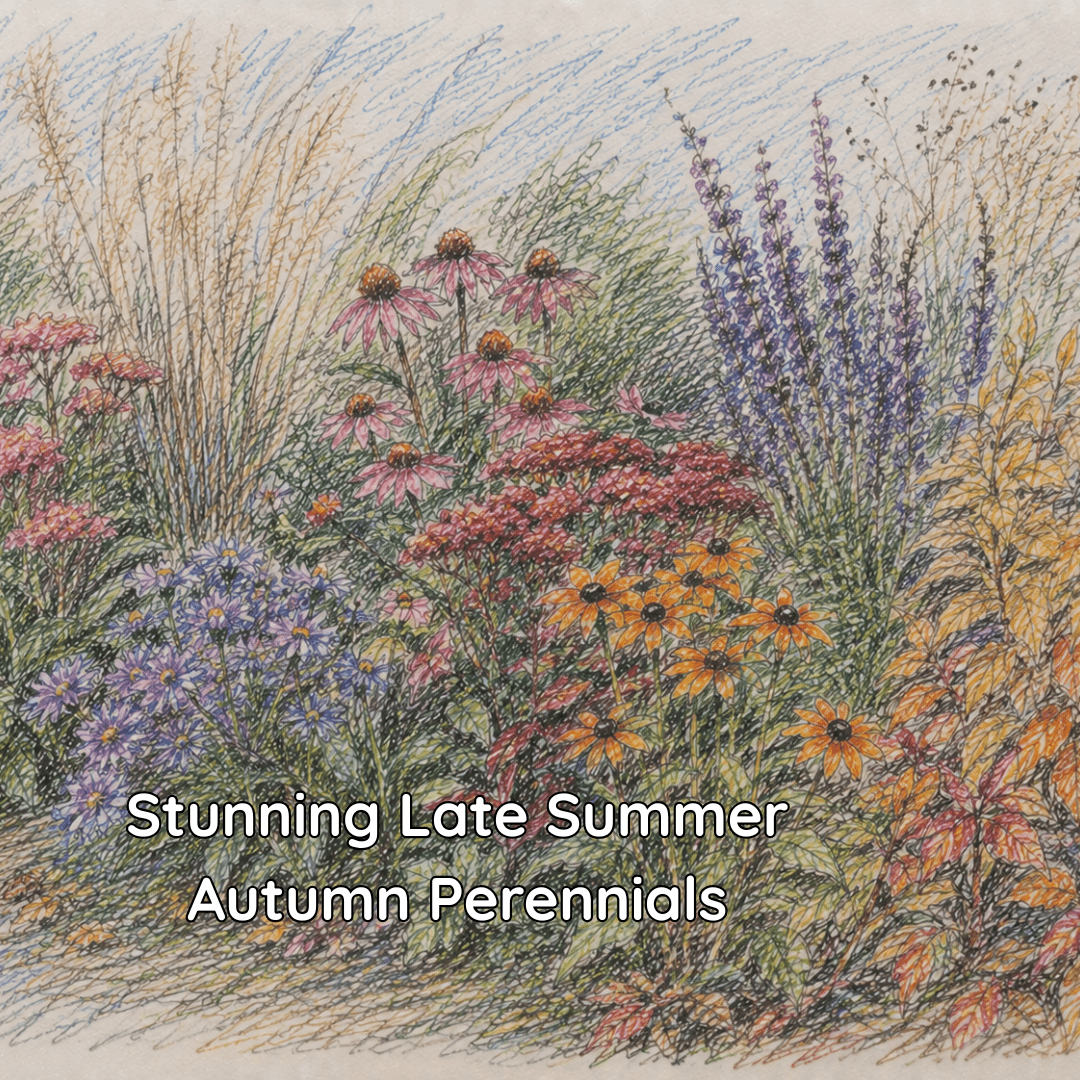
Summer’s peak may be behind us, but your garden doesn’t have to fade into dormancy just yet. Late summer and early autumn present the perfect opportunity to showcase perennials that thrive in the cooler temperatures and shorter days, bringing vibrant colours and seasonal interest when many plants are winding down for winter.
These hardy perennials offer something truly special—they bridge the gap between summer’s abundance and winter’s rest, providing essential nectar for late-season pollinators whilst creating stunning displays that carry your garden gracefully into the colder months. From towering asters to delicate Japanese anemones, these plants prove that autumn can be just as spectacular as any other season.
Let’s explore ten exceptional perennials that will transform your UK garden into a late-season showstopper, each bringing its own unique charm and character to your outdoor space.
Essential Late-Season Bloomers for British Gardens
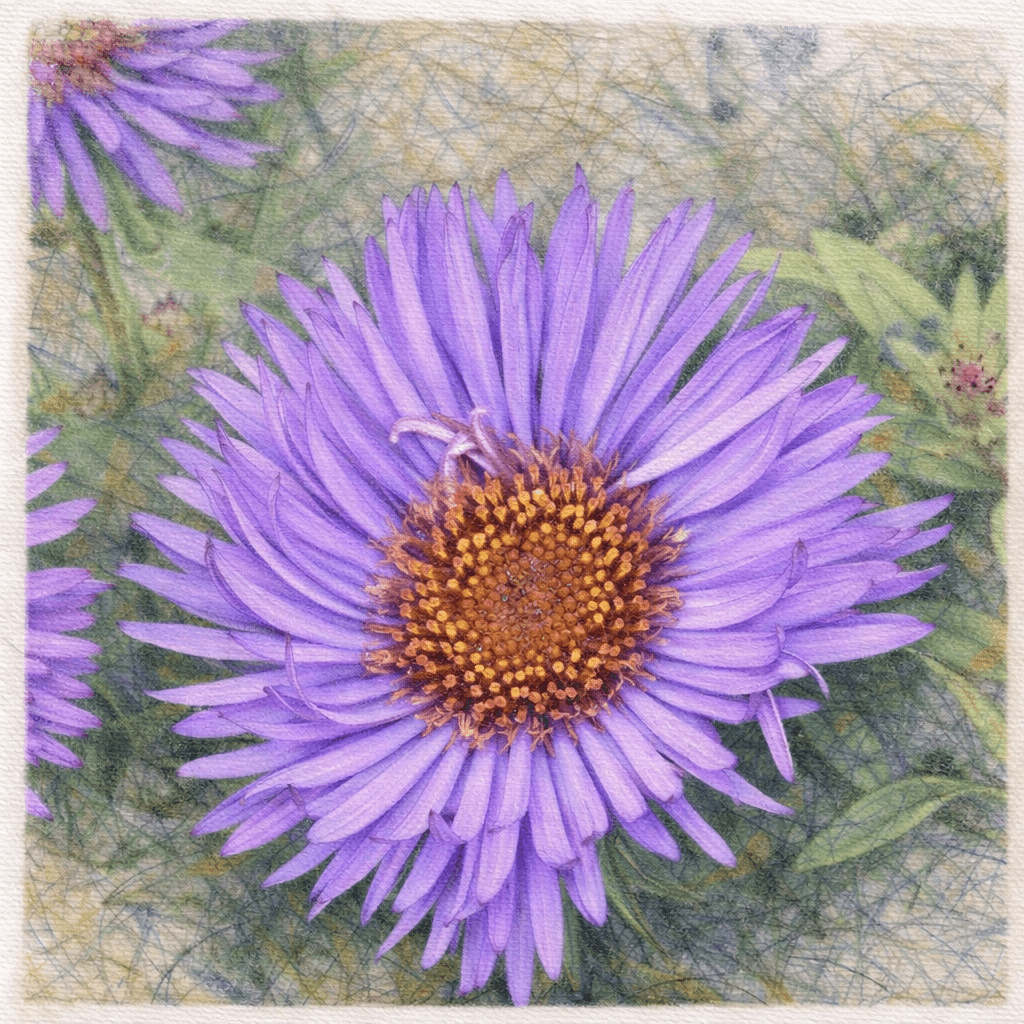
1. Symphyotrichum novae-angliae (New England Aster)
The New England Aster stands as one of autumn’s most reliable performers, producing clouds of daisy-like flowers in shades of purple, pink, and white from August through to October. This robust perennial reaches heights of 90-150cm, creating impressive vertical displays that work beautifully at the back of borders.
Native to North America but perfectly adapted to British conditions, these asters thrive in full sun to partial shade and tolerate a wide range of soil conditions. Their late flowering period makes them invaluable for hungry bees and butterflies preparing for winter, whilst their sturdy stems require minimal staking even in exposed positions.
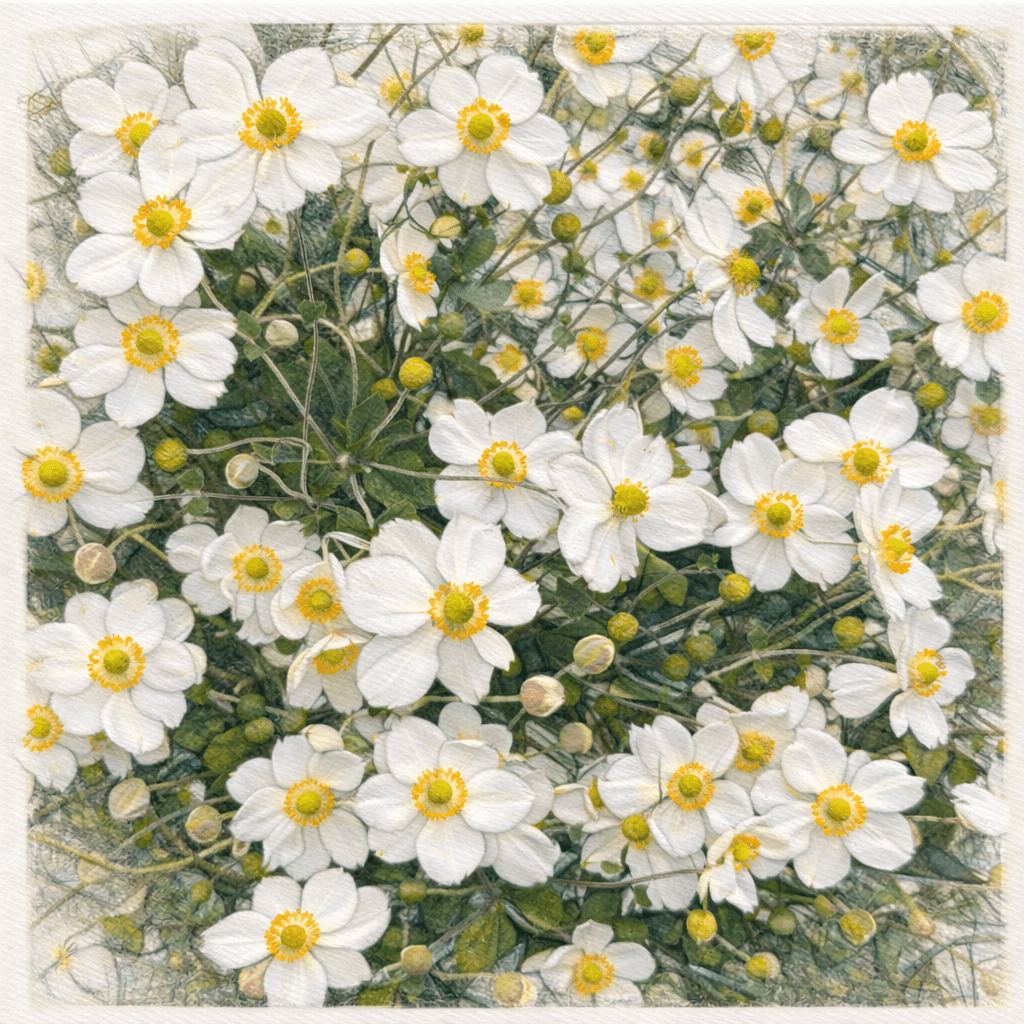
2. Anemone hupehensis (Japanese Anemone)
Japanese Anemones bring an elegant, almost ethereal quality to late summer borders with their delicate pink or white flowers dancing on tall stems from August to October. Growing 60-120cm tall, these perennials spread gradually to form substantial clumps that improve with age.
These versatile plants excel in partial shade, making them perfect for woodland gardens or areas beneath deciduous trees. Their deeply lobed foliage provides attractive ground cover throughout the growing season, whilst the silky seed heads extend interest well into winter.
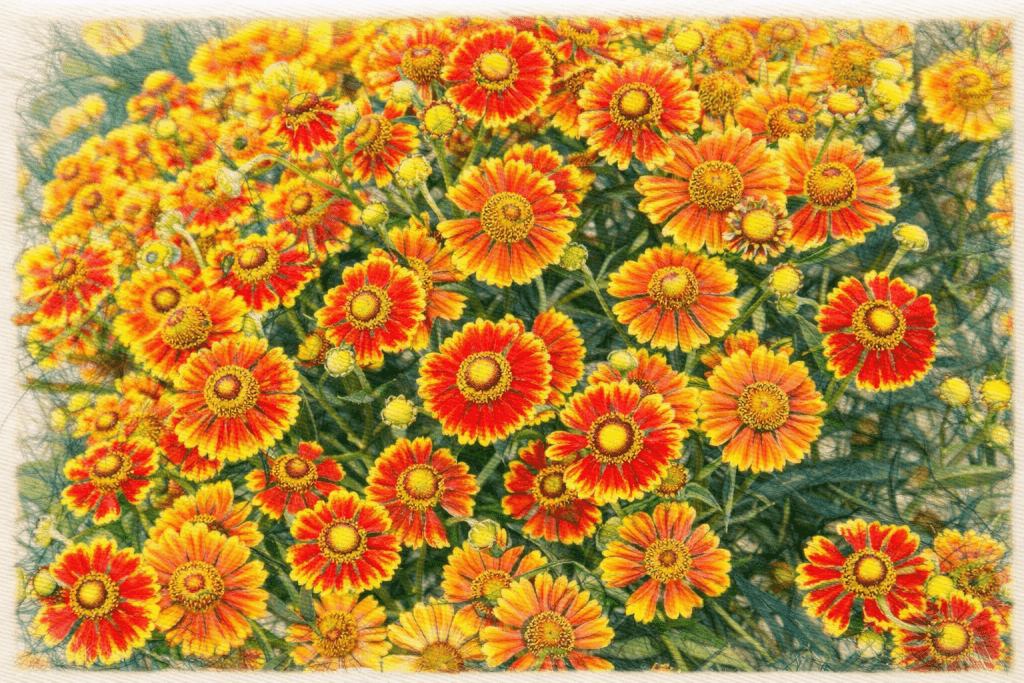
3. Helenium autumnale (Sneezeweed)
Despite its unfortunate common name, Helenium autumnale creates some of the most cheerful displays in the autumn garden. These North American natives produce masses of bright yellow, orange, or red daisy-like flowers with prominent central cones from July through September.
Growing 60-150cm tall depending on the variety, Heleniums prefer full sun and moist, fertile soil. Their hot colours perfectly capture the essence of autumn, whilst their long flowering period provides weeks of continuous colour. Regular deadheading extends the blooming season even further.
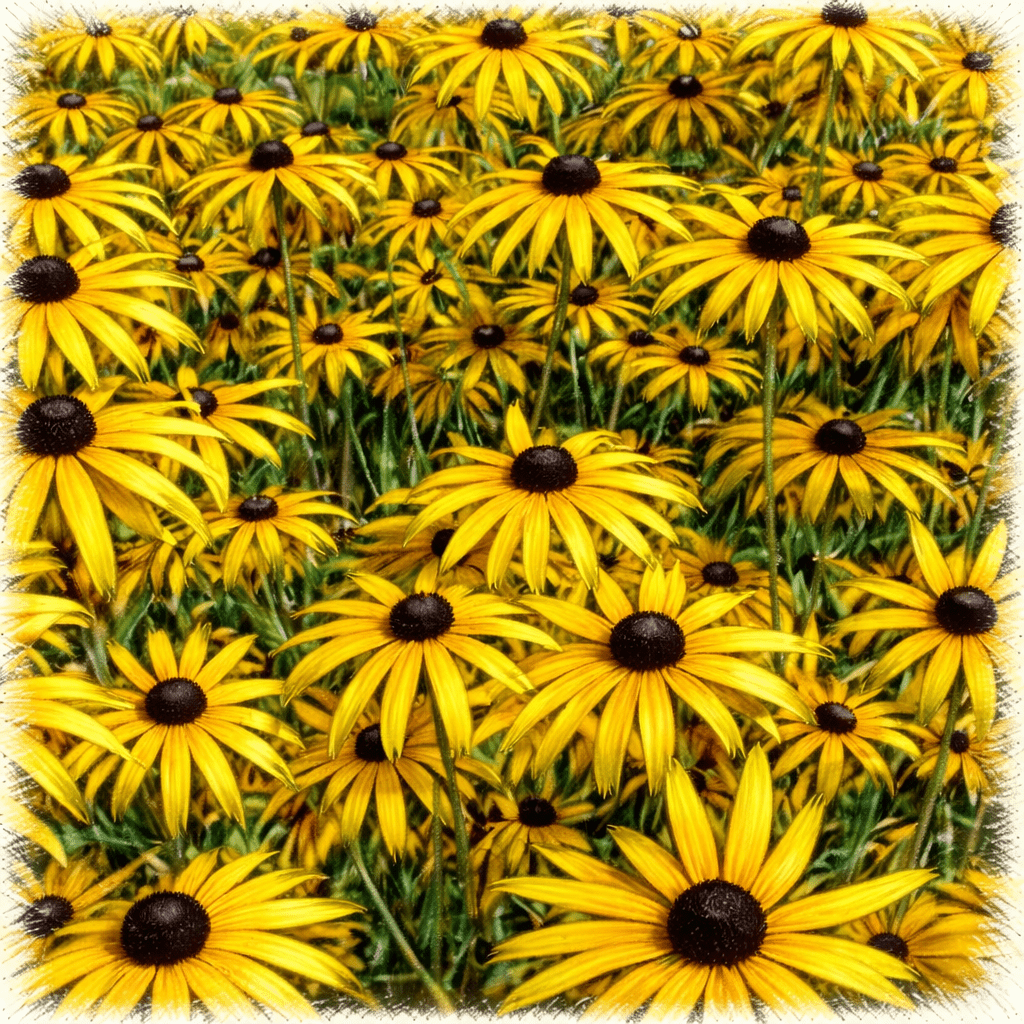
4. Rudbeckia fulgida (Black-Eyed Susan)
Black-Eyed Susans bring golden sunshine to late summer gardens with their cheerful yellow petals surrounding distinctive dark centres. Flowering from July to October, these hardy perennials reach 30-90cm in height and spread slowly to form attractive clumps.
Extremely tolerant of various growing conditions, Rudbeckias thrive in full sun to partial shade and adapt to both wet and dry soils. Their daisy-like flowers are magnets for butterflies and bees, whilst the seed heads provide winter food for birds and structural interest in the garden.
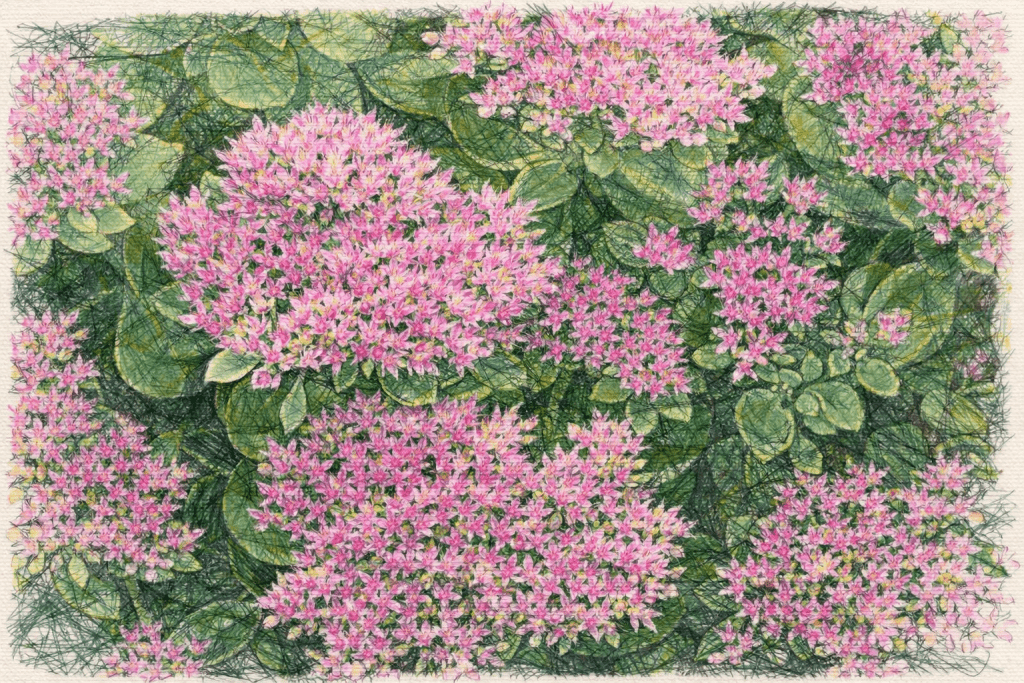
5. Sedum spectabile (Ice Plant)
The Ice Plant transforms from an unremarkable succulent into a star performer come late summer, when flat-topped clusters of pink flowers emerge from August through October. Growing 30-60cm tall with thick, fleshy leaves, this drought-tolerant perennial thrives in poor, well-drained soils.
Sedums are essential plants for wildlife gardens, attracting countless butterflies, bees, and other pollinators during their flowering period. The architectural seed heads remain attractive throughout winter, whilst the succulent foliage provides year-round structure in sunny borders.
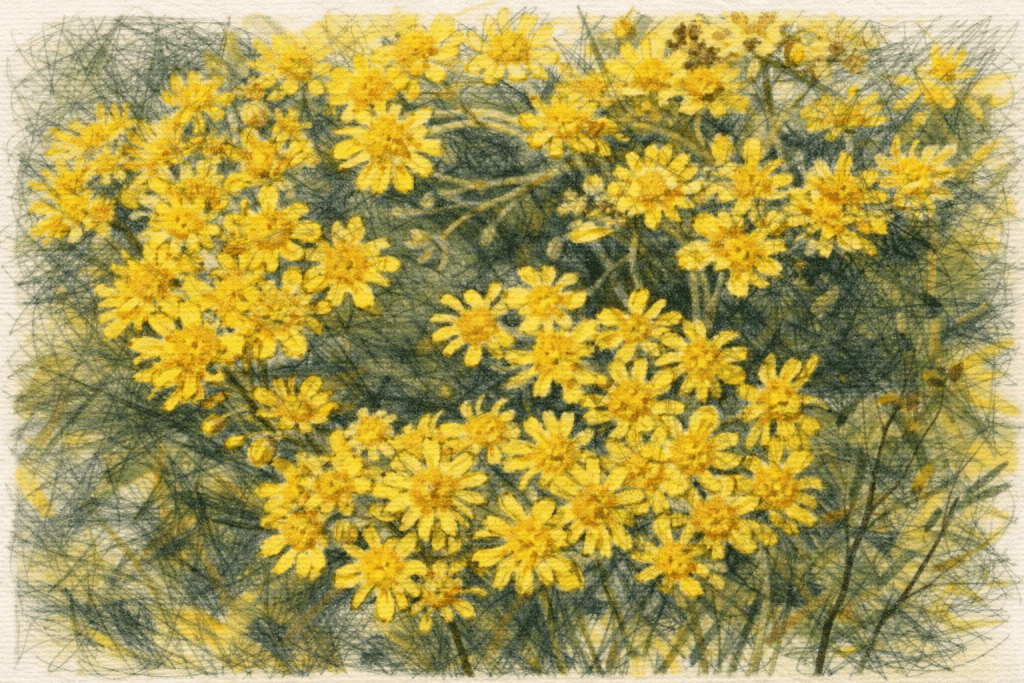
6. Solidago rigida (Stiff Goldenrod)
Stiff Goldenrod offers a more refined alternative to its aggressive cousins, producing dense, flat-topped clusters of golden-yellow flowers from August to September. This North American native reaches 60-150cm tall and forms neat, non-invasive clumps that won’t overwhelm neighbouring plants.
Thriving in full sun and well-drained soils, this perennial tolerates drought conditions once established. Its late-season nectar provides crucial food for migrating butterflies, whilst the seeds feed finches and other small birds throughout autumn and winter.
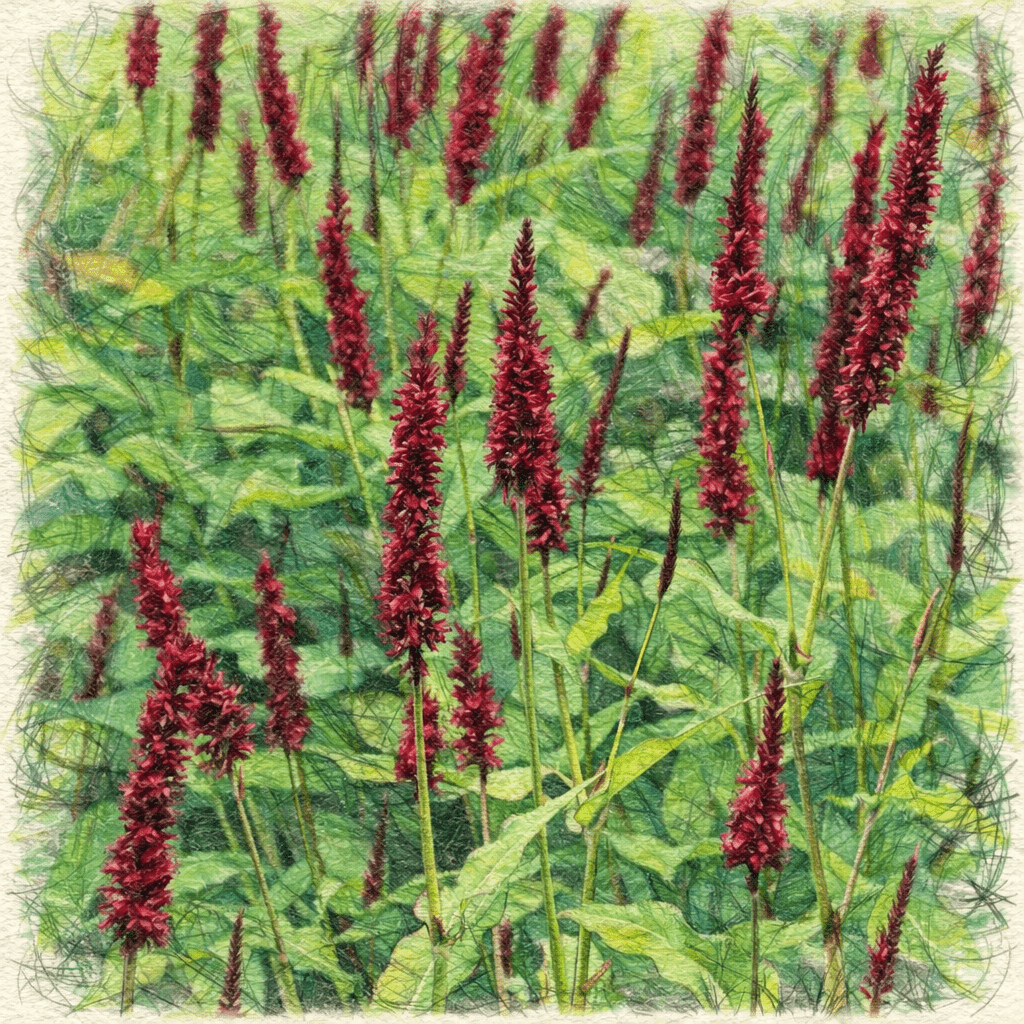
7. Persicaria amplexicaulis (Red Bistort)
Red Bistort brings tropical-looking excitement to British gardens with its striking bottle-brush spikes of flowers in shades of red, pink, or white from June through October. This vigorous perennial reaches 60-120cm tall and spreads to form substantial clumps in moist, fertile conditions.
Excellent for naturalising in wild gardens or woodland edges, Red Bistort thrives in partial shade and consistently moist soil. Its long flowering season and architectural foliage make it invaluable for extending colour deep into autumn.
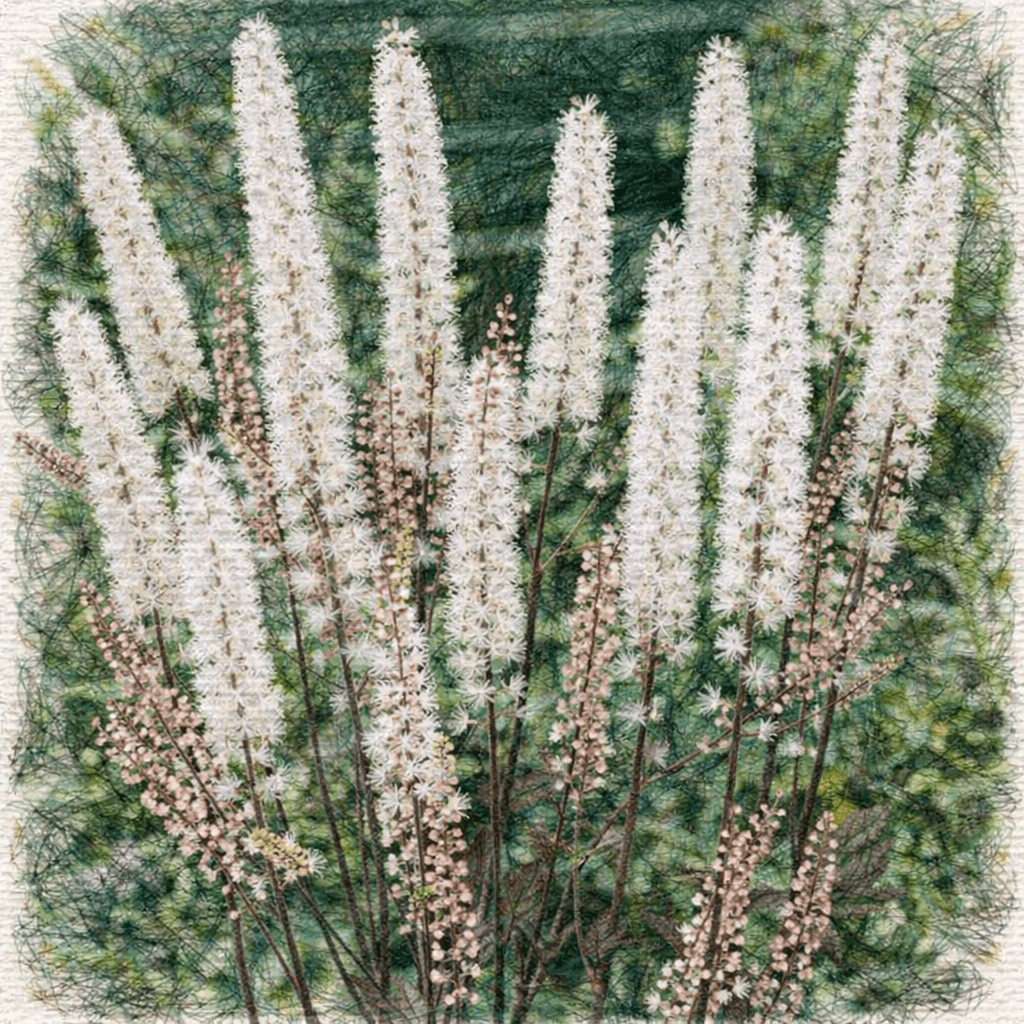
8. Actaea simplex (Bugbane)
Bugbane offers something completely different with its tall, fragrant spires of white flowers rising above attractive divided foliage from September to October. Growing 120-200cm tall, this woodland perennial creates dramatic vertical accents in shaded borders.
Perfect for the back of partially shaded borders, Bugbane prefers cool, moist conditions and rich, humus-laden soil. The distinctive bottle-brush flowers emit a sweet fragrance that attracts late-season pollinators, whilst the architectural seed heads provide winter interest.
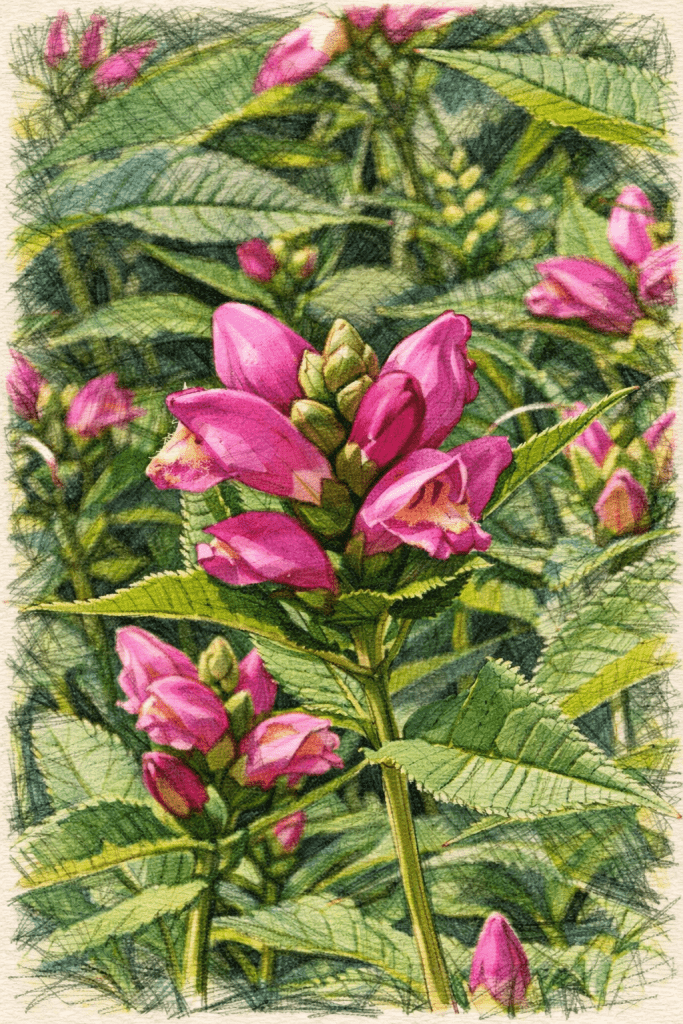
9. Chelone obliqua (Turtlehead)
Turtlehead brings unusual charm to late-season gardens with its distinctive snapdragon-like flowers in shades of pink or white from August to September. Growing 60-90cm tall, this North American native thrives in moist conditions that would challenge many other perennials.
Ideal for bog gardens, pond edges, or any consistently moist location, Turtlehead tolerates both sun and partial shade. Its glossy, dark green foliage provides excellent structure throughout the growing season, whilst the unique flowers add conversation-worthy interest to late summer displays.
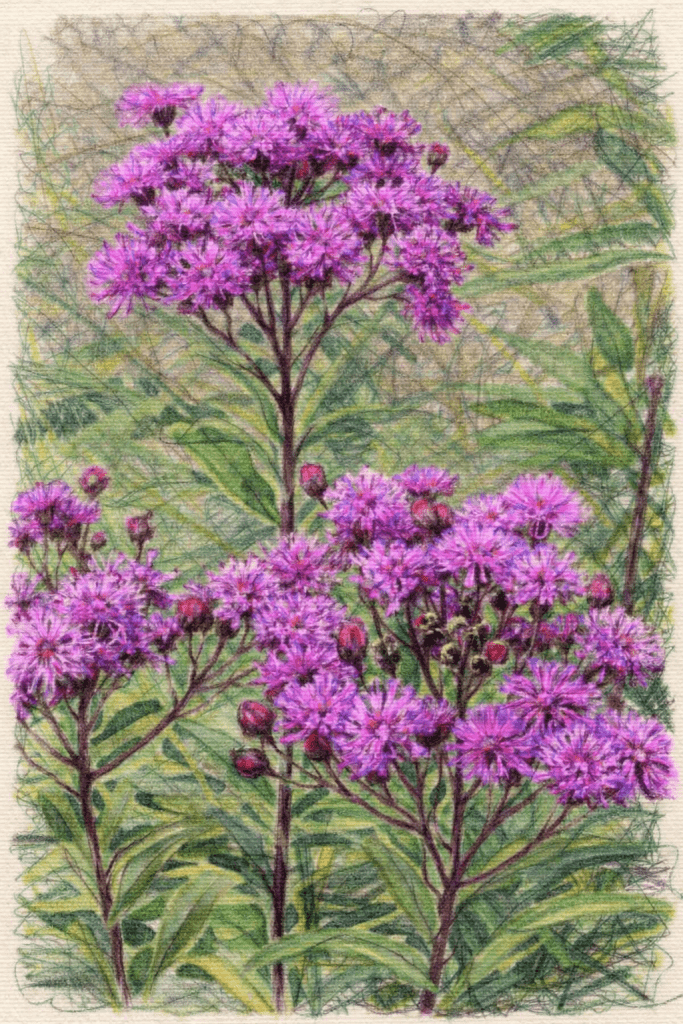
10. Vernonia crinita (Ironweed)
Ironweed concludes our selection with its impressive displays of deep purple flowers from August through September. This tall perennial reaches 120-180cm in height, creating substantial presence at the back of borders or in prairie-style plantings.
Native to eastern North America but well-suited to British conditions, Ironweed prefers full sun and moist, fertile soil. Its late-season blooms provide crucial nectar for butterflies and other pollinators, whilst the attractive seed heads offer winter food for birds and structural interest in the garden.
Creating Your Late-Season Garden Display
These ten perennials offer endless possibilities for creating stunning autumn displays in your UK garden. Consider combining the golden tones of Helenium and Rudbeckia with the purple hues of New England Asters and Ironweed for a classic autumnal palette. Alternatively, pair the delicate flowers of Japanese Anemones with the architectural presence of Bugbane for a more sophisticated, woodland-inspired display.
Remember that successful autumn gardens rely on thoughtful plant placement and consideration of each species’ specific needs. Group plants with similar requirements together, and don’t forget to leave space for these perennials to mature and spread naturally over time.
Your late-season garden awaits—discover the magic these remarkable perennials can bring to your outdoor space as summer gently transitions into autumn’s embrace.
Further Reading: Transform Your Garden into a Butterfly Haven, Why Bees Are Essential to Our Gardens, How to Lift and Divide Perennials
Follow Us on Instagram for Daily Inspiration 🌼

