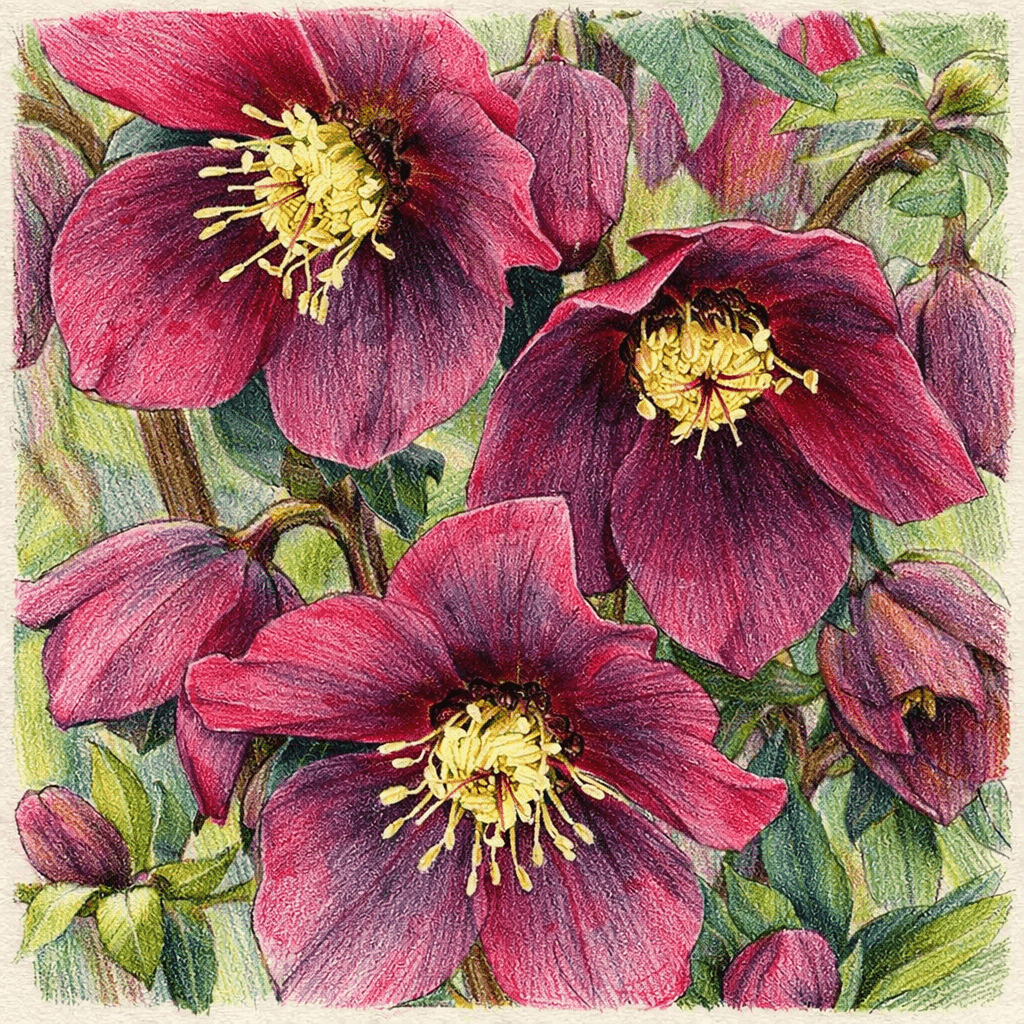
Winter gardens can often feel a little sleepy. As frost settles and the vibrant colours of summer fade into memory, many gardeners pack away their tools until spring. But there is a quiet, resilient beauty to be found in the colder months, provided you know where to look. Enter the Helleborus x hybridus ‘Hello Red’—a stunning Lenten Rose that refuses to let the grey skies win.
Brighten Winter Gardens with Helleborus x hybridus ‘Hello Red’
This exceptional perennial is a true winter hero. When most other plants are dormant, ‘Hello Red’ bursts into life, offering deep, rich tones that warm up even the chilliest borders. Whether you are an experienced horticulturist or simply looking to add a splash of colour to a shady corner, this plant is a rewarding addition to any green space.
A Rose by Any Other Name
Despite its common name, the Lenten Rose, this plant isn’t actually a rose at all. Helleborus x hybridus belongs to the Ranunculaceae family, making it a distant cousin of the buttercup, delphinium, and anemone. The name ‘Lenten Rose’ comes from its flowering time, which often coincides with the Christian season of Lent, leading up to Easter.
The specific variety we are celebrating here is ‘Hello Red’. As part of the Helleborus x hybridus group (often referred to as hybrid Lenten Roses), it has been bred for vigour and colour. The ‘Hello’ series is renowned for its upright habit and outward-facing blooms, meaning you don’t have to lift the flower heads to enjoy their beauty—they look right back at you.
Historically, hellebores originate from the mountainous regions of Southern and Central Europe, particularly the Balkans. They evolved to survive in rocky, scrubby woodlands, which explains their remarkable toughness and shade tolerance today.
Finding the Perfect Spot
One of the great joys of growing Helleborus x hybridus ‘Hello Red’ is its versatility. However, to see it truly flourish, you should aim to replicate its natural woodland habitat.
Climate and Situation
These plants are hardy souls. They thrive in the cool, temperate climates of the UK and can withstand frost with ease. In fact, seeing their flowers dusted with morning frost is one of the season’s most magical sights.
The ideal situation is semi-shade or dappled shade. Imagine the light filtering through the branches of deciduous trees—that is the “sweet spot” for a hellebore. While they can tolerate deep shade, they may flower less profusely. Conversely, too much direct summer sun can scorch their leathery foliage.
Soil Requirements
‘Hello Red’ is not overly fussy, but it does appreciate rich, well-drained soil. It dislikes having “wet feet,” so avoid waterlogged areas where winter rain pools. If your soil is heavy clay, incorporate plenty of organic matter or grit to improve drainage. They prefer neutral to alkaline soil, making them perfect for chalky gardens, though they will cope perfectly well in slightly acidic conditions too.
Caring for Your ‘Hello Red’
Once established, hellebores are famously low-maintenance, making them perfect for busy gardeners. A little care, however, goes a long way in keeping them looking their best.
Planting
When planting, dig a hole twice the size of the root ball. Mix in some well-rotted garden compost or leaf mould to give it a nutrient-rich start. ensure the crown of the plant sits just slightly above the soil level to prevent rot. Water it in well.
Pruning and Tidy-Up
The most critical task for hellebore care happens in late winter or early spring, just as the new flower buds begin to emerge at the base. This is the time to cut back the old, tattered foliage from the previous year.
Removing the old leaves serves two purposes:
Aesthetics: It allows the new, vibrant red flowers to be seen clearly without a backdrop of messy, brown leaves.
Health: It removes any fungal spores (like Hellebore Black Death or leaf spot) that may be lingering on the old foliage, protecting the new growth.
Feeding and Watering
Apply a generous mulch of organic matter in autumn to keep the roots cool and moist. A slow-release general fertiliser applied in early spring will encourage robust flowering. While they are drought-tolerant once established, keep an eye on them during particularly dry spells in their first year.
Companions in the Border
A single hellebore is lovely, but a drift of them is spectacular. However, ‘Hello Red’ also plays beautifully with others. To create a stunning winter and early spring display, consider pairing it with:
Snowdrops (Galanthus): The crisp white of snowdrops contrasts perfectly with the deep, moody reds of the hellebore.
Ferns: As the hellebores fade in late spring, ferns unfurl their fronds to fill the space and provide textural interest.
Cyclamen coum: These offer low carpets of pink and purple that harmonise with the hellebore’s height.
Pulmonaria (Lungwort): With their spotted leaves and blue-pink flowers, they enjoy the same shady conditions.
Why Choose ‘Hello Red’?
Every plant has its pros and cons, but ‘Hello Red’ is heavily weighted towards the former.
The Advantages
Early Colour: It blooms when most of the garden is bare, providing nectar for early-emerging bumblebees.
Longevity: These are long-lived perennials that can thrive for decades if left undisturbed.
Evergreen Foliage: Even when not in flower, the architectural, leathery leaves provide ground cover and structure throughout the year.
Deer and Rabbit Resistant: The sap is unpalatable to deer and rabbits, making it a safe choice for countryside gardens.
The Disadvantages
Toxicity: It is important to note that all parts of the hellebore are toxic if ingested. This protects them from pests but means they should be treated with caution around pets and children. The sap can also irritate sensitive skin, so wearing gloves when pruning is advisable.
Slow to Establish: They can take a year or two to settle in before they start flowering prolifically. Patience is key.
Myths, Magic, and Folklore
The hellebore is steeped in history and folklore, often associated with both healing and witchcraft.
In ancient times, it was believed that scattering powdered hellebore roots in the air could render you invisible—though we certainly don’t recommend trying this! In Greek mythology, the plant was used to cure madness. The most famous story involves Melampus, a soothsayer, using hellebore to cure the daughters of King Proetus, who had been driven mad and believed they were cows.
More closely related to the name ‘Lenten Rose’, Christian legend tells of a young shepherdess named Madelon. She was weeping because she had no gift to give the Christ child in Bethlehem. An angel, seeing her tears, swept away the snow to reveal a beautiful white flower—the Christmas Rose (Helleborus niger), a close relative of our hybrid friend.
Today, the ‘Hello Red’ carries less mystical baggage but retains all the enchantment. It serves as a reminder that life persists even in the depths of winter.
Bring Your Garden to Life
Whether you are looking to fill a shady void under a tree or simply want to enjoy flowers in February, Helleborus x hybridus ‘Hello Red’ is a superb choice. Its deep, rich colouring and easy-going nature make it a staple for the winter garden.
Planting a hellebore is an act of faith in the coming spring—a way to ensure that even on the darkest days, your garden still has a heartbeat.
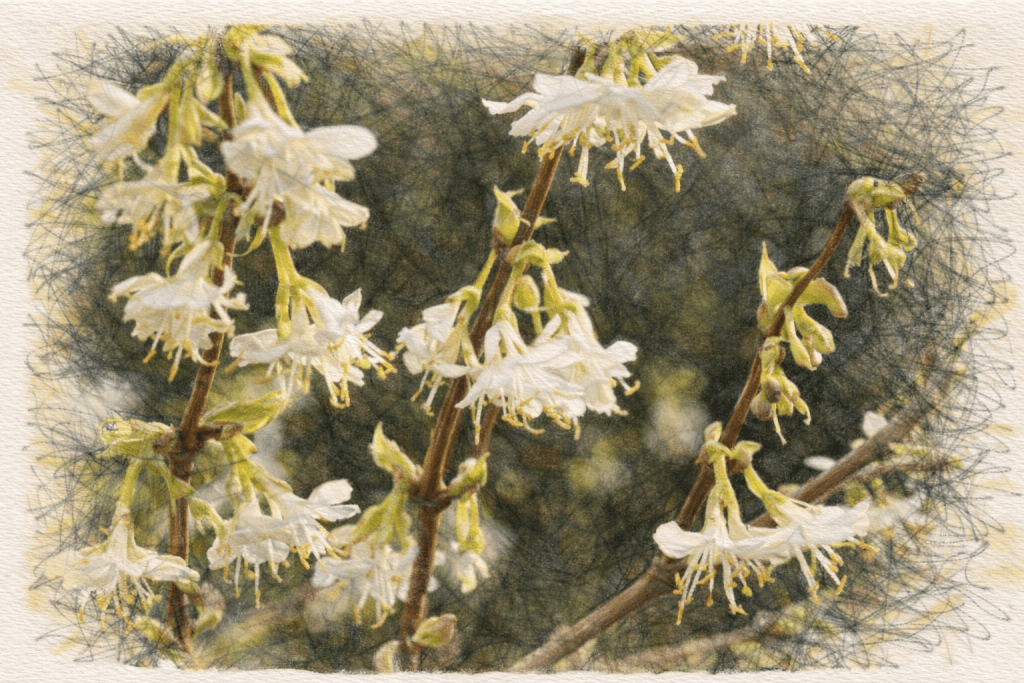
January and February can feel like a monochrome waiting game in the garden. The vibrant riot of summer is a distant memory, and the fresh green promises of spring have yet to break the soil. But, if you catch a drift of sweet, lemon-tinged perfume on the chilly air, you have likely found a winter-flowering honeysuckle.
This unassuming shrub is a true garden hero. While other plants retreat into dormancy, Lonicera fragrantissima bursts into life, offering delicate creamy-white blooms and a scent that rivals the finest perfumes. It serves as a reminder that nature never truly sleeps, even in the depths of winter.
The drawing should look like it was made quickly by hand with colour pencils and graphite on textured sketchbook paper. Include construction lines, slightly uneven outlines, and layered pencil marks to emphasize the hand-drawn look. Allow paper texture to show through the colours. Use light, imperfect strokes, varied pencil pressure, and subtle scribble shading. Colours should look like layered coloured pencil, not paint or digital gradients. Background should be loosely sketched and unfinished, keeping focus on the subject. Style reference: botanical field journal drawing, naturalist sketchbook, scientific coloured pencil sketch
For gardeners looking to extend the season and bring sensory delight to the colder months, this plant is an essential addition. It is hardy, forgiving, and generous with its fragrance. Let’s explore the story of this winter wonder and discover how you can welcome it into your own green space.
Meeting the Winter Honeysuckle
To truly appreciate this plant, we must first understand what it is—and what it is not. When most people hear “honeysuckle,” they picture the twisting, climbing vines of the woodbine (Lonicera periclymenum) that scramble over cottage arches in July.
The winter-flowering honeysuckle is different. Botanically known as Lonicera fragrantissima, it is a deciduous or semi-evergreen shrub, not a climber. It belongs to the Caprifoliaceae family, a group that includes viburnums and weigelas. Rather than scaling a trellis, it forms a bushy, tangled mound of arching branches, typically reaching heights of about two metres.
Its common names reflect its virtues. “Winter honeysuckle” tells you when it performs; “January jasmine” hints at its powerful scent; and “sweet breath of spring” suggests the hope it offers during the darkest days of the year.
A Traveller from the East
Like many of our garden favourites, Lonicera fragrantissima has travelled a long way to reach British soil. It originates from China and was introduced to the West by the legendary Scottish plant hunter Robert Fortune.
Fortune is a figure straight out of an adventure novel. In the 1840s, the Royal Horticultural Society sent him to China to collect plants. At the time, China was largely closed to foreigners, making his expeditions dangerous. He famously disguised himself as a mandarin to travel inland, collecting tea plants and ornamentals. He introduced Lonicera fragrantissima to Britain in 1845. Since then, it has remained a steadfast favourite for those in the know, bridging the gap between the last rose of autumn and the first daffodil of spring.
Where to Plant Your Winter Honeysuckle
The primary reason to grow this shrub is its perfume. Therefore, the golden rule of planting winter honeysuckle is simple: position it where you will smell it.
Do not tuck it away at the back of a deep border where you rarely venture in January. Instead, place it near a front path, beside the back door, or next to a driveway where you park the car. It is a plant that greets you.
Situation and Position
Lonicera fragrantissima is remarkably unfussy, but it performs best when you give it a little consideration:
Sun and Shade: It is happy in full sun or partial shade. A sunny spot will encourage more prolific flowering, but it is tolerant of shadier corners.
Shelter: While the plant itself is fully hardy down to -15°C or lower, the flowers are delicate. Planting it near a south or west-facing wall helps protect the blooms from harsh frosts and strong winds, ensuring the scent lingers longer in the air.
Space: Remember that this is a shrub with a somewhat unruly, spreading habit. Give it room to stretch its elbows—about 1.5 to 2 metres of spread is typical for a mature plant.
Soil Requirements
One of the reasons this plant remains popular is its lack of pretension regarding soil. It is not a diva. It thrives in well-drained soil of almost any type—chalk, clay, sand, or loam. As long as it is not sitting in a waterlogged bog, it will likely thrive. If your soil is particularly poor, digging in some well-rotted garden compost or manure before planting will give it a welcome boost.
Stories, Folklore and the Language of Flowers
Honeysuckles have long held a special place in folklore, symbolizing the bonds of love and devoted affection. This meaning comes from the climbing varieties, whose stems cling tightly to anything they touch. In the Victorian language of flowers, gifting honeysuckle was a way to say, “I am yours.”
While the shrubby winter honeysuckle lacks the clinging stems, it shares the family reputation for protection. In Scottish folklore, it was often believed that growing honeysuckle near the home would prevent evil spirits from entering. It was thought to keep the household safe and sweet.
There is also a delightful old wives’ tale suggesting that bringing honeysuckle blooms into the house would tempt a wedding to follow shortly after. However, young girls were historically warned not to bring the flowers indoors too often, lest the heady scent cause them to have “too many distinct dreams.”
Literary giants have also been seduced by the genus. Shakespeare mentions “woodbine” (honeysuckle) frequently, often as a metaphor for an embrace. While he was writing about the native British climber, the sentiment applies beautifully to the winter variety: a plant that embraces the cold season with warmth and sweetness.
Why You Need This Plant (and What to Watch Out For)
Every plant has its character, and Lonicera fragrantissima is no exception. Here is a breakdown of why it deserves a spot in your garden, along with a few honest caveats.
The Benefits
The Scent: This cannot be overstated. The fragrance is fresh, lemony, and incredibly strong. On a mild winter day, a single bush can scent an entire corner of a garden.
Wildlife Haven: Winter-active pollinators, such as the buff-tailed bumblebee, often struggle to find food in January. This shrub provides a vital nectar source when few other plants are in bloom.
Low Maintenance: It requires very little attention once established. It rarely suffers from pests or diseases and is drought-tolerant once its roots are down.
Winter Cheer: The flowers appear on bare wood (or amongst sparse leaves in mild areas), looking like tiny white stars. They are excellent for cutting; bring a few sprigs indoors, and they will perfume a whole room for days.
The Disadvantages
Summer Scruffiness: We must be honest—this is not a plant you grow for its summer foliage. After flowering, it produces dull green, oval leaves. It can look a bit untidy and nondescript from May to October.
Berry Toxicity: The plant produces small red berries in early summer. While birds love them, they are mildly toxic to humans and can cause stomach upset if ingested.
Space Hog: Because of its arching habit, it can look a bit leggy. It is not the best choice for a tiny, manicured courtyard unless you are prepared to prune it regularly.
How to Use It in the Garden
To mitigate the “summer scruffiness,” treat Lonicera fragrantissima as a support act in the summer and a headliner in the winter.
The Mixed Border: Plant it towards the back of a mixed border. In summer, let vibrant perennials like Dahlias, Salvias, or herbaceous Clematis grow up and around it to hide its plain leaves. In winter, when the perennials die back, the honeysuckle takes centre stage.
Informal Hedging: It makes a wonderful informal hedge or screen. It won’t give you the razor-sharp lines of Box or Yew, but it creates a dense, fragrant barrier that filters wind effectively.
Woodland Edge: If you have a larger garden with a woodland feel, this shrub looks right at home amongst snowdrops, winter aconites, and hellebores.
Bring the Fragrance Home
If you have a gap in your garden that needs filling, consider the winter honeysuckle. It asks for very little—just a patch of earth and a little light—but gives back so much. It turns the coldest walk to the compost heap into a sensory delight and provides a lifeline for our precious bees.
Next time you visit a garden centre or a winter garden open day, follow your nose. If you find yourself drawn to a sweet, citrusy aroma, you’ll know you’ve found Lonicera fragrantissima. Why not pick one up and plant a little joy for next January?
Winter gardens often get a bad reputation. As the days shorten and the frost sets in, many of our beloved blooms retreat underground or shed their leaves, leaving behind a landscape of bare branches and dormant earth. But your outdoor space doesn’t have to surrender to the grey skies. There is a way to inject vibrant colour and sweet fragrance into the coldest months of the year.
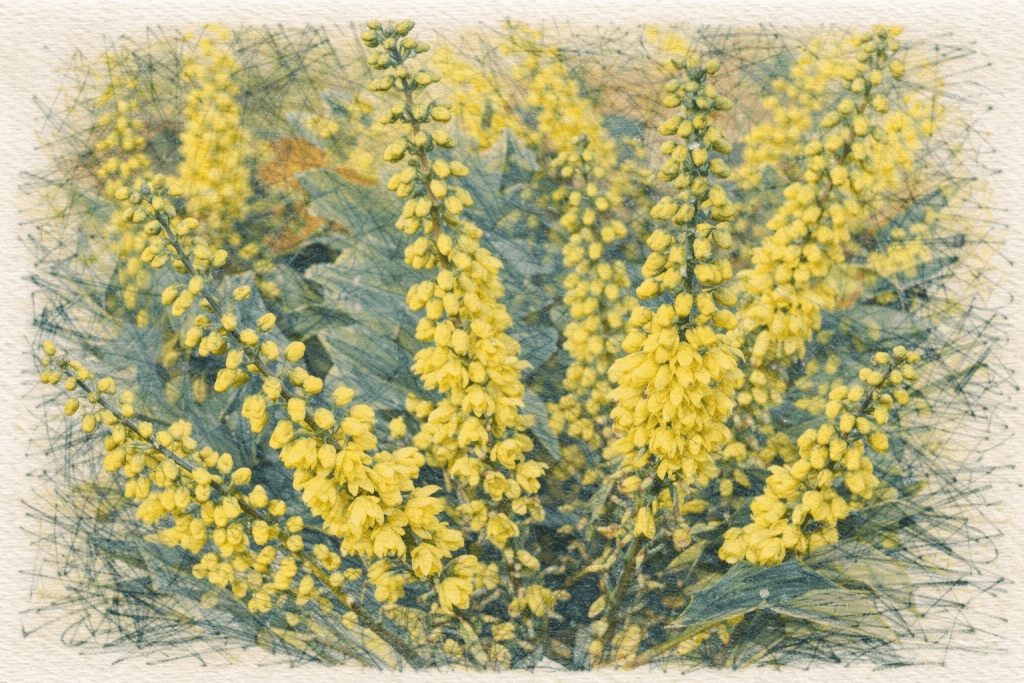
Enter Mahonia x media ‘Winter Sun’. This architectural evergreen shrub is a true winter warrior, offering structure, texture, and brilliant yellow blooms when most other plants are fast asleep. Whether you are an experienced horticulturist or a weekend gardener looking to spruce up a shady corner, this plant offers high impact with relatively low maintenance.
Brighten Your Garden with Mahonia x media ‘Winter Sun’
Let’s explore this striking shrub, from its botanical roots to the best ways to help it thrive in your own patch of earth.
A Beacon of Light in the Dark Months
Botanically known as Mahonia x media ‘Winter Sun’, this plant belongs to the Berberidaceae family. It is a hybrid, a cross between Mahonia japonica and Mahonia lomariifolia. While it doesn’t have a huge variety of common names, you might hear gardeners simply refer to it as “Oregon Grape” (though this usually refers to its cousin, Mahonia aquifolium) or simply “Mahonia”.
The ‘Winter Sun’ cultivar was selected for its specific, superior traits. It was raised in Northern Ireland at the Slieve Donard Nursery during the mid-20th century, specifically chosen for its upright habit and its tendency to flower earlier than other varieties.
Visually, it is a showstopper. It is an erect, evergreen shrub that brings a tropical, almost prehistoric feel to a temperate garden. The leaves are large, pinnate, and deeply divided into spiny, holly-like leaflets. These leathery, dark green fronds provide excellent architectural interest all year round.
But the real magic happens from November to March. Just as the rest of the garden fades, ‘Winter Sun’ produces long, racemes (spikes) of bright, lemon-yellow flowers. These clusters fan out from the centre of the leaf rosettes like rays of sunshine—hence the name. Following the flowers, deep purple-blue berries develop, providing a feast for birds later in the year.
Why ‘Winter Sun’ Belongs in Your Garden
Choosing plants for a garden is often about balancing the seasons. We tend to overload our beds with spring bulbs and summer perennials, leaving the winter months looking sparse. Here is why you should consider making space for this Mahonia.
A Feast for the Senses
The visual impact of the yellow flowers against the dark green foliage is undeniable, but the scent is equally delightful. The flowers carry a fragrance reminiscent of lily-of-the-valley—fresh, sweet, and uplifting on a crisp winter morning. Placing it near a pathway or entrance ensures you catch this scent every time you step outside.
A Lifeline for Wildlife
Gardening is a partnership with nature. In the depths of winter, pollinators often struggle to find food sources. The nectar-rich flowers of ‘Winter Sun’ are a vital refueling station for bumblebees that venture out on milder winter days. Later, the blue-black berries are adored by blackbirds and thrushes, making this shrub a fantastic choice for a wildlife-friendly garden.
Architectural Structure
Gardens need “bones”—plants that provide structure and shape regardless of the season. With its upright growth habit and distinct, sculptural leaves, this Mahonia acts as a focal point. It works beautifully at the back of a border, providing a dark, textured backdrop for other plants, or as a standalone specimen in a woodland setting.
Planting and Care: How to Make it Thrive
Despite its exotic appearance, Mahonia x media ‘Winter Sun’ is surprisingly robust and easy to grow in the UK climate. However, like any plant, it has its preferences.
Size and Space
This is not a small plant. It is vigorous and upright, eventually reaching a height of around 3 to 4 metres (10-13 feet) and a spread of 2 to 3 metres (6-10 feet). It requires room to stretch out. Avoid cramping it into a tiny pot or a narrow bed where its spiny leaves might snag passersby. It is best suited to the back of a large border or a dedicated shrubbery.
Sunlight and Position
One of the greatest assets of Mahonia is its tolerance for shade. It thrives in partial shade to full shade, making it the perfect solution for those tricky, darker corners of the garden where sun-loving plants fail.
While it can tolerate some sun, it prefers shelter from harsh, drying winds and direct midday sun in summer, which can scorch its leaves. A woodland edge or the dappled shade of deciduous trees is its ideal habitat.
Soil Requirements
‘Winter Sun’ is unfussy about soil type. It will grow in chalk, clay, loam, or sand, provided the drainage is good. It prefers moist, well-drained soil that is rich in organic matter.
When planting, dig a hole twice the width of the root ball. Incorporate plenty of well-rotted garden compost or manure into the excavated soil to give it a nutrient-rich start. Water it well after planting and keep it hydrated during dry spells for the first couple of years until it is fully established.
Pruning
Pruning is generally minimal. You may want to remove any dead or damaged branches in spring (April or May) after the flowering has finished. If the plant becomes leggy or bare at the base—a common occurrence as Mahonias age—you can cut the tallest stems back hard to a strong set of leaves to encourage bushy regrowth from lower down. This technique, known as renewal pruning, keeps the plant looking full and healthy.
Folklore and Alternative Uses
While Mahonia x media is a modern horticultural hybrid, the genus Mahonia carries a history rich in utility and story.
The genus is named after Bernard McMahon, an Irish-American horticulturist who was one of the stewards of the plant collection from the famous Lewis and Clark expedition in the early 19th century.
In folklore, plants with spiny leaves like holly and Mahonia were often planted near houses to ward off evil spirits or lightning—though for Mahonia, this is likely a borrowed association due to its holly-like appearance.
Historically, indigenous peoples in North America used the roots and bark of the related Mahonia aquifolium (Oregon Grape) for medicinal purposes. They utilized it to treat various ailments, including stomach issues and skin conditions. The roots contain berberine, a compound known for its antimicrobial and anti-inflammatory properties. The berries of Oregon Grape were also used to make jelly and wine, though they are quite tart.
While you shouldn’t go digging up your ‘Winter Sun’ for medicinal experiments, the berries are technically edible, though very acidic and filled with seeds. They are best left to the birds, who appreciate them far more than our palettes would!
Bring the Winter Sun Home
Gardening is a year-round joy, not just a summer pastime. By introducing Mahonia x media ‘Winter Sun’ into your landscape, you ensure that even the darkest days are punctuated with flashes of gold and sweet scent.
It is a resilient, architectural beauty that asks for little but gives so much in return. Whether you are looking to support early bees, fill a shady void, or simply enjoy flowers in January, this plant is a worthy addition to your green space.
So, wrap up warm, grab your spade, and invite a little sunshine into your winter garden.
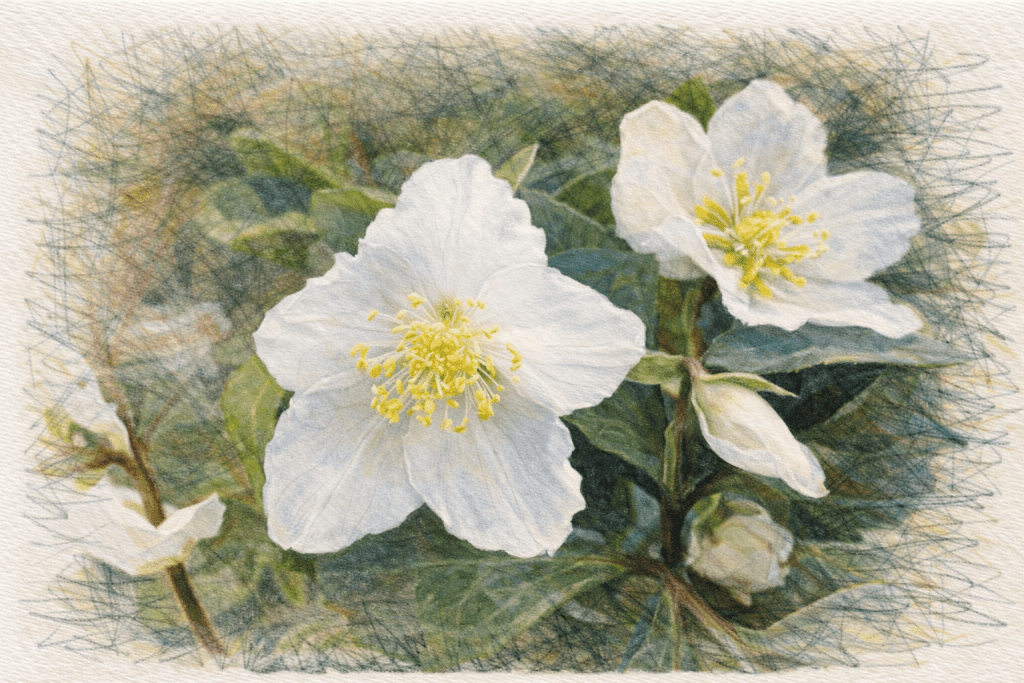
When the frost settles and the days grow short, most gardens retreat into a slumber of browns and greys. It is easy to assume that colour and life are reserved for the warmth of spring and summer. Yet, there is a quiet hero ready to defy the cold. Helleborus niger, commonly known as the Christmas Rose, is the star your winter garden has been waiting for.
Helleborus niger: The Star Plant That Brightens the Winter Garden
While other plants wither in the chill, this evergreen perennial pushes through the frozen earth to reveal pristine white blooms. It offers a fresh, hopeful sight in the depths of winter, reminding us that nature never truly stops. If you are looking to add brightness to shady corners or create a focal point that sparkles against the snow, it is time to rediscover this classic winter beauty.
A flower of contradictions: History and origins
The Helleborus niger is a plant of fascinating contrasts. Its botanical name tells a story hidden beneath the soil. While its flowers are a brilliant, snowy white, the specific epithet niger means ‘black’, referring to the colour of its thick, dark roots.
Native to the mountainous regions of Central and Southern Europe—specifically the Alps, Carpathians, and Appennines—this plant is built for resilience. It thrives in alpine environments, which explains its remarkable ability to withstand freezing temperatures.
Historically, the name Helleborus derives from the Greek words elein (to injure) and bora (food). This is a stark warning from the ancients: despite its delicate beauty, the plant is toxic if ingested. For centuries, it has walked a fine line between a revered ornamental flower and a dangerous substance, captivating gardeners and herbalists alike.
Finding the perfect spot in your garden
To get the best out of your Christmas Rose, you must treat it to conditions that mimic its natural alpine home. Unlike some hardy perennials that can be scattered anywhere, Helleborus niger has specific preferences.
Ideally suited for shade
These plants flourish in partial shade. In the wild, you would find them nestled at the edge of woodlands or beneath the canopy of deciduous trees. They appreciate the dappled sunlight of winter when the trees are bare, but require protection from the harsh, direct sun of summer. A spot that is too dark will result in lush foliage but very few flowers, so aim for a balance.
Soil requirements
The Christmas Rose craves rich, well-drained soil. It struggles in heavy clay that sits wet in winter or sandy soil that dries out too quickly in summer. To keep it happy, incorporate plenty of organic matter—such as leaf mould or garden compost—before planting. They also have a preference for alkaline conditions, so if your soil is acidic, adding a little garden lime can work wonders.
A note on stability
Once you have chosen a spot, try to keep it there. Helleborus niger possesses a deep and extensive root system and resents being disturbed. Establish it well, and it will reward you with blooms for years to come.
Creating a winter tapestry: Companion plants
A single Hellebore is beautiful, but a drift of them amongst other winter gems is breathtaking. Pairing Helleborus niger with the right companions creates a layered, textural display that makes a winter garden feel complete.
Consider planting them alongside Snowdrops (Galanthus). The nodding white heads of snowdrops echo the purity of the Christmas Rose, creating a carpet of white that looks magical under low winter light.
Cyclamen coum is another excellent partner. With their swept-back pink or magenta petals and silver-patterned leaves, they provide a splash of vibrancy that contrasts beautifully with the Hellebore’s white petals.
For texture, look to Ferns. The evergreen fronds of the Hart’s Tongue Fern (Asplenium scolopendrium) provide a glossy, architectural backdrop that highlights the delicate structure of the Hellebore flowers.
Features that captivate
What makes Helleborus niger such a standout? It is the sheer elegance of the bloom.
The flowers are saucer-shaped, usually 4–8cm across, held on short, sturdy stems that rise just above the foliage. Unlike many other flowers, what appear to be petals are actually sepals. This biological quirk means the ‘petals’ do not fall off quickly; they remain on the plant for months, slowly fading from pure white to a soft, antique pink or even green as the seeds develop.
At the centre of each flower lies a crown of golden-yellow stamens, acting as a beacon for any pollinators brave enough to venture out in January or February.
The foliage is equally attractive. The leaves are leathery, dark green, and divided into leaflets like the fingers of a hand (pedate). Being evergreen, they provide ground cover and structure all year round, acting as a foil for summer-flowering plants before taking centre stage again when the frost returns.
Legends, myths, and old wives’ tales
Few plants are as steeped in folklore as the Christmas Rose. Its blooming time, coinciding with the festive season, has birthed many legends.
The Legend of Madelon
The most famous tale explains its common name. Legend has it that a young shepherdess named Madelon was tending her flock on a cold winter night when the Wise Men passed by with gifts for the newborn Jesus. Madelon wept because she had no gift to offer, and the ground was frozen, yielding no flowers. An angel, seeing her tears, brushed the snow aside and revealed the white Hellebore blooming beneath. Madelon gathered the flowers and offered them as a gift of love—the first Christmas Rose.
Warding off evil
In the Middle Ages, the plant was viewed with a mix of fear and reverence. It was widely believed to possess magical properties. People would plant Helleborus niger near their front doors, not just for decoration, but to prevent evil spirits and witches from entering the home. In some traditions, the powdered roots were sprinkled on the floor to make inhabitants invisible—though given the plant’s toxicity, this was likely a dangerous practice!
Weather forecasting
An old wives’ tale suggests the plant could predict the weather for the coming year. Country folk would cut twelve Hellebore flowers on Christmas Eve, placing them in water. Each flower represented a month of the coming year. If a flower opened fully and stayed fresh, the corresponding month would be fair; if it wilted, the month would be wet and stormy.
Benefits and uses beyond beauty
While we primarily value Helleborus niger for its ornamental value today, it has a long history of utility, albeit a risky one.
A warning on toxicity
It is crucial to remember that all parts of the plant are poisonous. In ancient herbal medicine, it was used as a powerful purgative and to treat worms, but the difference between a cure and a poison was often a matter of a few grains. Today, we leave the medicinal uses firmly in the history books. Always wear gloves when handling the plant, as the sap can sometimes irritate the skin.
A lifeline for pollinators
The true modern benefit of the Christmas Rose is ecological. In the depths of winter, food sources for insects are scarce. On mild January or February days, honeybees and bumblebees will emerge to forage. The open, accessible flowers of Helleborus niger, rich in pollen and nectar, provide a vital lifeline for these early flyers, helping to sustain local pollinator populations until spring properly arrives.
Bring the magic of winter home
There is something deeply satisfying about looking out of your window on a grey day and seeing a cluster of bright white flowers defying the elements. Helleborus niger is more than just a plant; it is a symbol of endurance and hope.
Whether you have a sprawling woodland garden or a shady courtyard container, there is space for a Christmas Rose. Why not visit your local nursery this weekend? Discover the varieties available and bring a little winter magic home.
Gardens in winter are often dismissed as dormant, grey spaces waiting for the first breath of spring. We tend to retreat indoors, ignoring the potential beauty that cold months can offer. But nature has a way of surprising us, and few plants deliver that surprise quite like the Witch Hazel. Specifically, the Hamamelis x intermedia ‘Jelena’.
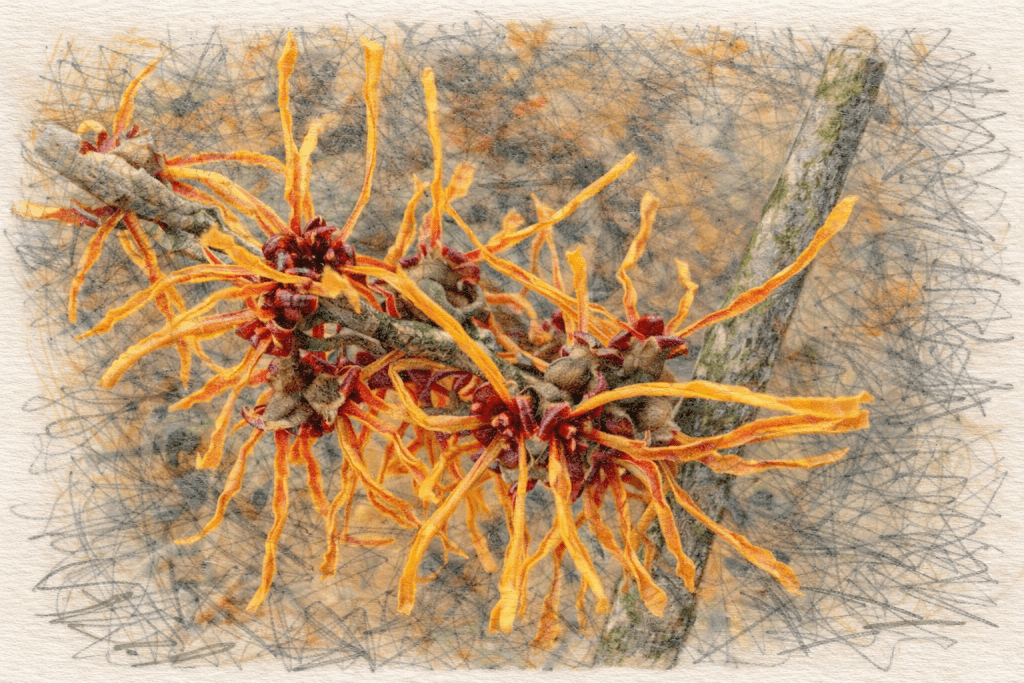
This isn’t just a shrub; it is a fiery beacon in the bleakest months of the year. When frost covers the ground and other plants have withered back, ‘Jelena’ bursts into life with copper-orange blooms that defy the chill. If you want to transform your outdoor space from a winter wasteland into a vibrant landscape, this is the plant to know.
A Meeting of East and West: The Origins of ‘Jelena’
To understand ‘Jelena’, we first need to look at its family tree. The plant is a hybrid, known botanically as Hamamelis x intermedia. This “intermedia” part of the name refers to it being a cross between two Asian species: the Japanese witch hazel (Hamamelis japonica) and the Chinese witch hazel (Hamamelis mollis).
The specific cultivar ‘Jelena’ has a rather romantic history. It was raised at the famous Kalmthout Arboretum in Belgium by Robert and Jelena de Belder. The de Belders were renowned horticulturists who significantly influenced the world of garden design and plant breeding in the 20th century. Robert named this specific seedling after his wife, Jelena, in 1954. It was a fitting tribute—a beautiful, resilient, and unique plant named for a woman who dedicated her life to botany.
Since its introduction, ‘Jelena’ has gained the prestigious Award of Garden Merit (AGM) from the Royal Horticultural Society, cementing its status as a reliable and superior plant for British gardens.
Why You Need ‘Jelena’ in Your Garden
There are many winter-flowering shrubs, but few command attention like this one. Here is why you should consider digging a hole for it this season.
Unrivalled Winter Colour
The primary reason gardeners fall in love with ‘Jelena’ is the flowers. Appearing from late December through to February (depending on the weather), the petals are like crimped ribbons. They start red at the base, transition to orange in the middle, and finish with yellow tips. From a distance, this blends into a rich, glowing copper that warms up even the coldest January day.
Witch Hazel ‘Jelena’
Incredible Fragrance
Winter gardens can lack scent, but ‘Jelena’ solves this. On a still, sunny winter day, the flowers release a delicate, spicy fragrance. It isn’t overpowering, but rather a subtle perfume that invites you to lean in closer.
Autumn Interest
This plant isn’t a one-trick pony. While it is famous for winter blooms, the foliage in autumn is equally spectacular. The broad, oval green leaves turn magnificent shades of orange, red, and scarlet before falling to reveal the flower buds ready for winter. It works hard for its place in your border for most of the year.
Finding the Perfect Spot: Growing Conditions
Witch Hazels have a reputation for being slightly fussy, but if you get the conditions right, they are generally trouble-free. Here is what ‘Jelena’ loves.
Sun and Shelter
Ideally, plant your Witch Hazel in an open, sunny position or dappled shade. Sun is vital for ripening the wood, which ensures better flowering the following winter. However, try to avoid an exposed, windy site. The flowers are hardy, but strong winds can strip them away prematurely. An open woodland setting is often perfect.
Soil Requirements
‘Jelena’, like most witch hazels, thrives in neutral to acid soil. It prefers a pH of 6.5 or lower. If you are gardening on chalk, you will likely struggle to keep it happy in the ground. In that case, consider a large container filled with ericaceous compost.
The soil needs to be moisture-retentive but free-draining. These plants hate having “wet feet” in winter, but they also dislike drying out completely in summer. A good mulch of leaf mould or compost in the spring helps retain that essential moisture during dryer months.
Space to Spread
This is a deciduous shrub with a spreading habit. Over 10 to 20 years, it can reach a height and spread of 4 metres by 4 metres. It creates a beautiful, vase-shaped silhouette, so give it room to breathe. Avoid crowding it with aggressive competitors.
Perfect Partners: Designing a Winter Scheme
Because ‘Jelena’ has such a distinct shape—bare branches adorned with spidery flowers—it looks best when underplanted. You want companions that highlight its copper tones without competing for height.
Snowdrops (Galanthus): The pure white of snowdrops provides a crisp contrast to the warm orange of the witch hazel. A carpet of white beneath the copper branches looks stunning in February.
Cyclamen (Cyclamen coum): For a splash of colour at ground level, pink or magenta Cyclamen work beautifully. The rounded leaves of the cyclamen contrast well with the spidery nature of the witch hazel flowers.
Hellebores (Helleborus): The Lenten Rose or Christmas Rose offers architectural foliage and nodding flowers that complement the woodland feel of the witch hazel. Look for white or pale yellow varieties to act as a foil for the copper blooms above.
Dogwood (Cornus): If you have a large space, planting red-stemmed or yellow-stemmed dogwood nearby can create a striking “fire and ice” effect, though ensure the dogwood doesn’t crowd the witch hazel.
Beyond the Garden: Uses and Benefits
While Hamamelis x intermedia ‘Jelena’ is primarily ornamental, the wider Witch Hazel family has a long history of utility.
Medicinal Heritage
The North American native species (Hamamelis virginiana) is the source of the witch hazel found in medicine cabinets worldwide. Native Americans used the bark and leaves to treat skin irritations and swellings. Today, distilled witch hazel is a common ingredient in toners and skincare products due to its astringent properties. While ‘Jelena’ is grown for beauty rather than the apothecary, it shares this rich botanical lineage.
Wildlife Haven
In the depths of winter, food sources for pollinators are scarce. On mild winter days, the flowers of ‘Jelena’ can provide a lifeline for early-emerging insects.
Cut Flowers
Don’t be afraid to snip a few branches. Bringing a flowering branch of ‘Jelena’ indoors is a wonderful way to enjoy the scent. The warmth of the house will help the perfume diffuse, filling a room with a clean, spicy aroma.
Myths and Folklore: The Water Witch
The common name “Witch Hazel” is steeped in folklore, though it has nothing to do with witches in the Halloween sense.
The “Witch” part of the name comes from the Old English word wice, meaning “pliant” or “bendable.” Early settlers in America observed Native Americans using the flexible branches of the native Hamamelis for dowsing—the practice of searching for underground water sources.
Because the leaves of the American Witch Hazel resembled the English Hazel tree (to which it is unrelated), the name stuck. The forked twigs were believed to dip downward when held over water, a practice that many dowsers still swear by today. So, when you look at your ‘Jelena’, you are looking at a plant historically associated with hidden depths and discovery.
Interesting Facts About ‘Jelena’
Weatherproof Mechanisms: The petals of ‘Jelena’ have a clever survival trick. On extremely cold, frosty nights, the petals curl up tightly towards the centre of the flower to protect themselves. As the sun comes out and the temperature rises, they unfurl again. This extends the flowering period significantly compared to other winter blooms.
Slow Burner: Witch hazels are not plants for the impatient. They grow relatively slowly, which makes them ideal for low-maintenance gardens as they rarely need pruning.
The “Spider” Flower: Children are often fascinated by the blooms, referring to them as “spiders” or “confetti” due to their crimped, ribbon-like appearance.
Embrace the Cold Season
It is easy to shut the curtains on the garden when the temperature drops, but plants like Hamamelis x intermedia ‘Jelena’ remind us that nature doesn’t stop. It offers colour, scent, and architectural beauty even in the depths of winter.
Whether you have a sprawling country estate or a modest suburban border, there is space for this copper-coloured gem. It connects us to the season, encourages us to step outside, and bridges the gap between the last leaf of autumn and the first bulb of spring.
So, wrap up warm, grab a spade, and invite ‘Jelena’ into your garden. Your winter view will never be the same again.
Winter gardens need not be bleak landscapes of bare branches and dormant soil. The right selection of winter interest shrubs can transform your outdoor space into a captivating display of colour, texture and fragrance throughout the coldest months. These hardy performers stand as beacons of beauty when most plants retreat into seasonal slumber.
Choosing shrubs for winter interest requires understanding how different species contribute to the garden’s structure and appeal during the darker months. Some offer brilliant stems that glow like fire against frost-covered ground, while others produce berries that feed wildlife and provide splashes of vibrant colour. Many winter-flowering varieties release intoxicating fragrances that drift through crisp air, reminding us that life persists even in the depths of winter.
The art of winter gardening has roots stretching back centuries. Victorian gardeners understood the importance of four-season interest, carefully selecting plants that would provide structure and beauty year-round. They recognised that winter gardens serve not only aesthetic purposes but also practical ones—providing shelter for wildlife, protecting soil from erosion, and creating windbreaks that make outdoor spaces more comfortable.
Modern gardeners continue this tradition, though we now have access to an even wider range of cultivars and species. The key lies in selecting shrubs that complement your garden’s existing structure while providing the specific type of winter interest you most desire. Whether you’re drawn to architectural forms, brilliant colours, or seasonal fragrances, the following ten shrubs will ensure your garden remains a source of joy throughout winter’s reign.
Cornus alba ‘Sibirica’ – Siberian Dogwood
The Siberian Dogwood stands among winter’s most dramatic performers, transforming ordinary garden borders into galleries of living art. This deciduous shrub reveals its true glory only after autumn’s final leaves have fallen, when its brilliant coral-red stems emerge like brushstrokes against winter’s neutral palette.
Native to Siberia and northern China, this hardy shrub has graced British gardens since the 18th century. Victorian plant hunters prized it for its ability to provide colour when little else could survive the harsh conditions. The stems intensify in colour as temperatures drop, reaching their most vibrant hues during the coldest months.
Cornus alba ‘Sibirica’ – Siberian Dogwood. Winter Interest Shrub
Advantages: Exceptionally hardy, tolerating temperatures well below freezing. Provides stunning winter colour without requiring flowers. Easy to maintain through annual pruning. Excellent for cutting and bringing indoors for winter arrangements.
Considerations: Can spread vigorously if not managed properly. Requires annual hard pruning to maintain the brightest stem colour. May look untidy during summer months when foliage takes precedence.
Ideal Situation: Thrives in full sun to partial shade with moist, well-drained soil. Plant in locations where winter sun can illuminate the stems for maximum impact. Excellent near water features where reflections double the visual effect.
Hamamelis x intermedia ‘Jelena’ – Witch Hazel
Witch hazel brings magic to winter gardens through its extraordinary ability to bloom during the coldest months. ‘Jelena’ produces masses of copper-orange flowers that unfurl like tiny fireworks across bare branches, typically from December through February.
This hybrid arose from crosses between Asian and American species, combining the best characteristics of both parents. The genus name derives from the Greek words meaning “together with fruit,” referring to the plant’s unusual habit of producing flowers and fruit simultaneously. Ancient civilisations valued witch hazel for its supposed mystical properties, and early American settlers learned to use it medicinally from Native American tribes.
Hamamelis x intermedia ‘Jelena’ – Witch Hazel. Winter Interest Shrub
Advantages: Spectacular winter flowering when few other plants bloom. Intense fragrance carries on winter air. Beautiful autumn foliage provides dual-season interest. Long-lived and relatively disease-free once established.
Considerations: Slow to establish and reach flowering size. Expensive initial investment compared to other shrubs. Requires patience as young plants may take several years to bloom prolifically.
Ideal Situation: Prefers partial shade with shelter from harsh winds. Thrives in acidic to neutral soil with consistent moisture. Plant near pathways or windows where the fragrance can be appreciated.
Mahonia x media ‘Charity’ – Oregon Grape
‘Charity’ mahonia commands attention through winter with its architectural presence and honey-scented yellow flowers. This evergreen shrub produces dramatic spikes of bright yellow blooms from November through February, followed by blue-black berries that birds treasure.
The mahonia genus honours Bernard McMahon, an Irish-American botanist who helped introduce Lewis and Clark’s plant discoveries to cultivation. ‘Charity’ represents a hybrid between two species, combining the hardiness of one parent with the floral abundance of the other. Victorian gardeners particularly valued mahonias for their ability to provide structure and colour during winter months.
Mahonia x media ‘Charity’ – Oregon Grape.
Advantages: Evergreen foliage maintains year-round structure. Fragrant flowers attract winter pollinators. Berries provide food for wildlife. Tolerates difficult growing conditions including dry shade.
Considerations: Spiny leaves require careful placement away from pathways. Can become leggy with age if not pruned properly. May suffer wind damage in exposed locations.
Ideal Situation: Excellent for north-facing borders and difficult shady spots. Tolerates most soil types but prefers well-drained conditions. Ideal as a specimen plant or backdrop for smaller winter performers.
Viburnum x bodnantense ‘Dawn’ – Fragrant Viburnum
‘Dawn’ viburnum epitomises winter romance, producing clusters of intensely fragrant pink flowers that brave the harshest weather. This deciduous shrub begins blooming in November and continues intermittently through March, with the most prolific displays occurring during mild spells.
This hybrid emerged from Bodnant Garden in Wales during the 1930s, where it quickly gained recognition for its exceptional winter performance. The cross between two Asian species created a shrub that combined the best flowering characteristics of both parents. Its common name reflects the plant’s ability to bring the promise of spring even during winter’s darkest days.
Viburnum x bodnantense ‘Dawn’ – Fragrant Viburnum. Winter Interest Shrub
Advantages: Exceptional fragrance carries long distances on winter air. Flowers appear sporadically throughout winter months. Attractive autumn foliage extends seasonal interest. Relatively fast-growing compared to other winter bloomers.
Considerations: Flowers may be damaged by severe frost, though new buds continue opening. Can become quite large if not pruned regularly. May look sparse during summer months.
Ideal Situation: Thrives in full sun to partial shade with fertile, well-drained soil. Plant near seating areas or pathways where fragrance can be fully appreciated. Benefits from shelter from harsh winds.
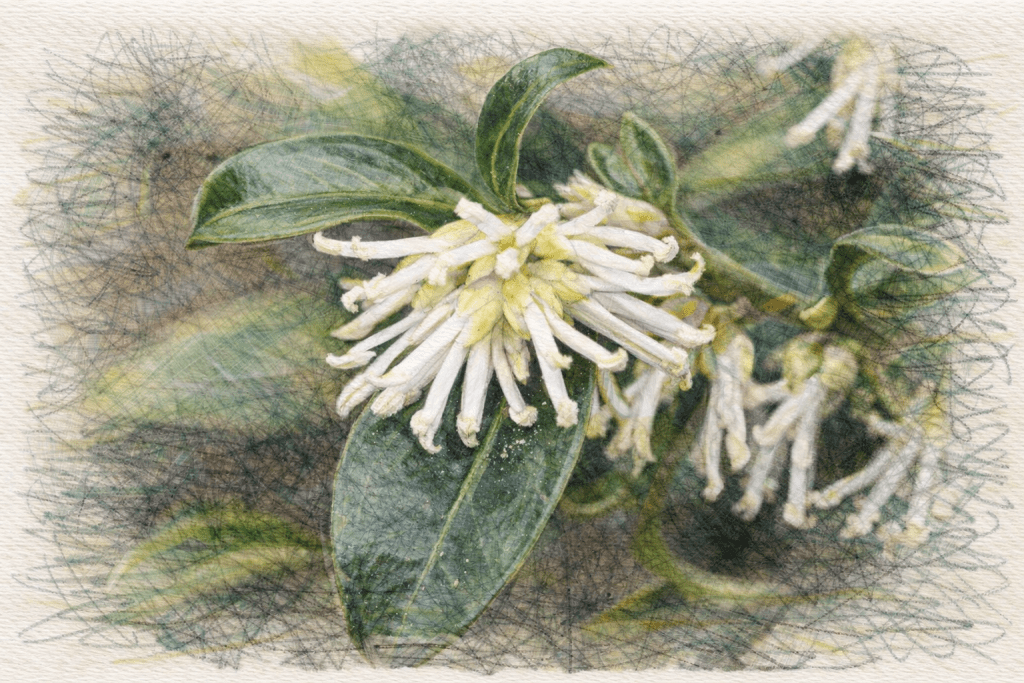
Sarcococca confusa – Sweet Box
Sweet box proves that the most powerful winter performers often come in modest packages. This compact evergreen produces tiny white flowers that release an intensely sweet fragrance capable of perfuming entire garden areas. The blooms appear from December through February, followed by glossy black berries.
Native to western China, sarcococca species have provided winter fragrance in British gardens since the Victorian era. The genus name combines Greek words meaning “fleshy berry,” while the species name “confusa” reflects the botanical confusion that once surrounded this group of closely related plants. Despite its small stature, sweet box has earned a place among the most treasured winter garden plants.
Sarcococca confusa – Sweet Box
Advantages: Intense fragrance from inconspicuous flowers. Excellent ground cover in challenging locations. Tolerates deep shade where few other plants thrive. Requires minimal maintenance once established.
Considerations: Slow to establish and spread. Flowers are not visually striking despite their fragrance. Can be expensive to purchase in sufficient quantities for ground cover use.
Ideal Situation: Perfect for dry shade under trees or shrubs. Thrives in most soil types except waterlogged conditions. Ideal near entrances or pathways where fragrance creates welcoming atmospheres.
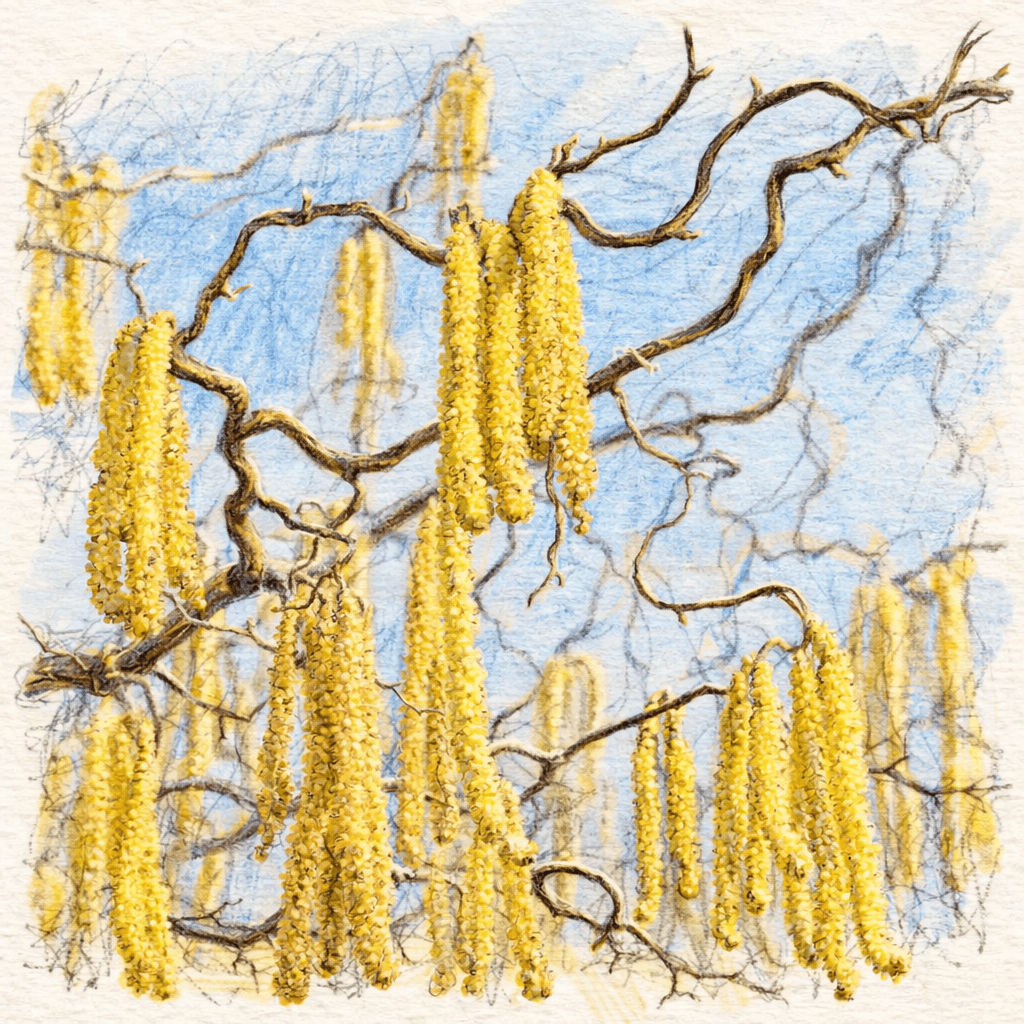
Corylus avellana ‘Contorta’ – Corkscrew Hazel
The corkscrew hazel transforms winter gardens into living sculptures through its extraordinary twisted branches. This deciduous shrub reveals its full architectural drama only after leaves fall, when the contorted stems create intricate patterns against winter skies. Long yellow catkins drape the branches in late winter, adding movement and colour.
This remarkable cultivar arose as a mutation discovered in a Gloucestershire hedgerow during the 1860s. Victorian gardeners immediately recognised its unique appeal, and it quickly became a prized specimen plant in fashionable gardens. The twisted growth habit results from a genetic mutation that affects the plant’s ability to grow in straight lines, creating the characteristic spiralled branches that give it such distinctive character.
Corylus avellana ‘Contorta’
Advantages: Unique architectural form provides year-round interest. Dramatic winter silhouette creates focal points. Catkins provide early nectar for pollinators. Suitable for containers and small gardens.
Considerations: Can be grafted onto straight rootstock that may produce unwanted shoots. Relatively expensive due to slow propagation methods. Limited autumn colour compared to other hazels.
Ideal Situation: Displays best in open locations where twisted branches can be fully appreciated. Tolerates most soil types but prefers well-drained conditions. Excellent as specimen plants or conversation pieces.
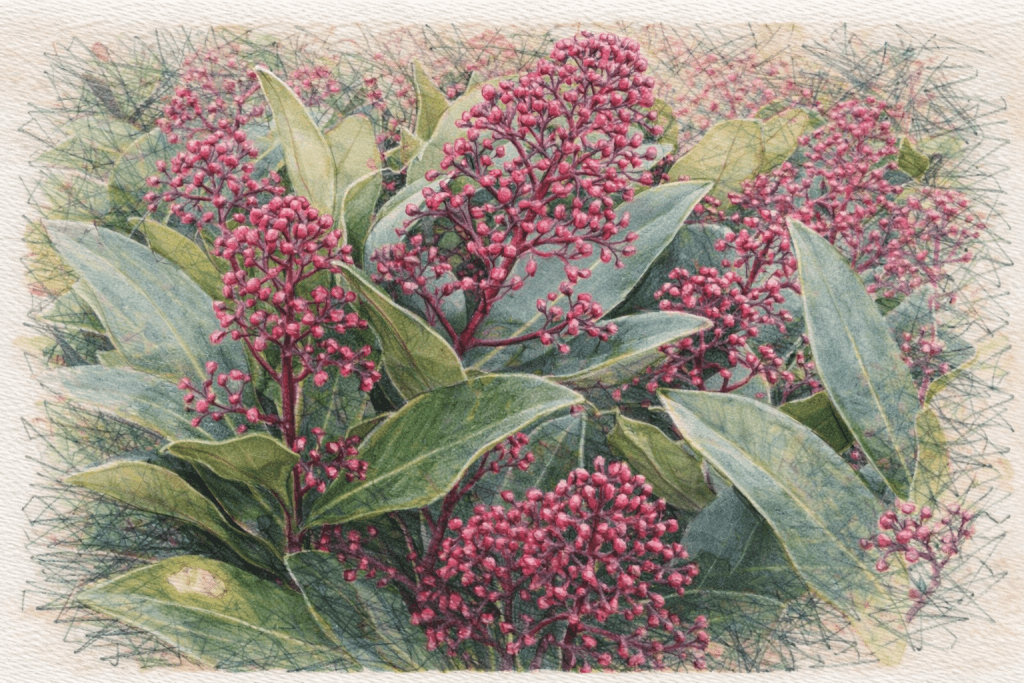
Skimmia japonica ‘Rubella’ – Japanese Skimmia
‘Rubella’ skimmia brings reliable colour to winter gardens through its distinctive red flower buds and bronze-tinted foliage. This compact evergreen maintains its ornamental appeal throughout the darkest months, with deep red buds providing colour from autumn through to spring flowering.
Japanese skimmias arrived in British gardens during the mid-19th century, introduced by plant hunters exploring Japan’s mountainous regions. ‘Rubella’ represents a male selection valued specifically for its winter bud colour and compact growth habit. Traditional Japanese gardens have long appreciated skimmias for their ability to provide colour and structure in shaded areas.
Skimmia japonica ‘Rubella’ – Japanese Skimmia. Winter Interest Shrub
Advantages: Compact size suits small gardens and containers. Reliable winter colour regardless of weather conditions. Aromatic foliage when crushed. Tolerates pollution and urban conditions.
Considerations: Male plants do not produce berries. Requires lime-free soil conditions. Can suffer from phytophthora in waterlogged conditions.
Ideal Situation: Perfect for shaded borders and woodland gardens. Thrives in acidic, humus-rich soil with consistent moisture. Excellent companion for other acid-loving plants like rhododendrons.
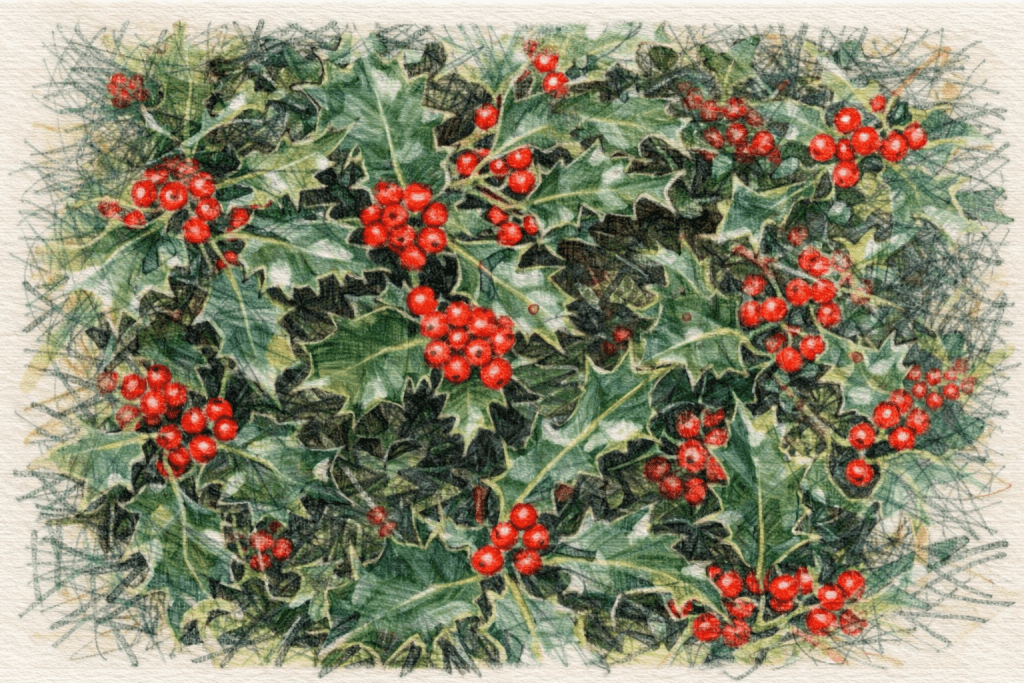
Ilex aquifolium ‘J.C. van Tol’ – English Holly
‘J.C. van Tol’ holly provides classic winter appeal through its glossy evergreen foliage and brilliant red berries. This self-fertile cultivar eliminates the usual requirement for separate male and female plants, making it ideal for smaller gardens where space limitations prevent planting multiple specimens.
Holly holds deep cultural significance in British tradition, with its association with Christmas celebrations stretching back to pre-Christian times. Ancient Celts believed holly possessed protective powers, while early Christians adopted it as a symbol of Christ’s crown of thorns. ‘J.C. van Tol’ was selected in the Netherlands during the early 20th century, prized for its reliable berry production and relatively smooth-edged leaves.
Ilex aquifolium ‘J.C. van Tol’ – English Holly. Winter Interest Shrub
Advantages: Self-fertile variety produces berries without requiring separate male plant. Berries provide excellent food source for winter birds. Evergreen foliage maintains year-round structure. Traditional Christmas decoration material.
Considerations: Growth can be slow initially. May require protection from harsh winds when young. Berries attractive to birds may be quickly consumed.
Ideal Situation: Thrives in full sun to partial shade with well-drained soil. Excellent for hedging or specimen planting. Benefits from shelter during establishment period.
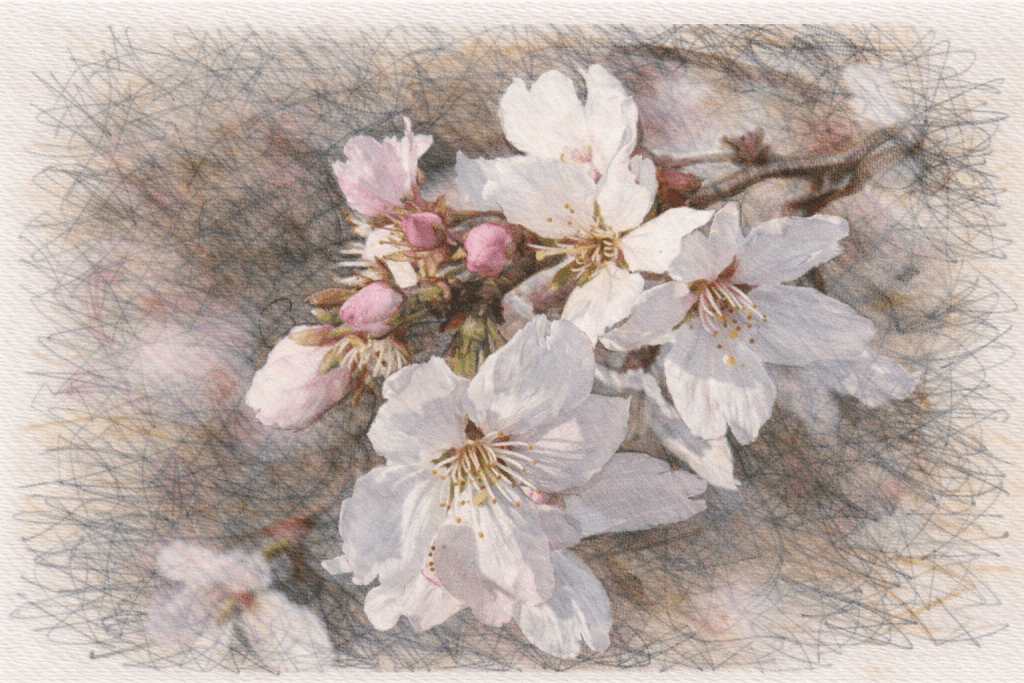
Prunus x subhirtella ‘Autumnalis’ – Autumn Cherry
The autumn cherry defies conventional expectations by producing delicate pink flowers intermittently throughout winter months. This small deciduous tree creates an enchanting display from November through March, with the most prolific flowering occurring during mild spells between cold snaps.
This remarkable cultivar represents centuries of Japanese horticultural expertise, developed through careful selection and breeding programmes. Japanese cherry cultivation dates back over a thousand years, with winter-flowering varieties particularly treasured for their ability to provide beauty during harsh months. The name ‘Autumnalis’ reflects its unusual flowering season, though winter blooms often surpass autumn displays in abundance.
Prunus x subhirtella ‘Autumnalis’ – Autumn Cherry. Winter Interest Shrub
Advantages: Unusual winter flowering period creates garden highlights. Delicate flowers provide nectar for winter-active pollinators. Attractive bark provides additional winter interest. Suitable for smaller gardens due to modest size.
Considerations: Flowers may be damaged by severe frost, reducing display quality. Can be short-lived compared to other flowering trees. May suffer from various cherry diseases.
Ideal Situation: Performs best in full sun with well-drained, fertile soil. Benefits from shelter from harsh winds that can damage delicate flowers. Excellent near seating areas where winter blooms can be appreciated.
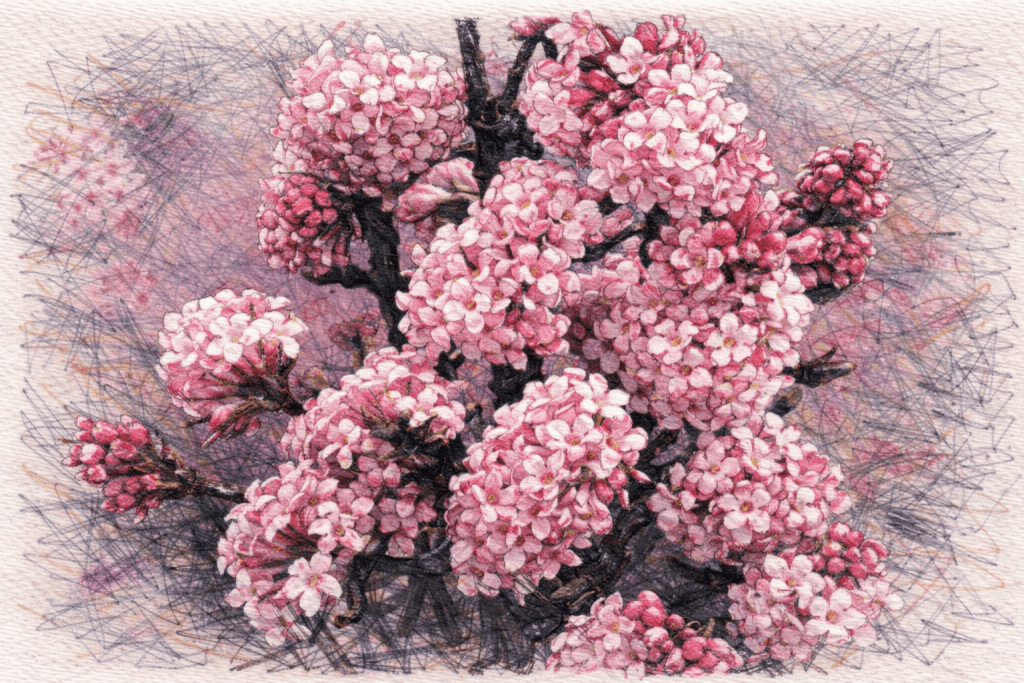
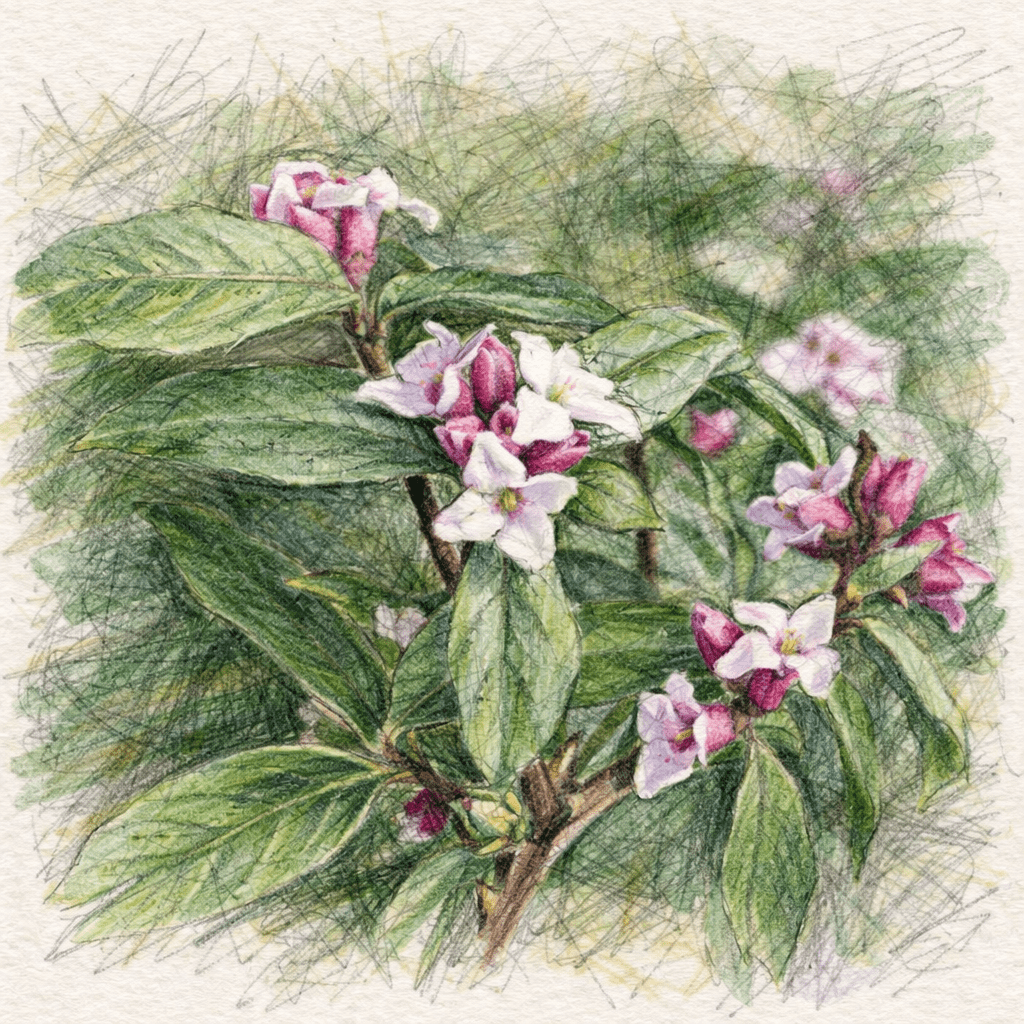
‘Jacqueline Postill’ daphne concludes our selection with perhaps the most intoxicating fragrance winter gardens can offer. This semi-evergreen shrub produces clusters of pink and white flowers from December through February, releasing a perfume so intense it can scent entire garden areas.
This cultivar originated from seeds collected in Nepal during the 1960s, representing the remarkable diversity found in Himalayan plant communities. Named after the wife of the nurseryman who first cultivated it, ‘Jacqueline Postill’ has proven to be among the hardiest of the winter-flowering daphnes. The species grows naturally at high altitudes, explaining its tolerance for cold conditions.
Advantages: Exceptional winter fragrance unmatched by most garden plants. Semi-evergreen habit maintains some structure year-round. Relatively compact size suits smaller gardens. Flowers attract winter-flying moths.
Considerations: Can be challenging to establish successfully. Dislikes root disturbance once planted. May suffer sudden death syndrome common to daphnes.
Ideal Situation: Requires excellent drainage and slightly alkaline soil conditions. Benefits from morning sun and afternoon shade. Plant near pathways or windows where fragrance can be fully appreciated.
Creating Your Winter Garden Masterpiece
These ten shrubs represent just the beginning of winter garden possibilities. Success lies in understanding how each plant contributes to the overall composition, creating layers of interest that sustain beauty throughout the coldest months. Consider combining plants with different flowering times to extend the display season, and remember that winter gardens benefit from thoughtful placement where low-angled sunlight can illuminate stems, flowers, and berries to maximum effect.
The rewards of winter gardening extend far beyond aesthetic pleasure. These shrubs provide crucial habitat and food sources for wildlife during harsh months, support early pollinators with nectar and pollen, and remind us that nature’s beauty persists even during the most challenging seasons. Your garden becomes a beacon of life and colour when the wider landscape sleeps, creating a sanctuary that nurtures both wildlife and human spirits throughout winter’s reign.
A shrub can form the backbone of a garden or border. They provide structure, seasonal interest and a sense of permanence that few other plants can match. Whether you’re looking to fill a border, create privacy, or simply add year-round colour, understanding how to plant and care for shrubs will transform your outdoor space.
This guide will walk you through everything you need to know about planting shrubs in the UK—from choosing the right variety to ensuring it thrives for years to come.
What is a shrub?
A shrub is a woody plant that produces multiple stems from its base, distinguishing it from trees, which typically have a single trunk. Shrubs vary enormously in size, from compact varieties like lavender that reach just 30cm in height, to towering specimens such as certain rhododendrons that can grow over 4 metres tall.
They play a vital role in garden design. Deciduous shrubs like hydrangeas offer spectacular seasonal displays, whilst evergreens such as box and holly provide structure and greenery throughout the winter months. Some shrubs are grown for their flowers, others for their foliage or berries, and many for their ability to attract wildlife.
Historically, shrubs have been essential to the English landscape. The hawthorn, for instance, has been used for centuries in hedgerows across the countryside, whilst ornamental shrubs like roses have graced the gardens of stately homes since Tudor times. Today, they remain indispensable for gardeners seeking both beauty and practicality.
What to consider when purchasing a shrub
Selecting the right shrub requires careful thought. A plant that thrives in one garden may struggle in another, so it’s worth taking time to assess your space and needs before making a purchase.
The Height and width of a Shrub
Consider the mature size of the shrub, not just its appearance in the pot. A small plant may look modest at the garden centre, but could grow to dominate a border within a few years. Check the label for expected height and spread, and plan accordingly. If you’re planting near a path or window, choose compact varieties. For the back of a border or screening, opt for taller specimens.
Climate and hardiness
The UK climate varies considerably, from the mild, wet conditions of the south-west to the colder, drier winters of the north and east. Choose shrubs suited to your local conditions. Tender varieties like citrus or hibiscus may struggle in frost-prone areas, whilst hardy shrubs such as viburnum and cotoneaster can withstand harsh winters.
Pay attention to the plant’s hardiness rating. Most labels will indicate whether a shrub is fully hardy, frost-hardy or requires winter protection.
Colours and seasonal interest of a Shrub
Think about what you want from your shrub throughout the year. Spring-flowering varieties like forsythia and magnolia offer early colour, whilst autumn shrubs such as euonymus provide fiery foliage. Evergreens like yew and holly maintain their appearance year-round, making them ideal for structural planting.
If you’re designing a mixed border, consider how the shrub’s colour will complement surrounding plants. A vivid red Japanese maple, for example, can create a striking focal point, whilst softer hues like the silver foliage of artemisia blend harmoniously with perennials.
Soil type
Different shrubs have different soil preferences. Acid-loving plants like rhododendrons, camellias, and pieris require ericaceous soil with a pH below 7. They will struggle—or fail entirely—in alkaline conditions. Conversely, shrubs like lilac and mock orange prefer neutral to slightly alkaline soil.
Before purchasing, test your soil’s pH using a simple kit from a garden centre. If your soil doesn’t suit your chosen shrub, consider planting in containers filled with the appropriate compost, or amend the soil with organic matter to adjust its pH.
Sunlight requirements
Most shrubs have specific light preferences. Sun-lovers like cistus and lavender need at least six hours of direct sunlight daily to flower well. Shade-tolerant varieties such as mahonia and skimmia thrive in dappled or full shade, making them perfect for north-facing borders or woodland gardens.
Observe your garden throughout the day to understand where the sun falls, and match your shrub to the conditions.
How to plant a shrub
Planting a shrub correctly gives it the best possible start. Follow these steps to ensure success.
Choose the right time to plant a Shrub
The optimal planting window in the UK is during the dormant season, from late autumn to early spring (November to March). During this period, the soil is still warm enough to encourage root growth, but the plant isn’t expending energy on leaves or flowers. Avoid planting during periods of frost or waterlogged conditions.
Container-grown shrubs can technically be planted year-round, but they’ll require more frequent watering if planted in summer.
Prepare the site
Select a location that meets the shrub’s requirements for light, soil, and space. Clear the area of weeds, as these will compete with your shrub for nutrients and water.
Dig a hole approximately twice the width of the root ball and just as deep. This allows the roots to spread easily into the surrounding soil. If your soil is heavy clay, consider incorporating organic matter such as well-rotted compost or manure to improve drainage. For sandy soils, organic matter will help retain moisture.
Remove the shrub from its pot
Gently ease the shrub out of its container. If the roots are tightly bound (a condition known as being “pot-bound”), tease them apart with your fingers or make a few vertical cuts with a knife. This encourages the roots to grow outwards into the soil rather than continuing to circle.
Position and plant
Place the shrub in the hole, ensuring the top of the root ball is level with the surrounding soil. Planting too deep can cause the stem to rot, whilst planting too shallow exposes the roots.
Backfill the hole with the excavated soil, firming it gently with your hands or feet to eliminate air pockets. Avoid compacting the soil too much, as this can hinder root growth.
Water thoroughly
After planting, water the shrub generously to settle the soil around the roots. Even in wet weather, this initial watering is essential. Apply a 5–7cm layer of mulch (such as bark chippings or compost) around the base of the shrub, keeping it a few centimetres away from the stem. Mulch helps retain moisture, suppress weeds, and regulate soil temperature.
How to care for a shrub
Once planted, shrubs require ongoing care to remain healthy and attractive.
Watering a Shrub
Newly planted shrubs need regular watering during their first growing season, especially in dry spells. Water deeply once or twice a week rather than little and often, as this encourages deep root growth. Established shrubs are generally more drought-tolerant, though they may still need watering during prolonged dry periods.
Feeding A Shrub
Most shrubs benefit from an annual feed in early spring. Use a general-purpose fertiliser or one tailored to the shrub’s needs (such as ericaceous feed for acid-lovers). Spread the fertiliser around the base of the plant and water it in well.
Pruning A Shrub
Pruning keeps shrubs healthy, encourages flowering, and maintains an attractive shape. However, different shrubs require different pruning techniques and timings.
Spring-flowering shrubs (such as forsythia and flowering currant) should be pruned immediately after flowering. These plants produce flowers on the previous year’s growth, so pruning too late will remove next year’s buds.
Summer-flowering shrubs (such as buddleia and hydrangea) can be pruned in late winter or early spring, as they flower on new growth produced during the current season.
Evergreen shrubs like box and privet can be trimmed in late spring or summer to maintain their shape.
Always use sharp, clean secateurs or shears to make clean cuts. Remove dead, diseased, or crossing branches first, then shape the plant as desired. If you’re unsure when to prune a particular shrub, check its label or consult a reliable gardening resource.
Mulching
Refresh the mulch layer annually in spring to suppress weeds and retain moisture. This simple task significantly reduces maintenance throughout the year.
A garden shaped by shrubs
Planting a shrub is one of the most rewarding tasks a gardener can undertake. They grow steadily, require relatively little maintenance once established, and offer beauty in every season. From the cheerful yellow blooms of forsythia in spring to the ruby-red berries of cotoneaster in winter, shrubs bring life and structure to any garden.
By choosing the right plant, planting it carefully, and providing appropriate care, you’ll enjoy years of colour, texture and interest. So pick up your spade, select a shrub that speaks to you, and watch your garden flourish.
The garden sleeps beneath winter’s blanket, but beneath the frost-kissed earth, spring’s potential lies dormant, waiting. For the thoughtful gardener, these quiet months offer something precious: time to dream, plan and prepare for the spectacular displays that will unfold when warmth returns.
Winter provides the perfect opportunity to step back from the immediate demands of weeding and watering to consider the bigger picture. With catalogues spread across kitchen tables and notebooks filled with sketched ideas, you can craft borders that will bring months of joy and beauty to your garden. The bare bones of your garden are now visible, revealing its true structure and allowing you to see exactly where improvements could transform your outdoor space.
Planning a new border during winter isn’t merely about choosing pretty plants—it’s about creating living tapestries that change throughout the seasons, each month bringing new colours, textures, and fragrances. Whether you’re starting from scratch or reimagining an existing space, winter’s contemplative pace allows for the careful consideration that truly exceptional borders require.
Understanding Your Canvas
Before selecting a single plant, successful border planning begins with understanding your garden’s unique conditions. Walk your proposed border area at different times of day, observing how light moves across the space. Does morning sun give way to afternoon shade? Are there areas that remain consistently bright or perpetually dim?
Soil quality tells its own story through what already grows there. Areas where weeds flourish often indicate fertile, well-draining conditions, whilst bare patches might suggest compacted or poor soil requiring improvement. Take time to observe how water moves through your garden during winter rains—noting where it pools or runs off rapidly will inform your plant selections later.
Consider the border’s relationship to your home and existing garden features. Will this be a display primarily viewed from indoors, requiring plants with strong winter structure? Or perhaps it borders a frequently used path, where fragrant plants could release their perfumes as you brush past them on evening strolls.
Drawing Inspiration from Garden History
Gardens have reflected the personalities and aspirations of their creators throughout history, offering rich inspiration for today’s border makers. The herbaceous borders of Gertrude Jekyll, with their carefully orchestrated colour progressions, demonstrated how understanding plant heights, flowering times, and colour theory could create breathtaking displays that seemed effortlessly natural.
Victorian cottage gardens, bursting with productive and ornamental plants grown side by side, show how borders can serve multiple purposes whilst maintaining abundant charm. These gardens mixed vegetables with flowers, herbs with ornamental shrubs, creating spaces that were both beautiful and practical—a principle increasingly relevant for modern gardeners seeking sustainability alongside beauty.
The prairie-style plantings pioneered by designers like Piet Oudolf have revolutionised contemporary border design, emphasising naturalistic combinations that provide year-round interest through seedheads and structural grasses. These borders celebrate the beauty found in plants’ entire lifecycle, not just their flowering moments.
Exploring Border Styles and Planting Approaches
The Mixed Border: A Symphony of Textures
Mixed borders combine perennials, shrubs, bulbs, and annuals to create displays with extended seasonal interest. This approach, popularised in English country gardens, allows for experimentation with different plant combinations whilst maintaining structure through permanent woody plants.
For a mixed border, consider starting with structural shrubs like Viburnum tinus, which provides evergreen backbone and winter flowers, or Cornus alba varieties whose coloured winter stems create dramatic focal points. Weave in seasonal performers: early bulbs such as snowdrops and crocuses, followed by tulips and alliums, then perennials like hardy geraniums and astilbe for summer colour.
The beauty of mixed borders lies in their ability to evolve. Gaps between young shrubs can be filled with annuals whilst the permanent plants establish, creating full displays from the first season whilst allowing for long-term development.
The Herbaceous Border: Seasonal Spectacle
Pure herbaceous borders, though requiring annual cutting back, offer unparalleled displays during their growing season. These borders showcase the full drama of perennial plants, from their first spring shoots through to their autumn seed heads.
Plan herbaceous borders with careful attention to flowering succession. Begin with early performers like hellebores and pulmonarias, progress through summer stalwarts such as delphiniums, phlox, and rudbeckias, then finish with late-season heroes like asters and Japanese anemones.
Height variation creates visual interest—use tall plants like Verbascum olympicum or Thalictrum delavayi as dramatic punctuation marks, with mid-height plants like echinaceas and salvias forming the border’s backbone, and low-growing sedums and heucheras creating neat front edges.
The Prairie Border: Natural Rhythms
Prairie-style borders embrace nature’s own planting patterns, using ornamental grasses interwoven with perennials to create naturalistic displays that provide beauty through all seasons. These borders require careful plant selection but reward with relatively low maintenance once established.
Structural grasses like Calamagrostis x acutiflora ‘Karl Foerster’ provide vertical accents, whilst Panicum virgatum varieties offer airy texture and autumn colour. Intersperse these with perennials that complement the naturalistic aesthetic: Echinacea species, Rudbeckia fulgida, and Aster species create the flowering tapestry that makes prairie borders so captivating.
The magic of prairie borders unfolds gradually—spring emergence is subtle, summer brings flowering crescendos, and winter reveals the beautiful architecture of grass plumes and persistent seed heads dusted with frost.
The Colour-Themed Border: Artistic Expression
Single-colour borders, whether the sophisticated elegance of white gardens or the passionate drama of red borders, offer opportunities for artistic expression through plant combinations. These borders require careful attention to texture, form, and flowering times to maintain interest without colour contrast.
A white border might combine the architectural presence of white foxgloves and delphiniums with the delicate textures of crambe and gypsophila, unified by silver-foliaged plants like artemisia and stachys. The challenge lies in ensuring continuous interest—plan for succession plantings and include plants valued for foliage or form alongside flowering specimens.
Hot-coloured borders celebrate warm tones, combining plants like crocosmia, kniphofia, and heleniums with bronze-foliaged dahlias and orange or red rudbeckias. These borders can feel particularly welcoming during cooler months, their warm colours providing psychological warmth even when temperatures drop.
Bringing Your Vision to Life
The most beautiful borders begin as sketches on paper, refined through winter’s contemplative months. Draw your proposed border to scale, marking existing features and noting sun patterns, soil conditions, and viewing angles. This groundwork prevents costly mistakes and ensures your plant selections suit their intended locations.
Create planting plans that consider mature plant sizes—a common mistake is underestimating how large plants will grow, leading to overcrowded borders that require frequent division or removal. Allow space for plants to achieve their natural forms whilst ensuring sufficient coverage to suppress weeds.
Consider maintenance requirements realistically. A border requiring weekly attention may be rewarding but impractical for busy gardeners. Prairie-style plantings generally require less intervention than mixed borders with numerous different plants requiring individual care regimens.
Creating Your Garden Legacy
As winter’s planning period draws to a close, you’ll find yourself equipped with detailed visions for borders that will provide years of pleasure. The hours spent dreaming over plant catalogues and sketching possibilities represent an investment in future happiness—both your own and that of the wildlife your plantings will support.
Remember that the finest borders evolve over time, shaped by successes, failures, and happy accidents. Your winter planning provides the foundation, but remain open to refinement and change as your border develops its own personality.
Start gathering your chosen plants through reputable nurseries, and prepare your soil during late winter and early spring. The careful planning you’ve undertaken during these quiet months will reward you with borders that provide beauty, wildlife habitat, and deep satisfaction for years to come.
Your garden’s next chapter awaits, written in the language of leaves, flowers, and changing seasons—a living story that begins with winter’s thoughtful preparation.
As autumn settles in, the gardener’s mind turns to spring. It’s the perfect time to plant bulbs, those small, unassuming packages that promise a riot of colour when the days begin to lengthen once more. Planting bulbs can be a deeply rewarding task, but it can also be tough on the back and knees. This is where a dedicated bulb planter comes into its own, transforming the job from a chore into a simple, satisfying activity.
For centuries, gardeners relied on the humble trowel for this task. But as the great gardens of the 18th and 19th centuries expanded, so did the need for more efficient tools. The bulb planter emerged as a specialised instrument designed for one purpose: to create the perfect home for a bulb, quickly and with minimal effort. Today, we can reap the benefits of this innovation.
What is a Bulb Planter?
A bulb planter is a simple yet ingenious tool designed to remove a plug of soil from the ground, creating a hole of the ideal depth and width for planting bulbs. Once the bulb is placed inside, the soil plug is returned, neatly covering it. This method ensures each bulb is planted consistently and with very little disturbance to the surrounding soil or lawn.
The Advantages of a Bulb Planter Over a Trowel
While a trusty trowel is an indispensable part of any gardener’s toolkit, a bulb planter offers several distinct advantages when it comes to planting bulbs in large numbers.
Speed and Efficiency: If you’re planting dozens or even hundreds of bulbs, a planter is significantly faster. Instead of digging individual holes, you simply push, twist, and lift. This repetitive, rhythmic action allows you to plant swathes of daffodils, tulips, or crocuses in a fraction of the time.
Uniform Depth: Achieving the correct planting depth is crucial for a bulb’s success. A bulb planter, often marked with depth measurements, removes the guesswork. This ensures your bulbs are planted deep enough to protect them from frost and foraging wildlife, leading to a more reliable and uniform display come spring.
Less Soil Disturbance: When planting into an established lawn or a tightly packed border, a trowel can create a messy, disturbed patch of earth. A bulb planter cleanly removes a small core of soil, leaving the surrounding area almost untouched. This is particularly useful for naturalising bulbs in grass, as the lawn recovers much more quickly.
Reduced Physical Strain: Digging multiple holes with a trowel requires a lot of bending and wrist action. A long-handled bulb planter allows you to do most of the work while standing up, saving your back and knees from unnecessary strain. Even a short-handled version is often more ergonomic than a trowel for this specific, repetitive task.
Choosing Your Planter
There are two main types of bulb planters, each suited to different gardening needs.
Hand-Held Bulb Planter
The short-handled planter, like the Burgon & Ball Bulb Planter, is perfect for working in raised beds, containers, or well-cultivated borders. It features a serrated edge to cut cleanly through the soil and a spring-loaded handle that releases the soil plug with a simple press. This design gives you precise control, allowing you to easily manoeuvre around existing plants.
Long-Handled Bulb Planter
For planting large numbers of bulbs directly into lawns or extensive borders, the Long Handled Bulb Planter is an excellent choice. Its design allows you to use your body weight to drive the tool into the ground, making it effective even in compacted soil. You can work from a standing position, making the process much more comfortable and efficient.
Prepare for a Spectacular Spring
Planting bulbs is an act of faith and an investment in the future beauty of your garden. By choosing the right tool for the job, you can make this autumnal ritual a pleasure rather than a pain. A bulb planter, whether long or short-handled, is a specialised piece of equipment that earns its place in the shed by saving you time, effort, and ensuring a spectacular floral display year after year.
There’s something profoundly satisfying about planting a tree. Unlike annual flowers that bloom and fade within a season, a tree is a living legacy—one that will stand for decades, perhaps centuries, offering shade, shelter and beauty to generations yet to come. Whether you’re cultivating a small urban garden or stewarding a sprawling country estate, planting a tree is an act of hope and care for the future.
But as with any worthwhile endeavour, success lies in the details. A hastily planted tree can struggle to establish, fail to thrive or even become a liability as it matures. The good news? With a little knowledge and preparation, you can give your tree the best possible start in life.
This guide will walk you through every step of the process, from selecting the right species for your garden to ensuring your young tree thrives in its new home. Let’s begin.
Choosing the Right Tree for Your Garden
Before you even think about digging a hole, take time to consider which tree will suit your garden best. This is where many well-intentioned gardeners go astray. A tree that looks charming in the nursery may grow into a towering giant that dominates your space, casts heavy shade, or causes problems with foundations and drainage.
Consider the Mature Size
Every tree has a mature height and spread, and these dimensions matter more than you might think. A willow might seem appealingly graceful when young, but it can reach 20 metres in height with roots that seek out water pipes and drains. On the other hand, a Japanese maple might top out at just four metres, making it perfect for smaller gardens.
Ask yourself: how much space do I have? Will this tree overshadow flower beds, patios or neighbouring properties? Will it interfere with overhead power lines or underground utilities? A little research now can save years of regret later.
Match the Tree to Your Climate and Soil
Britain’s climate is famously changeable, but even within these isles, conditions vary. A tree that flourishes in the mild, wet west of Scotland may languish in the drier, colder east of England. Similarly, soil type plays a crucial role. Some trees, like birches and pines, tolerate sandy, acidic soils. Others, such as field maples and hawthorns, prefer chalky, alkaline ground.
Test your soil’s pH if you’re unsure, and choose a species that naturally thrives in your local conditions. Native trees—oak, ash, birch, hazel—are often the safest bet, having evolved over millennia to suit British soils and weather.
Think About the Garden’s Microclimate
Even within a single garden, conditions can differ. Observe where frost lingers longest, where wind batters most fiercely, and where the sun lingers in the afternoon. A south-facing spot will be warmer and sunnier, ideal for sun-loving species like magnolias. A shaded corner might suit shade-tolerant trees like holly or yew.
The Shade Factor
Remember that a tree casts shade—sometimes a great deal of it. This can be a blessing on a hot summer’s day, but it can also limit what you can grow beneath it. Dense evergreens like laurel create year-round shade, while deciduous trees allow spring bulbs and woodland flowers to flourish before the canopy fills in.
If you’re planting near the house, consider how the tree’s shadow will move across windows and garden rooms throughout the day and across the seasons.
Selecting a Healthy Tree
Once you’ve decided on a species, it’s time to choose a specific tree. Not all trees are created equal, and a little scrutiny at the garden centre or nursery can make all the difference.
What to Look For
A healthy tree has a strong, straight trunk with no visible wounds, cracks or signs of disease. The bark should be intact and free from peeling or discolouration. Branches should be evenly spaced, not crossing or rubbing against one another.
Check the roots if possible. Containerised trees sometimes become pot-bound, with roots circling tightly around the base. These can struggle to grow outward once planted. Ideally, roots should be firm, white or light brown and free from foul odours.
Avoid trees with yellowing leaves, sparse foliage or signs of pest damage. A tree that’s been poorly cared for in the nursery will take longer to establish—if it establishes at all.
Bare-Root vs. Container-Grown
Trees are sold in two main forms: bare-root and container-grown. Bare-root trees are lifted from the ground during dormancy (November to March) and sold without soil around their roots. They’re often cheaper and establish more quickly, as their roots haven’t been confined. However, they must be planted immediately or heeled into the ground temporarily.
Container-grown trees can be planted almost year-round and are more convenient, though they tend to cost more. Both have their merits; choose based on timing and budget.
How to Plant Your Tree
Now comes the moment you’ve been waiting for: putting your tree in the ground. Done well, this sets the stage for a lifetime of healthy growth.
Choose the Planting Position
Revisit your earlier research. Ensure the spot you’ve chosen offers enough space for the tree’s mature size, suits its soil and light requirements, and won’t interfere with structures or utilities. Mark the position clearly.
Avoid planting too close to buildings—roots can undermine foundations, and branches can damage roofs and gutters. A general rule of thumb is to plant at least half the tree’s mature height away from structures.
Prepare the Ground
Good soil preparation is essential. Begin by clearing a circular area at least one metre in diameter, removing all weeds, grass and debris. Dig a hole twice the width of the root ball but no deeper—the tree should sit at the same level it was growing in the nursery, with the root flare (where the trunk widens at the base) just visible above the soil.
Loosen the soil at the bottom and sides of the hole with a fork to encourage roots to spread. If your soil is heavy clay, consider mixing in some organic matter or grit to improve drainage. Sandy soils benefit from added compost to retain moisture.
Position the Tree
Carefully remove the tree from its container, teasing out any circling roots. If planting bare-root, spread the roots evenly in the hole. Position the tree so it stands upright and straight, then backfill with the excavated soil, firming gently as you go to eliminate air pockets. Water thoroughly.
Staking and Support
Young trees often need support while their roots establish. Drive a sturdy wooden stake into the ground at a 45-degree angle, on the side of the prevailing wind, before planting. Secure the tree to the stake with a flexible tree tie, positioned about a third of the way up the trunk. Check and loosen the tie periodically as the tree grows to prevent it from cutting into the bark.
Most trees need staking for only one to three years. Once the roots have taken hold, remove the stake to allow the trunk to flex and strengthen naturally.
Mulching
Apply a generous layer of mulch—bark chips, well-rotted compost, or leaf mould—around the base of the tree, leaving a small gap around the trunk itself to prevent rot. Mulch suppresses weeds, retains moisture, and adds valuable organic matter to the soil as it breaks down. Aim for a layer at least 5cm deep, extending to the edge of the planting hole.
Watering and Feeding
Even the toughest tree needs care in its first few years.
Watering
Water your newly planted tree regularly, especially during dry spells. A thorough soak once a week is better than frequent shallow watering, as it encourages deep root growth. In the first summer, this is critical. By the second or third year, most trees will have established sufficiently to cope with typical British rainfall.
Feeding
Trees planted in good soil rarely need supplementary feeding. However, if growth seems slow or foliage appears pale, a spring application of general-purpose fertiliser or well-rotted manure can help. Avoid over-feeding, which encourages soft, sappy growth vulnerable to pests and frost damage.
Formative Pruning
Pruning might seem daunting, but a little attention in the early years helps shape a strong, well-balanced tree.
Why Prune?
Formative pruning removes damaged, crossing, or badly placed branches, encouraging a healthy framework. It’s best done in late winter or early spring, when the tree is dormant and wounds heal quickly.
What to Remove
Start by cutting away any dead, diseased, or broken wood. Next, look for branches that cross or rub against one another—these can create wounds that invite infection. Remove the weaker of the two. Aim to maintain a single leading shoot (the main upward-growing branch) and a well-spaced arrangement of side branches.
Keep cuts clean and just above a bud or branch junction. Avoid leaving stubs, which can rot, and don’t use wound paint—modern research suggests it does more harm than good.
When to Call in a Professional
Large trees or complex pruning tasks are best left to qualified arborists. Attempting ambitious cuts without the right equipment or knowledge can be dangerous and may damage the tree.
Additional Care and Advice
Protect from Pests and Disease
Young trees can fall prey to rabbits, deer and voles. A tree guard or spiral wrap around the trunk offers protection. Keep an eye out for signs of disease—unusual leaf spots, cankers or fungal growth—and consult a tree specialist if concerned.
Be Patient
Trees grow slowly. A sapling that seems insignificant in its first year may still look modest in its fifth. But given time, it will reward your patience with shade, beauty and a sense of permanence that few other garden features can match.
Celebrate Seasonal Changes
One of the joys of planting a tree is watching it change with the seasons. Spring blossom, summer foliage, autumn colour, and the stark beauty of winter branches—each has its charm. Choose a tree that offers year-round interest, and your garden will never feel dull.
Planting a Tree is Planting the Future
To plant a tree is to believe in tomorrow. It’s an investment in beauty, biodiversity, and the health of the planet. Whether you’re planting an oak that will outlive you by centuries or a cherry tree that will delight your children with its spring blossom, you’re making a contribution that extends far beyond your own lifetime.
So take your time, do your research, and plant with care. The tree you nurture today will stand as a testament to your stewardship for generations to come..