Moving into a new build home is exciting. You have fresh walls, modern fixtures, and a blank canvas waiting outside your door. But that bare patch of earth comes with its own challenges. The soil has likely been compacted by heavy machinery, stripped of nutrients, and left lifeless. Creating a flourishing garden from this starting point takes patience, planning, and a bit of know-how.
Here’s some thoughts and essential steps to transform your new build plot into a healthy, vibrant garden. From rejuvenating tired soil to thinking strategically about structure and seasons, you’ll learn how to lay the groundwork for long-term success.
Start with the soil
Healthy soil is the foundation of any successful garden. Without it, even the most carefully chosen plants will struggle. Unfortunately, new build plots rarely come with soil that’s ready to support plant life. Construction work compacts the ground, removing air pockets and making it difficult for roots to penetrate. Topsoil is often stripped away or mixed with subsoil, leaving you with a nutrient-poor base.
Assess the damage
Before you do anything else, take time to understand what you’re working with. Dig down about 30 centimetres in several spots across your plot. Is the soil heavy and clay-like? Does it drain poorly, leaving puddles after rain? Or is it sandy and quick to dry out? Understanding your soil type will help you choose the right approach to improvement.
If the soil is severely compacted, you may notice a hard layer just below the surface. This pan of compressed earth prevents water and roots from moving freely. Breaking it up is essential.
Rejuvenate and rebuild
Start by aerating the soil. Use a garden fork to break up compacted areas, working methodically across the plot. For larger spaces, consider hiring a rotavator or getting help from a professional. Once you’ve loosened the soil, it’s time to add organic matter.
Compost, well-rotted manure, and leaf mould are all excellent choices. They improve soil structure, boost nutrient levels, and encourage beneficial organisms like earthworms. Spread a generous layer—at least five to ten centimetres—across the surface and dig it in. This process may need repeating over the first year or two as the soil continues to settle and improve.
If your budget allows, consider bringing in fresh topsoil. A layer of 15 to 20 centimetres can make an immediate difference, particularly if the existing soil is very poor. Just make sure the topsoil is high quality and free from weeds.
Think structure first
Once your soil is in better shape, resist the temptation to rush straight into planting. A successful garden needs structure. Without it, your space can feel haphazard and difficult to maintain.
Plan your layout
Start by thinking about how you’ll use the garden. Do you want a lawn for children to play on? Space for growing vegetables? A quiet corner for relaxing? Sketch out a rough plan, marking pathways, borders, and any hard landscaping features like patios or sheds.
Paths are particularly important. They define the flow of your garden and make it easier to access different areas without compacting the soil. Use materials that suit your style—gravel, paving slabs, bark chippings, or even reclaimed bricks all work well.
Create layers and focal points
A well-structured garden has depth. Use taller plants and features at the back of borders, with shorter ones at the front. Consider adding vertical interest with trellises, arches, or small trees. These elements draw the eye upwards and create a sense of maturity, even when the garden is still young.
Focal points also add character. A well-placed bench, a striking container, or a small water feature can anchor a space and give it purpose.
Plant for seasons, not moments
It’s easy to get carried away at the garden centre, filling your trolley with whatever looks beautiful that day. But if you want a garden that looks good year-round, you need to think beyond the present moment.
Choose plants for every season
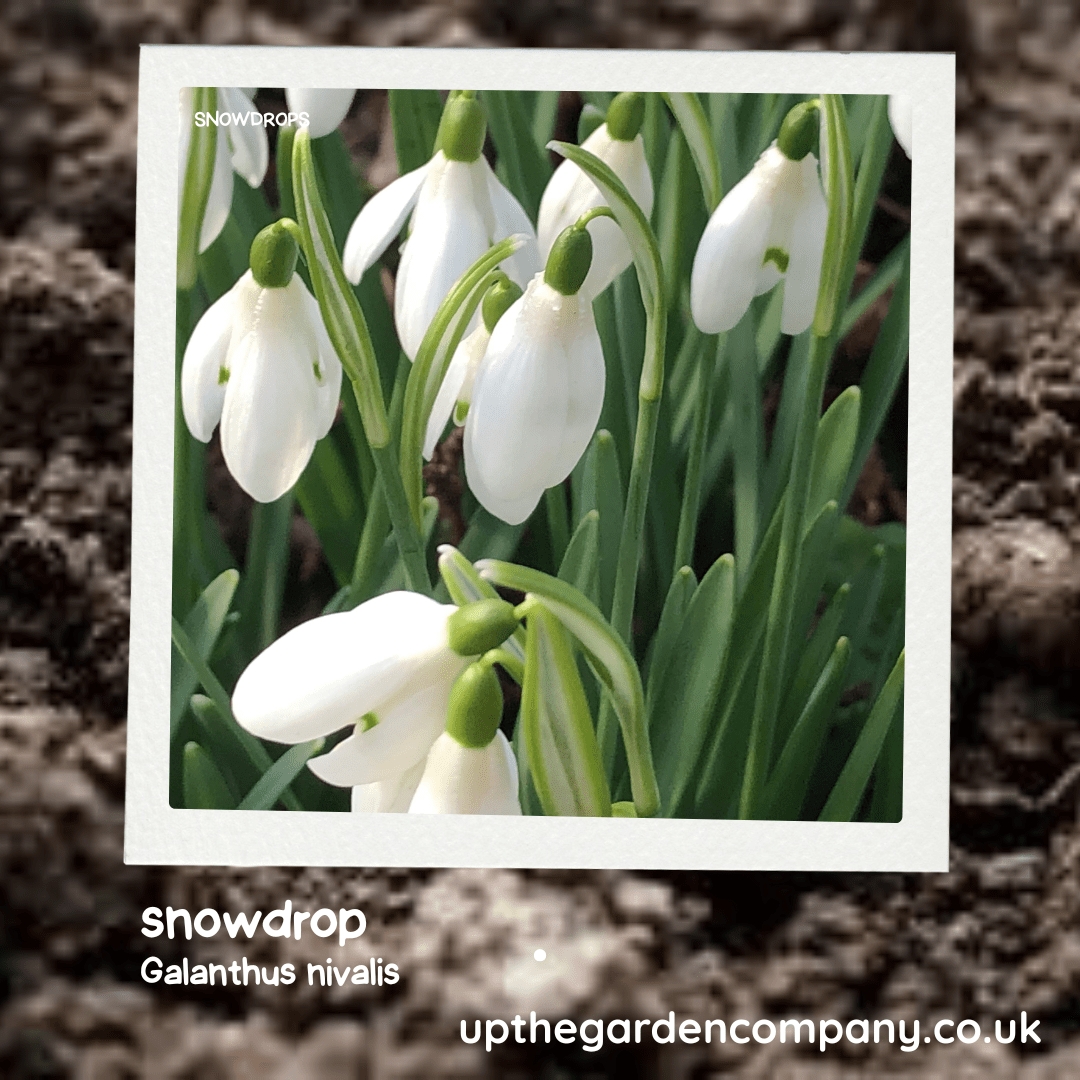
Aim for a mix of plants that offer interest throughout the year. Spring bulbs like daffodils and crocuses bring early colour. Summer perennials such as lavender, echinacea, and geraniums keep borders vibrant during the warmer months. Autumn brings fiery tones from Japanese maples and ornamental grasses, while evergreens like holly and box provide structure through winter.
Don’t forget about texture and form. Even when flowers aren’t in bloom, plants with interesting foliage or striking silhouettes can hold attention.
Be patient with planting
New gardeners often plant too densely, eager to fill empty space. But plants need room to grow. Follow spacing guidelines on plant labels and resist the urge to overcrowd. In the meantime, use annuals or fast-growing ground covers to fill gaps. These can be removed or cut back as permanent plants mature.
Mulching around young plants helps retain moisture, suppress weeds, and improve soil as it breaks down. A layer of bark, compost, or gravel works well.
Build your garden community
Gardening doesn’t have to be a solitary activity. Connecting with others who share your interest can provide inspiration, advice, and a sense of belonging.
Join local gardening groups or online communities where you can ask questions, share progress, and learn from experienced gardeners. Many areas also have plant swaps or community gardens where you can exchange cuttings, seeds, and ideas.
If you’re unsure where to start, visit nearby gardens or open spaces for inspiration. Observing how plants grow in similar conditions to yours can help you make informed choices about what to include in your own plot.
Keep learning and adapting
Your garden will change over time, and so will your understanding of it. Plants will thrive, struggle, or surprise you. Soil will continue to improve with care. Seasons will reveal what works and what doesn’t.
Stay curious. Experiment with new plants, try different techniques, and don’t be afraid to move things around if they’re not quite right. Gardening is as much about observation and adaptation as it is about following rules.
Take notes on what you plant and when. Record successes and failures. Over time, this will help you build a deeper knowledge of your garden and what it needs to flourish.
Create a garden that grows with you
Transforming a new build plot into a thriving garden takes time, but the process is deeply rewarding. By focusing on soil health, planning for structure, and planting with all seasons in mind, you’ll create a space that’s resilient, beautiful, and uniquely yours.
Start small if you need to. Even a single well-tended border or a handful of carefully chosen plants can make a difference. As your garden matures, so will your confidence and connection to the space.
Explore more gardening tips and join a community of fellow garden enthusiasts to keep your inspiration growing.
Further Reading: Transform Your Garden with UpTheGarden Company, Sustainable Hardscaping: Build a Beautiful, Eco-Friendly Garden, Create a Sanctuary Space: Your Haven of Calm at Home, Garden Trends 2026: Reconnect with Nature, Winter Planning: Design Your Dream Border for Next Year
Inspiration: Follow Us on Instagram, Threads, BlueSky, Twitter, TikTok and Pinterest.