Why Sharp Garden Tools Matter

Gardening is an activity that requires precision and care. A crucial, yet often overlooked, aspect of effective garden maintenance is the condition of your tools. Using dull secateurs, shears and loppers can damage plants, increase the physical effort required, and ultimately lead to a less healthy garden. Keeping your tools sharp ensures clean cuts, promotes plant health, and makes your gardening tasks more efficient and enjoyable.

Why Sharp Garden Tools Matter

Using sharp tools is fundamental to good horticultural practice. The benefits extend from the health of your plants to your own physical ease.

  • Promotes Plant Health and Faster Healing: A sharp blade makes a clean, precise cut that damages fewer plant cells. This allows the plant to heal more quickly, much like a surgical incision. A clean cut is less susceptible to diseases and pests, which can easily enter through the ragged wound left by a dull blade. Dull tools crush and tear plant tissues, creating a larger surface area for infection and causing unnecessary stress to the plant.
  • Reduces Physical Strain: Cutting with a sharp tool requires significantly less force. This reduces strain on your hands, wrists and arms, making gardening a more comfortable and less fatiguing activity. For gardeners who spend many hours pruning, this can help prevent repetitive strain injuries.
  • Improves Pruning Accuracy: Sharp tools give you greater control, allowing you to make precise cuts exactly where you intend. This is important when shaping plants, removing specific branches, or deadheading flowers. Dull blades can slip or fail to cut through a branch cleanly, potentially damaging parts of the plant you intended to keep.
  • Extends Tool Lifespan: Regular sharpening and maintenance prevent the formation of rust and nicks on the blades. By keeping the cutting edge in good condition, you reduce the overall wear and tear on the tool, ensuring it remains functional for many years.

What You Need to Sharpen Your Tools

Before you begin, gather the necessary equipment. Having the right supplies will make the sharpening process safer and more effective.

Burgon and Ball Garden Tool Maintenance Equipment.
Sharpening Stone, Oil, Blade Edge Restorer, Sharpening Steel
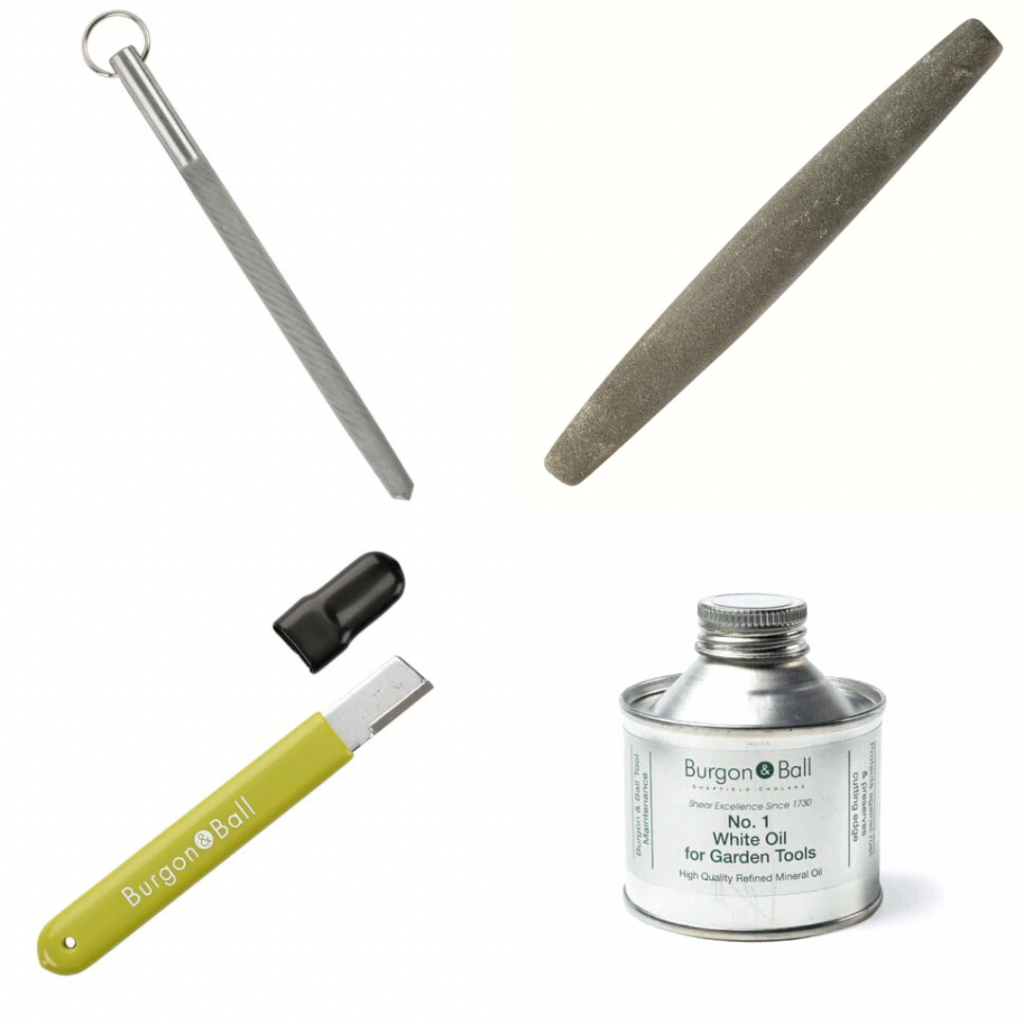
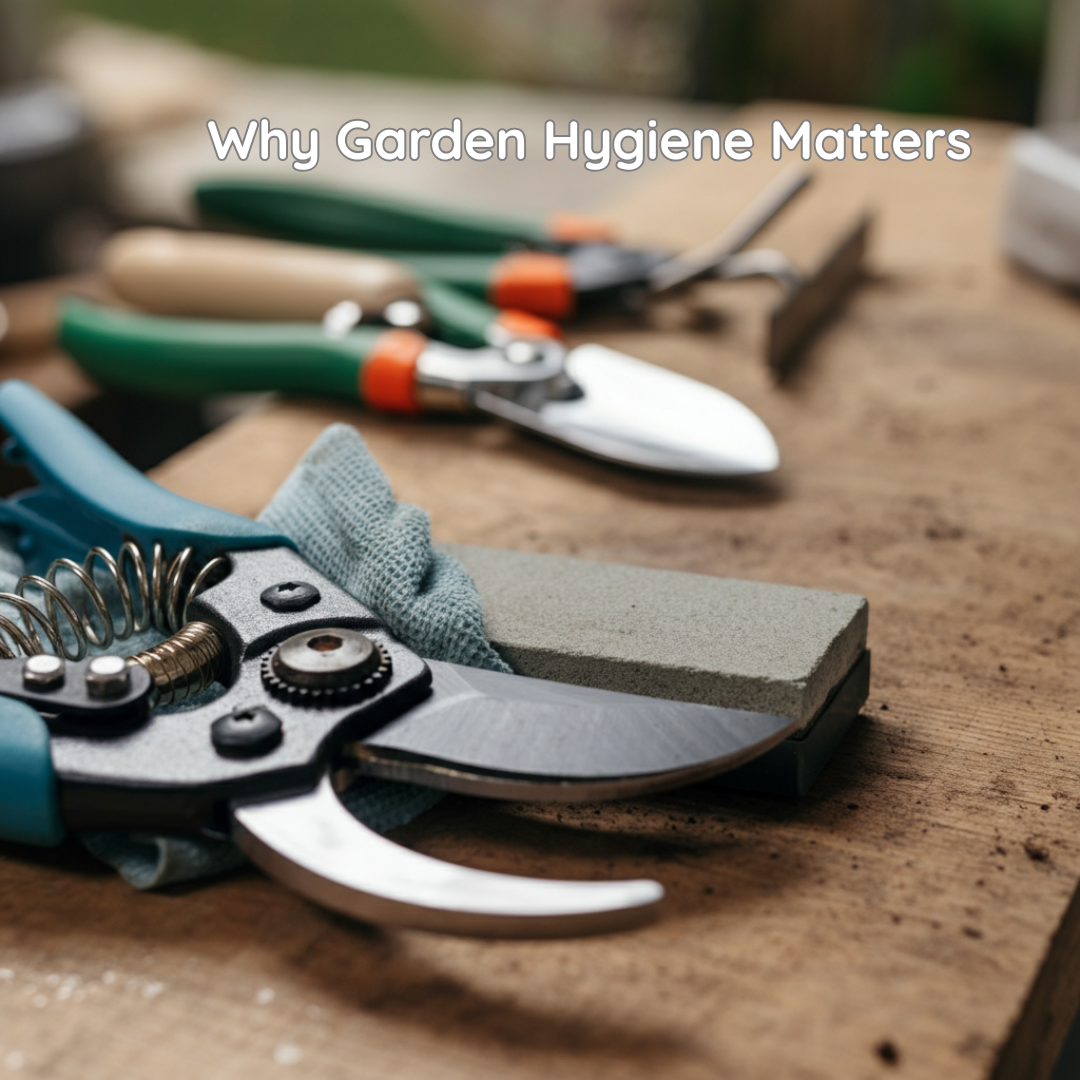
  • Sharpening Stone (Whetstone) or Diamond File: These are the primary tools for sharpening. A whetstone is a traditional option, available in various grits (coarseness). A medium-grit stone is usually sufficient for garden tools. Diamond files are more aggressive and work faster, making them ideal for very dull or damaged blades.
  • Safety Gloves: Heavy-duty gloves will protect your hands from accidental cuts.
  • Eye Protection: Safety glasses are recommended to shield your eyes from any metal filings.
  • Vice or Clamp: A vice provides a secure way to hold the tool, freeing both of your hands for sharpening. This is particularly useful for larger tools like shears.
  • Cleaning Supplies: You will need a stiff brush, soapy water, and a cloth to clean the tools before sharpening. Methylated spirits can be used to sterilise the blades and remove stubborn sap.
  • Lubricating Oil: A product like WD-40 or a general-purpose lubricating oil is essential for protecting the blades from rust after sharpening.

How to Sharpen Your Garden Tools: A Step-by-Step Guide

The following method can be applied to most single-bladed cutting tools, such as secateurs and loppers, as well as double-bladed shears.

1. Clean the Tool Thoroughly

Before you can sharpen a blade, it must be completely clean. Dirt, sap, and rust can clog your sharpening file and prevent you from achieving a clean edge.

  • Disassemble the tool if possible. This makes it easier to access the blades. Use a spanner or screwdriver to undo the central nut.
  • Use a stiff brush and warm, soapy water to scrub away any dirt and debris.
  • For stubborn sap, soak a cloth in methylated spirits and rub it over the blades until the residue dissolves.
  • Dry the tool completely with a clean cloth to prevent immediate rusting.

2. Secure the Blade

For safety and precision, it is important that the tool is held firmly in place.

  • If you have a bench vice, secure the tool or the individual blade in the vice with the bevelled edge facing upwards.
  • If you do not have a vice, you can hold smaller tools like secateurs firmly in your non-dominant hand, resting your arm on a stable surface. Always ensure the blade is pointing away from your body.

3. Sharpen the Bevelled Edge

Most garden tools, like bypass secateurs, have a single bevelled cutting edge. The other blade is flat and should not be sharpened.

  • Identify the bevel, which is the angled surface of the cutting blade. This is the only part you need to sharpen.
  • Hold your sharpening stone or file at the same angle as the existing bevel (usually between 10-20 degrees). Maintaining this angle is the most critical part of the process.
  • Press the file firmly against the blade and push it in one direction, from the base of the blade to the tip. Follow the curve of the blade.
  • Lift the file and return to the starting position. Do not saw back and forth, as this can damage the edge.
  • Repeat this motion 10-20 times, applying consistent pressure. You should start to see a new, shiny edge forming.
  • For shears with two bevelled blades, repeat this process on the second blade.

4. Remove the Burr

Sharpening creates a small ridge of metal on the flat side of the blade, known as a burr. This needs to be removed to create a truly sharp edge.

  • Turn the blade over.
  • Lay your sharpening stone flat against the back of the blade.
  • Make one or two gentle passes to remove the burr. The back of the blade should be perfectly flat, so do not try to create a new angle.

5. Reassemble and Lubricate

Once you are satisfied with the sharpness, it is time to reassemble and protect the tool.

  • Wipe the blades with a clean cloth to remove any metal filings.
  • Apply a light coat of lubricating oil to all metal parts, including the blades, spring, and pivot joint. This will prevent rust and ensure a smooth cutting action.
  • Reassemble the tool, ensuring the central nut is tight but still allows for free movement.

Maintaining Your Tools

Regular maintenance will keep your tools in good condition and reduce the frequency of major sharpening sessions.

  • How Often to Sharpen: For avid gardeners, sharpening tools once or twice a season is a good rule of thumb. However, if you notice that your tools are crushing stems instead of cutting them cleanly, it is time to sharpen them, regardless of when they were last maintained.
  • Cleaning After Each Use: A quick wipe-down after each use can make a significant difference. Use a cloth to remove any soil and moisture. For sap, use methylated spirits.
  • Proper Storage: Store your tools in a dry place, such as a shed or garage, to protect them from moisture and prevent rust. Do not leave them outside.

Invest in Healthier Plants

Maintaining sharp garden tools is a simple but vital practice for any gardener. It ensures clean, healthy cuts that protect your plants from disease, reduces physical effort and prolongs the life of your equipment. By dedicating a small amount of time to cleaning and sharpening your secateurs and shears, you are making a valuable investment in the long-term health and beauty of your garden.

Further reading: Why Garden Hygiene Matters, Maintaining your Garden ToolsHow to Choose Garden Tools

Follow Us on Instagram for Daily Gardening Inspiration 

Why Garden Hygiene Matters

Poor garden hygiene remains one of the most overlooked causes of plant disease and garden failure. Research conducted by the Royal Horticultural Society indicates that contaminated tools and containers contribute to approximately 40% of preventable plant diseases in domestic gardens. Understanding and implementing proper sanitation practices can significantly reduce plant mortality rates and improve overall garden health.

Garden hygiene encompasses the systematic cleaning and maintenance of all gardening equipment, containers and workspaces to prevent the spread of pathogens. These disease-causing organisms include bacteria, fungi, viruses and pests that can devastate plant populations when allowed to proliferate unchecked.

The economic impact of poor garden hygiene extends beyond plant replacement costs. Contaminated soil, repeated treatment expenses and reduced crop yields create substantial financial burden for gardeners. Implementing proper hygiene protocols represents a cost-effective preventive measure that protects both plant health and garden investment.

The Hidden Dangers of Contaminated Garden Tools

Garden tools serve as primary vectors for disease transmission between plants. Pruning shears, secateurs, and loppers create open wounds on plants, providing direct entry points for pathogens. When tools remain unsterilised between uses, they effectively inoculate healthy plants with disease-causing organisms from previously infected specimens.

Bacterial infections spread particularly rapidly through contaminated cutting tools. Fire blight, a devastating bacterial disease affecting fruit trees, can spread to entire orchards through a single infected pruning tool. The bacteria Erwinia amylovora survives on tool surfaces for extended periods, remaining viable for transmission weeks after initial contact.

Fungal spores present another significant concern. These microscopic reproductive structures adhere to tool surfaces and remain dormant until suitable growing conditions arise. Common fungal diseases such as black spot on roses, canker on fruit trees, and blight on tomatoes spread efficiently through contaminated equipment.

Viral infections transmitted through tools prove particularly problematic because no chemical treatments exist for infected plants. Tobacco mosaic virus, cucumber mosaic virus and various other plant viruses spread through the sap transfer that occurs during cutting and pruning activities.

Essential Tool Sterilisation Methods

Effective tool sterilisation requires systematic approach and appropriate disinfectants. The most reliable method involves using a 10% bleach solution, prepared by mixing one part household bleach with nine parts water. This concentration effectively eliminates bacteria, fungi, and viruses without causing excessive corrosion to metal tools.

Application procedure begins with removing visible debris from tool surfaces using a stiff brush. Organic matter can protect pathogens from disinfectants, reducing treatment effectiveness. Following debris removal, tools should be completely submerged in the bleach solution for a minimum of 30 seconds to ensure thorough sterilisation.

Alternatively, 70% isopropyl alcohol provides rapid sterilisation for immediate use between plants. Alcohol-based disinfectants work quickly, requiring only brief contact time, but may require more frequent application during extended pruning sessions. Pre-soaked cloths or spray bottles facilitate convenient application in garden settings.

For gardeners preferring non-chemical options, flame sterilisation using a small torch effectively eliminates pathogens from metal tool surfaces. This method requires careful handling to prevent tool damage and personal injury. Heat treatment should continue until tool surfaces reach visible red heat, indicating sufficient temperature for pathogen destruction.

Regular maintenance enhances sterilisation effectiveness. Sharp, well-maintained tools create cleaner cuts that heal more rapidly, reducing infection opportunities. Dull blades create ragged wounds that remain vulnerable to pathogen entry for extended periods.

Container Contamination: The Overlooked Threat

Plant containers, including pots, seed trays and planters, harbour pathogens that can persist for multiple growing seasons. Fungi such as Pythium and Phytophthora thrive in moist container environments, causing root rot and damping-off diseases in seedlings and established plants.

Used potting containers often contain residual organic matter that supports pathogen survival. Decomposing root fragments, old growing media and accumulated mineral deposits create ideal conditions for disease organisms to multiply and spread to new plantings.

Seed trays present particular challenges due to their multi-cell design and frequent reuse. Contamination in a single cell can spread throughout the entire tray system, affecting multiple seedlings simultaneously. The confined growing environment accelerates disease development and transmission between adjacent plants.

Commercial greenhouse operations recognise container sanitation as critical for maintaining plant health. Studies conducted by agricultural extension services demonstrate that proper container sterilisation can reduce seedling mortality by up to 75% compared to untreated containers.

Comprehensive Container Cleaning Protocol

Effective container sanitation begins with complete removal of all growing media and plant debris. Stubborn residue requires mechanical removal using brushes or scrapers to ensure complete surface access for disinfectants. Mineral deposits from hard water or fertiliser accumulation should be addressed using appropriate cleaning agents.

The standard cleaning solution consists of one part bleach mixed with nine parts water, identical to tool sterilisation protocols. Containers should be completely submerged or thoroughly sprayed with this solution, ensuring all interior and exterior surfaces receive treatment. Contact time of at least 10 minutes allows for complete pathogen elimination.

Following disinfection, containers require thorough rinsing with clean water to remove bleach residue that could harm plant roots. Multiple rinses ensure complete chemical removal, particularly important for containers used for sensitive plants or edible crops.

Alternative cleaning methods include commercial greenhouse disinfectants specifically formulated for container sanitation. These products often provide broader spectrum pathogen control and may offer longer-lasting residual effects compared to household bleach solutions.

Large containers or permanent planters that cannot be submerged benefit from spray application methods. Garden sprayers or pump bottles facilitate even coverage of disinfectant solutions on oversized containers or fixed installations.

Year-Round Hygiene Maintenance

Seasonal maintenance schedules help maintain garden hygiene throughout the growing year. Spring preparation should include comprehensive tool and container cleaning before the growing season begins. This prevents overwintering pathogens from infecting new growth and plantings.

Summer maintenance focuses on prompt removal of diseased plant material and immediate tool sterilisation following contact with infected specimens. Regular inspection and removal of declining plants prevents disease establishment and spread during peak growing periods.

Autumn cleanup requires particular attention to thorough removal of fallen leaves, fruit, and other organic debris that can harbour overwintering pathogens. Comprehensive tool cleaning and proper storage preparation protects equipment during dormant periods.

Winter storage practices should include clean, dry tool storage in protected environments. Moisture exposure during storage can promote corrosion and provide conditions for pathogen survival on tool surfaces.

Building Long-Term Garden Health

Consistent garden hygiene practices create cumulative benefits that compound over successive growing seasons. Reduced pathogen loads in soil and on equipment lead to healthier plants, improved yields and decreased need for chemical interventions.

Proper hygiene protocols support integrated pest management strategies by reducing disease pressure that can weaken plants and increase susceptibility to insect damage. Healthy plants demonstrate improved resistance to environmental stresses and recover more rapidly from adverse conditions.

Investment in quality cleaning supplies and equipment pays dividends through reduced plant losses and improved garden productivity. Simple tools such as dedicated cleaning brushes, spray bottles and appropriate disinfectants represent minimal costs compared to plant replacement expenses.

Regular hygiene practices also enhance the gardening experience by providing confidence in plant health outcomes and reducing frustration associated with recurring disease problems. Systematic approaches to garden sanitation create more predictable and enjoyable gardening results.

Protecting Your Garden Investment

Garden hygiene represents fundamental plant health management that determines success or failure in gardening endeavours. The systematic cleaning and sterilisation of tools and containers prevents disease transmission, reduces plant mortality, and protects garden investments.

Implementing proper hygiene protocols requires minimal time and expense while providing substantial returns through improved plant health and reduced losses. These preventive measures prove far more cost-effective than treating established disease problems or replacing infected plants.

Gardeners who prioritise hygiene practices position themselves for sustained success across multiple growing seasons. Clean tools, sterile containers, and pathogen-free growing environments create the foundation for thriving gardens and rewarding gardening experiences.

Further Reading: Maintaining your Garden Tools, How to Choose Garden Tools

Follow Us on Instagram for Daily Gardening Inspiration 💚

How to Plant a Natural Dye Garden

Imagine creating vibrant, lasting colours for your fabrics using nothing more than the plants growing in your own back garden. From the fiery oranges of coreopsis to the deep indigos of woad, nature offers a rich palette waiting to be discovered. This ancient practice of using plants for dyeing is not only a sustainable way to colour textiles but also a deeply rewarding way to connect with the seasons and the history of craft.

A dyer’s garden is a space dedicated to cultivating plants specifically for their ability to produce natural dyes. It’s a living library of colour, where each root, leaf and flower holds the potential for transformation.

The Rich History of Dye Gardens

Long before the invention of synthetic dyes in the mid-19th century, humans relied entirely on the natural world for colour. For thousands of years, civilisations across the globe cultivated specific plants to dye their textiles, creating colours that signified everything from royalty and wealth to cultural identity. The knowledge of which plants yielded which hues was a closely guarded secret, passed down through generations of skilled artisans.

In medieval Europe, dyer’s gardens were essential to the textile trade. Woad (Isatis tinctoria) was cultivated extensively for its brilliant blue, while weld (Reseda luteola) provided a vivid yellow and madder (Rubia tinctorum) produced a range of reds. These three plants formed the cornerstone of the European dyer’s palette, capable of creating a full spectrum of colours when over-dyed. Monasteries often maintained their own extensive dye gardens, using the plants to colour vestments and create illuminated manuscripts.

The arrival of synthetic dyes in 1856, starting with William Henry Perkin’s discovery of mauveine, marked a dramatic shift. These new chemical dyes were cheaper, quicker to use, and offered a consistency that natural dyes could not always guarantee. As a result, the cultivation of dye plants dwindled, and much of the traditional knowledge was nearly lost. Today, however, there is a powerful resurgence of interest in natural dyeing, driven by a desire for sustainability, a connection to craft, and the uniquely beautiful, living colours that only plants can provide.

Essential Plants for a Dyer’s Garden

Creating a dyer’s garden is an exciting venture. Many traditional dye plants are well-suited to the British climate and others can be grown easily as annuals.

1. Madder

  • Botanical Name: Rubia tinctorum
  • Description: A sprawling perennial herb with small, star-shaped yellow flowers and whorls of lance-shaped leaves. It can grow quite unruly, so give it a dedicated space where it can spread.
  • History: Madder has been used for over 5,000 years to produce a range of red dyes. It was famously used to dye the “red coats” of the British army and was a vital crop in Europe until the late 19th century.
  • Colour & Part Used: Madder produces a spectrum of reds, oranges, and pinks. The valuable dye comes from the roots, which must be harvested after at least three years of growth for the strongest colour.

2. Weld

  • Botanical Name: Reseda luteola
  • Description: An unassuming biennial plant that forms a rosette of leaves in its first year and sends up a tall, slender spike of greenish-yellow flowers in its second, reaching up to 1.5 metres.
  • History: Weld produces one of the most lightfast natural yellow dyes available. It was highly prized in ancient Rome and medieval Europe and was used to create the beautiful yellows and greens (when over-dyed with woad) seen in historical tapestries.
  • Colour & Part Used: Weld gives a brilliant, clear lemon yellow. The dye is extracted from the entire plant—leaves, stems and flowers—harvested just as it begins to flower.

3. Woad

  • Botanical Name: Isatis tinctoria
  • Description: A biennial from the brassica family. It forms a rosette of long, blue-green leaves in its first year, followed by a tall stalk with clusters of small, bright yellow flowers in the second.
  • History: Woad is Europe’s native source of indigo dye and has a history stretching back to the Iron Age. Ancient Britons, including the Picts, were said to have painted their bodies with woad for battle. It was a cornerstone of the European textile industry until the 17th century.
  • Colour & Part Used: Woad produces a beautiful and classic indigo blue. The pigment is extracted from the leaves harvested in the first year, through a complex fermentation process.

4. Japanese Indigo

  • Botanical Name: Persicaria tinctoria
  • Description: A fast-growing annual that thrives in warm, sunny conditions. It has broad, pointed leaves and produces small, pinkish-white flowers in late summer. It is easier to grow and process for indigo than woad.
  • History: As its name suggests, this plant has been the primary source of indigo in Japan for centuries, used to dye fabrics for everything from samurai garments to peasant workwear.
  • Colour & Part Used: This plant yields a stunning indigo blue from its leaves. Multiple harvests can be taken throughout the summer before the plant flowers.

5. Coreopsis

  • Botanical Name: Coreopsis tinctoria
  • Description: Also known as Dyer’s Coreopsis or Plains Coreopsis, this is a cheerful and easy-to-grow annual. It produces masses of daisy-like flowers with yellow petals and deep red-brown centres.
  • History: Native to North America, Coreopsis was used by various indigenous peoples for dyeing. It is now a popular choice in modern dye gardens for its ease of cultivation and the brilliant colours it produces.
  • Colour & Part Used: The flower heads produce a range of rich colours from golden yellow and bright orange to deep russet and mahogany red.

6. Hollyhock

  • Botanical Name: Alcea rosea
  • Description: A classic cottage garden biennial or short-lived perennial, known for its tall, stately spikes of large, showy flowers in a wide array of colours.
  • History: While primarily grown as an ornamental, the darker varieties of hollyhock have long been used in folk dyeing traditions to create subtle shades.
  • Colour & Part Used: The deep red, purple, and near-black flowers can be used to create shades of mauve, lavender, and soft grey. The colours are beautiful but not always as lightfast as other dye plants.

7. Lady’s Bedstraw

  • Botanical Name: Galium verum
  • Description: A low-growing, sprawling perennial with fine, needle-like leaves and clouds of tiny, honey-scented yellow flowers in summer. It is a common wildflower in the UK.
  • History: A relative of madder, Lady’s Bedstraw was traditionally used to dye textiles red and to curdle milk for cheese-making. Its name comes from its use as a stuffing for mattresses, where its scent helped to repel fleas.
  • Colour & Part Used: Similar to madder, the roots of Lady’s Bedstraw produce a red dye, while the flowering tops can yield a soft yellow.

8. Dahlia

  • Botanical Name: Dahlia spp.
  • Description: A tuberous perennial beloved for its spectacular, varied flower forms and colours. They bloom from mid-summer until the first frosts, providing a late-season source of dye.
  • History: Originating in Mexico, dahlias were primarily grown for their beauty. However, dyers have discovered that their vibrant petals can also impart beautiful colours to fabric.
  • Colour & Part Used: The flower heads (specifically the petals) of yellow, orange, and red varieties can be used to produce shades of yellow and orange.

9. Onion

  • Botanical Name: Allium cepa
  • Description: The humble kitchen onion is a surprisingly potent dye source. It is a biennial plant grown as an annual for its edible bulb.
  • History: Using onion skins for dyeing is a practice rooted in frugality and tradition, found in cultures worldwide. It is one of the most accessible and reliable natural dyes.
  • Colour & Part Used: The papery outer skins of yellow onions produce a range of beautiful golden yellows and rusty oranges. The skins of red onions yield shades of khaki green, amber, and brown.

10. Marigold

  • Botanical Name: Tagetes spp.
  • Description: French and African marigolds are hardy annuals known for their pungent scent and vibrant yellow, orange, and red flowers. They are incredibly easy to grow from seed.
  • History: Marigolds have been used for dyeing for centuries, particularly in India, where they are used to create the brilliant yellows seen in celebratory textiles and are offered in religious ceremonies.
  • Colour & Part Used: The flower heads give a strong and reliable yellow to deep orange dye that is very lightfast, especially on wool.

How to Plant and Maintain Your Dye Garden

Creating your dyer’s garden follows the same principles as any other garden, with a few special considerations.

Planning Your Space

  • Sunlight: Most dye plants, including woad, weld, Japanese indigo and coreopsis, thrive in full sun (at least six hours of direct sunlight per day).
  • Soil: Good drainage is key. Most of these plants are not fussy, but they will not tolerate waterlogged soil. Amending heavy clay soil with compost or horticultural grit will improve its structure.
  • Space: Some plants, like madder, are perennials that will spread and need a permanent, dedicated bed. Annuals like Japanese indigo and coreopsis can be planted in beds or large containers.

Planting and Care

  • Sowing Seeds: Annuals like coreopsis, marigolds, and Japanese indigo are best sown indoors in early spring and planted out after the last frost. Biennials like woad and weld can be sown directly into the garden in late summer to establish before winter.
  • Watering: Water your plants regularly after planting until they are established. Once established, many dye plants are quite drought-tolerant, but they will produce more dye material with consistent watering during dry spells.
  • Feeding: Generally, dye plants do not require heavy feeding. Over-fertilising can lead to lush leaf growth at the expense of dye concentration. A light top-dressing of compost in the spring is usually sufficient.
  • Weeding: Keep your dye beds well-weeded, especially when the plants are young, to reduce competition for light, water, and nutrients.

Harvesting and Storing Your Dye Plants

The timing of your harvest is crucial for achieving the best colours.

  • Flowers (Coreopsis, Marigold, Dahlia): Harvest flower heads when they are fully open. They can be used fresh or dried for later use. To dry, spread them in a single layer on a screen or hang them in bunches in a dark, airy place. Store dried flowers in paper bags or airtight jars away from direct sunlight.
  • Leaves (Woad, Japanese Indigo): Harvest leaves for indigo before the plant starts to flower, as this is when the indican pigment is at its highest concentration. These leaves must be used fresh for the best results.
  • Whole Plants (Weld): Harvest weld just as the flowers begin to open. The entire plant can be hung upside down to dry for later use.
  • Roots (Madder): Madder roots should not be harvested until the plants are at least three years old. Dig them up in the autumn, wash them thoroughly, chop them into small pieces, and dry them completely before storing.

Using Your Plants to Dye Fabric

The final step is to transform your harvest into colour. While each plant has its specific requirements, the general process for most (excluding indigo) involves two key stages: mordanting and dyeing.

1. Mordanting Your Fabric

Mordanting is the process of pre-treating your fabric with a metallic salt, which acts as a binder between the dye and the fibre, ensuring a permanent, lightfast colour. Alum (potassium aluminium sulphate) is the most common and safest mordant.

  • Choose Your Fibres: Natural fibres like wool, silk, cotton and linen work best. Wool and silk (protein fibres) take up dye more readily than cotton and linen (cellulose fibres).
  • Process: Weigh your dry fabric. Use about 15% alum to the weight of your fabric. Dissolve the alum in hot water, then add it to a large pot of water. Add your pre-wetted fabric, heat gently for an hour, and then allow it to cool in the pot. You can use the fabric immediately or dry it for later.

2. Creating the Dyebath

  • Extraction: Chop your plant material (flowers, leaves or roots) and place it in a large, non-reactive pot (stainless steel or enamel). Cover with water and heat gently for about an hour to extract the colour. Avoid boiling, as it can dull the colours.
  • Straining: Strain the liquid through a fine-mesh sieve or cloth to remove all the plant material, leaving you with a clear dyebath.
  • Dyeing: Add your pre-wetted, mordanted fabric to the dyebath. Heat gently for at least an hour, stirring occasionally to ensure even colour. For deeper shades, you can leave the fabric to cool in the dyebath overnight.
  • Rinsing and Drying: Once you are happy with the colour, remove the fabric, rinse it in clean water until the water runs clear and hang it to dry away from direct sunlight.

A Garden of Colourful Possibilities

Planting a dye garden is an act of creation from soil to fabric. It connects you to a rich history of artistry and offers a sustainable alternative to the world of synthetic colour. The journey of watching seeds sprout, flowers bloom, and colours emerge in the dyepot is profoundly satisfying. Start small with a few pots of marigolds or a patch of coreopsis, and you will soon discover the joy of painting your world with the colours of your own garden.

Further Reading: How to Plant, Plan and Create a Witches’ Garden, How to Plan and Create a Forager’s Garden, How to make Natural Dyes

Follow Us on Instagram for Garden Daily Inspiration 🌼

Growing Wallflowers

Few flowers can match the intoxicating fragrance and cheerful colours of wallflowers. These hardy biennials have graced British gardens for centuries, transforming ordinary walls and borders into spectacular displays of golden yellows, deep purples and vibrant oranges. With their distinctive four-petalled blooms and ability to thrive in challenging conditions, wallflowers offer both novice and experienced gardeners a reliable way to bridge the gap between winter’s end and summer’s arrival.

Whether you’re looking to add early colour to your garden or create a cottage garden atmosphere, wallflowers deserve serious consideration. Their sweet, spicy fragrance alone makes them worthy of a place in any garden, whilst their low-maintenance nature ensures success even for those new to gardening.

What Are Wallflowers?

Wallflowers belong to the Brassicaceae family and carry the botanical name Erysimum cheiri. These compact plants typically grow between 20-60cm tall, producing clusters of four-petalled flowers in shades ranging from pale cream to deep burgundy. Each flower measures approximately 2cm across and contains the characteristic cross-shaped formation typical of the brassica family.

The most recognisable feature of wallflowers is their intense fragrance—a sweet, spicy scent that becomes particularly pronounced during warm afternoons and early evenings. The lance-shaped leaves are typically grey-green, providing an attractive backdrop to the vibrant blooms.

A Rich Garden History

Wallflowers have adorned European gardens since medieval times, earning their common name from their tendency to naturalise in the cracks and crevices of old stone walls. Originally native to southern Europe, these resilient plants spread throughout Britain during the Roman occupation, where they found the cool, moist climate particularly suitable.

During the Victorian era, wallflowers became synonymous with faithfulness and fidelity, often planted in memorial gardens and given as tokens of enduring love. The Victorians particularly prized the deep, velvety varieties, which they believed held the strongest fragrance.

Traditional cottage gardens wouldn’t be complete without drifts of wallflowers, where they provided essential early nectar for emerging bees and butterflies. This historical connection continues today, making wallflowers perfect for wildlife-friendly gardens.

Advantages and Disadvantages

Advantages:

  • Early flowering: Bloom from March through June when few other flowers are available
  • Exceptional fragrance: Provide intense, sweet scent throughout their flowering period
  • Low maintenance: Require minimal care once established
  • Drought tolerance: Survive dry conditions better than many other spring flowers
  • Wildlife friendly: Attract bees, butterflies, and other beneficial insects
  • Long flowering period: Continue blooming for several months
  • Excellent cut flowers: Stems last well in vases and fill rooms with fragrance

Disadvantages:

  • Biennial nature: Must be replanted every two years
  • Short lifespan: Individual plants typically last only one growing season
  • Susceptible to clubroot: Can suffer from this soil-borne fungal disease
  • Limited colour range: Fewer colour options compared to other spring flowers
  • Self-seeding tendency: May spread beyond intended areas in suitable conditions

Best Planting Locations

Wallflowers thrive in sunny, well-drained positions with neutral to slightly alkaline soil. They’re particularly effective when planted:

Against south-facing walls: The reflected heat intensifies their fragrance and extends flowering
In raised beds: Improved drainage prevents root rot during wet winters
Along garden paths: Their fragrance can be fully appreciated by passing visitors
In cottage garden borders: Mixed with other spring flowers like forget-me-nots and tulips
In containers: Particularly useful for patios and small gardens
On banks and slopes: Their drought tolerance makes them excellent for challenging sites

Avoid planting wallflowers in heavy, waterlogged soil or deep shade, where they’ll struggle to establish and flower poorly.

Growing from Seed or Plants

Growing from Seed:
Sowing wallflower seeds offers the greatest variety and proves remarkably economical. Seeds can be sown directly in the ground or in seed trays from May through July. Direct sowing works particularly well—simply scatter seeds thinly in prepared soil and rake lightly to cover.

For container sowing, use a good-quality seed compost and maintain temperatures around 15-18°C. Germination typically occurs within 7-14 days. Once seedlings develop their first true leaves, transplant them into individual pots or thin direct-sown seedlings to prevent overcrowding.

Buying Young Plants:
Purchasing young plants from garden centres provides instant results and guarantees specific varieties. Look for sturdy, compact plants with healthy, dark green foliage. Avoid leggy specimens or those showing signs of pest damage.

When to Sow and Plant

Seed Sowing Timeline:

  • May-July: Optimal sowing period for flowering the following spring
  • August: Latest recommended sowing time in most regions
  • September onwards: Too late for reliable establishment before winter

Planting Out Young Plants Schedule:

  • September-October: Ideal time for transplanting seedlings to final positions
  • March-April: Alternative planting time for pot-grown specimens
  • Spacing: Plant 15-20cm apart to allow for mature spread

Early autumn planting allows plants to establish strong root systems before winter, resulting in more vigorous growth and abundant flowering the following spring.

Care and Maintenance

Once planted, wallflowers require minimal attention. Water newly planted specimens during dry spells, but established plants rarely need supplementary watering except during prolonged drought.

Deadheading: Regular removal of spent flowers encourages continued blooming and prevents excessive self-seeding. However, leaving some flowers to set seed provides food for birds and allows natural regeneration.

Fertilising: A light application of general-purpose fertiliser in early spring supports vigorous growth. Avoid high-nitrogen feeds, which promote leafy growth at the expense of flowers.

Winter Protection: Established plants rarely need protection, but newly planted specimens benefit from a light mulch around the base during severe weather.

Best Varieties to Grow

‘Cloth of Gold’: Deep golden-yellow flowers with exceptional fragrance. Compact growth reaches 30cm tall.

‘Blood Red’: Striking deep red blooms create dramatic displays. Slightly taller at 45cm.

‘Ivory White’: Pure white flowers provide elegant contrast. Excellent for moon gardens and evening fragrance.

‘Purple Queen’: Rich purple blooms with velvety texture. Traditional cottage garden variety.

‘Fire King’: Brilliant orange-red flowers create vibrant spring displays. Heat-tolerant variety.

‘Harlequin Mixed’: Blend of colours including yellow, orange, red, and purple. Perfect for informal plantings.

Perennial Wallflowers: Erysimum ‘Bowles’s Mauve’ and ‘Constant Cheer’ offer year-round interest but lack the intense fragrance of traditional varieties.

Making the Most of Your Wallflowers

Wallflowers reward gardeners with months of colour and fragrance in exchange for minimal effort. Their ability to thrive in challenging conditions makes them perfect for novice gardeners, whilst their rich history and cottage garden charm appeal to traditionalists.

Plant wallflowers this autumn for a spectacular spring display that will fill your garden with colour and your home with the sweetest of fragrances. Once you’ve experienced their magical scent drifting across the garden on a warm spring evening, you’ll understand why these humble flowers have remained garden favourites for centuries.

Further Reading: Creating a Cottage GardenPlant Autumn Bulbs Now for a Beautiful Spring Garden, Sowing Sweet Peas in Autumn

Follow Us on Instagram for Daily Garden Inspiration 

Sowing Sweet Peas in Autumn

As the vibrant colours of summer fade and the garden prepares for its winter slumber, a thoughtful gardener knows that now is the time to lay the groundwork for next year’s floral abundance. One of the most rewarding tasks for an autumn afternoon is sowing sweet peas. These quintessentially English cottage garden flowers, with their delicate, butterfly-like blooms and intoxicating fragrance, can get a powerful head start if sown before the winter frosts set in.

What are Sweet Peas?

The sweet pea, known botanically as Lathyrus odoratus, is a climbing annual celebrated for its enchanting scent and clusters of colourful, ruffled flowers. The name Lathyrus comes from the Greek word for ‘pea’ or ‘pulse’, while odoratus is Latin for ‘fragrant’, a perfect description for this beloved bloom.

The flower’s history is just as captivating as its perfume. Native to Sicily and southern Italy, the sweet pea was first discovered in the late 17th century by a Franciscan monk, Brother Franciscus Cupani. He was so taken by its intense fragrance that he sent seeds to Dr Robert Uvedale, a schoolmaster and keen horticulturist in Enfield, England. From these humble beginnings, the sweet pea captured the hearts of British gardeners.

It was the Victorian era, however, that marked the sweet pea’s golden age. Scottish nurseryman Henry Eckford dedicated his life to breeding them, transforming the original, small purple flower into the larger, more varied blooms we recognise today. His work earned him the title “King of Sweet Peas” and introduced a stunning array of colours, from soft pastels to deep, velvety maroons.

Why Sow Sweet Peas in Autumn?

While you can certainly sow sweet peas in the spring, an autumn sowing offers several distinct advantages.

The Benefits of Autumn Sowing

  • Stronger, Healthier Plants: Sowing in autumn allows the seeds to germinate and develop a robust root system throughout the winter. This head start results in sturdier, more vigorous plants that are better equipped to handle the transition to their final growing positions in spring.
  • Earlier Flowering: Autumn-sown plants will almost always flower earlier than their spring-sown counterparts. You can expect your first fragrant blooms to appear as early as May, extending the flowering season by several weeks.
  • More Prolific Blooms: The well-established root system enables the plants to produce a greater abundance of flowers over a longer period. More roots mean more energy for producing those beautiful, scented blossoms.

Potential Drawbacks

Of course, there are a few considerations to keep in mind. Autumn-sown seedlings require protection from the harshest winter weather. They will need a cold frame, an unheated greenhouse, or a sheltered spot to prevent them from succumbing to severe frosts, waterlogged soil or hungry mice who find the seeds a tasty winter snack. Spring sowing avoids these challenges, but the resulting plants often take longer to establish.

For most gardeners, the promise of earlier, more abundant flowers makes the small effort of overwintering seedlings well worth it.

How to Sow Sweet Peas in Autumn

Sowing sweet peas is a simple and deeply satisfying process. Follow these steps to give your seeds the best possible start.

1. Choose Your Seeds

Select high-quality seeds from a reputable supplier. There is a vast range of cultivars to choose from, including the highly-scented heirloom varieties like ‘Cupani’ or the large-flowered Spencer types developed by Eckford.

2. Prepare Your Containers

Sweet peas have long taproots that dislike disturbance. For this reason, deep pots or specialised ‘root trainers’ are the ideal choice. Root trainers are deep, grooved cells that encourage the roots to grow straight down, and they hinge open, allowing you to transplant the seedlings with minimal root disturbance.

Fill your chosen containers with a good-quality, peat-free seed compost. Lightly firm it down and water it well, allowing any excess to drain away before sowing.

3. Sow the Seeds

Place two seeds in each pot or cell, pushing them about 1cm (half an inch) deep into the compost. Sowing two seeds per pot is a good insurance policy in case one fails to germinate. If both grow, you can either pinch out the weaker seedling or carefully separate them when planting out.

Cover the seeds with a little more compost, but do not water them again until you see signs of germination. This helps prevent the seeds from rotting in cold, damp conditions.

4. Overwintering Your Seedlings

Once sown, the seedlings need a bright, cool and protected place to spend the winter. An unheated greenhouse, a cold frame, or even a sheltered, sunny windowsill in a cool room is perfect. The goal is to provide enough light for growth without the warmth that would encourage soft, leggy stems.

Keep an eye out for mice, which are notorious for digging up and eating sweet pea seeds. If they are a problem in your area, cover the pots with a sheet of plastic or mesh until the seedlings have emerged. Once germinated, water the seedlings sparingly throughout the winter, only when the compost feels dry to the touch.

Planting Out Your Sweet Peas

As winter recedes and the first signs of spring appear, your sturdy little sweet pea plants will be ready for their final home in the garden.

When to Plant Out

The best time to plant out your autumn-sown sweet peas is from March to April, once the soil has started to warm up and the risk of hard frost has passed. A week or two before planting, ‘harden them off’ by gradually acclimatising them to outdoor conditions. Place them outside during the day and bring them back under cover at night.

How to Plant Out and Provide Support

Choose a sunny, well-drained spot in your garden. Sweet peas are hungry plants, so enrich the soil beforehand by digging in plenty of well-rotted manure or garden compost.

Space your plants about 20-30cm apart at the base of their support structure. Sweet peas are natural climbers and will need a sturdy frame to scramble up. You can use a wigwam of bamboo canes, a trellis against a wall, or netting stretched between posts.

Gently remove the seedlings from their pots, taking care not to disturb the roots, and plant them at the same depth they were in their containers. Water them in well.

Caring for Your Plants

To encourage bushy growth, pinch out the growing tip of each plant when it has developed three or four pairs of leaves. This prompts the plant to produce side shoots from the base, resulting in more stems and, ultimately, more flowers.

Once they start growing, tie the stems to their supports until they begin to climb on their own. Water them regularly, especially during dry spells, and apply a high-potash liquid feed (like a tomato fertiliser) every couple of weeks once they start flowering.

The most important task is to pick the flowers regularly. The more you pick, the more the plant will produce. If you allow seed pods to develop, the plant will think its job is done and stop flowering.

A Garden Filled with Fragrance

By following these simple steps, you can fill your garden with the unparalleled scent and beauty of sweet peas from late spring right through the summer. The small effort of sowing seeds on a crisp autumn day will be repaid a thousand times over when you are able to gather bunch after bunch of these exquisite, fragrant blooms.

Further Reading: Creating a Cottage Garden, Plant Autumn Bulbs Now for a Beautiful Spring Garden

Follow Us on Instagram for Daily Garden Inspiration 🌼

How to Plant a Hedge

Creating a hedge transforms your outdoor space into something truly special. Whether you’re seeking privacy, defining boundaries or attracting wildlife, planting a hedge offers a natural solution that grows more beautiful with each passing year.

Unlike fencing or walls, hedges provide living boundaries that change with the seasons, support local wildlife and can last for generations with proper care. The process requires patience and planning, but the rewards extend far beyond simple garden dividers. You’ll create habitats for birds, natural windbreaks and stunning features that enhance your property’s value and character.

Why Plant a Hedge?

Hedges offer remarkable versatility for any outdoor space. They create natural privacy screens that grow denser over time, providing year-round screening that no fence can match. Many homeowners discover that hedges actually increase property values whilst reducing noise pollution from neighbouring areas.

Wildlife benefits enormously from hedge planting. Native species provide nesting sites for birds, shelter for small mammals and nectar sources for pollinators. A well-established hedge becomes a miniature ecosystem supporting biodiversity right in your garden.

The environmental advantages continue with natural windbreaks that protect more delicate plants, reduced air pollution through natural filtration, and carbon absorption that helps combat climate change. Hedges also offer practical benefits like reduced maintenance costs compared to replacing fencing panels and the ability to trim to any desired height or shape.

Essential Planning Considerations

Choosing the Perfect Position

Location determines your hedge’s success more than any other factor. Survey your boundaries carefully, noting existing structures, utility lines and drainage patterns. Consider your neighbours’ perspectives and local planning restrictions, particularly if you’re planting along shared boundaries.

Measure the available space precisely, allowing room for the hedge to reach its mature width. Most hedges require 1-2 metres of growing space, though this varies significantly between species. Check for underground cables or pipes before marking your planting line.

Understanding Weather Elements

British weather presents unique challenges for hedge establishment. Prevailing winds, frost pockets and rainfall patterns all influence plant selection and positioning. Exposed sites require hardy species that can withstand strong winds, whilst shaded areas need plants that thrive in lower light conditions.

Consider seasonal variations in sunlight, particularly the winter sun’s lower angle. South-facing hedges receive maximum light but may require more watering during dry spells. North-facing positions suit shade-tolerant species but may experience slower establishment.

Selecting Plant Types

Native species typically establish more successfully and support local wildlife better than exotic alternatives. Popular choices include:

Deciduous Options:

  • Beech: Retains bronze leaves through winter
  • Hornbeam: Similar to beech but more tolerant of wet conditions
  • Hawthorn: Fast-growing with spring flowers and autumn berries

Evergreen Choices:

  • Yew: Dense, long-lived and highly versatile
  • Privet: Quick-establishing with glossy foliage
  • Laurel: Broad leaves providing excellent screening

Mixed Species Benefits:
Creating mixed hedges provides extended flowering periods, varied wildlife habitats, and natural disease resistance. Combine complementary species with similar growth rates and maintenance requirements.

How to Plant Your Hedge

Soil Preparation

Begin preparation at least six weeks before planting. Clear weeds and grass from a strip 1 metre wide along your intended hedge line. Double-dig the soil, incorporating well-rotted compost or manure to improve structure and fertility.

Test soil pH using a simple testing kit. Most hedge plants prefer slightly acidic to neutral conditions (pH 6.0-7.0). Heavy clay soils benefit from added grit or sharp sand for drainage, whilst sandy soils need organic matter for moisture retention.

Planting Techniques

Plant bare-root specimens between November and March when plants are dormant. Container-grown plants can be planted year-round but establish best in spring or autumn.

Space plants according to their mature spread, typically 30-60cm apart depending on species. Dig holes slightly wider than root systems but no deeper than the original planting depth. Position plants at the same level they grew previously, identifiable by the soil mark on stems.

Water thoroughly after planting, ensuring soil settles around roots without air pockets. Apply a 5cm layer of organic mulch around plants, keeping it away from stems to prevent pest problems.

Growth Expectations

Hedge establishment varies significantly between species and growing conditions. Fast-growing varieties like privet or leylandii can achieve 60-90cm height annually, whilst slower species like yew may grow only 15-30cm per year.

First-year growth focuses primarily on root establishment rather than height. Expect limited vertical growth during this period, but strong root development creates the foundation for future vigorous growth. Most hedges require 3-5 years to reach effective screening height.

Caring for Your Hedge

Year One: Foundation Building

Focus entirely on establishment during the first growing season. Water regularly during dry periods, providing approximately 2.5cm weekly. Avoid fertilising newly planted hedges, which can encourage soft growth susceptible to winter damage.

Remove weeds competing for nutrients and water. Hand-weeding or careful hoeing prevents root damage that cultivation tools might cause. Monitor for pest problems or disease symptoms, addressing issues promptly to prevent establishment problems.

Years Two to Five: Shaping the Future

Year Two:
Light trimming encourages bushier growth. Remove only the soft growing tips, never cutting into older wood. This formative pruning creates the hedge’s basic shape whilst maintaining vigour.

Year Three:
Begin proper shaping, creating the desired profile. Trim sides more heavily than the top to encourage upward growth whilst maintaining density at the base. Cut evergreens in late spring after frost danger passes.

Year Four:
Establish regular trimming patterns. Most hedges benefit from two cuts annually—late spring and late summer. Create slightly tapered sides, wider at the bottom to ensure light reaches lower branches.

Year Five:
Your hedge should reach near-mature dimensions. Continue regular maintenance trimming, adjusting frequency based on growth rate and desired formality. Well-established hedges may require only annual trimming.

Professional Hedge Cutting

Once established, proper trimming maintains health, shape and density. Sharp tools produce clean cuts that heal quickly, preventing disease entry points. Hand shears provide precision for detailed work, whilst powered trimmers handle large areas efficiently.

Timing depends on species and desired formality. Formal hedges require more frequent cutting—potentially three times annually for species like privet. Informal hedges need less frequent attention, often just once yearly after flowering.

Cut in dry conditions when possible, allowing wounds to seal before wet weather arrives. Never remove more than one-third of growth in a single session, which can stress plants severely.

Benefits and Considerations

Advantages of Hedge Planting

Living boundaries provide unmatched privacy that improves annually. Unlike artificial screens, hedges become more attractive with age, developing character and supporting wildlife communities. They offer excellent noise reduction, particularly when planted in multiple rows with varying heights.

Property values typically increase with mature hedge plantings, especially native species that require minimal long-term maintenance. The environmental benefits include air purification, carbon storage, and habitat creation that supports local ecosystems.

Potential Disadvantages

Hedge establishment requires patience, with several years needed to achieve full screening. Initial costs can be substantial, particularly for large properties or premium species. Ongoing maintenance represents a lifetime commitment that some property owners find challenging.

Space requirements may limit options for smaller gardens. Mature hedges can reduce light levels in adjacent areas and compete with other plants for nutrients and water. Some fast-growing species can become invasive if not properly managed.

Legal considerations include boundary disputes with neighbours and potential restrictions in conservation areas. Research local regulations before planting, particularly regarding height restrictions and protected species.

Growing Your Garden’s Future

Planting a hedge represents an investment in your property’s long-term beauty and functionality. These living boundaries reward patience with decades of service, growing more valuable each year whilst supporting wildlife and enhancing your outdoor space.

Start planning your hedge project by assessing your site conditions and browsing local nurseries for suitable species. Consider visiting established gardens to see mature examples of different hedge types in similar growing conditions.

Begin with proper soil preparation and choose quality plants from reputable suppliers. Remember that initial care determines long-term success, so commit to regular watering and monitoring during the establishment period.

Your hedge will become a cherished garden feature, providing privacy, wildlife habitat and natural beauty for generations to come. Take the first step towards creating your own living boundary and discover the lasting satisfaction of growing something truly worthwhile.

Further Reading: The Complete Guide to Planting and Caring for a Hedge, The Silent Invader Threatening UK Gardens – Box Blight,

Follow Us on Instagram for Daily Inspiration 💚

Leaf Mulch: Nature’s Ultimate Soil Enhancer

Autumn brings a spectacular display of golden, amber and crimson leaves cascading from trees. Rather than raking these fallen treasures into bags for collection, discover how to transform them into one of gardening’s most valuable resources. Leaf mulch offers an eco-friendly solution that enriches your soil whilst reducing waste.

This natural approach to garden improvement costs nothing yet delivers remarkable benefits. From moisture retention to soil enrichment, leaf mulch provides everything your plants need to thrive. Whether you’re a seasoned gardener or just beginning your horticultural journey, understanding how to harness the power of fallen leaves will revolutionise your outdoor space.

Leaf Mulch Photo set against a background of autumn colourful leaves.

What Is Leaf Mulch?

Leaf mulch consists of decomposed or partially decomposed leaves that create a nutrient-rich layer for your garden beds. Unlike fresh fallen leaves, proper leaf mulch has broken down sufficiently to provide immediate benefits to your soil and plants.

The decomposition process transforms ordinary autumn leaves into a dark, crumbly material teeming with beneficial microorganisms. These microscopic helpers work tirelessly to improve soil structure and deliver nutrients directly to plant roots.

Two main types of leaf mulch serve different purposes in your garden. Fresh leaf mulch, made from recently fallen leaves, works excellently as a protective surface layer. Aged leaf mulch, which has decomposed for several months, integrates seamlessly into existing soil to boost fertility and structure.

Benefits That Transform Your Garden

Soil Enhancement

Leaf mulch acts as nature’s slow-release fertiliser, gradually breaking down to feed your plants throughout the growing season. As earthworms and beneficial bacteria process the organic matter, they create humus that dramatically improves soil structure.

Clay soils become more workable and better-draining, whilst sandy soils gain improved water and nutrient retention. This natural soil conditioner eliminates the need for expensive commercial amendments.

Moisture Conservation

A 5-10cm layer of leaf mulch significantly reduces water evaporation from soil surfaces. During hot summer months, this natural barrier can reduce watering needs by up to 70%. Plants maintain consistent moisture levels, reducing stress and promoting healthier growth patterns.

Weed Suppression

Properly applied leaf mulch creates an effective barrier against weed germination. Existing weeds struggle to penetrate the dense layer, whilst new seeds find it difficult to establish roots. This natural weed control reduces the need for chemical herbicides and hours of manual weeding.

Temperature Regulation

Leaf mulch insulates plant roots from temperature extremes. During summer, it keeps soil cooler, protecting delicate root systems. Winter brings opposite benefits, as the insulating layer prevents deep frost penetration that can damage perennial plants.

How to Use Leaf Mulch Effectively

Application Techniques

Apply leaf mulch in layers between 5-10cm thick around plants, keeping it several centimetres away from tree trunks and plant stems. This prevents moisture retention against bark that could encourage rot or pest problems.

Spread mulch evenly across flower beds, vegetable gardens, and around shrubs. For established perennials, gently work some aged leaf mulch into the top few centimetres of soil during spring preparation.

Seasonal Timing

Autumn presents the ideal time for fresh leaf mulch application. Apply after cleaning up summer debris but before winter’s harsh weather arrives. Spring applications work well for aged leaf mulch that can be incorporated directly into planting beds.

Avoid applying fresh leaf mulch too thickly in spring, as decomposing leaves can temporarily tie up soil nitrogen as they break down.

Collecting and Creating Your Own Leaf Mulch

Collection Strategies

Gather leaves when they’re slightly damp but not sodden. Dry leaves blow away easily, whilst overly wet leaves become compacted and difficult to handle. Early morning after dew has formed often provides ideal collection conditions.

Use a rake or leaf blower to gather leaves from lawns, paths, and flower beds. Focus on healthy leaves from deciduous trees, avoiding any showing signs of disease or pest damage.

Burgon and Ball Leaf Rake photo set against a background of autumn colourful leaves.

Preparation Methods

Shredding Method: Pass collected leaves through a shredder or run a lawnmower over them several times. Smaller pieces decompose more quickly and are less likely to mat together and block air circulation.

Composting Approach: Layer whole or shredded leaves with nitrogen-rich materials like grass clippings in a compost bin. Turn regularly and maintain proper moisture levels to create high-quality aged mulch within 6-12 months.

Simple Decomposition: Pile leaves in a designated area and leave them to break down naturally. This method requires less effort but takes 12-18 months to produce usable mulch.

Important Considerations

Choose leaves from healthy trees, avoiding those from diseased plants that might spread problems to your garden. Oak, maple and beech leaves make excellent mulch, whilst eucalyptus and walnut leaves contain compounds that may inhibit plant growth.

Never use leaves gathered from roadsides where they may contain pollutants from vehicle emissions. Stick to leaves from your own property or clean suburban areas.

Advantages and Disadvantages

Key Advantages

Cost Effectiveness: Leaf mulch costs nothing to produce whilst delivering benefits equivalent to expensive commercial mulches. This sustainable approach reduces household waste whilst improving your garden.

Environmental Benefits: Using leaf mulch reduces landfill waste and eliminates the carbon footprint associated with transporting commercial mulch products. You’re creating a closed-loop system that mimics natural forest floors.

Long-term Soil Improvement: Unlike synthetic mulches, leaf mulch continuously improves soil as it decomposes. Each season brings cumulative benefits that build healthier, more fertile growing conditions.

Potential Disadvantages

Appearance Concerns: Some gardeners prefer the uniform look of commercial mulches over the natural appearance of decomposing leaves. Fresh leaf mulch can look untidy until it settles and begins breaking down.

Seasonal Availability: Leaf collection is largely seasonal, requiring advance planning to gather sufficient quantities. Urban gardeners may struggle to source adequate volumes.

Disease Risk: Diseased leaves can introduce pathogens to your garden. Careful selection and proper composting help mitigate these risks.

Initial Labour: Collecting, processing, and applying leaf mulch requires time and effort upfront, though long-term benefits far outweigh this initial investment.

Create Your Natural Garden Paradise

Leaf mulch represents one of gardening’s best-kept secrets—a free, sustainable resource that transforms ordinary gardens into thriving ecosystems. Start small with a single flower bed and experience the remarkable differences this natural approach delivers.

Embrace autumn’s generous gift and begin collecting leaves for your garden transformation. Your plants will thank you with stronger growth, vibrant blooms, and resilient health throughout the seasons. Join countless gardeners who have discovered that sometimes the best solutions come directly from nature itself.

Further Reading: Embrace Chop and Drop for a Greener Garden, How to Make Comfrey Tea: The Perfect Garden Fertiliser, Transforming Your Compost into Potting Mix

Follow Us on Instagram for Daily Gardening Inspiration 💚

How to Scarify Your Lawn

A lush, green lawn doesn’t happen by accident. Behind every pristine garden lies a series of careful maintenance practices and scarifying ranks among the most transformative yet overlooked techniques. This powerful lawn care method can revitalise tired, patchy grass and restore your outdoor space to its former glory.

Scarifying might sound intimidating, but it’s simpler than you think. With the right knowledge and tools, you can tackle this essential garden task and watch your lawn flourish like never before. Let’s explore everything you need to know about scarifying your lawn, from understanding the process to weighing its benefits and potential drawbacks.

Ready to transform your garden? Pack your gardening gloves and prepare to discover how scarifying can give your lawn the fresh start it deserves.

What Is Scarifying?

Scarifying is the process of mechanically removing thatch, moss and debris from your lawn’s surface and upper soil layer. Think of it as giving your grass a deep cleanse that reaches beyond what regular mowing can achieve.

The technique involves using a scarifying tool—either a manual rake or electric scarifier—equipped with sharp, vertical blades or tines. These cut through the lawn’s surface, pulling up dead organic matter that has accumulated over time. The process creates temporary bare patches and leaves your lawn looking rather worse for wear initially, but this apparent destruction paves the way for remarkable regeneration.

Thatch, the primary target of scarifying, consists of dead grass stems, roots, and other organic debris that forms a layer between the soil and living grass blades. While a thin layer of thatch can be beneficial, providing insulation and cushioning, excessive build-up creates problems. When thatch exceeds 12mm in thickness, it prevents water, nutrients and air from reaching the grass roots effectively.

Scarifying also tackles moss, which thrives in compacted, poorly-drained conditions. By removing moss and opening up the soil surface, you create an environment where grass can out-compete these unwanted invaders.

The best time to scarify depends on your grass type and climate. Cool-season grasses benefit from autumn scarifying, typically between September and October, when temperatures are moderate and rainfall is more frequent. This timing allows grass to recover before winter dormancy and establishes strong roots for spring growth.

Why Should You Scarify Your Lawn?

Scarifying delivers remarkable benefits that transform both the appearance and health of your lawn. Understanding these advantages will help you appreciate why this seemingly harsh treatment is actually an act of garden kindness.

Improved Air Circulation

Dense thatch creates a barrier that restricts airflow to grass roots. Scarifying removes this obstacle, allowing oxygen to penetrate the soil more effectively. Better air circulation promotes healthier root development and reduces the risk of fungal diseases that thrive in stagnant, moisture-trapped conditions.

Enhanced Water Absorption

Water struggles to penetrate thick thatch layers, often running off the surface rather than reaching the root zone where grass needs it most. After scarifying, rainfall and irrigation can soak directly into the soil, reducing water waste and ensuring your grass receives adequate hydration during dry periods.

Better Nutrient Uptake

Fertilisers and organic nutrients face the same penetration challenges as water when confronted with excessive thatch. Scarifying creates direct pathways for nutrients to reach grass roots, making your feeding regime more effective and reducing the amount of fertiliser needed to maintain healthy growth.

Moss and Weed Control

Moss indicates underlying lawn problems, typically poor drainage, soil compaction or nutrient deficiency. Scarifying physically removes existing moss while addressing the conditions that allowed it to establish. The process also disturbs shallow-rooted weeds, making them easier to treat or remove entirely.

Stimulated New Growth

The scarifying process might look destructive, but it actually stimulates grass to produce new shoots and strengthen existing root systems. This controlled stress response results in denser, more resilient turf that can better withstand future challenges like drought, foot traffic and pest pressure.

Preparation for Overseeding

If your lawn has bare patches or thin areas, scarifying creates ideal conditions for overseeding. The process opens up the soil surface, providing excellent seed-to-soil contact that improves germination rates and helps new grass establish quickly.

Plan your scarifying session when you have time to follow up with appropriate aftercare, including watering and potential reseeding of sparse areas.

What Are the Disadvantages of Scarifying Your Lawn?

While scarifying offers significant benefits, it’s important to understand the potential drawbacks before starting this intensive lawn care process. Being aware of these challenges helps you prepare properly and set realistic expectations.

Temporary Aesthetic Impact

Scarifying transforms your lawn into what might charitably be described as a battlefield. The process leaves behind piles of debris, bare patches, and a generally disheveled appearance that can persist for several weeks. If you’re planning a garden party or outdoor event, factor in recovery time when scheduling your scarifying session.

Weather Dependency

Success depends heavily on favourable weather conditions following scarification. Extended dry periods can stress the exposed grass and soil, while excessive rainfall might cause waterlogging or wash away newly sown seeds. Unfortunately, British weather rarely follows our gardening schedules, making timing a constant challenge.

Physical Demands

Scarifying requires significant physical effort, particularly when using manual tools on larger lawns. The process involves repetitive motion and can be surprisingly strenuous work. Electric scarifiers reduce the physical burden but still require careful handling and can be heavy to manoeuvre around obstacles.

Risk of Overdoing It

Enthusiastic scarifying can cause more harm than good. Removing too much material or scarifying too frequently can damage healthy grass roots and create conditions favourable to weeds and diseases. The key lies in finding the right balance, which comes with experience and careful observation of your lawn’s response.

Equipment and Cost Considerations

Professional-grade scarifying equipment represents a significant investment for occasional use. While you can hire tools, rental costs add up and you’ll need to transport and store the equipment. Manual alternatives are cheaper but require more time and energy to achieve comparable results.

Potential for Weed Invasion

The bare soil created by scarifying provides perfect conditions for weed seeds to germinate. Without prompt reseeding and careful aftercare, you might find your newly scarified lawn colonised by dandelions, plantains and other unwanted species that were previously suppressed by dense thatch.

Timing Sensitivity

Scarifying at the wrong time can set back your lawn’s recovery significantly. Late autumn scarifying might leave grass vulnerable to winter damage, while spring scarifying during active growth periods can interrupt the natural growing cycle.

Despite these potential drawbacks, most gardeners find that the long-term benefits of scarifying far outweigh the temporary inconveniences. Success lies in careful planning, appropriate timing and commitment to post-scarifying care.

Preparing for Success

Transform your scarifying experience from daunting task to rewarding garden project by preparing thoroughly. Start by assessing your lawn’s condition and choosing appropriate weather windows. Gather your tools, clear the area of obstacles, and have a post-scarifying plan ready.

Remember that scarifying is an investment in your lawn’s future health. The temporary disruption gives way to stronger, more beautiful grass that will reward your efforts for years to come. Take the time to do it properly and your garden will thank you with the lush, green lawn you’ve always wanted.

Ready to give your lawn the care it deserves? Start planning your scarifying project and prepare to discover just how beautiful your outdoor space can become.

Further Reading: Why Plastic Lawns are a Threat to the Environment, RHS Lawns

All About Seed Saving

Late summer marks one of the most rewarding times for gardeners. As August transitions into September, your garden reaches peak maturity, offering the perfect opportunity to collect seeds from your favourite plants. This practice connects you directly to next year’s garden while preserving varieties you’ve grown to love.

Seed saving transforms you from a seasonal gardener into a true plant steward. Rather than purchasing packets each spring, you’ll have your own supply of seeds perfectly adapted to your local conditions. The process requires minimal equipment but delivers maximum satisfaction as you witness the complete lifecycle of your plants.

This comprehensive guide will walk you through proven methods for collecting, processing, and storing seeds from ten reliable garden plants that produce offspring true to their parent’s characteristics.

The Perfect Timing for Seed Saving

August and September provide optimal conditions for seed saving across most temperate regions. Plants have had the entire growing season to mature, and their seeds contain maximum viability. Morning collection works best, after dew has dried but before the afternoon heat causes seed pods to split prematurely.

Watch for visual cues that indicate seed readiness. Pods should feel dry and papery, while seed heads often change colour from green to brown or tan. Seeds themselves should appear plump and fully formed rather than pale or shrivelled.

Essential Seed Saving Methods

Dry Collection Method

Most garden seeds benefit from dry collection techniques. Cut entire seed heads or pods using clean secateurs, leaving a short stem for easier handling. Place collections immediately into paper bags or envelopes, never plastic, which traps moisture and encourages mould.

For plants with explosive seed dispersal like sweet peas or poppies, cover developing pods with breathable fabric bags secured with string. This captures seeds as they naturally release whilst maintaining air circulation.

Wet Collection Method

Fleshy fruits require wet processing to separate viable seeds. Scoop seeds from fully ripe tomatoes, squash or melons, then place them in water for several days. Viable seeds sink whilst pulp and poor-quality seeds float, making separation straightforward.

Professional Storage Techniques

Proper Drying Process

Spread collected seeds on newspaper or screens in a warm, well-ventilated area away from direct sunlight. Most seeds require one to two weeks of drying, depending on size and moisture content. Test dryness by bending a seed—properly dried specimens snap rather than bend.

Labelling and Organisation

Create detailed labels immediately upon collection. Include plant variety, collection date, and location within your garden. Use permanent markers on weatherproof labels, as pencil writing fades over time.

Store dried seeds in paper envelopes or small glass jars within airtight containers. Add silica gel packets or dry rice to absorb residual moisture. Label containers clearly and store in cool, dark locations such as refrigerators or unheated basements.

Ten Reliable Plants for Seed Saving

1. Marigolds (Tagetes)

These cheerful annuals produce abundant seeds that germinate reliably. Allow flower heads to dry completely on plants before collecting. Seeds store well for up to three years when kept dry and cool.

2. Sunflowers (Helianthus annuus)

Harvest seeds when the back of flower heads turn from green to brown. Cover developing heads with cloth bags to protect from birds. Each head can yield hundreds of viable seeds.

3. Nasturtiums (Tropaeolum majus)

These edible flowers produce large, easily handled seeds. Collect individual seeds as they fall naturally, or gather them from dried plants. Fresh seeds often germinate within days of planting.

4. Calendula (Calendula officinalis)

Often called pot marigold, calendula produces curved seeds that are unmistakable. Collect regularly throughout the growing season as flowers fade. These hardy annuals self-seed readily when allowed.

5. Sweet Peas (Lathyrus odoratus)

Allow pods to dry completely on vines before collection. The hard seeds benefit from scarification—gently file or nick the seed coat before planting to improve germination rates.

6. Cosmos (Cosmos bipinnatus)

These drought-tolerant flowers produce needle-like seeds attached to feathery structures. Shake dried flower heads over containers to release seeds easily. Remove chaff by gentle winnowing.

7. Zinnias (Zinnia elegans)

Wait until petals have completely dried and flower centres feel firm. Pull apart dried flower heads to reveal seeds attached to the base. Each flower can yield dozens of seeds.

8. Love-in-a-Mist (Nigella damascena)

The distinctive inflated seed pods make collection straightforward. Allow pods to dry until they rattle when shaken. Store seeds within pods until planting time for best results.

9. Lettuce (Lactuca sativa)

Allow several plants to bolt and flower for seed production. Harvest when fluffy seed heads form and begin to open. Handle gently as mature seeds detach easily.

10. Radishes (Raphanus sativus)

Leave several plants unharvested to flower and set seed. Collect dried pods when they turn brown and brittle. Each pod contains multiple round seeds that store exceptionally well.

Maximising Seed Viability

Testing Germination Rates

Before relying on collected seeds, test their viability. Place ten seeds on damp paper towels within sealed plastic containers. Check germination rates after the expected timeframe for each variety. Acceptable rates vary, but 70% or higher indicates good viability.

Genetic Considerations

The plants listed above are open-pollinated varieties that produce offspring matching their parents. Avoid collecting seeds from F1 hybrids, which produce unpredictable results in subsequent generations.

Cross-pollination can occur between related plants, so maintain distance between different varieties of the same species. For guaranteed purity, grow only one variety of each species or hand-pollinate flowers whilst covering them from insects.

Troubleshooting Common Issues

Mould Prevention

Ensure seeds are completely dry before storage. Add desiccant packets to storage containers and check periodically for moisture buildup. Discard any seeds showing signs of mould immediately to prevent spread.

Pest Management

Store seeds in sealed containers to prevent insect damage. Check stored seeds regularly and freeze any showing signs of pest activity for 48 hours to eliminate insects without damaging seeds.

Begin Your Seed-Saving Adventure

Collecting seeds from your garden creates an annual cycle of growth, harvest, and renewal that deepens your connection to the natural world. Start with just a few reliable varieties this season, then expand your collection as confidence grows.

Your garden holds countless opportunities for seed collection. Walk through your space this August with fresh eyes, identifying candidates for your first harvesting attempts. Each successful collection brings you closer to true gardening independence whilst preserving the unique characteristics of plants that thrive in your specific conditions.

Further Reading: Stunning Late Summer Autumn Perennials, A Clean Start: The Importance of Garden Hygiene, The Ultimate Guide to Garden Seed Ordering for Your Home Vegetable Patch 

Follow Us on Instagram for Daily Gardening Inspiration 🌼

A Guide to Prairie Planting

Imagine a garden filled with graceful grasses and vibrant perennials, swaying together in a gentle breeze. This relaxed, naturalistic style, known as prairie planting, brings the untamed beauty of a meadow right to your doorstep. While most effective in larger spaces, you can also capture this stunning effect in smaller gardens.

This style of planting creates a rich habitat for wildlife, offering nectar for pollinators and shelter for overwintering insects. Discover how to create your own prairie-style garden, a beautiful and evolving landscape that offers interest all year round.

What is Prairie Planting?

The term “prairie” traditionally refers to the vast grasslands of the American Midwest. In gardening, however, it has evolved to describe a style that combines grasses and flowering perennials requiring similar growing conditions.

While you could base a scheme on a South African meadow or Mediterranean maquis, a prairie-style garden doesn’t have to be geographically pure. You can successfully combine plants from different parts of the world, as long as they thrive in similar soil and climate conditions. This guide will walk you through creating these beautiful, naturalistic plantings, whether in a dedicated border or across a larger landscape where they have the most dramatic impact.

When to Establish a Prairie Planting

The best time to start your prairie garden is in March. As the soil begins to warm up, your plants will have the entire growing season to establish strong roots. While some planting can be done in September, this timing is not ideal for warm-season grasses.

If you’re starting from seed, the timing will depend on the specific mix you choose. Always select species with similar germination requirements so they can be sown together and grow in harmony.

How to Create a Prairie-Style Garden

There are two main approaches to creating a prairie-style garden, each resulting in a distinct look and feel.

  • Planting in drifts: This method involves planting established grasses and flowering perennials in flowing groups or blocks. The result is similar to a traditional border but with a more natural, evolving character.
  • Broadcast sowing: By sowing a mix of seeds directly onto the soil, you can create a true ecological community where plants compete and mingle naturally. This approach mimics a genuine prairie and changes continuously over the years.

Regardless of the method you choose, a site that receives full sun for most of the day is generally the best option.

1. Planting a Prairie-Style Border

This method is an excellent way to introduce the prairie look into your garden. It draws inspiration from traditional perennial borders, which have long featured prairie natives like phlox, goldenrod (Solidago), and asters. By incorporating ornamental grasses, you can create a space that truly captures the spirit of the prairie.

Advantages:

  • Ideal for smaller gardens where space is limited.
  • Using well-developed plants gives them a head start against pests.
  • Planting in defined drifts makes it easier to identify and remove weeds.

Disadvantages:

  • Requires as much maintenance as a traditional herbaceous border.
  • The planting is less dense than a seeded prairie, leaving more room for weeds to establish if not regularly maintained.

How to Prepare the Ground

Your success starts with thorough ground preparation.

  1. Ensure the area is completely free of perennial weeds like couch grass, ground elder, and bindweed.
  2. If you’re creating a new border, rotavate the ground to break up the soil.
  3. Incorporate a generous 7.5cm (3in) layer of well-rotted garden compost or manure to enrich the soil and improve its structure.

Design and Planting

With your canvas prepared, it’s time to select your plants.

  • Assess your site: Determine how much sun the area receives and identify your soil type.
  • Plan your display: Decide when you want the main floral display to be and how long it should last.
  • Create variety: Aim for a mix of flower shapes—daisies, spires, globes, and airy “see-through” plants—to add texture and interest.
  • Plant in drifts: In smaller areas, plant in informal drifts of at least five plants of the same species. This creates a more naturalistic impression than single specimens.
  • Consider the light: Use backlighting from the low sun to illuminate grasses and seed heads. Island beds work particularly well for this.
  • Layer your planting: Choose plants that provide interest throughout the seasons. Start with low-growing spring perennials, followed by taller plants that flower through summer and into autumn.
  • Repeat groupings: Repeating clusters of plants throughout the border creates a sense of rhythm and coherence.
  • Include annuals and bulbs: Don’t forget to add annuals, biennials, and bulbs for extra layers of colour and interest.

For larger spaces, consider using the matrix planting technique, championed by renowned garden designer Piet Oudolf. This involves:

  1. The matrix: A base layer of one or two species, often a grass, planted in large numbers to unify the design.
  2. Primary plants: Groups of strong, structural flowering plants planted within the matrix to provide the main interest.
  3. Scatter plants: A few “secondary” plants, like Verbascum, added randomly to give the planting a spontaneous, natural feel.

Aftercare

  • Mulch deeply: Once planted, apply a 7.5cm (3in) layer of mulch, such as bark chips or gravel, to suppress weeds and retain moisture.
  • Water regularly: Water thoroughly at least twice a week during the first two growing seasons to help plants establish.
  • Weed diligently: Remove weeds regularly before they have a chance to set seed.
  • Cut back in spring: Leave the foliage and seed heads standing over winter to provide structural interest and shelter for wildlife. Cut everything down in early spring before new growth appears. The old plant material will act as a natural mulch.

2. Prairie Plant Communities from Seed

For a truly naturalistic and low-maintenance garden, sowing seed is the ultimate approach. The goal is to establish a self-sustaining plant community where species intermingle and evolve over time. This method has been pioneered by designers like James Hitchmough and Nigel Dunnett, whose work can be seen at the Oxford Botanic Garden and the London Olympic Park.

Advantages:

  • Establishes a genuine plant community that is more resistant to weeds once mature.
  • More cost-effective than buying established plants.
  • Allows for a greater diversity of species, extending the flowering season.
  • Ideal for sites with low soil fertility.

Disadvantages:

  • Requires significant weeding and maintenance during the initial establishment phase.
  • Slugs and snails can be a major problem for young seedlings in the UK’s damp climate.

How to Prepare for Seed Sowing

This method requires meticulous preparation.

  1. The area must be completely clear of all existing vegetation, especially perennial weeds. Removing them by hand is the most organic method but can take a year or more.
  2. If the area was previously lawn, the soil is likely to be compacted. Dig or rotavate it to the depth of a spade’s blade, then level it carefully with a landscape rake.
  3. To prevent annual weed seeds in the soil from germinating, lay a 7.5cm (3in) deep layer of washed sharp sand over the surface before sowing.

Sowing

  1. Mark out your sowing area into a grid of one-metre squares to ensure even coverage.
  2. Mix your seed with a carrier, such as damp sawdust or kiln-dried sand, at a rate of 1-2g of seed per square metre.
  3. Broadcast the seed and carrier mix over the area, making two passes in different directions for good distribution.
  4. Gently rake the seed into the top layer of sand, again in two directions at right angles.
  5. You can lay open-weave jute netting over the area to protect it from being disturbed by cats or other animals.

You can also add a few mature, container-grown plants to the scheme before sowing. This is useful for perennials that are difficult to grow from seed or for introducing specific cultivars.

Aftercare

  • Water consistently: Water the entire area every few days during the first growing season.
  • Manage slugs: Implement a slug and snail deterrent programme to protect your seedlings.
  • Weed, weed, weed: In early summer, carefully identify and remove any weed seedlings. This is a crucial step.
  • Thin out dominant species: After the second year, you may need to thin out any species that are becoming too dominant. This requires careful observation to maintain a balanced plant community.

Ready to Create Your Own Prairie Garden?

Whether you choose to plant a carefully designed border or sow a wild, evolving meadow, prairie planting offers a wonderfully rewarding way to garden. It connects you with the changing seasons, supports local wildlife, and creates a breathtakingly beautiful landscape that will bring you joy for years to come.

Discover a new way of gardening and create a space that is both stunning and sustainable.

Further Reading: Creating Harmony with Nature Naturalistic Garden Design, Garden Design with Grasses

Follow us on Instagram for Daily Gardening Inspiration 💙