Growing Wallflowers

Few flowers can match the intoxicating fragrance and cheerful colours of wallflowers. These hardy biennials have graced British gardens for centuries, transforming ordinary walls and borders into spectacular displays of golden yellows, deep purples and vibrant oranges. With their distinctive four-petalled blooms and ability to thrive in challenging conditions, wallflowers offer both novice and experienced gardeners a reliable way to bridge the gap between winter’s end and summer’s arrival.

Whether you’re looking to add early colour to your garden or create a cottage garden atmosphere, wallflowers deserve serious consideration. Their sweet, spicy fragrance alone makes them worthy of a place in any garden, whilst their low-maintenance nature ensures success even for those new to gardening.

What Are Wallflowers?

Wallflowers belong to the Brassicaceae family and carry the botanical name Erysimum cheiri. These compact plants typically grow between 20-60cm tall, producing clusters of four-petalled flowers in shades ranging from pale cream to deep burgundy. Each flower measures approximately 2cm across and contains the characteristic cross-shaped formation typical of the brassica family.

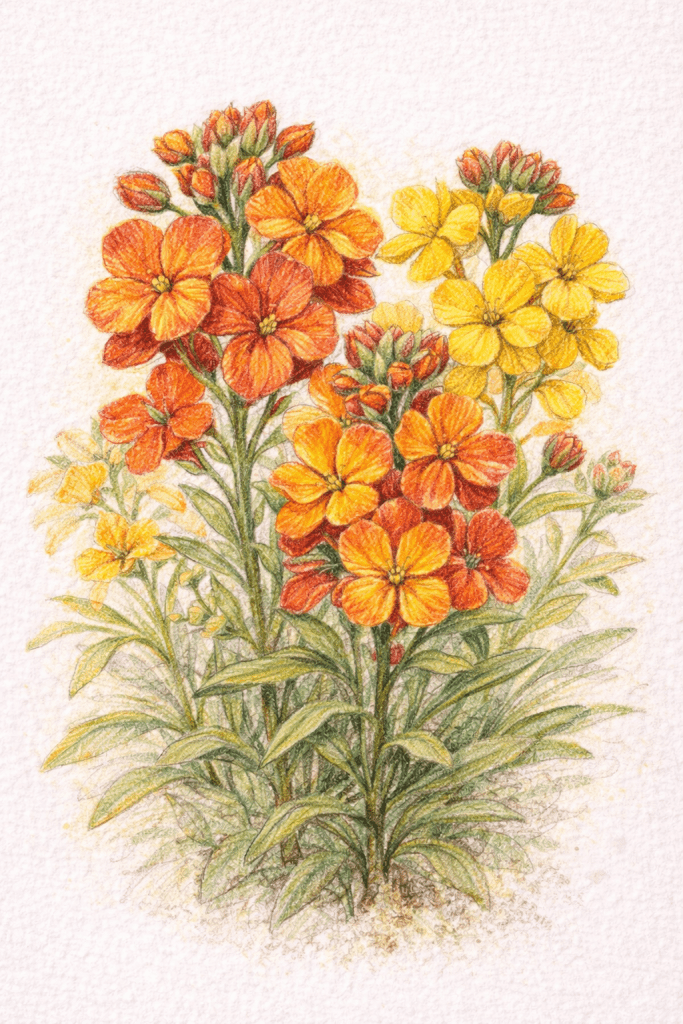
The most recognisable feature of wallflowers is their intense fragrance—a sweet, spicy scent that becomes particularly pronounced during warm afternoons and early evenings. The lance-shaped leaves are typically grey-green, providing an attractive backdrop to the vibrant blooms.

A Rich Garden History

Wallflowers have adorned European gardens since medieval times, earning their common name from their tendency to naturalise in the cracks and crevices of old stone walls. Originally native to southern Europe, these resilient plants spread throughout Britain during the Roman occupation, where they found the cool, moist climate particularly suitable.

During the Victorian era, wallflowers became synonymous with faithfulness and fidelity, often planted in memorial gardens and given as tokens of enduring love. The Victorians particularly prized the deep, velvety varieties, which they believed held the strongest fragrance.

Traditional cottage gardens wouldn’t be complete without drifts of wallflowers, where they provided essential early nectar for emerging bees and butterflies. This historical connection continues today, making wallflowers perfect for wildlife-friendly gardens.

Advantages and Disadvantages

Advantages:

  • Early flowering: Bloom from March through June when few other flowers are available
  • Exceptional fragrance: Provide intense, sweet scent throughout their flowering period
  • Low maintenance: Require minimal care once established
  • Drought tolerance: Survive dry conditions better than many other spring flowers
  • Wildlife friendly: Attract bees, butterflies, and other beneficial insects
  • Long flowering period: Continue blooming for several months
  • Excellent cut flowers: Stems last well in vases and fill rooms with fragrance

Disadvantages:

  • Biennial nature: Must be replanted every two years
  • Short lifespan: Individual plants typically last only one growing season
  • Susceptible to clubroot: Can suffer from this soil-borne fungal disease
  • Limited colour range: Fewer colour options compared to other spring flowers
  • Self-seeding tendency: May spread beyond intended areas in suitable conditions

Best Planting Locations

Wallflowers thrive in sunny, well-drained positions with neutral to slightly alkaline soil. They’re particularly effective when planted:

Against south-facing walls: The reflected heat intensifies their fragrance and extends flowering
In raised beds: Improved drainage prevents root rot during wet winters
Along garden paths: Their fragrance can be fully appreciated by passing visitors
In cottage garden borders: Mixed with other spring flowers like forget-me-nots and tulips
In containers: Particularly useful for patios and small gardens
On banks and slopes: Their drought tolerance makes them excellent for challenging sites

Avoid planting wallflowers in heavy, waterlogged soil or deep shade, where they’ll struggle to establish and flower poorly.

Growing from Seed or Plants

Growing from Seed:
Sowing wallflower seeds offers the greatest variety and proves remarkably economical. Seeds can be sown directly in the ground or in seed trays from May through July. Direct sowing works particularly well—simply scatter seeds thinly in prepared soil and rake lightly to cover.

For container sowing, use a good-quality seed compost and maintain temperatures around 15-18°C. Germination typically occurs within 7-14 days. Once seedlings develop their first true leaves, transplant them into individual pots or thin direct-sown seedlings to prevent overcrowding.

Buying Young Plants:
Purchasing young plants from garden centres provides instant results and guarantees specific varieties. Look for sturdy, compact plants with healthy, dark green foliage. Avoid leggy specimens or those showing signs of pest damage.

When to Sow and Plant

Seed Sowing Timeline:

  • May-July: Optimal sowing period for flowering the following spring
  • August: Latest recommended sowing time in most regions
  • September onwards: Too late for reliable establishment before winter

Planting Out Young Plants Schedule:

  • September-October: Ideal time for transplanting seedlings to final positions
  • March-April: Alternative planting time for pot-grown specimens
  • Spacing: Plant 15-20cm apart to allow for mature spread

Early autumn planting allows plants to establish strong root systems before winter, resulting in more vigorous growth and abundant flowering the following spring.

Care and Maintenance

Once planted, wallflowers require minimal attention. Water newly planted specimens during dry spells, but established plants rarely need supplementary watering except during prolonged drought.

Deadheading: Regular removal of spent flowers encourages continued blooming and prevents excessive self-seeding. However, leaving some flowers to set seed provides food for birds and allows natural regeneration.

Fertilising: A light application of general-purpose fertiliser in early spring supports vigorous growth. Avoid high-nitrogen feeds, which promote leafy growth at the expense of flowers.

Winter Protection: Established plants rarely need protection, but newly planted specimens benefit from a light mulch around the base during severe weather.

Best Varieties to Grow

‘Cloth of Gold’: Deep golden-yellow flowers with exceptional fragrance. Compact growth reaches 30cm tall.

‘Blood Red’: Striking deep red blooms create dramatic displays. Slightly taller at 45cm.

‘Ivory White’: Pure white flowers provide elegant contrast. Excellent for moon gardens and evening fragrance.

‘Purple Queen’: Rich purple blooms with velvety texture. Traditional cottage garden variety.

‘Fire King’: Brilliant orange-red flowers create vibrant spring displays. Heat-tolerant variety.

‘Harlequin Mixed’: Blend of colours including yellow, orange, red, and purple. Perfect for informal plantings.

Perennial Wallflowers: Erysimum ‘Bowles’s Mauve’ and ‘Constant Cheer’ offer year-round interest but lack the intense fragrance of traditional varieties.

Making the Most of Your Wallflowers

Wallflowers reward gardeners with months of colour and fragrance in exchange for minimal effort. Their ability to thrive in challenging conditions makes them perfect for novice gardeners, whilst their rich history and cottage garden charm appeal to traditionalists.

Plant wallflowers this autumn for a spectacular spring display that will fill your garden with colour and your home with the sweetest of fragrances. Once you’ve experienced their magical scent drifting across the garden on a warm spring evening, you’ll understand why these humble flowers have remained garden favourites for centuries.

Further Reading: Creating a Cottage GardenPlant Autumn Bulbs Now for a Beautiful Spring Garden, Sowing Sweet Peas in Autumn

Follow Us on Instagram for Daily Garden Inspiration 

Sowing Sweet Peas in Autumn

As the vibrant colours of summer fade and the garden prepares for its winter slumber, a thoughtful gardener knows that now is the time to lay the groundwork for next year’s floral abundance. One of the most rewarding tasks for an autumn afternoon is sowing sweet peas. These quintessentially English cottage garden flowers, with their delicate, butterfly-like blooms and intoxicating fragrance, can get a powerful head start if sown before the winter frosts set in.

What are Sweet Peas?

The sweet pea, known botanically as Lathyrus odoratus, is a climbing annual celebrated for its enchanting scent and clusters of colourful, ruffled flowers. The name Lathyrus comes from the Greek word for ‘pea’ or ‘pulse’, while odoratus is Latin for ‘fragrant’, a perfect description for this beloved bloom.

The flower’s history is just as captivating as its perfume. Native to Sicily and southern Italy, the sweet pea was first discovered in the late 17th century by a Franciscan monk, Brother Franciscus Cupani. He was so taken by its intense fragrance that he sent seeds to Dr Robert Uvedale, a schoolmaster and keen horticulturist in Enfield, England. From these humble beginnings, the sweet pea captured the hearts of British gardeners.

It was the Victorian era, however, that marked the sweet pea’s golden age. Scottish nurseryman Henry Eckford dedicated his life to breeding them, transforming the original, small purple flower into the larger, more varied blooms we recognise today. His work earned him the title “King of Sweet Peas” and introduced a stunning array of colours, from soft pastels to deep, velvety maroons.

Why Sow Sweet Peas in Autumn?

While you can certainly sow sweet peas in the spring, an autumn sowing offers several distinct advantages.

The Benefits of Autumn Sowing

  • Stronger, Healthier Plants: Sowing in autumn allows the seeds to germinate and develop a robust root system throughout the winter. This head start results in sturdier, more vigorous plants that are better equipped to handle the transition to their final growing positions in spring.
  • Earlier Flowering: Autumn-sown plants will almost always flower earlier than their spring-sown counterparts. You can expect your first fragrant blooms to appear as early as May, extending the flowering season by several weeks.
  • More Prolific Blooms: The well-established root system enables the plants to produce a greater abundance of flowers over a longer period. More roots mean more energy for producing those beautiful, scented blossoms.

Potential Drawbacks

Of course, there are a few considerations to keep in mind. Autumn-sown seedlings require protection from the harshest winter weather. They will need a cold frame, an unheated greenhouse, or a sheltered spot to prevent them from succumbing to severe frosts, waterlogged soil or hungry mice who find the seeds a tasty winter snack. Spring sowing avoids these challenges, but the resulting plants often take longer to establish.

For most gardeners, the promise of earlier, more abundant flowers makes the small effort of overwintering seedlings well worth it.

How to Sow Sweet Peas in Autumn

Sowing sweet peas is a simple and deeply satisfying process. Follow these steps to give your seeds the best possible start.

1. Choose Your Seeds

Select high-quality seeds from a reputable supplier. There is a vast range of cultivars to choose from, including the highly-scented heirloom varieties like ‘Cupani’ or the large-flowered Spencer types developed by Eckford.

2. Prepare Your Containers

Sweet peas have long taproots that dislike disturbance. For this reason, deep pots or specialised ‘root trainers’ are the ideal choice. Root trainers are deep, grooved cells that encourage the roots to grow straight down, and they hinge open, allowing you to transplant the seedlings with minimal root disturbance.

Fill your chosen containers with a good-quality, peat-free seed compost. Lightly firm it down and water it well, allowing any excess to drain away before sowing.

3. Sow the Seeds

Place two seeds in each pot or cell, pushing them about 1cm (half an inch) deep into the compost. Sowing two seeds per pot is a good insurance policy in case one fails to germinate. If both grow, you can either pinch out the weaker seedling or carefully separate them when planting out.

Cover the seeds with a little more compost, but do not water them again until you see signs of germination. This helps prevent the seeds from rotting in cold, damp conditions.

4. Overwintering Your Seedlings

Once sown, the seedlings need a bright, cool and protected place to spend the winter. An unheated greenhouse, a cold frame, or even a sheltered, sunny windowsill in a cool room is perfect. The goal is to provide enough light for growth without the warmth that would encourage soft, leggy stems.

Keep an eye out for mice, which are notorious for digging up and eating sweet pea seeds. If they are a problem in your area, cover the pots with a sheet of plastic or mesh until the seedlings have emerged. Once germinated, water the seedlings sparingly throughout the winter, only when the compost feels dry to the touch.

Planting Out Your Sweet Peas

As winter recedes and the first signs of spring appear, your sturdy little sweet pea plants will be ready for their final home in the garden.

When to Plant Out

The best time to plant out your autumn-sown sweet peas is from March to April, once the soil has started to warm up and the risk of hard frost has passed. A week or two before planting, ‘harden them off’ by gradually acclimatising them to outdoor conditions. Place them outside during the day and bring them back under cover at night.

How to Plant Out and Provide Support

Choose a sunny, well-drained spot in your garden. Sweet peas are hungry plants, so enrich the soil beforehand by digging in plenty of well-rotted manure or garden compost.

Space your plants about 20-30cm apart at the base of their support structure. Sweet peas are natural climbers and will need a sturdy frame to scramble up. You can use a wigwam of bamboo canes, a trellis against a wall, or netting stretched between posts.

Gently remove the seedlings from their pots, taking care not to disturb the roots, and plant them at the same depth they were in their containers. Water them in well.

Caring for Your Plants

To encourage bushy growth, pinch out the growing tip of each plant when it has developed three or four pairs of leaves. This prompts the plant to produce side shoots from the base, resulting in more stems and, ultimately, more flowers.

Once they start growing, tie the stems to their supports until they begin to climb on their own. Water them regularly, especially during dry spells, and apply a high-potash liquid feed (like a tomato fertiliser) every couple of weeks once they start flowering.

The most important task is to pick the flowers regularly. The more you pick, the more the plant will produce. If you allow seed pods to develop, the plant will think its job is done and stop flowering.

A Garden Filled with Fragrance

By following these simple steps, you can fill your garden with the unparalleled scent and beauty of sweet peas from late spring right through the summer. The small effort of sowing seeds on a crisp autumn day will be repaid a thousand times over when you are able to gather bunch after bunch of these exquisite, fragrant blooms.

Further Reading: Creating a Cottage Garden, Plant Autumn Bulbs Now for a Beautiful Spring Garden

Follow Us on Instagram for Daily Garden Inspiration 🌼

Autumn Bulbs for Spring Garden

Autumn marks one of the most rewarding times in the gardening calendar. As temperatures cool and leaves begin to turn, it’s the perfect opportunity to plant spring-flowering bulbs that will brighten your garden when winter finally releases its grip. With just a little effort now, you’ll create a spectacular display of colour that will lift your spirits during the darker months ahead.

Planting bulbs in autumn isn’t just about creating beauty—it’s about working with nature’s timing. Spring bulbs need a cold winter period to develop properly, making autumn planting essential for success. Whether you’re a seasoned gardener or just starting out, this guide will help you choose the right bulbs, plant them correctly and enjoy a stunning spring display.

What Bulbs Can Be Planted in Autumn

Spring-flowering bulbs offer an incredible variety of colours, shapes and blooming times. Here are the most popular options that thrive when planted in autumn:

Daffodils (Narcissus) are among the most reliable spring bulbs. These cheerful yellow flowers naturalise well in grass and return year after year with minimal care. Plant them 10-15cm deep in well-drained soil.

Tulips provide vibrant colour in countless varieties, from early-flowering species tulips to late-season Darwin hybrids. They prefer slightly alkaline soil and should be planted 15-20cm deep for best results.

Crocuses are perfect for creating carpets of purple, white or yellow flowers. These small bulbs work well in rock gardens, under trees or naturalised in lawn areas. Plant them 7-10cm deep.

Hyacinths offer intense fragrance alongside their dense flower spikes. Available in pink, blue, white and purple, they make excellent container plants or border specimens. Plant 12-15cm deep.

Snowdrops create delicate white flowers that often push through snow. These hardy bulbs multiply naturally and are perfect for woodland gardens. Plant them 7-10cm deep in partial shade.

Alliums produce striking spherical flower heads in purple, white, or yellow. These ornamental onions add architectural interest to borders and are excellent for cutting. Plant larger varieties 15-20cm deep.

Grape hyacinths (Muscari) create dense clusters of blue or white bell-shaped flowers. They spread readily and work well as ground cover or in containers. Plant 7-10cm deep.

Essential Considerations for Successful Bulb Planting

Success with autumn bulb planting depends on several key factors that ensure your bulbs develop properly and bloom reliably.

Soil drainage is absolutely critical. Bulbs will rot in waterlogged conditions, so ensure your planting area drains well. If your soil is heavy clay, add grit or plant in raised beds to improve drainage.

Planting depth follows a simple rule: plant bulbs at a depth three times their height. A 5cm tall bulb should be planted 15cm deep. This depth provides protection from frost and gives bulbs room to develop strong root systems.

Spacing allows bulbs to grow without competing for nutrients. As a general guide, space bulbs one to two bulb-widths apart. For naturalised plantings, you can plant more densely for greater impact.

Site selection matters for long-term success. Most spring bulbs prefer full sun to partial shade and well-drained soil. Consider the mature size of nearby plants—bulbs need sunlight to photosynthesise and build energy for next year’s blooms.

Timing is crucial for autumn planting. Plant bulbs when soil temperatures have cooled but before the ground freezes. In the UK, this typically means September through November, depending on your location.

Burgon and Ball RHS Bulb Planter
Burgon and Ball Long Handled Bulb Planter

Best Methods for Planting Bulbs

Different planting methods suit different situations and garden styles. Choose the approach that works best for your space and design goals.

Individual hole planting works well for formal designs or when adding bulbs to established borders. Use a bulb planter or narrow spade to create holes of the correct depth. Place one bulb per hole, pointed end upward, and backfill with soil.

Trench planting is efficient for large quantities of the same bulb type. Dig a trench to the appropriate depth, place bulbs along the bottom at correct spacing, then cover with soil. This method works particularly well for creating drifts of daffodils or crocuses.

Layered planting maximises impact in limited space by planting different bulbs at various depths in the same area. Plant large bulbs like tulips deepest, medium bulbs like daffodils in the middle layer, and small bulbs like crocuses nearest the surface.

Container planting allows you to create portable displays and control growing conditions precisely. Use containers at least 20cm deep with drainage holes. Layer different bulb types for extended flowering periods.

Naturalised planting creates informal, meadow-like displays. Scatter bulbs randomly over the planting area, then plant where they fall for a natural look. This method works beautifully with daffodils and crocuses in grass.

When planting, always place bulbs with the pointed end facing upward. If you’re unsure which end is up, plant the bulb on its side—it will find its way to the surface. Water thoroughly after planting to settle soil around the bulbs.

When Your Bulbs Will Bloom

Understanding bloom times helps you plan a succession of colour throughout spring. Early bulbs provide crucial nectar for emerging pollinators, while later varieties extend the display into early summer.

February bloomers include snowdrops, winter aconites and early crocuses. These hardy pioneers often flower through snow and signal winter’s end.

March flowers bring the first major wave of colour with species tulips, more crocuses, early daffodils and iris reticulata. These bulbs mark the true beginning of spring.

April displays feature the main daffodil season, hyacinths, grape hyacinths and many tulip varieties. This is typically the peak blooming period for spring bulbs.

May bloomers include late tulips, alliums and Spanish bluebells. These extend the bulb season and bridge the gap to early summer perennials.

June flowers from late alliums and some lilies (if planted in autumn) complete the spring bulb display and overlap with summer flowering plants.

Most bulbs will bloom for two to three weeks, though some varieties last longer. Weather conditions affect timing—cold springs delay flowering while warm weather speeds it up.

Caring for Your Newly Planted Bulbs

After planting, your bulbs need minimal care but benefit from a few simple practices. Apply a thin layer of mulch to conserve moisture and suppress weeds, but avoid thick mulches that prevent shoots from emerging.

Water bulbs if autumn is particularly dry, but avoid overwatering once cold weather arrives. Most bulbs prefer drier conditions during their dormant period.

Mark planting locations to avoid accidental damage when working in the garden. Small plant labels or a garden map help you remember where bulbs are planted.

Creating Your Spring Garden Vision

Successful bulb planting combines practical techniques with creative vision. Plant bulbs in odd-numbered groups for natural-looking displays and choose varieties with different bloom times for extended colour.

Consider companion plants that will complement your bulbs and provide structure as bulb foliage dies back. Hostas, ferns and other perennials work well for this purpose.

Most importantly, plant enough bulbs to create real impact. A hundred daffodils costs little more than a restaurant meal but provides years of spring joy.

Your autumn bulb planting efforts will reward you with months of beautiful blooms, starting when you need them most. Take time now to prepare your garden for a spectacular spring display that will make every chilly morning worthwhile.

Further Reading: Crocuses: Nature’s Painted Jewels, The Daffodil: A Symbol of Spring & Renewal, The Snowdrop: A Symbol of Hope and Resilience

For Daily Inspiration: Follow Us On Instagram 💚

All About Seed Saving

Late summer marks one of the most rewarding times for gardeners. As August transitions into September, your garden reaches peak maturity, offering the perfect opportunity to collect seeds from your favourite plants. This practice connects you directly to next year’s garden while preserving varieties you’ve grown to love.

Seed saving transforms you from a seasonal gardener into a true plant steward. Rather than purchasing packets each spring, you’ll have your own supply of seeds perfectly adapted to your local conditions. The process requires minimal equipment but delivers maximum satisfaction as you witness the complete lifecycle of your plants.

This comprehensive guide will walk you through proven methods for collecting, processing, and storing seeds from ten reliable garden plants that produce offspring true to their parent’s characteristics.

The Perfect Timing for Seed Saving

August and September provide optimal conditions for seed saving across most temperate regions. Plants have had the entire growing season to mature, and their seeds contain maximum viability. Morning collection works best, after dew has dried but before the afternoon heat causes seed pods to split prematurely.

Watch for visual cues that indicate seed readiness. Pods should feel dry and papery, while seed heads often change colour from green to brown or tan. Seeds themselves should appear plump and fully formed rather than pale or shrivelled.

Essential Seed Saving Methods

Dry Collection Method

Most garden seeds benefit from dry collection techniques. Cut entire seed heads or pods using clean secateurs, leaving a short stem for easier handling. Place collections immediately into paper bags or envelopes, never plastic, which traps moisture and encourages mould.

For plants with explosive seed dispersal like sweet peas or poppies, cover developing pods with breathable fabric bags secured with string. This captures seeds as they naturally release whilst maintaining air circulation.

Wet Collection Method

Fleshy fruits require wet processing to separate viable seeds. Scoop seeds from fully ripe tomatoes, squash or melons, then place them in water for several days. Viable seeds sink whilst pulp and poor-quality seeds float, making separation straightforward.

Professional Storage Techniques

Proper Drying Process

Spread collected seeds on newspaper or screens in a warm, well-ventilated area away from direct sunlight. Most seeds require one to two weeks of drying, depending on size and moisture content. Test dryness by bending a seed—properly dried specimens snap rather than bend.

Labelling and Organisation

Create detailed labels immediately upon collection. Include plant variety, collection date, and location within your garden. Use permanent markers on weatherproof labels, as pencil writing fades over time.

Store dried seeds in paper envelopes or small glass jars within airtight containers. Add silica gel packets or dry rice to absorb residual moisture. Label containers clearly and store in cool, dark locations such as refrigerators or unheated basements.

Ten Reliable Plants for Seed Saving

1. Marigolds (Tagetes)

These cheerful annuals produce abundant seeds that germinate reliably. Allow flower heads to dry completely on plants before collecting. Seeds store well for up to three years when kept dry and cool.

2. Sunflowers (Helianthus annuus)

Harvest seeds when the back of flower heads turn from green to brown. Cover developing heads with cloth bags to protect from birds. Each head can yield hundreds of viable seeds.

3. Nasturtiums (Tropaeolum majus)

These edible flowers produce large, easily handled seeds. Collect individual seeds as they fall naturally, or gather them from dried plants. Fresh seeds often germinate within days of planting.

4. Calendula (Calendula officinalis)

Often called pot marigold, calendula produces curved seeds that are unmistakable. Collect regularly throughout the growing season as flowers fade. These hardy annuals self-seed readily when allowed.

5. Sweet Peas (Lathyrus odoratus)

Allow pods to dry completely on vines before collection. The hard seeds benefit from scarification—gently file or nick the seed coat before planting to improve germination rates.

6. Cosmos (Cosmos bipinnatus)

These drought-tolerant flowers produce needle-like seeds attached to feathery structures. Shake dried flower heads over containers to release seeds easily. Remove chaff by gentle winnowing.

7. Zinnias (Zinnia elegans)

Wait until petals have completely dried and flower centres feel firm. Pull apart dried flower heads to reveal seeds attached to the base. Each flower can yield dozens of seeds.

8. Love-in-a-Mist (Nigella damascena)

The distinctive inflated seed pods make collection straightforward. Allow pods to dry until they rattle when shaken. Store seeds within pods until planting time for best results.

9. Lettuce (Lactuca sativa)

Allow several plants to bolt and flower for seed production. Harvest when fluffy seed heads form and begin to open. Handle gently as mature seeds detach easily.

10. Radishes (Raphanus sativus)

Leave several plants unharvested to flower and set seed. Collect dried pods when they turn brown and brittle. Each pod contains multiple round seeds that store exceptionally well.

Maximising Seed Viability

Testing Germination Rates

Before relying on collected seeds, test their viability. Place ten seeds on damp paper towels within sealed plastic containers. Check germination rates after the expected timeframe for each variety. Acceptable rates vary, but 70% or higher indicates good viability.

Genetic Considerations

The plants listed above are open-pollinated varieties that produce offspring matching their parents. Avoid collecting seeds from F1 hybrids, which produce unpredictable results in subsequent generations.

Cross-pollination can occur between related plants, so maintain distance between different varieties of the same species. For guaranteed purity, grow only one variety of each species or hand-pollinate flowers whilst covering them from insects.

Troubleshooting Common Issues

Mould Prevention

Ensure seeds are completely dry before storage. Add desiccant packets to storage containers and check periodically for moisture buildup. Discard any seeds showing signs of mould immediately to prevent spread.

Pest Management

Store seeds in sealed containers to prevent insect damage. Check stored seeds regularly and freeze any showing signs of pest activity for 48 hours to eliminate insects without damaging seeds.

Begin Your Seed-Saving Adventure

Collecting seeds from your garden creates an annual cycle of growth, harvest, and renewal that deepens your connection to the natural world. Start with just a few reliable varieties this season, then expand your collection as confidence grows.

Your garden holds countless opportunities for seed collection. Walk through your space this August with fresh eyes, identifying candidates for your first harvesting attempts. Each successful collection brings you closer to true gardening independence whilst preserving the unique characteristics of plants that thrive in your specific conditions.

Further Reading: Stunning Late Summer Autumn Perennials, A Clean Start: The Importance of Garden Hygiene, The Ultimate Guide to Garden Seed Ordering for Your Home Vegetable Patch 

Follow Us on Instagram for Daily Gardening Inspiration 🌼

Why Sow Broad Beans in Autumn?

Understanding Broad Beans

Broad beans, scientifically known as Vicia faba, are a type of legume cherished for their distinctive flavour and texture. They can be incorporated into various dishes, adding a nutty taste and creamy consistency. In addition to their culinary appeal, broad beans are packed with nutritional benefits. They are an excellent source of protein, fibre and essential vitamins and minerals, such as folate, iron, and potassium. This makes them a nutritious addition to any diet.

Broad Beans Vicia faba

The broad bean plant itself is quite robust and can thrive in a range of conditions, which is one reason it has been cultivated for centuries across different regions. The plants typically grow to a height of 0.5 to 1.8 metres and produce pods containing 4-8 seeds each. The seeds can vary in colour from green to brown or even black, depending on the variety.

Broad beans are particularly well-suited to the UK climate, adapting well to cooler temperatures and thriving in the moist conditions common during the autumn months. This adaptability makes them an ideal crop for both amateur and experienced gardeners looking to extend their growing season.

When it comes to soil preferences, broad beans are not particularly fussy but do best in well-draining soil enriched with organic matter. They can tolerate a range of pH levels, although a slightly acidic to neutral soil is ideal. Given their nitrogen-fixing abilities, broad beans also contribute to improving soil health, benefiting not only themselves but also subsequent crops planted in the same location.

In terms of pests and diseases, broad beans are relatively hardy but can occasionally be affected by issues like blackfly infestations and fungal diseases such as chocolate spot. Regular monitoring and appropriate preventative measures can help keep these problems at bay.

Reasons to Cultivate Broad Beans

Broad beans play a crucial role in promoting soil health. As nitrogen-fixers, they naturally enrich the soil by converting atmospheric nitrogen into a form that plants can utilise. This reduces the reliance on synthetic fertilisers, making your gardening practice more eco-friendly. Additionally, broad beans can improve soil structure and fertility for subsequent crops.

Another advantage of growing broad beans is their early harvesting season. Planting them in autumn allows you to enjoy fresh beans by late spring or early summer, bridging the gap before other crops are ready for harvest. This extended growing season helps maximise the productivity of your garden space.

Broad beans are also relatively easy to grow, making them suitable for gardeners of all experience levels. Their ability to adapt to various soil conditions and tolerate cooler temperatures means they can thrive with minimal intervention. Regular monitoring and basic care are usually sufficient to ensure a healthy crop.

Moreover, broad beans can be an attractive addition to your garden. Their tall, upright plants and colourful flowers add visual interest, while also attracting beneficial insects such as bees, which help with pollination.

Finally, cultivating broad beans offers nutritional benefits. They are rich in protein, fibre and essential vitamins and minerals, making them a healthy addition to your diet. Incorporating homegrown broad beans into your meals ensures you have access to fresh, high-quality produce, enhancing both the flavour and nutritional value of your dishes.

Advantages of Planting in Autumn in the UK

One significant advantage of sowing broad beans in autumn is the favourable climate conditions in the UK during this season. The cooler temperatures and ample rainfall create an ideal environment for broad bean germination and early growth. Soil temperature is crucial as it affects important plant processes like nutrient uptake and root growth, which are essential for the development of broad beans.

Moreover, the reduced presence of pests and diseases in the cooler months helps the plants to establish themselves more robustly. This early establishment leads to healthier, more resilient crops by the time spring arrives. Autumn-sown broad beans often benefit from a head start, maturing earlier than those sown in spring, thus allowing for an earlier harvest.

Planting broad beans in autumn also means that gardeners can take advantage of the natural cycle of the seasons. The plants grow slowly over the winter, building a strong root system that supports vigorous growth in the spring. This slow and steady development results in robust plants that are better equipped to withstand adverse conditions.

Additionally, autumn planting helps to extend the growing season, making the most of the available garden space. With fewer gardening tasks typically required in the autumn compared to the busy spring season, there is more time to focus on proper planting and care.

Another benefit is the improvement of soil structure and fertility. Broad beans, being nitrogen-fixers, enhance the soil by adding essential nutrients, which can benefit subsequent crops planted in the same location. This natural enrichment reduces the need for synthetic fertilisers, promoting a more sustainable gardening practice.

Autumn Sowing Guide for Broad Beans

To sow broad beans successfully in autumn, start by choosing a sunny location in your garden that has well-draining soil. Preparing the soil is crucial; incorporate compost or well-rotted manure to ensure it is rich in essential nutrients.

Next, plant your seeds about 5 cm deep and 20-25 cm apart, spacing rows approximately 45 cm apart. This arrangement allows each plant ample room to grow and develop a strong root system. After sowing, lightly water the soil to help with seed germination, taking care to maintain moisture without causing waterlogging.

It’s also beneficial to use cloches or fleece to protect your seeds and seedlings from early frost. These coverings can help to maintain soil temperature and provide some protection against pests. In particularly wet conditions, consider raising the soil beds slightly to improve drainage and prevent the seeds from rotting.

As your broad beans begin to grow, keep an eye on soil moisture levels. While they do require consistent moisture, overwatering can be detrimental. Aim to keep the soil just moist, particularly during dry periods. Additionally, mulching around the base of the plants can help retain soil moisture and reduce the growth of weeds.

To further support young plants, you might consider using stakes or supports as they grow taller. This can prevent the plants from being damaged by strong winds or heavy rain. Regularly check for signs of pests or diseases, and take immediate action if any issues are detected to ensure healthy development.

By adhering to these guidelines, you can establish a healthy, productive crop of broad beans that will thrive through the winter and into the spring.

From Seedling to Harvest: Care Instructions

After your broad bean seedlings have emerged, they will require consistent care to reach their full potential. Watering is vital, particularly during dry periods, but it’s essential to strike a balance to avoid waterlogging. Broad beans benefit from a soil that remains consistently moist but not overly saturated.

Mulching around the plants can help retain moisture and suppress weed growth, reducing competition for nutrients. As your seedlings grow, consider using stakes or other supports to protect them from wind damage and heavy rain, which can otherwise cause the plants to topple.

Regular weeding is crucial to ensure your broad beans do not compete with other plants for vital nutrients. Monitor your plants closely for signs of pests like aphids or diseases such as chocolate spot. Early detection and prompt action can prevent these issues from affecting your crop. Natural pest control methods or suitable organic treatments can be effective in managing these problems.

Throughout the growing season, inspect your plants regularly to ensure they remain healthy and robust. Pinching out the tips of the plants when they reach about 15-20 cm can encourage bushier growth and potentially higher yields. This practice can also help deter blackfly infestations, as the pests are often attracted to the tender new growth.

Finally, keep an eye on soil health. Given that broad beans are nitrogen-fixers, they improve the nutrient content of the soil. Nevertheless, it’s beneficial to occasionally feed your plants with a balanced, organic fertiliser to support their development. Regular monitoring and timely interventions will help you achieve a successful and productive harvest of broad beans.

Broad Bean Harvesting: Timing and Techniques

Broad beans typically mature by late spring or early summer, depending on the variety and local climate conditions. When the pods feel plump and firm, it’s time to harvest. Using your fingers or a pair of scissors, gently pinch or cut the pods from the plant. Regular harvesting encourages the plant to continue producing beans, thereby extending your harvest period. Aim to pick the beans when they are young and tender, as they are at their most flavourful and nutritious at this stage. If left too long, the beans can become tough and less palatable. Post-harvest, broad beans can be stored in a cool, dry place or blanched and frozen for later use, ensuring you can enjoy your homegrown produce well beyond the growing season.

Further reading: The Benefits of Growing your Own Vegetables

Follow us on Instagram for daily gardening inspiration