The Autumn Vegetable Garden

September arrives with cooler mornings and shorter days, signalling a shift in your vegetable garden’s rhythm. While many gardeners view autumn as the end of the growing season, experienced growers know this period offers unique opportunities for both harvest and preparation. The autumn months bring their own rewards and requirements, from gathering the fruits of your summer labour to setting the stage for next year’s success.

Understanding what happens in your vegetable garden during September and October helps you make the most of these transitional months. Your plants respond to changing daylight hours and temperatures in predictable ways, and knowing these patterns allows you to time your activities perfectly. Some crops reach their peak flavour after the first light frosts, while others need protection to extend their productive period.

The autumn garden requires a different approach than the busy planting season of spring. Your focus shifts from rapid growth to preservation, from sowing tender seedlings to protecting established plants. This seasonal transition also presents the perfect opportunity to prepare your soil and plan for the year ahead, ensuring your garden remains productive and healthy.

What’s Happening in Your Autumn Garden

Your vegetable garden undergoes significant changes during the autumn months. Daylight hours decrease steadily and this reduction in light triggers many plants to shift their energy from growth to seed production or storage. Root vegetables like carrots, parsnips, and beetroot concentrate their sugars, developing the sweet flavours that make them autumn favourites.

Soil temperature begins to drop, though it changes more slowly than air temperature. This means your soil remains warm enough to support growth well into October, particularly for cold-hardy crops. The combination of warm soil and cool air creates ideal conditions for many vegetables, reducing stress and improving flavour development.

Pest pressure often decreases during autumn, as many insects begin their winter preparations. However, some pests become more active as they seek shelter and final feeding opportunities. Slugs and snails can be particularly troublesome during mild, wet autumn weather, making vigilance important for protecting your remaining crops.

Beneficial insects also change their behaviour during autumn. Bees continue foraging on late-flowering crops like runner beans and courgettes, while predatory insects help control remaining pest populations. Supporting these beneficial creatures through autumn helps maintain your garden’s natural balance.

Autumn Harvesting: Making the Most of Your Crops

Root Vegetables and Storage Crops

October marks prime harvest time for many root vegetables. Carrots, parsnips and beetroot can remain in the ground until needed, as soil provides excellent natural storage. However, lifting and storing these crops indoors protects them from severe weather and makes access easier during winter months.

Potatoes require harvesting before the first hard frost damages the tubers. Choose a dry day for lifting potatoes, allowing them to surface-dry for a few hours before storing. Brush off excess soil but avoid washing, as this can lead to rot during storage.

Onions and garlic benefit from proper curing before storage. Lift bulbs when the foliage has died back naturally, then spread them in a warm, airy location for several weeks. Well-cured bulbs store for months in cool, dry conditions.

Brassicas and Winter Vegetables

Brussels sprouts improve dramatically after exposure to frost, developing their characteristic sweet flavour. Begin harvesting from the bottom of the stem upwards, taking firm, tight sprouts while leaving smaller ones to develop further.

Cabbages can withstand considerable cold but should be harvested before severe frosts split the heads. Red cabbages generally store better than green varieties and can often remain in the garden longer.

Leeks tolerate frost exceptionally well and can be harvested throughout autumn and winter. Earth up around the stems regularly to maintain the white portion that gives leeks their mild flavour.

Late Summer Crops

Courgettes and marrows continue producing until the first frost. Regular harvesting encourages continued production, while allowing some fruits to mature into marrows provides variety for winter storage.

Sweetcorn reaches maturity when the silks turn brown and the kernels produce a milky juice when pressed. Harvest in the morning when sugar content is highest, and use immediately for the best flavour.

Runner beans and French beans produce their final flush during early autumn. Pick young, tender pods regularly, and consider saving seeds from the best plants for next year’s crop.

Strategic Autumn Sowing

Quick-Growing Salads and Greens

September offers excellent opportunities for sowing quick-growing crops that will provide fresh harvests through winter. Winter lettuces, particularly hardy varieties like ‘Winter Density’ and ‘Arctic King’, can be sown now for winter harvests under protection.

Rocket and mustard greens germinate quickly in the residual soil warmth and tolerate cold weather well. These peppery leaves add interest to winter salads and can be harvested repeatedly as cut-and-come-again crops.

Corn salad (lamb’s lettuce) thrives in autumn conditions and provides tender leaves throughout winter. This hardy green requires no protection in most areas and self-seeds readily for future crops.

Winter Radishes and Asian Greens

Daikon radishes and other winter varieties can be sown through September for autumn and winter harvests. These large radishes store well in the ground and provide valuable fresh vegetables when other crops are scarce.

Pak choi, mizuna, and other Asian greens germinate readily in autumn’s moderate temperatures. These fast-growing vegetables tolerate light frosts and provide nutritious harvests within weeks of sowing.

Green Manures and Soil Improvement

Empty beds benefit from green manure crops that protect and improve the soil over winter. Crimson clover, winter rye, and field beans can be sown through September to prevent soil erosion and add organic matter when dug in during spring.

Broad beans sown in autumn provide an early crop next year while fixing nitrogen in the soil. Choose hardy varieties specifically bred for autumn sowing, and provide some protection during severe weather.

Essential Autumn Garden Tasks

Soil Care and Preparation

Autumn soil preparation sets the foundation for next year’s success. Add compost or well-rotted manure to beds that will remain empty over winter, allowing soil organisms to incorporate the organic matter slowly.

Dig heavy clay soils roughly during autumn, leaving large clods exposed to winter frosts. This freeze-thaw action breaks down clay particles naturally, improving soil structure without the risk of compaction that comes with working wet spring soil.

Test your soil pH during autumn when results accurately reflect the season’s growing conditions. Lime can be applied now if needed, giving it time to adjust soil pH before spring planting begins.

Plant Protection and Season Extension

Protect tender plants from early frosts using fleece, cloches or cold frames. These simple structures can extend the growing season by several weeks, providing fresh vegetables well into winter.

Earth up celery, leeks, and other crops that benefit from blanching. This process not only improves flavour but also provides some frost protection to sensitive plant parts.

Install protective barriers around brassicas to prevent pigeon damage. These birds become more troublesome during autumn as natural food sources become scarce.

Pest and Disease Management

Clear up fallen leaves and plant debris that can harbour pests and diseases over winter. Compost healthy material but dispose of diseased plants to prevent problems next year.

Check stored vegetables regularly, removing any showing signs of deterioration before they affect healthy produce. Good air circulation and consistent temperatures help maintain quality during storage.

Apply winter washes to fruit trees and inspect vegetable plants for overwintering pest eggs. Early intervention prevents problems from establishing during the growing season.

Tool Maintenance and Garden Organisation

Clean and oil garden tools before winter storage to prevent rust and ensure they remain sharp and functional. Well-maintained tools make garden work more efficient and enjoyable.

Drain and store irrigation equipment to prevent frost damage. Clean out water containers and check hoses for splits or blockages that need attention before next season.

Review the season’s successes and challenges while the experience remains fresh. Keep notes about varieties that performed well and problems that need addressing next year.

Planning for Winter and Beyond

Seed Saving and Selection

Autumn provides excellent opportunities for saving seeds from successful crops. Allow beans, peas and brassicas to fully mature before collecting seeds, then dry and store them properly for next year’s planting.

Research new varieties for next year’s garden while autumn catalogs arrive with fresh inspiration. Consider disease-resistant varieties and plants suited to your local climate conditions.

Order spring seeds early to ensure availability of popular varieties. Many suppliers offer early-bird discounts that make advance planning financially rewarding.

Structural Improvements

Plan and implement structural improvements during autumn when the pressure of daily maintenance decreases. Build new raised beds, install trellises or improve pathway access while weather remains workable.

Assess irrigation needs and plan improvements for next year’s system. Autumn installation allows testing and adjustments before the busy growing season begins.

Consider adding season extension structures like polytunnels or cold frames. These investments pay dividends by extending both ends of the growing season significantly.

Looking Forward: Setting Up for Success

Your autumn garden work creates the foundation for next year’s growing success. The vegetables you harvest now represent months of careful attention, while the preparations you make during these transitional months determine how smoothly next season begins.

Take time to celebrate your autumn harvests and the satisfaction that comes from growing your own food. Each perfectly ripe tomato, crisp apple or tender carrot represents a connection to the natural world that becomes increasingly precious in our modern lives.

The rhythm of the garden teaches patience and planning, showing how small actions taken at the right time yield significant rewards. Your autumn vegetable garden work continues this cycle, preparing for the dormant months ahead while setting the stage for spring’s renewed growth.

Keep detailed records of this year’s experiences, noting which varieties performed best and which techniques proved most effective. This information becomes invaluable when planning next year’s garden, helping you build on successes and avoid repeating mistakes.

Remember that gardening skills develop gradually through experience and observation. Each season teaches new lessons and provides opportunities to refine your techniques, making your garden more productive and rewarding year after year.

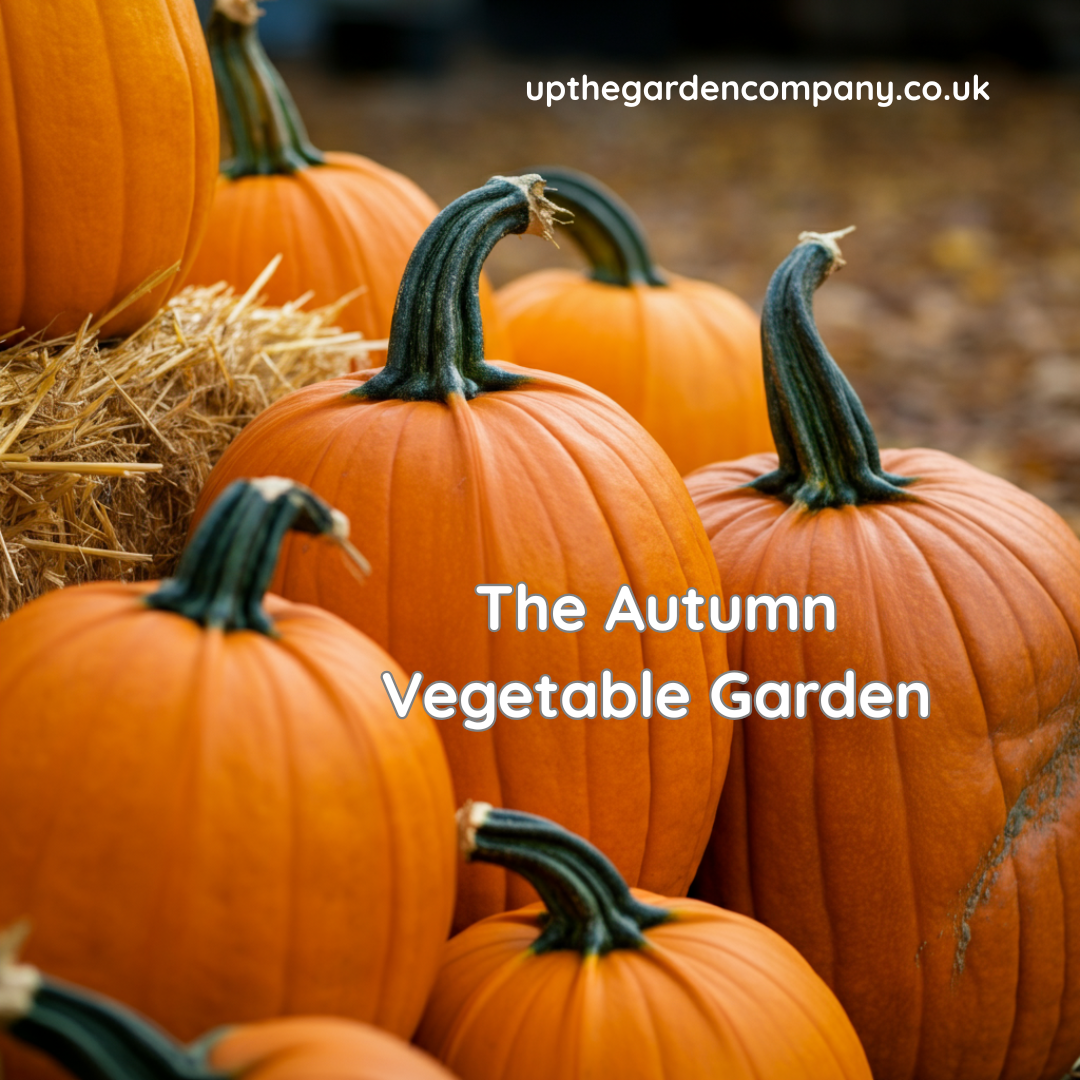
Further Reading: All About Marrows, Pumpkins – The King of the Autumn Harvest

All About Seed Saving

Late summer marks one of the most rewarding times for gardeners. As August transitions into September, your garden reaches peak maturity, offering the perfect opportunity to collect seeds from your favourite plants. This practice connects you directly to next year’s garden while preserving varieties you’ve grown to love.

Seed saving transforms you from a seasonal gardener into a true plant steward. Rather than purchasing packets each spring, you’ll have your own supply of seeds perfectly adapted to your local conditions. The process requires minimal equipment but delivers maximum satisfaction as you witness the complete lifecycle of your plants.

This comprehensive guide will walk you through proven methods for collecting, processing, and storing seeds from ten reliable garden plants that produce offspring true to their parent’s characteristics.

The Perfect Timing for Seed Saving

August and September provide optimal conditions for seed saving across most temperate regions. Plants have had the entire growing season to mature, and their seeds contain maximum viability. Morning collection works best, after dew has dried but before the afternoon heat causes seed pods to split prematurely.

Watch for visual cues that indicate seed readiness. Pods should feel dry and papery, while seed heads often change colour from green to brown or tan. Seeds themselves should appear plump and fully formed rather than pale or shrivelled.

Essential Seed Saving Methods

Dry Collection Method

Most garden seeds benefit from dry collection techniques. Cut entire seed heads or pods using clean secateurs, leaving a short stem for easier handling. Place collections immediately into paper bags or envelopes, never plastic, which traps moisture and encourages mould.

For plants with explosive seed dispersal like sweet peas or poppies, cover developing pods with breathable fabric bags secured with string. This captures seeds as they naturally release whilst maintaining air circulation.

Wet Collection Method

Fleshy fruits require wet processing to separate viable seeds. Scoop seeds from fully ripe tomatoes, squash or melons, then place them in water for several days. Viable seeds sink whilst pulp and poor-quality seeds float, making separation straightforward.

Professional Storage Techniques

Proper Drying Process

Spread collected seeds on newspaper or screens in a warm, well-ventilated area away from direct sunlight. Most seeds require one to two weeks of drying, depending on size and moisture content. Test dryness by bending a seed—properly dried specimens snap rather than bend.

Labelling and Organisation

Create detailed labels immediately upon collection. Include plant variety, collection date, and location within your garden. Use permanent markers on weatherproof labels, as pencil writing fades over time.

Store dried seeds in paper envelopes or small glass jars within airtight containers. Add silica gel packets or dry rice to absorb residual moisture. Label containers clearly and store in cool, dark locations such as refrigerators or unheated basements.

Ten Reliable Plants for Seed Saving

1. Marigolds (Tagetes)

These cheerful annuals produce abundant seeds that germinate reliably. Allow flower heads to dry completely on plants before collecting. Seeds store well for up to three years when kept dry and cool.

2. Sunflowers (Helianthus annuus)

Harvest seeds when the back of flower heads turn from green to brown. Cover developing heads with cloth bags to protect from birds. Each head can yield hundreds of viable seeds.

3. Nasturtiums (Tropaeolum majus)

These edible flowers produce large, easily handled seeds. Collect individual seeds as they fall naturally, or gather them from dried plants. Fresh seeds often germinate within days of planting.

4. Calendula (Calendula officinalis)

Often called pot marigold, calendula produces curved seeds that are unmistakable. Collect regularly throughout the growing season as flowers fade. These hardy annuals self-seed readily when allowed.

5. Sweet Peas (Lathyrus odoratus)

Allow pods to dry completely on vines before collection. The hard seeds benefit from scarification—gently file or nick the seed coat before planting to improve germination rates.

6. Cosmos (Cosmos bipinnatus)

These drought-tolerant flowers produce needle-like seeds attached to feathery structures. Shake dried flower heads over containers to release seeds easily. Remove chaff by gentle winnowing.

7. Zinnias (Zinnia elegans)

Wait until petals have completely dried and flower centres feel firm. Pull apart dried flower heads to reveal seeds attached to the base. Each flower can yield dozens of seeds.

8. Love-in-a-Mist (Nigella damascena)

The distinctive inflated seed pods make collection straightforward. Allow pods to dry until they rattle when shaken. Store seeds within pods until planting time for best results.

9. Lettuce (Lactuca sativa)

Allow several plants to bolt and flower for seed production. Harvest when fluffy seed heads form and begin to open. Handle gently as mature seeds detach easily.

10. Radishes (Raphanus sativus)

Leave several plants unharvested to flower and set seed. Collect dried pods when they turn brown and brittle. Each pod contains multiple round seeds that store exceptionally well.

Maximising Seed Viability

Testing Germination Rates

Before relying on collected seeds, test their viability. Place ten seeds on damp paper towels within sealed plastic containers. Check germination rates after the expected timeframe for each variety. Acceptable rates vary, but 70% or higher indicates good viability.

Genetic Considerations

The plants listed above are open-pollinated varieties that produce offspring matching their parents. Avoid collecting seeds from F1 hybrids, which produce unpredictable results in subsequent generations.

Cross-pollination can occur between related plants, so maintain distance between different varieties of the same species. For guaranteed purity, grow only one variety of each species or hand-pollinate flowers whilst covering them from insects.

Troubleshooting Common Issues

Mould Prevention

Ensure seeds are completely dry before storage. Add desiccant packets to storage containers and check periodically for moisture buildup. Discard any seeds showing signs of mould immediately to prevent spread.

Pest Management

Store seeds in sealed containers to prevent insect damage. Check stored seeds regularly and freeze any showing signs of pest activity for 48 hours to eliminate insects without damaging seeds.

Begin Your Seed-Saving Adventure

Collecting seeds from your garden creates an annual cycle of growth, harvest, and renewal that deepens your connection to the natural world. Start with just a few reliable varieties this season, then expand your collection as confidence grows.

Your garden holds countless opportunities for seed collection. Walk through your space this August with fresh eyes, identifying candidates for your first harvesting attempts. Each successful collection brings you closer to true gardening independence whilst preserving the unique characteristics of plants that thrive in your specific conditions.

Further Reading: Stunning Late Summer Autumn Perennials, A Clean Start: The Importance of Garden Hygiene, The Ultimate Guide to Garden Seed Ordering for Your Home Vegetable Patch 

Follow Us on Instagram for Daily Gardening Inspiration 🌼

Stunning Late Summer Autumn Perennials

Summer’s peak may be behind us, but your garden doesn’t have to fade into dormancy just yet. Late summer and early autumn present the perfect opportunity to showcase perennials that thrive in the cooler temperatures and shorter days, bringing vibrant colours and seasonal interest when many plants are winding down for winter.

These hardy perennials offer something truly special—they bridge the gap between summer’s abundance and winter’s rest, providing essential nectar for late-season pollinators whilst creating stunning displays that carry your garden gracefully into the colder months. From towering asters to delicate Japanese anemones, these plants prove that autumn can be just as spectacular as any other season.

Let’s explore ten exceptional perennials that will transform your UK garden into a late-season showstopper, each bringing its own unique charm and character to your outdoor space.

Essential Late-Season Bloomers for British Gardens

1. Symphyotrichum novae-angliae (New England Aster)

The New England Aster stands as one of autumn’s most reliable performers, producing clouds of daisy-like flowers in shades of purple, pink, and white from August through to October. This robust perennial reaches heights of 90-150cm, creating impressive vertical displays that work beautifully at the back of borders.

Native to North America but perfectly adapted to British conditions, these asters thrive in full sun to partial shade and tolerate a wide range of soil conditions. Their late flowering period makes them invaluable for hungry bees and butterflies preparing for winter, whilst their sturdy stems require minimal staking even in exposed positions.

Symphyotrichum novae-angliae (New England Aster)

2. Anemone hupehensis (Japanese Anemone)

Japanese Anemones bring an elegant, almost ethereal quality to late summer borders with their delicate pink or white flowers dancing on tall stems from August to October. Growing 60-120cm tall, these perennials spread gradually to form substantial clumps that improve with age.

These versatile plants excel in partial shade, making them perfect for woodland gardens or areas beneath deciduous trees. Their deeply lobed foliage provides attractive ground cover throughout the growing season, whilst the silky seed heads extend interest well into winter.

Anemone hupehensis (Japanese Anemone)

3. Helenium autumnale (Sneezeweed)

Despite its unfortunate common name, Helenium autumnale creates some of the most cheerful displays in the autumn garden. These North American natives produce masses of bright yellow, orange, or red daisy-like flowers with prominent central cones from July through September.

Growing 60-150cm tall depending on the variety, Heleniums prefer full sun and moist, fertile soil. Their hot colours perfectly capture the essence of autumn, whilst their long flowering period provides weeks of continuous colour. Regular deadheading extends the blooming season even further.

Helenium autumnale (Sneezeweed)

4. Rudbeckia fulgida (Black-Eyed Susan)

Black-Eyed Susans bring golden sunshine to late summer gardens with their cheerful yellow petals surrounding distinctive dark centres. Flowering from July to October, these hardy perennials reach 30-90cm in height and spread slowly to form attractive clumps.

Extremely tolerant of various growing conditions, Rudbeckias thrive in full sun to partial shade and adapt to both wet and dry soils. Their daisy-like flowers are magnets for butterflies and bees, whilst the seed heads provide winter food for birds and structural interest in the garden.

Rudbeckia fulgida (Black-Eyed Susan)

5. Sedum spectabile (Ice Plant)

The Ice Plant transforms from an unremarkable succulent into a star performer come late summer, when flat-topped clusters of pink flowers emerge from August through October. Growing 30-60cm tall with thick, fleshy leaves, this drought-tolerant perennial thrives in poor, well-drained soils.

Sedums are essential plants for wildlife gardens, attracting countless butterflies, bees, and other pollinators during their flowering period. The architectural seed heads remain attractive throughout winter, whilst the succulent foliage provides year-round structure in sunny borders.

Sedum spectabile (Ice Plant)

6. Solidago rigida (Stiff Goldenrod)

Stiff Goldenrod offers a more refined alternative to its aggressive cousins, producing dense, flat-topped clusters of golden-yellow flowers from August to September. This North American native reaches 60-150cm tall and forms neat, non-invasive clumps that won’t overwhelm neighbouring plants.

Thriving in full sun and well-drained soils, this perennial tolerates drought conditions once established. Its late-season nectar provides crucial food for migrating butterflies, whilst the seeds feed finches and other small birds throughout autumn and winter.

Solidago rigida (Stiff Goldenrod)

7. Persicaria amplexicaulis (Red Bistort)

Red Bistort brings tropical-looking excitement to British gardens with its striking bottle-brush spikes of flowers in shades of red, pink, or white from June through October. This vigorous perennial reaches 60-120cm tall and spreads to form substantial clumps in moist, fertile conditions.

Excellent for naturalising in wild gardens or woodland edges, Red Bistort thrives in partial shade and consistently moist soil. Its long flowering season and architectural foliage make it invaluable for extending colour deep into autumn.

Persicaria amplexicaulis (Red Bistort)

8. Actaea simplex (Bugbane)

Bugbane offers something completely different with its tall, fragrant spires of white flowers rising above attractive divided foliage from September to October. Growing 120-200cm tall, this woodland perennial creates dramatic vertical accents in shaded borders.

Perfect for the back of partially shaded borders, Bugbane prefers cool, moist conditions and rich, humus-laden soil. The distinctive bottle-brush flowers emit a sweet fragrance that attracts late-season pollinators, whilst the architectural seed heads provide winter interest.

Actaea simplex (Bugbane)

9. Chelone obliqua (Turtlehead)

Turtlehead brings unusual charm to late-season gardens with its distinctive snapdragon-like flowers in shades of pink or white from August to September. Growing 60-90cm tall, this North American native thrives in moist conditions that would challenge many other perennials.

Ideal for bog gardens, pond edges, or any consistently moist location, Turtlehead tolerates both sun and partial shade. Its glossy, dark green foliage provides excellent structure throughout the growing season, whilst the unique flowers add conversation-worthy interest to late summer displays.

Chelone obliqua (Turtlehead)

10. Vernonia crinita (Ironweed)

Ironweed concludes our selection with its impressive displays of deep purple flowers from August through September. This tall perennial reaches 120-180cm in height, creating substantial presence at the back of borders or in prairie-style plantings.

Native to eastern North America but well-suited to British conditions, Ironweed prefers full sun and moist, fertile soil. Its late-season blooms provide crucial nectar for butterflies and other pollinators, whilst the attractive seed heads offer winter food for birds and structural interest in the garden.

Vernonia crinita (Ironweed)

Creating Your Late-Season Garden Display

These ten perennials offer endless possibilities for creating stunning autumn displays in your UK garden. Consider combining the golden tones of Helenium and Rudbeckia with the purple hues of New England Asters and Ironweed for a classic autumnal palette. Alternatively, pair the delicate flowers of Japanese Anemones with the architectural presence of Bugbane for a more sophisticated, woodland-inspired display.

Remember that successful autumn gardens rely on thoughtful plant placement and consideration of each species’ specific needs. Group plants with similar requirements together, and don’t forget to leave space for these perennials to mature and spread naturally over time.

Your late-season garden awaits—discover the magic these remarkable perennials can bring to your outdoor space as summer gently transitions into autumn’s embrace.

Further Reading: Transform Your Garden into a Butterfly Haven, Why Bees Are Essential to Our Gardens, How to Lift and Divide Perennials

Follow Us on Instagram for Daily Inspiration 🌼

A Guide to Prairie Planting

Imagine a garden filled with graceful grasses and vibrant perennials, swaying together in a gentle breeze. This relaxed, naturalistic style, known as prairie planting, brings the untamed beauty of a meadow right to your doorstep. While most effective in larger spaces, you can also capture this stunning effect in smaller gardens.

This style of planting creates a rich habitat for wildlife, offering nectar for pollinators and shelter for overwintering insects. Discover how to create your own prairie-style garden, a beautiful and evolving landscape that offers interest all year round.

What is Prairie Planting?

The term “prairie” traditionally refers to the vast grasslands of the American Midwest. In gardening, however, it has evolved to describe a style that combines grasses and flowering perennials requiring similar growing conditions.

While you could base a scheme on a South African meadow or Mediterranean maquis, a prairie-style garden doesn’t have to be geographically pure. You can successfully combine plants from different parts of the world, as long as they thrive in similar soil and climate conditions. This guide will walk you through creating these beautiful, naturalistic plantings, whether in a dedicated border or across a larger landscape where they have the most dramatic impact.

When to Establish a Prairie Planting

The best time to start your prairie garden is in March. As the soil begins to warm up, your plants will have the entire growing season to establish strong roots. While some planting can be done in September, this timing is not ideal for warm-season grasses.

If you’re starting from seed, the timing will depend on the specific mix you choose. Always select species with similar germination requirements so they can be sown together and grow in harmony.

How to Create a Prairie-Style Garden

There are two main approaches to creating a prairie-style garden, each resulting in a distinct look and feel.

  • Planting in drifts: This method involves planting established grasses and flowering perennials in flowing groups or blocks. The result is similar to a traditional border but with a more natural, evolving character.
  • Broadcast sowing: By sowing a mix of seeds directly onto the soil, you can create a true ecological community where plants compete and mingle naturally. This approach mimics a genuine prairie and changes continuously over the years.

Regardless of the method you choose, a site that receives full sun for most of the day is generally the best option.

1. Planting a Prairie-Style Border

This method is an excellent way to introduce the prairie look into your garden. It draws inspiration from traditional perennial borders, which have long featured prairie natives like phlox, goldenrod (Solidago), and asters. By incorporating ornamental grasses, you can create a space that truly captures the spirit of the prairie.

Advantages:

  • Ideal for smaller gardens where space is limited.
  • Using well-developed plants gives them a head start against pests.
  • Planting in defined drifts makes it easier to identify and remove weeds.

Disadvantages:

  • Requires as much maintenance as a traditional herbaceous border.
  • The planting is less dense than a seeded prairie, leaving more room for weeds to establish if not regularly maintained.

How to Prepare the Ground

Your success starts with thorough ground preparation.

  1. Ensure the area is completely free of perennial weeds like couch grass, ground elder, and bindweed.
  2. If you’re creating a new border, rotavate the ground to break up the soil.
  3. Incorporate a generous 7.5cm (3in) layer of well-rotted garden compost or manure to enrich the soil and improve its structure.

Design and Planting

With your canvas prepared, it’s time to select your plants.

  • Assess your site: Determine how much sun the area receives and identify your soil type.
  • Plan your display: Decide when you want the main floral display to be and how long it should last.
  • Create variety: Aim for a mix of flower shapes—daisies, spires, globes, and airy “see-through” plants—to add texture and interest.
  • Plant in drifts: In smaller areas, plant in informal drifts of at least five plants of the same species. This creates a more naturalistic impression than single specimens.
  • Consider the light: Use backlighting from the low sun to illuminate grasses and seed heads. Island beds work particularly well for this.
  • Layer your planting: Choose plants that provide interest throughout the seasons. Start with low-growing spring perennials, followed by taller plants that flower through summer and into autumn.
  • Repeat groupings: Repeating clusters of plants throughout the border creates a sense of rhythm and coherence.
  • Include annuals and bulbs: Don’t forget to add annuals, biennials, and bulbs for extra layers of colour and interest.

For larger spaces, consider using the matrix planting technique, championed by renowned garden designer Piet Oudolf. This involves:

  1. The matrix: A base layer of one or two species, often a grass, planted in large numbers to unify the design.
  2. Primary plants: Groups of strong, structural flowering plants planted within the matrix to provide the main interest.
  3. Scatter plants: A few “secondary” plants, like Verbascum, added randomly to give the planting a spontaneous, natural feel.

Aftercare

  • Mulch deeply: Once planted, apply a 7.5cm (3in) layer of mulch, such as bark chips or gravel, to suppress weeds and retain moisture.
  • Water regularly: Water thoroughly at least twice a week during the first two growing seasons to help plants establish.
  • Weed diligently: Remove weeds regularly before they have a chance to set seed.
  • Cut back in spring: Leave the foliage and seed heads standing over winter to provide structural interest and shelter for wildlife. Cut everything down in early spring before new growth appears. The old plant material will act as a natural mulch.

2. Prairie Plant Communities from Seed

For a truly naturalistic and low-maintenance garden, sowing seed is the ultimate approach. The goal is to establish a self-sustaining plant community where species intermingle and evolve over time. This method has been pioneered by designers like James Hitchmough and Nigel Dunnett, whose work can be seen at the Oxford Botanic Garden and the London Olympic Park.

Advantages:

  • Establishes a genuine plant community that is more resistant to weeds once mature.
  • More cost-effective than buying established plants.
  • Allows for a greater diversity of species, extending the flowering season.
  • Ideal for sites with low soil fertility.

Disadvantages:

  • Requires significant weeding and maintenance during the initial establishment phase.
  • Slugs and snails can be a major problem for young seedlings in the UK’s damp climate.

How to Prepare for Seed Sowing

This method requires meticulous preparation.

  1. The area must be completely clear of all existing vegetation, especially perennial weeds. Removing them by hand is the most organic method but can take a year or more.
  2. If the area was previously lawn, the soil is likely to be compacted. Dig or rotavate it to the depth of a spade’s blade, then level it carefully with a landscape rake.
  3. To prevent annual weed seeds in the soil from germinating, lay a 7.5cm (3in) deep layer of washed sharp sand over the surface before sowing.

Sowing

  1. Mark out your sowing area into a grid of one-metre squares to ensure even coverage.
  2. Mix your seed with a carrier, such as damp sawdust or kiln-dried sand, at a rate of 1-2g of seed per square metre.
  3. Broadcast the seed and carrier mix over the area, making two passes in different directions for good distribution.
  4. Gently rake the seed into the top layer of sand, again in two directions at right angles.
  5. You can lay open-weave jute netting over the area to protect it from being disturbed by cats or other animals.

You can also add a few mature, container-grown plants to the scheme before sowing. This is useful for perennials that are difficult to grow from seed or for introducing specific cultivars.

Aftercare

  • Water consistently: Water the entire area every few days during the first growing season.
  • Manage slugs: Implement a slug and snail deterrent programme to protect your seedlings.
  • Weed, weed, weed: In early summer, carefully identify and remove any weed seedlings. This is a crucial step.
  • Thin out dominant species: After the second year, you may need to thin out any species that are becoming too dominant. This requires careful observation to maintain a balanced plant community.

Ready to Create Your Own Prairie Garden?

Whether you choose to plant a carefully designed border or sow a wild, evolving meadow, prairie planting offers a wonderfully rewarding way to garden. It connects you with the changing seasons, supports local wildlife, and creates a breathtakingly beautiful landscape that will bring you joy for years to come.

Discover a new way of gardening and create a space that is both stunning and sustainable.

Further Reading: Creating Harmony with Nature Naturalistic Garden Design, Garden Design with Grasses

Follow us on Instagram for Daily Gardening Inspiration 💙

How to Create Raised Beds for Your Garden

Raised beds are a versatile and effective way to elevate your gardening game, quite literally! Raised beds can revolutionise the way you work with plants, offering improved conditions for growth and greater control over soil quality. So here is why raised beds are worth considering and how to create them step by step.


Why Have Raised Beds?

Raised beds are more than just a practical gardening solution; they’re a way to customise your growing space and make it work for you. Wondering why they’re so popular? Here are some compelling benefits.

1. Improved Growing Conditions

Raised beds allow you to create loose, nutrient-rich soil that drains well and warms up quicker in the spring. This means healthier roots for your plants and an extended growing season, especially in colder climates.

2. Control Soil Type

If your garden’s natural soil isn’t ideal for particular plants, raised beds give you the freedom to bring in the perfect soil mix. Match soil type to specific plants’ needs, whether you’re growing acidic-loving blueberries or vegetables that thrive in well-drained loam.

3. Nursery Beds for Germination

Use raised beds as nursery areas for starting seeds. The controlled environment makes it easier to monitor germination and care for seedlings before transplanting them elsewhere in your garden.

4. Perfect for Vegetables and Herbs

With a raised vegetable bed, it’s easier to plan crop rotation and keep pests like slugs at bay. They’re also great for compact herb gardens conveniently placed near your kitchen.

5. Space for Smaller Plants

Raised beds can serve as beautiful focal points for smaller plants like alpines and give these delicate species the better-draining conditions they crave.


Things to Consider Before Creating Raised Beds

Before you begin building raised beds, there are several important factors to keep in mind to make your project successful.

1. Aspect and Orientation

For sun-loving plants, position your raised beds to make the most of available light. A north-south orientation is ideal for maximising sunlight throughout the day.

2. Size and Depth

  • Width: Beds should be no wider than 1.5 metres, so you can comfortably reach the centre without stepping on the soil.
  • Depth: Opt for a depth of at least 30 cm, though deeper beds are better for root crops like carrots.
  • Pathways: Ensure pathways between beds are at least 45 cm wide for easy access, or 1 m wide if you need wheelchair accessibility or space for a wheelbarrow.

3. Materials

Raised beds can be made from various materials, each with their own advantages and drawbacks:

  • Brick
    • Pros: Durable, long-lasting, gives a polished look.
    • Cons: Higher cost and requires skilled labour for construction.
  • Timber
    • Pros: Affordable, easily accessible, natural look.
    • Cons: May rot over time; choose treated or rot-resistant wood like cedar.
  • Kits
    • Pros: Quick and easy to assemble, ideal for beginners.
    • Cons: May offer less customisation compared to DIY options.

Step-by-Step Guide to Building Raised Beds

Once you’ve decided on the location, size and materials, it’s time to get building. Follow these steps to create the perfect raised beds for your garden.

1. Prepare the Base

  • Start by clearing the site of weeds and grass. You can either dig them out manually or lay a layer of geotextile membrane to suppress regrowth.
  • If drainage is an issue, add a layer of gravel or stones to the bottom of your bed for improved water flow.

2. Build the Frame

  • Construct or assemble your chosen frame material (brick, timber or kit). Ensure the sides are sturdy and that corners are properly secured to prevent the frame from shifting over time.
  • Double-check that the structure is level to promote even water distribution.

3. Fill the Bed

  • Layer 1 (optional): Add organic materials like twigs, branches or shredded leaves to mimic a hugelkultur base.
  • Layer 2: Add a rich compost-soil mix. Aim for a 70-30 ratio of soil to compost to ensure good drainage and a steady nutrient supply.
  • Fill the bed to just below the rim, allowing space for watering without overflow.

4. Allow Soil to Settle

  • Water the soil generously and allow it to settle for a day or two. Top up with additional soil or compost if necessary before planting.

Optional FAQ

Do I need to line my raised beds?

You can line your beds with landscape fabric to prevent soil from escaping or use mesh to deter burrowing pests like moles. Avoid plastic lining as it may restrict drainage.

What’s the best soil mix for a raised bed?

A mix of loamy soil, compost and a bit of sand for drainage works well for most plants. Tailor the composition to suit specific crops if needed.

How do you maintain raised beds?

Annual maintenance includes replenishing soil with fresh compost and ensuring your bed structure remains sturdy. Regularly weed and mulch to retain moisture and control weeds.


Transform Your Garden with Raised Beds

Now that you know the benefits and steps for creating raised beds, it’s time to bring your gardening vision to life. Raised beds not only enhance the aesthetic appeal of your garden but also make growing plants easier, more efficient and accessible.

Further Reading: Caring for your Hanging Baskets, Thriller, Filler and Spiller, How to Choose the Perfect Flower Pot for Your Crops

For Daily Inspiration; Follow us on InstagramBlueSkyX , Pinterest or Threads.

How to Prune Your Wisteria for Stunning Displays

Wisterias are the showstoppers of any garden, their cascading blooms a sight of breathtaking beauty. But achieving healthy vines laden with flowers takes careful attention and pruning is a vital part of that process. So what do you need to know about pruning your wisteria?


When Is the Best Time to Prune Wisteria?

To keep wisteria under control and encourage abundant blooms, it needs pruning twice a year:

  • Summer Pruning (July–August): Focused on controlling growth and shaping the vine after the flush of spring blooms.
  • Winter Pruning (January–February): Essential for refining the structure, ensuring good airflow and encouraging flower buds for the next season.

Pruning during these times aligns with the plant’s natural cycle. Summer pruning helps manage vigorous growth, while winter pruning concentrates energy into flower production. Get into the habit of these two pruning sessions and you’ll see notable results year-round.


Why Should You Prune Wisteria?

Pruning isn’t just for appearance; it plays a crucial role in the plant’s health and performance. Here’s why it’s essential:

  • Keeps Growth Manageable: Wisterias are naturally fast-growing climbers, and without pruning, they can quickly take over walls, trees or pergolas.
  • Boosts Flower Production: Blooms grow on spurs formed on older wood, and regular pruning encourages this process, enhancing the number of flowers.
  • Encourages Better Airflow: Trimming reduces dense foliage, helping prevent fungal diseases and pest infestations.
  • Shapes the Plant: Whether on walls, pergolas or as standards, pruning helps train your wisteria to grow in a tidy and appealing structure.

Pruning might sound intimidating, but with a little practice, it becomes a straightforward and highly satisfying gardening task.


How to Summer Prune Wisteria (Step-by-Step)

Summer pruning is all about controlling wild growth. Follow this step-by-step guide to keep your vine in check:

1. Inspect the Plant

Look over your wisteria for any overgrown or wayward shoots. These are typically the long, thin growths (or ‘whippy’ shoots) extending from the main branches.

2. Prune Excess Growth

  • Cut back new shoots to five or six leaves from the main stems. This helps tidy the plant while leaving enough foliage for photosynthesis to nourish the plant.
  • If shoots are covering windows, doors or pathways, trim them back to where they don’t obstruct.

3. Tidy Up Climbing Structures

Ensure the plant doesn’t outgrow its space on walls, pergolas or trellises. If desired, tie some shoots into place for support.

By keeping summer pruning regular, you’ll maintain a compact, flower-laden plant that doesn’t spread out of control.


How to Winter Prune Wisteria (Step-by-Step)

Winter pruning focuses on refining the plant’s structure and preparing it for the blooming season ahead. Here’s how to winter prune:

1. Start by Clearing Dead Material

Identify and remove any dead, weak or damaged branches. Look for wood that appears dry, brittle or hollow inside.

2. Shorten Summer Growth

  • Cut back the same shoots you trimmed during summer so they’re reduced further to two or three buds from the main branch. These buds will develop into flower spurs.
  • Remove any very vigorous shoots that undermine the plant’s structure.

3. Check for Crossing Branches

If stems are crossing and rubbing against each other, remove the weaker of the two to prevent damage and maintain an open framework.

Winter pruning is precise and focused, setting up your wisteria for a resplendent spring display.


How to Hard Prune or Renovate Wisteria (Step-by-Step)

If your wisteria has been neglected or grown out of control, hard pruning (or renovation pruning) can help rejuvenate it. While this might mean cutting back significantly, don’t worry—wisterias are hardy and bounce back well.

Step-by-Step Guide to Hard Pruning:

  1. Choose the Right Time: Perform hard pruning in late winter (January–February) when the plant is dormant.
  2. Cut Back to the Main Framework: Reduce all side shoots to within half a metre (1.5 feet) of the main stem or trunk.
  3. Remove Old, Overgrown Wood: Eliminate thick, non-productive branches to open up the plant and give space for new growth.
  4. Define New Leader Shoots: Select a few strong main branches to anchor the vine’s structure moving forward.

Hard pruning may delay flowering for a season, but it’s well worth it for the long-term health and shape of the vine.


How to Train Wisteria on Walls, Pergolas, Arches, and as Standards

Beyond pruning, training wisteria is key to creating a beautiful, structured display. Different surfaces and supports require specific strategies:

Training on Walls

  • Use horizontal wires spaced 30cm (12 inches) apart.
  • Tie stems loosely to the wires with soft garden ties. Guide new shoots along the wires to form an espalier-like structure over time.

Training on Pergolas or Arches

  • Allow one or two main shoots to grow vertically up the support, then train lateral branches horizontally to cover the structure evenly.
  • Tie branches gently and trim excess growth during summer pruning.

Training On Trees

  • Choose a sturdy tree with a clear structure (e.g., no sprawling, low branches).
  • Allow the vine to twist around the trunk naturally. Prune regularly to prevent overgrowth or competition with the host tree.

Training as a Standard

  • Select a single strong upright shoot and stake it for support.
  • Remove all side shoots along the lower stem to create a clear trunk. Allow top growth to spread into a crown, pruning annually to maintain shape.

Each training method works beautifully in different garden designs, so choose the one that fits your space and aesthetic.


The Key to Stunning Wisteria Begins with You

Pruning your wisteria might feel like a daunting task at first, but as you’ve seen, breaking it down into seasonal steps makes the process manageable and rewarding. By integrating regular summer and winter pruning, experimenting with training methods and occasionally hard pruning when necessary, you’re ensuring your wisteria remains a healthy and captivating feature of your garden for years to come.

Take a look at Our Favourite Pruners here.

For Daily Inspiration; Follow us on Instagram, BlueSky, X , Pinterest or Threads.

Mast Years: Why They Happen and Their Impact

Understanding Mast Years

Have you ever noticed certain years when trees seem unusually generous, scattering an abundance of seeds or fruits across the ground? These extraordinary years are known as Mast Years, a natural occurrence where particular tree species produce a significantly larger quantity of seeds than they would in most years. What makes this phenomenon so captivating is its irregularity; it doesn’t happen annually but rather appears sporadically, leaving us to marvel at nature’s intricate timing.

A Mast Year is not just about sheer volume; it’s a strategic event deeply rooted in the life cycle of trees. Species like oak, beech, and chestnut are some of the most well-known participants in this process. During these years, the ground beneath these trees often becomes carpeted with acorns, beech nuts or conkers, painting a vivid picture of nature’s abundance.

At first glance, it might seem as though Mast Years occur at random. However, they are carefully timed, guided by factors that allow trees to maximise the success of their seeds. Unlike humans, trees communicate and coordinate with one another in ways that remain partly a mystery to us. What we do know is that they often “decide” to conserve their energy in some years, diverting resources towards seed production only when conditions are just right.

This unpredictable rhythm is part of what makes Mast Years so special. They act as a subtle reminder that nature operates on its own schedule, creating moments of plenty that ripple through the surrounding ecosystem. For anyone lucky enough to observe a Mast Year in action, it offers a unique opportunity to witness the wisdom embedded in the natural world, as trees work together to ensure the survival of future generations. In their quiet and unhurried way, trees continue to surprise and inspire us, connecting us to the timeless cycles of life.

Causes Behind Mast Years

Mast Years arise from a fascinating interplay of natural cues and evolutionary strategies. Trees, ever attuned to their surroundings, seem to time their bountiful seed production in response to a blend of internal and external factors. Weather plays a particularly prominent role, with certain conditions acting as a green light for trees to divert energy into reproduction. A warm spring or a stretch of favourable growing conditions can often set the stage, creating the perfect environment for seeds to flourish.

Beyond the weather, the synchronised nature of Mast Years is one of their most intriguing aspects. Many tree species, such as oaks and beeches, appear to work in unison, producing seeds en masse across wide areas. This synchrony is believed to be a strategy to increase the chances of survival for their offspring. By overwhelming animals that feed on seeds, trees ensure that even though many will be eaten, plenty will escape predation and germinate. This approach benefits the tree population as a whole, securing the continuity of their species.

Internal biological rhythms also guide this behaviour. Trees take years to accumulate the energy required for such a large-scale production of seeds. During non-mast years, resources are stored up, allowing them to be expended in a dramatic burst when the timing is right. This rhythm not only conserves energy but also prevents seed predators from becoming too reliant on an annual harvest, helping to maintain balance in the ecosystem.

Interestingly, Mast Years are not uniform. Different species of trees have their own unique cycles and triggers, and even neighbouring forests might experience them in varying ways. This diversity highlights the complexity of the natural systems around us, with each tree responding to an intricate web of signals that are still not fully understood. What we do know is that these years are a testament to the remarkable adaptability and resourcefulness of trees, quietly shaping the world around them in profound ways.

Consequences of Mast Years

When trees produce an extraordinary abundance of seeds during a Mast Year, it sets off a cascade of effects throughout the ecosystem. For many animals, this sudden surplus provides a much-needed source of nourishment. Species such as squirrels, wood mice, jays and deer often thrive during these times, as the plentiful seeds and nuts offer them an energy-rich diet. This abundance can lead to population increases among seed-eating species, creating a noticeable buzz of activity in woodland areas.

However, such booms are often followed by periods of scarcity once the seed supply diminishes. Wildlife populations that have expanded in response to the glut may find it challenging to adjust, leading to fluctuations in numbers as food sources return to more typical levels. These cycles demonstrate the delicate balance that Mast Years bring to animal communities.

The effects also extend to the landscape itself. When more seeds are left uneaten, there is an increased chance of saplings sprouting, potentially shifting the forest’s composition over time. This can create opportunities for regeneration, as well as competition among young trees for sunlight, water and nutrients. These changes can subtly alter the structure and diversity of the woodland, shaping the environment for years to come.

Beyond natural ecosystems, Mast Years touch on human interests too. Those managing forests might find themselves navigating the challenges of a surge in tree regeneration, while farmers could notice higher activity from foraging wildlife, which may affect crops or land use. Additionally, the sheer volume of seeds can sometimes become a feature of daily life, from crunching through acorns on a woodland walk to noticing how the extra food has drawn wildlife closer to home.

These vibrant bursts of seed production remind us of the interconnectedness of life, as trees quietly set the stage for shifts across multiple layers of the natural world.

Human Responses to Mast Years

While Mast Years are a natural phenomenon, they can occasionally present challenges for humans, especially in areas where forestry, agriculture, or conservation efforts are actively managed. In woodlands, a sudden surge in seed production can result in dense clusters of young trees competing for space and resources. In such instances, selective thinning or careful intervention may be needed to ensure that the forest remains healthy and balanced, allowing a diversity of species to thrive.

For those involved in farming, the increased activity of wildlife following a Mast Year can sometimes pose difficulties. Animals that have benefited from the abundance of seeds may turn to crops or stored food supplies when natural sources dwindle. Simple measures, such as securing food stores or creating deterrents, can help to mitigate these issues, preserving both crops and coexistence with wildlife.

In urban and suburban areas, Mast Years might bring subtle changes closer to home. Gardens and public spaces can become magnets for wildlife attracted by the surplus, creating wonderful opportunities for observation and engagement. However, it’s not uncommon for some animals, such as squirrels, to extend their search for food to bird feeders or garden plants. Adjusting feeding routines or providing wildlife-friendly spaces can help to accommodate these visitors without undue disruption.

For those passionate about conservation, Mast Years highlight the delicate interplay between species, offering a chance to observe and support these natural cycles. Community-led initiatives, such as planting native trees or protecting young saplings, can make a meaningful contribution, ensuring that the legacy of Mast Years endures. Whether through hands-on efforts or simply by observing and learning, there is much to gain from engaging with the rhythms of nature that Mast Years so beautifully exemplify.

Mast Year Predictions for 2025 in the UK

Predicting whether 2025 will be a Mast Year in the UK involves piecing together clues from the past and present. Mast Years follow cycles influenced by a combination of weather, environmental conditions and the internal rhythms of trees. Oaks and beeches, two of the most common contributors to Mast Years in the UK, are known for their irregular yet somewhat patterned intervals of seed production, often occurring every 4 to 7 years. Based on these tendencies, there is a reasonable possibility that 2025 could see a significant seed production for one or both of these species.

Weather conditions in the years leading up to a Mast Year are particularly significant. For example, a warm spring and favourable growing seasons can encourage trees to divert resources into reproduction. The conditions in 2023 and 2024 may therefore provide important hints about what to expect. Observing tree health, flowering patterns, and the abundance of seeds in the coming seasons will also help foresters and researchers determine whether a Mast Year is on the horizon.

While it’s impossible to predict with absolute certainty, keeping an eye on woodland areas and natural spaces can reveal early signs of a Mast Year. Local observations, such as changes in flowering or early fruiting, are often among the first indicators. For those with an interest in the outdoors, this provides an excellent opportunity to learn more about the trees around you and the subtle ways they respond to their environment.

Whether or not 2025 turns out to be a Mast Year, the anticipation itself is a reminder of nature’s unpredictability and wonder. Paying attention to these cycles not only deepens our understanding of the natural world but also fosters a greater sense of connection with the landscapes we share.

Follow Us on Instagram for Daily Inspiration 💚

Other Blogs that Might Interest you. 😊 When and How to Thin your Fruit Trees, Some Plants to Use in your Garden to Attract Wildlife

When and How to Thin Your Fruit Trees

Fruit tree thinning is a time-honoured technique that gardeners have relied on to nurture healthier and more productive trees. At its core, it involves the careful removal of some of the young fruits from the branches. This might sound counterproductive, but the practice helps the tree focus its energy on developing the remaining fruits, resulting in larger and more flavourful produce. Think of it as a way of giving your fruit trees a bit of breathing room, allowing them to grow stronger and yield better harvests.

Introduction to Fruit Tree Thinning

Imagine your tree as an artist, sculpting fewer but more magnificent masterpieces rather than overloading itself with an abundance of small, less impressive works. By thinning your fruit trees, you’re guiding them to channel their resources more efficiently, which in turn promotes overall tree health. This method isn’t just about improving fruit size and taste; it’s also about fostering a more resilient tree, capable of withstanding the elements and supporting future growth.

Embarking on this journey might feel a bit daunting, especially if you’re new to gardening. However, with a little knowledge and practice, you’ll soon find it to be a rewarding endeavour. This community of gardeners, both seasoned and new, is here to support and inspire each other as we learn and grow together. Whether you’re tending to a small backyard orchard or just a couple of trees, the principles of fruit tree thinning remain the same. It’s a nurturing practice that not only benefits your garden but also enhances your connection to nature and the food you cultivate.

Methods for Thinning Fruit Trees

There are several approaches to thinning fruit trees, each suited to different types of trees and gardener preferences. The most straightforward method is manual thinning, which involves carefully removing excess fruits by hand. This hands-on technique allows for precise selection, ensuring that the fruits left on the tree have adequate space to grow and thrive. When using this method, it’s essential to handle the branches gently to avoid causing any damage.

For those with larger trees or those who prefer a bit of extra assistance, there are tools available to help with the thinning process. Long-handled pruners or pole pruners are particularly useful for reaching higher branches that might be out of arm’s reach. Thinning shears can also be employed to make clean cuts, minimising harm to the tree and ensuring a healthy regrowth.

Another method involves using a small, soft brush to sweep away excess fruits. This can be particularly effective for trees with smaller, more delicate fruits that might be easily damaged by hand-thinning. Whichever technique you choose, the key is to space the remaining fruits adequately, so each one has the opportunity to develop fully.

Regardless of the method, always aim to thin when the fruits are still small and before they have begun to draw too many resources from the tree. Pay attention to the tree’s natural growth patterns and be mindful of its overall health as you work. By adopting these methods, you can effectively thin your fruit trees, promoting better fruit quality and ensuring a healthier, more productive tree.

Advantages of Thinning Fruit Trees

Thinning fruit trees can greatly enhance the quality of your harvest. When fewer fruits are left on the branches, each one receives a greater share of the tree’s nutrients and energy, resulting in produce that is larger, juicier, and often more flavourful. This practice not only benefits the fruits but also supports the tree’s structural integrity. Overloaded branches are prone to breaking under the weight of too many fruits, which can cause lasting damage. By carefully removing excess fruits, you help to prevent such issues, ensuring that the tree remains strong and healthy.

Additionally, thinning plays a crucial role in disease prevention. Crowded fruits can create a breeding ground for pests and diseases, as air circulation is restricted and moisture levels can become too high. By spacing out the fruits, you improve air flow around the tree, making it less susceptible to these problems. This proactive approach reduces the need for chemical treatments, promoting a more organic and sustainable method of cultivation.

Thinning also encourages better sunlight penetration. When fruits are evenly spaced, sunlight can reach more parts of the tree, aiding in the development of fruits and the overall health of the tree. Enhanced light exposure not only helps the fruits to ripen more uniformly but also strengthens the tree’s branches and leaves.

Another advantage is that thinning can lead to more consistent yields. Trees that are not overburdened with too many fruits can produce a steady crop year after year, rather than experiencing cycles of heavy and light production. This balance allows you to enjoy a reliable supply of fruit, making your gardening efforts more predictable and rewarding.

Disadvantages and Considerations

While fruit tree thinning offers numerous advantages, there are a few potential drawbacks to keep in mind. One of the primary challenges is ensuring that you do not remove too many fruits, as this can stress the tree and potentially reduce its overall yield. Achieving the right balance is crucial; thinning too aggressively can deprive the tree of necessary energy and resources, impacting its ability to thrive.

Another consideration is the time and effort involved. Thinning can be a labour-intensive task, particularly for larger trees or orchards. It requires careful attention and a gentle touch to avoid damaging the branches and remaining fruits. For those new to gardening, the process might initially seem daunting and require a bit of practice to master.

The environmental impact of thinning is also worth considering. While it promotes healthier tree growth and better fruit quality, over-thinning can lead to unnecessary waste. To mitigate this, it’s important to plan how you will use the removed fruits, ensuring they are not simply discarded but repurposed in creative and sustainable ways.

Additionally, thinning may alter the availability of fruits for local wildlife. Birds, insects, and other animals often rely on these fruits for nourishment, so removing too many can impact the local ecosystem. It’s a good idea to observe and understand the wildlife interactions in your garden and strike a balance that supports both your harvest and the natural food chain.

Lastly, fruit tree thinning requires a certain level of knowledge and experience. Understanding the specific needs of different tree species and their growth patterns is essential for effective thinning. New gardeners may need to invest time in learning these details to avoid common pitfalls and ensure their efforts are beneficial.

Timing for Effective Thinning

Timing is crucial for successful fruit tree thinning. Late spring to early summer is generally the best period for this practice, as the fruit has set but remains small. This timing allows the tree to reallocate its energy to the remaining fruits, promoting better growth and development.

Observing your tree’s growth stages is essential. Different species and varieties may have unique timelines, so paying attention to their specific needs can make a significant difference. For instance, apple and pear trees benefit from thinning when the fruits are about the size of a marble, while stone fruits like peaches and plums should be thinned when they are slightly larger.

Weather conditions also play a role in the timing of thinning. Avoid performing this task during extremely hot or dry periods, as the tree might already be stressed. Similarly, after a heavy rainfall, the branches may be more delicate and prone to damage. Choose a mild, dry day to carry out thinning, ensuring that the tree is in optimal condition to recover and thrive.

Another factor to consider is the natural fruit drop, known as the “June drop,” which occurs in many fruit trees. During this period, trees naturally shed some of their immature fruits. It’s wise to wait until after this drop to begin thinning, as it gives you a clearer picture of how many fruits the tree can support.

By carefully timing your thinning efforts, you not only enhance the quality of your harvest but also support the overall health and resilience of your fruit trees.

Utilising Thinned Fruit

Thinned fruit can be a delightful addition to your culinary repertoire, offering both versatility and a burst of flavour. Consider making homemade jams or preserves, where even the smallest fruits can contribute to a rich, fruity spread. Smoothies are another excellent option; simply blend the fruits with yoghurt and honey for a refreshing treat.

For those who love baking, these little gems can be incorporated into pies or crumbles, adding a unique tartness that complements sweeter ingredients. Drying thinned fruits is also a fantastic way to create homemade snacks, perfect for adding to cereals or trail mix.

You can even get creative with savoury dishes. Try using thinned fruits in chutneys or sauces to pair with meats and cheeses, providing a delightful contrast of flavours. By finding these innovative uses for your thinned fruit, you’ll not only reduce waste but also discover new and enjoyable ways to savour the fruits of your labour.💚

Further Reading: RHS Fruit Thinning, Grow Your Own – The Best Garden Fruits, The Ultimate Guide to Storing your Fruit Harvest

Embrace Chop and Drop for a Greener Garden

Introduction to Chop and Drop Gardening

Welcome to the practice of Chop and Drop gardening, an innovative and eco-friendly method that fosters a thriving garden environment with minimal effort. This technique is all about working in harmony with nature by cutting back plants such as annuals, crops and pruned branches, then leaving the trimmings right on the soil surface. Unlike traditional gardening methods that require laborious composting or digging, Chop and Drop simplifies the process by letting natural decomposition take its course.

As these plant materials break down, they release valuable nutrients back into the soil, which, in turn, enriches it and supports healthy plant growth. This organic matter also acts as a natural mulch, helping to retain moisture and reduce the need for frequent watering. Additionally, it serves as a barrier to weed growth, making garden maintenance less of a chore.

Chop and Drop is an integral practice within sustainable gardening approaches such as permaculture and ‘no dig’ gardening. These methods advocate for minimal soil disturbance, promoting a healthier garden ecosystem. By adopting Chop and Drop, you’re not only making your gardening routine easier but also supporting a more sustainable and environmentally friendly way of nurturing your plants. So, embrace this simple yet powerful technique and watch your garden flourish with life.

Benefits for Soil and Environment

One of the standout advantages of Chop and Drop gardening is its remarkable effect on soil health. When plant material decomposes, it releases vital nutrients into the soil, creating a nutrient-rich environment that fosters robust plant growth. This organic layer acts as a natural mulch, effectively conserving soil moisture and thereby reducing the frequency of watering. This practice also aids in weed control, as the mulch layer blocks sunlight from reaching weed seeds, preventing them from germinating.

Moreover, Chop and Drop gardening supports a thriving ecosystem beneath the soil. As the organic matter breaks down, it attracts earthworms and beneficial microorganisms, which further enhance soil structure and fertility. The presence of these organisms leads to improved aeration and drainage, creating ideal conditions for plant roots to thrive.

Additionally, by minimising the need for synthetic fertilisers and chemical weed control, Chop and Drop promotes a more sustainable and eco-friendly gardening approach. This technique not only preserves the natural balance of the soil but also reduces the environmental impact of gardening activities. The lessened reliance on external inputs makes this method both cost-effective and beneficial for the environment.

In essence, Chop and Drop gardening transforms plant trimmings into a valuable resource for soil improvement. By integrating this practice into your gardening routine, you contribute to a healthier, more resilient garden ecosystem, ensuring that your plants receive the essential nutrients they need to flourish.

Enhancing Biodiversity

Chop and Drop gardening plays a vital role in boosting biodiversity within your garden. By leaving organic matter on the soil surface, you create a welcoming environment for a multitude of beneficial organisms. Earthworms, fungi and microorganisms thrive in this habitat, breaking down plant material into rich humus that nourishes the soil. This process not only enhances soil fertility but also improves its structure, promoting healthier root development for your plants.

The increased activity of earthworms and other soil life contributes to better aeration and drainage, creating optimal growing conditions. This thriving underground ecosystem supports a diverse range of life forms, from tiny insects to larger invertebrates, all of which play crucial roles in maintaining soil health. The presence of these organisms encourages natural pest control, reducing the need for chemical interventions and fostering a balanced ecosystem.

Additionally, Chop and Drop encourages the proliferation of native plant species, which in turn attracts local wildlife such as birds and pollinators. These creatures contribute to the pollination and seed dispersal processes, ensuring a vibrant and dynamic garden environment. By supporting a wide array of plant and animal life, Chop and Drop gardening creates a resilient and self-sustaining ecosystem that benefits not only your garden but the surrounding environment as well. Embracing this practice invites a rich tapestry of life into your garden, making it a lively and thriving haven for biodiversity.

Integration in Permaculture and No Dig Gardening

Chop and Drop seamlessly aligns with the principles of permaculture and ‘no dig’ gardening, which prioritise working with natural processes to create sustainable and productive landscapes. Permaculture, a holistic design system, focuses on creating harmonious and self-sustaining ecosystems. Chop and Drop complements this by enhancing soil health and fostering a biodiverse environment without the need for synthetic inputs or intensive labour.

In ‘no dig’ gardening, soil health is paramount. This approach avoids disturbing the soil structure, which is crucial for maintaining its fertility and preventing erosion. By leaving plant trimmings to decompose on the soil surface, Chop and Drop naturally feeds the soil and supports a healthy microbe population, key components in the ‘no dig’ philosophy. This method reduces the need for chemical fertilisers and frequent watering, aligning perfectly with the ethos of minimal intervention and maximum sustainability.

Adopting Chop and Drop in your permaculture or no dig garden also supports carbon sequestration. As plant materials break down, carbon is stored in the soil, contributing to reduced atmospheric carbon levels. This practice, therefore, not only benefits your garden but also contributes to broader environmental goals.

Chop and Drop is a practical, eco-friendly technique that fits seamlessly into sustainable gardening frameworks. It encourages a holistic approach to garden management, where each action supports a thriving, resilient ecosystem. By incorporating Chop and Drop, you are actively participating in a gardening movement that values long-term environmental health and productivity.

Steps to Implement Chop and Drop

Start by identifying which plants need cutting back, such as overgrown crops, spent annuals, or pruned branches. Choose a time that aligns with seasonal changes, allowing the plant material to break down efficiently. Make sure to use sharp, clean tools for neat cuts, which help in quicker decomposition and prevent plant damage.

Once you’ve trimmed the plants, spread the cuttings evenly over the soil surface. Aim for an even layer to ensure that all parts of the garden benefit from the decomposing material. Avoid piling the trimmings too thickly in one spot, as this can slow down the decomposition process and may lead to unwanted pest issues.

If you’re dealing with larger branches, consider chopping them into smaller pieces to speed up their breakdown. For finer plant material, simply scatter it as it is. This step-by-step approach ensures that the decomposing plant matter enriches the soil evenly and effectively.

Regularly observe your garden to see how well the Chop and Drop material is decomposing. You may find that certain plants decompose faster than others, providing a continuous supply of nutrients to the soil. If needed, add more trimmings as the previous ones break down, maintaining a steady supply of organic matter for your garden.

By following these simple steps, you’ll create a thriving, low-maintenance garden that supports healthy plant growth and fosters a vibrant ecosystem, all while embracing an eco-friendly gardening practice.

Common Misconceptions

Whilst Chop and Drop gardening has numerous benefits, it’s often misunderstood. A common concern is that leaving plant trimmings on the soil will create a messy garden. However, as the plant material decomposes, it blends naturally into the soil, improving its appearance over time. This process is a natural and visually appealing part of a healthy garden ecosystem.

Another misconception is that Chop and Drop might attract unwanted pests. In truth, this method fosters a balanced environment where beneficial organisms, such as earthworms and certain insects, thrive. These organisms help control pest populations, reducing the need for chemical interventions. The presence of a diverse range of soil life can lead to a healthier, more resilient garden.

Some gardeners worry that Chop and Drop might not provide sufficient nutrients compared to traditional fertilisers. However, the decomposing organic matter releases a steady supply of nutrients, enriching the soil naturally. This method supports long-term soil health, unlike synthetic fertilisers that can sometimes harm soil structure and microbial life.

Lastly, there is a belief that this technique is only suitable for certain types of gardens. In reality, Chop and Drop can be adapted to various garden styles, whether you’re growing vegetables, flowers or perennials. Its simplicity and effectiveness make it a versatile and accessible option for any gardener looking to adopt more sustainable practices.

Long-term Benefits for the Planet

Chop and Drop gardening offers profound long-term benefits for our planet by fostering sustainable practices. By minimising the need for synthetic fertilisers, we reduce the chemical load on our environment, promoting healthier ecosystems. This method also significantly cuts down on water usage, as the natural mulch created by decomposing plant material helps retain soil moisture.

As more gardeners adopt Chop and Drop, we collectively contribute to lowering our carbon footprint. The organic matter breaking down in the soil aids in carbon sequestration, helping to mitigate climate change. This technique supports biodiversity by creating a thriving habitat for beneficial organisms, which in turn helps maintain soil health and reduces the need for chemical pest control.

Moreover, Chop and Drop aligns with the principles of permaculture and no dig gardening, both of which emphasise working with nature to create sustainable and productive landscapes. The practice encourages a holistic approach to gardening that values long-term environmental health over short-term gains. By embracing Chop and Drop, you’re not only enhancing your garden but also playing a part in preserving our planet for future generations. It’s a small step with a big impact, nurturing both your garden and the earth.

Further Reading: Creating Harmony with Nature Naturalistic Garden Design, How to Make Comfrey Tea: The Perfect Garden Fertiliser, Homemade Fertilisers for Your Garden, No-Dig Gardening

Follow us on Instagram for daily gardening inspiration 🌿

Growing Cactuses Made Easy

Is there an easier way to bring a touch of serenity and charm to your indoor space than with a cactus? These quirky, low-maintenance plants are beloved by both beginner and experienced gardeners for their beauty and adaptability. Whether you’re a seasoned plant lover or just getting your hands dirty, this guide will walk you through how to grow cactuses, care for them, and enjoy the many benefits they bring to your home.


What Are Cactuses?

Cactuses (or cacti, if you prefer the traditional plural form) are a unique family of plants known for their ability to thrive in harsh environments. Typically found in deserts, cactuses are drought-resistant and characterised by their thick, fleshy stems, which store water for survival. And while their natural habitats may seem rugged and dusty, these prickly plants have transformed themselves into trendy indoor décor icons.

There’s an incredible variety of cactuses, from the tall and stately Saguaro to the small and charming Bunny Ears cactus. Some bloom with vibrant flowers, while others develop fascinating textures and patterns. The common thread? They’re all stunning, low-maintenance additions to any plant collection.


How to Grow Cactuses

Bringing a cactus into your home isn’t just simple; it’s also a rewarding process. Whether you’re starting from seeds or purchasing a young plant, here’s how to ensure your cactus gets off to a great start.

Choosing Your Cactus

First, decide what type of cactus suits your space and needs.

  • For beginners: Varieties like the Barrel Cactus or Christmas Cactus are forgiving and easy to grow.
  • For a statement piece: Choose a Saguaro or Euphorbia for their eye-catching shapes.
  • For limited space: Opt for small ones like the Zebra Cactus or Star Cactus.

The Right Pot and Soil

Cactuses thrive in well-draining soil, so avoid regular potting soil and pick up a mix specifically designed for succulents and cacti. When choosing a pot, make sure it has a drainage hole to prevent water from pooling around the roots. Terracotta pots are especially ideal as they allow soil to dry out quickly, mimicking a cactus’s natural environment.

Planting Your Cactus

  1. Begin by lining your pot with a layer of small pebbles or gravel.
  2. Add the cactus soil mix, leaving enough room for your cactus’s roots.
  3. Gently position your cactus in the pot, making sure it’s standing upright. (Wear gloves or use tongs if your cactus has sharp spines!)
  4. Fill in the gaps with soil, pressing down lightly to secure the plant.

How to Care for Your Cactus

Now that you’ve planted your cactus, how do you keep it happy and healthy? The good news is that cactuses require minimal upkeep; however, there are a few key factors to consider.

Watering

While cactuses are famously forgiving when it comes to water, that doesn’t mean you should neglect them entirely! A good rule of thumb is to water your cactus once every 2 to 4 weeks, allowing the soil to dry out completely between watering. During their growing period (spring and summer), they’ll need slightly more water than in the colder months when they’re dormant.

Pro tip: Over-watering is the number one cause of cactus mishaps. If in doubt, don’t water.

Light

Cactuses love light, so position them in a sunny spot such as a windowsill or a well-lit corner of your home. That said, some varieties may struggle in direct sunlight for prolonged periods, particularly if you live in an especially hot climate. Monitor your cactus to ensure its leaves or body aren’t scorched.

Temperature and Humidity

Most cactuses prefer warm, dry conditions. They’re happiest at temperatures ranging from 18°C to 30°C, and they’ll tolerate lower temperatures to around 12°C during dormant months. Avoid placing cactuses in overly humid areas like bathrooms, as this can encourage rot.

Feeding

During the growing season, give your cactus a boost with a cactus-specific fertiliser about once every 4 weeks. This will provide the nutrients they need for healthy growth and, if you’re lucky, encourage them to flower.


Benefits of Cactuses for Your Indoor Garden

Cactuses aren’t just pretty to look at; they also bring several practical benefits to your indoor environment.

  1. Low Maintenance

Cactuses are one of the easiest plants to care for, making them a perfect choice for beginners or busy individuals who still want to enjoy a green thumb.

  1. Improved Air Quality

Like other houseplants, cactuses contribute to better air quality by absorbing CO2 and releasing oxygen. Some varieties, such as the Christmas Cactus, even work their magic at night, making them a great addition to bedrooms.

  1. Mood-Boosting Properties

Studies suggest that caring for plants, like cactuses, promotes relaxation and boosts your mood. Their unique and striking appearance also adds personality to your space, creating a calming and inspiring atmosphere.

  1. Space-Saving Charm

Because of their compact size and slow growth, cactuses are particularly suited for small spaces. Place a potted cactus on your desk, bookshelf, or windowsill and watch it transform the vibe of your home.

  1. A Touch of Nature

With their sculptural forms and unique textures, cactuses bring a little piece of the desert into your indoor jungle. Mixed with other houseplants, they add variety and visual interest to your collection.


Bring Life to Your Indoor Space with Cactuses

Whether you’re looking for an easy-care plant, a statement piece, or a way to purify your indoor air, cactuses are a versatile and rewarding choice. By following these simple steps for growing and caring for them, you’ll soon have a thriving desert-inspired oasis right in your home.💚

Further Reading: How to Get Rid of House Plant Flies, Plant Whispering: Is Talking to Your Plants Really a Thing?, Transform Your Home with Houseplants

For Daily Gardening Inspiration Follow Us on Instagram