A beautiful garden begins with a commitment to one of the most vital gardening tasks—weeding. Whether you’re an experienced gardener or just dreaming of vibrant flower beds, knowing how to manage those persistent weeds is the key to a flourishing garden. Let’s dig into all you need to know to tackle weeds confidently and create a thriving outdoor space you’re proud of!
What Is Garden Weeding?
Weeding is the process of identifying and removing unwanted plants (weeds) from your garden. These invasive plants compete with your cherished flowers, herbs and vegetables for vital resources like sunlight, water and nutrients. Left unchecked, weeds can overrun your garden and stunt the growth of your prized plants.
But there’s more to it than just pulling them out—it’s about understanding their impact and knowing how to remove them effectively while ensuring they don’t return.
How Do You Weed a Garden?
Weeding your garden can be simple and therapeutic when approached the right way. Here’s a step-by-step breakdown to help you get started:
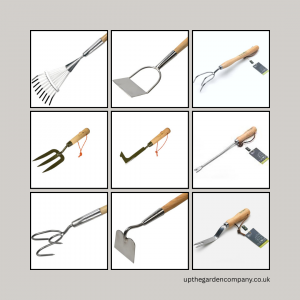
- Prepare Your Tools:
Equip yourself with essentials like gardening gloves, a hand trowel, a hoe, a bucket (for collecting the weeds) and a kneeling pad for comfort.
- Identify the Weeds:
Learn to spot weeds among your plants. They often look different from your cultivated plants, but taking time to learn the common garden invaders helps ensure you don’t remove desirable plants.
- Loosen the Soil:
Moist soil makes weed removal much easier. Try weeding a day after rain or lightly water the area before starting.
- Remove Weeds by Hand or Tools:
Grip the weed firmly at its base to ensure its root comes out. For tougher weeds, use a trowel or hoe to dig around the base and dislodge the roots.
- Dispose of the Weeds:
Avoid leaving uprooted weeds in your garden—they can regrow! Add them to your compost heap unless they’ve gone to seed, as that can spread them further.
- Maintain Regularly:
Set aside time each week for quick weeding sessions. Regular maintenance helps prevent your garden from being overrun.
Top Tips for Stress-Free Weeding
Want to make the task easier and more effective? Here are tips every gardener should know:
- Weed Early and Often:
Young weeds are easier to remove and clearing them regularly ensures they don’t gain a foothold.
- Mulch for Defence:
A layer of organic mulch around your plants blocks sunlight from reaching weed seeds, preventing them from growing.
- Focus on Roots:
Pulling off the top isn’t enough—leaving roots behind leads to regrowth. Always aim to remove the entire plant.
- Weed After Rain:
Wet soil loosens weeds, making it easier to get them out by the roots (and saving effort!).
- Know Problem Weeds:
Some weeds are exceptionally persistent (like bindweed or dandelions), requiring special attention. Learn to recognise them to act quickly.
Why Is It Important to Weed Your Garden?
The task may seem tedious, but the benefits of consistent weeding are immense. Here’s why it’s worth the effort:
- Healthier Plants:
Weeds compete fiercely for water, nutrients, and sunlight, leaving your plants weaker and less productive. Clearing weeds lets your garden grow to its full potential.
- Better Aesthetics:
A weed-free garden looks tidy and inviting, becoming a serene space you enjoy spending time in.
- Disease Control:
Weeds can host pests and diseases that may spread to your plants. Keep them in check to avoid infestations and infections.
- Improved Soil Quality:
Certain weeds can rob the soil of its nutrients. Regular removal keeps your garden soil rich and fertile.
- A Sense of Accomplishment:
Few tasks match the satisfaction of seeing a weed-free space, knowing it’s a result of your dedication. Plus, it’s great light exercise too!
Empower Your Garden Today
Armed with the right knowledge and tools, you’re ready to win the battle against weeds and nurture a thriving, vibrant garden. By making weeding part of your gardening routine, you’ll see the transformation—healthier plants, stunning beds and the joy of knowing you’re in full control.
Take a look at our fabulous weeding tools here
Further Reading: No-Dig Gardening, Discover Your Soil Type: A Gardener’s Guide, Ways to Improve your Soil, Identifying Weeds
For Daily Inspiration: Follow us on Instagram