The sound of crashing waves, the feel of sea breeze on your skin and the sight of endless horizons make coastal living truly special. But these same elements that make seaside locations so appealing can present unique challenges for gardeners. Salt-laden winds, intense sunlight and sandy soils require a different approach to garden design than traditional inland spaces.
Creating a beautiful coastal garden isn’t just about choosing the right plants—it’s about understanding how to work with nature’s forces rather than against them. The key lies in embracing the coastal environment and designing a space that thrives in these conditions whilst capturing the relaxed, natural beauty of seaside living.
Whether you’re dealing with a clifftop plot, a beachside cottage garden or simply want to bring coastal charm to your outdoor space, this guide will help you create a garden that’s both stunning and resilient. You’ll discover which plants flourish in salty conditions, how to choose materials that withstand coastal weather and design principles that capture the essence of seaside style.
Understanding Coastal Garden Conditions
Coastal gardens face a unique set of environmental challenges that don’t exist in inland locations. Understanding these conditions is the first step towards creating a thriving seaside space.
Salt Spray and Wind Exposure
The most significant challenge for coastal gardens is salt spray carried by sea winds. This salt can damage plant foliage, causing leaf burn and stunted growth in sensitive species. The closer your garden is to the shoreline, the more intense this effect becomes.
Wind exposure is equally challenging. Coastal winds are often stronger and more persistent than inland breezes, causing physical damage to plants and increased water loss through transpiration. These winds can also carry sand and debris, further stressing your plants.
Intense Sunlight and Heat
Coastal locations often experience more intense sunlight due to reflection off water and sand. This increased UV exposure can scorch delicate plants and cause rapid soil drying. The combination of salt, wind and intense sun creates a harsh environment that requires careful plant selection.
Soil Conditions
Many coastal gardens have sandy, free-draining soils that are naturally low in nutrients. Whilst this provides excellent drainage, it also means plants can struggle to retain moisture and nutrients. Some coastal areas may also have elevated soil pH levels due to shell fragments and limestone presence.
Seasonal Weather Variations
Coastal weather can be unpredictable, with sudden storms bringing high winds and salt spray further inland. However, proximity to water also moderates temperature extremes, often providing frost protection in winter and cooling in summer.
What Defines Coastal Garden Style
Coastal garden design draws inspiration from natural seaside landscapes, creating spaces that feel organic and weather-beaten whilst maintaining structure and beauty. This style embraces informality and celebrates plants that thrive in maritime conditions.
Key Design Principles
The coastal style favours naturalistic plantings over formal arrangements. Plants are often allowed to grow into their natural shapes, creating the windswept appearance characteristic of seaside vegetation. Repetition of hardy plants creates rhythm and unity whilst ensuring resilience.
Layered plantings work particularly well, with taller, salt-tolerant shrubs providing shelter for more delicate plants behind them. This creates microclimates within your garden and allows you to grow a wider range of species.
Colour Palettes
Coastal gardens typically feature colours that echo the seaside environment. Blues and whites predominate, reflecting sky and foam, whilst silvers and greys mirror driftwood and weathered surfaces. Purple and pink flowers add gentle colour without competing with the natural backdrop.
Avoid intense, tropical colours that can look out of place in temperate coastal settings. Instead, embrace the subtle beauty of muted tones that harmonise with the natural environment.
Essential Plants for Coastal Gardens
Selecting the right plants is crucial for coastal garden success. Focus on species that naturally tolerate salt, wind and sun exposure.
Salt-Tolerant Trees and Large Shrubs
Tamarisk (Tamarix) provides excellent windbreak protection with its feathery foliage and pink flowers. These hardy trees actually prefer sandy soil and salt spray, making them ideal for exposed coastal positions.
Sea Buckthorn (Hippophae rhamnoides) offers silvery foliage and bright orange berries on female plants. It’s extremely salt tolerant and provides excellent wildlife value whilst creating effective wind protection.
Pine species, particularly Pinus nigra (Austrian Pine) and Pinus pinaster (Maritime Pine), naturally thrive in coastal conditions. Their needle-like leaves resist salt damage whilst their strong root systems anchor them against wind.
Olearia species, also known as daisy bushes, produce masses of white flowers and have naturally salt-resistant foliage. They’re excellent for creating informal hedging or specimen plantings.
Hardy Perennials and Grasses
Sea Holly (Eryngium maritimum) is the quintessential coastal plant, with spiky blue flowers and deeply cut silvery foliage. It thrives in poor, sandy soils and looks spectacular in naturalistic plantings.
Thrift (Armeria maritima) forms neat cushions of grass-like foliage topped with pink or white pompom flowers. It’s perfect for edging paths or creating drifts of colour in rockeries.
Ornamental grasses such as Festuca glauca (Blue Fescue) and Stipa tenuissima (Mexican Feather Grass) add movement and texture whilst tolerating salt and drought conditions.
Catmint (Nepeta) provides long-lasting purple-blue flowers and aromatic foliage. It’s extremely hardy and attracts beneficial insects whilst deterring pests.
Ground Cover and Rock Plants
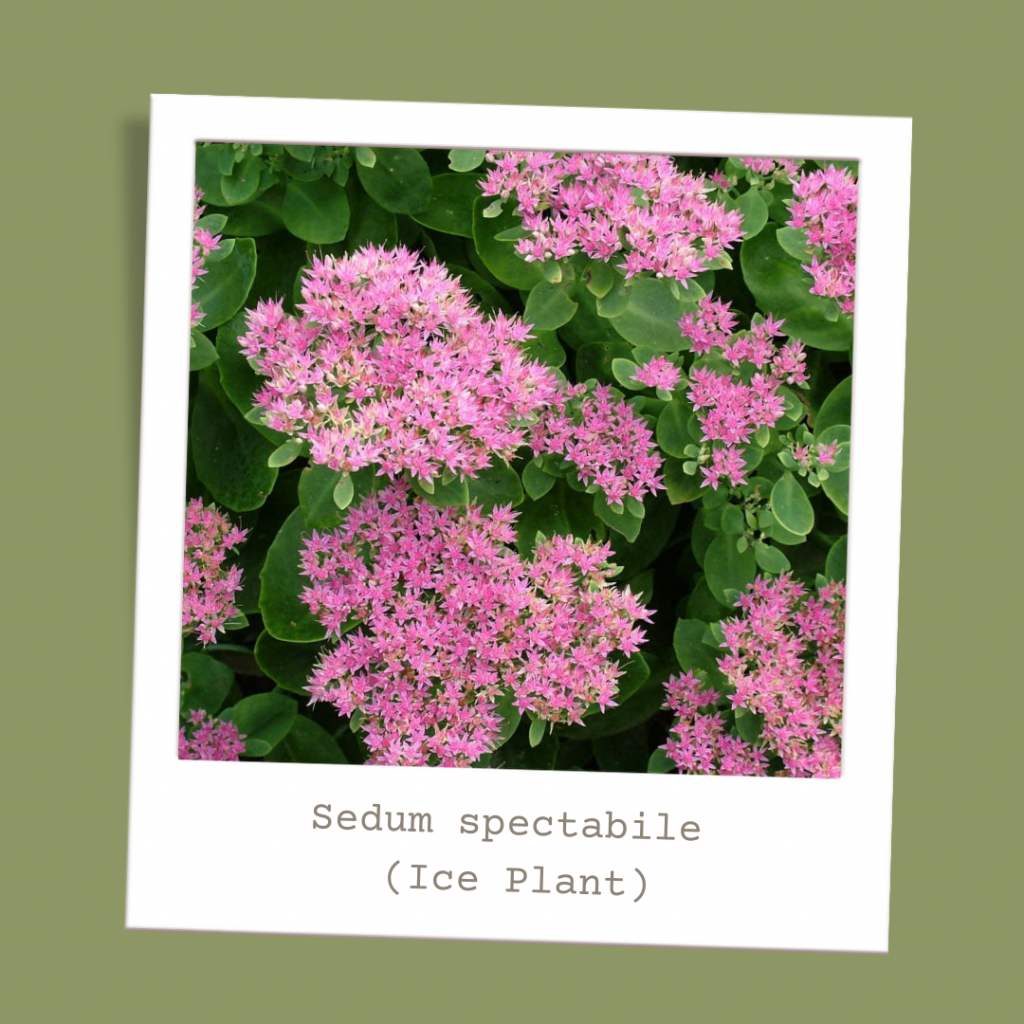
Sedum species are perfect for coastal conditions, storing water in their succulent leaves and producing colourful flowers. Sedum spectabile and Sedum ‘Autumn Joy’ are particularly effective.
Rock Rose (Helianthemum) produces papery flowers in various colours and thrives in poor, well-drained soils. It’s excellent for covering banks or filling gaps between rocks.
Thyme varieties provide fragrant ground cover and attract pollinators. Thymus serpyllum creates dense mats perfect for pathways or rock gardens.
Surfaces and Materials for Coastal Gardens
Choosing appropriate surfaces and materials is essential for creating a garden that can withstand coastal conditions whilst maintaining its beauty over time.
Gravel and Stone
Gravel is an excellent choice for coastal gardens, providing excellent drainage whilst suppressing weeds. Choose rounded beach pebbles or crushed stone in colours that complement your planting scheme. Light-coloured gravels help reflect heat and prevent soil overheating.
The main advantage of gravel is its permeability and low maintenance requirements. However, it can be challenging to walk on and may require periodic topping up as it settles or spreads.
Natural stone creates beautiful, durable surfaces but can be expensive. Choose local stone where possible to ensure it harmonises with the surrounding landscape. Sandstone and limestone work particularly well in coastal settings.
Sand and Shell-Based Materials
Sand provides an authentic coastal feel but isn’t practical for high-traffic areas as it shifts underfoot and can blow around in windy conditions. It’s better used as a decorative mulch around plants or in dedicated beach garden areas.
Crushed shell creates attractive, pale surfaces that reflect the coastal environment. It provides good drainage and gradually breaks down to improve soil structure. However, it can be sharp underfoot and may increase soil pH levels.
Decking and Timber
Hardwood decking creates elevated surfaces perfect for seating areas and entertaining spaces. Choose naturally weather-resistant timbers or properly treated softwoods. Regular maintenance with appropriate oils or stains will extend the life of timber surfaces.
The main disadvantage of timber in coastal locations is its susceptibility to salt damage and weathering. However, the natural aging process can create attractive silvered surfaces that complement the coastal aesthetic.
Borders and Planting Design
Creating effective borders in coastal gardens requires understanding how plants interact with harsh environmental conditions and designing plantings that provide mutual protection.
Shelter Planting
The most important element in coastal garden design is creating effective windbreaks. Plant tough, salt-tolerant species on the seaward side of your garden to create shelter for more delicate plants behind.
Escallonia makes an excellent informal hedge, producing glossy leaves and pink or white flowers. It tolerates severe salt exposure whilst providing year-round structure.
Griselinia littoralis creates dense, evergreen screening with attractive apple-green foliage. It’s particularly effective in milder coastal areas and can be lightly pruned to maintain shape.
Elaeagnus varieties offer silvery foliage and excellent wind resistance. Elaeagnus × ebbingei is particularly useful, providing evergreen structure and fragrant autumn flowers.
Layered Planting Approach
Behind your shelter belt, create layers of planting that gradually transition from hardy coastal species to more delicate garden plants. This creates interesting visual depth whilst providing practical protection.
Place medium-height shrubs like Hebe species and Cistus (Rock Rose) in the middle layer. These plants bridge the gap between windbreak plants and smaller perennials whilst contributing flowers and interesting foliage.
Fill the foreground with hardy perennials and ornamental grasses that can tolerate some salt exposure but benefit from the protection of larger plants behind them.
Naturalistic Planting Style
Coastal gardens look best when plantings appear natural and unforced. Use repetition of key plants to create rhythm, but vary the spacing and grouping sizes to avoid regimented appearance.
Allow plants to grow into their natural shapes rather than forcing them into unnatural forms. The windswept, slightly dishevelled appearance of coastal vegetation is part of its charm.
Colour Schemes
Build your planting schemes around a limited palette of colours that work harmoniously together. Silver and grey foliage plants provide excellent backbone planting, whilst blue, white and purple flowers add gentle colour.
Use plants with interesting seed heads and winter structure to ensure year-round interest. Many coastal plants, such as Sea Holly and ornamental grasses, look spectacular when backlit by low winter sun.
Creating Seating and Entertainment Areas
Coastal gardens need carefully positioned seating areas that provide shelter from wind whilst taking advantage of views and sunshine.
Positioning Considerations
Look for naturally sheltered spots or create protection using plantings or screens. Areas that receive morning sun but are protected from prevailing winds often work well for breakfast seating.
Consider installing windbreak screens made from natural materials like woven willow or bamboo. These provide immediate protection whilst your shelter plantings establish.
Material Choices
Teak and other hardwoods weather naturally to attractive silver-grey colours that complement coastal gardens perfectly. They require minimal maintenance beyond occasional cleaning.
Metal furniture should be made from marine-grade materials like powder-coated aluminium or stainless steel to prevent corrosion. Avoid mild steel unless it’s properly galvanised and maintained.
Stone and concrete create permanent seating solutions that improve with age. Consider built-in benches using local stone or rendered blockwork that can incorporate planters for additional interest.
Accessories and Garden Art
Carefully chosen accessories can enhance the coastal theme whilst adding personality to your garden.
Natural Materials
Driftwood makes excellent sculptural elements and can be used to create informal borders or plant supports. Large pieces can become focal points, whilst smaller pieces can edge pathways.
Beach stones and pebbles can be arranged in patterns or used to create Japanese-inspired features like dry streams or meditation areas.
Rope and nautical elements should be used sparingly to avoid creating a theme park effect. Simple rope handrails or planters can add authentic coastal character.
Weather-Resistant Features
Choose garden art and accessories that can withstand salt spray and strong winds. Ceramic and stone pieces generally perform better than metal unless specifically designed for marine environments.
Glass elements like coloured bottles or specially designed garden glass can catch and reflect light beautifully whilst being completely unaffected by salt exposure.
Advantages and Challenges of Coastal Gardening
Understanding both the benefits and difficulties of coastal gardening will help you create realistic expectations and plan effectively.
Benefits of Coastal Gardens
Frost protection is one of the biggest advantages of coastal locations. The moderating effect of nearby water means coastal gardens often experience fewer hard frosts, allowing you to grow tender plants that wouldn’t survive inland.
Extended growing seasons are common in coastal areas, with plants often continuing to grow well into autumn and starting earlier in spring.
Unique plant opportunities exist in coastal gardens. Many salt-tolerant plants are uncommon in inland gardens, allowing you to create distinctive plantings that stand out from typical suburban landscapes.
Wildlife value is often exceptional in coastal gardens, as they provide important habitat corridors for migrating birds and support specialist insects adapted to maritime conditions.
Ongoing Challenges
Plant establishment can be difficult, with young plants particularly vulnerable to salt and wind damage. You may need to provide temporary protection whilst plants establish their root systems.
Maintenance requirements can be higher than inland gardens, with regular cleaning of salt deposits from hard surfaces and furniture necessary to prevent damage.
Limited plant palette means you’ll need to abandon dreams of growing certain plants. Roses, for example, often struggle with salt exposure, whilst tropical plants may suffer from salt burn.
Seasonal storm damage is an ongoing concern, requiring regular inspection and maintenance of plant supports and garden structures.
Making Your Coastal Garden Vision Reality
Creating a successful coastal garden requires patience, planning and acceptance that some experiments may not work. Start with the hardiest, most salt-tolerant plants and gradually expand your palette as you learn what thrives in your specific conditions.
Focus on building effective shelter first—this investment in windbreak planting will pay dividends by allowing you to grow a much wider range of plants in the protected areas behind. Remember that even salt-tolerant plants benefit from some protection, especially when young.
Embrace the natural beauty of coastal conditions rather than fighting against them. The weathered, natural appearance that develops in seaside gardens has a unique charm that can’t be replicated in protected inland locations.
Your coastal garden will become a sanctuary that celebrates the dramatic beauty of seaside living whilst providing a practical, enjoyable outdoor space for you and your family. With careful planning and appropriate plant choices, you can create a garden that thrives in challenging conditions whilst capturing the essence of coastal life.
Further Reading: A Guide to Prairie Planting, Creating Harmony with Nature Naturalistic Garden Design, Garden Design with Grasses
Follow Us on Instagram for Inspiration, Blogs and our latest Garden Offers 💚