How to Plant a Hedge

Creating a hedge transforms your outdoor space into something truly special. Whether you’re seeking privacy, defining boundaries or attracting wildlife, planting a hedge offers a natural solution that grows more beautiful with each passing year.

Unlike fencing or walls, hedges provide living boundaries that change with the seasons, support local wildlife and can last for generations with proper care. The process requires patience and planning, but the rewards extend far beyond simple garden dividers. You’ll create habitats for birds, natural windbreaks and stunning features that enhance your property’s value and character.

Why Plant a Hedge?

Hedges offer remarkable versatility for any outdoor space. They create natural privacy screens that grow denser over time, providing year-round screening that no fence can match. Many homeowners discover that hedges actually increase property values whilst reducing noise pollution from neighbouring areas.

Wildlife benefits enormously from hedge planting. Native species provide nesting sites for birds, shelter for small mammals and nectar sources for pollinators. A well-established hedge becomes a miniature ecosystem supporting biodiversity right in your garden.

The environmental advantages continue with natural windbreaks that protect more delicate plants, reduced air pollution through natural filtration, and carbon absorption that helps combat climate change. Hedges also offer practical benefits like reduced maintenance costs compared to replacing fencing panels and the ability to trim to any desired height or shape.

Essential Planning Considerations

Choosing the Perfect Position

Location determines your hedge’s success more than any other factor. Survey your boundaries carefully, noting existing structures, utility lines and drainage patterns. Consider your neighbours’ perspectives and local planning restrictions, particularly if you’re planting along shared boundaries.

Measure the available space precisely, allowing room for the hedge to reach its mature width. Most hedges require 1-2 metres of growing space, though this varies significantly between species. Check for underground cables or pipes before marking your planting line.

Understanding Weather Elements

British weather presents unique challenges for hedge establishment. Prevailing winds, frost pockets and rainfall patterns all influence plant selection and positioning. Exposed sites require hardy species that can withstand strong winds, whilst shaded areas need plants that thrive in lower light conditions.

Consider seasonal variations in sunlight, particularly the winter sun’s lower angle. South-facing hedges receive maximum light but may require more watering during dry spells. North-facing positions suit shade-tolerant species but may experience slower establishment.

Selecting Plant Types

Native species typically establish more successfully and support local wildlife better than exotic alternatives. Popular choices include:

Deciduous Options:

  • Beech: Retains bronze leaves through winter
  • Hornbeam: Similar to beech but more tolerant of wet conditions
  • Hawthorn: Fast-growing with spring flowers and autumn berries

Evergreen Choices:

  • Yew: Dense, long-lived and highly versatile
  • Privet: Quick-establishing with glossy foliage
  • Laurel: Broad leaves providing excellent screening

Mixed Species Benefits:
Creating mixed hedges provides extended flowering periods, varied wildlife habitats, and natural disease resistance. Combine complementary species with similar growth rates and maintenance requirements.

How to Plant Your Hedge

Soil Preparation

Begin preparation at least six weeks before planting. Clear weeds and grass from a strip 1 metre wide along your intended hedge line. Double-dig the soil, incorporating well-rotted compost or manure to improve structure and fertility.

Test soil pH using a simple testing kit. Most hedge plants prefer slightly acidic to neutral conditions (pH 6.0-7.0). Heavy clay soils benefit from added grit or sharp sand for drainage, whilst sandy soils need organic matter for moisture retention.

Planting Techniques

Plant bare-root specimens between November and March when plants are dormant. Container-grown plants can be planted year-round but establish best in spring or autumn.

Space plants according to their mature spread, typically 30-60cm apart depending on species. Dig holes slightly wider than root systems but no deeper than the original planting depth. Position plants at the same level they grew previously, identifiable by the soil mark on stems.

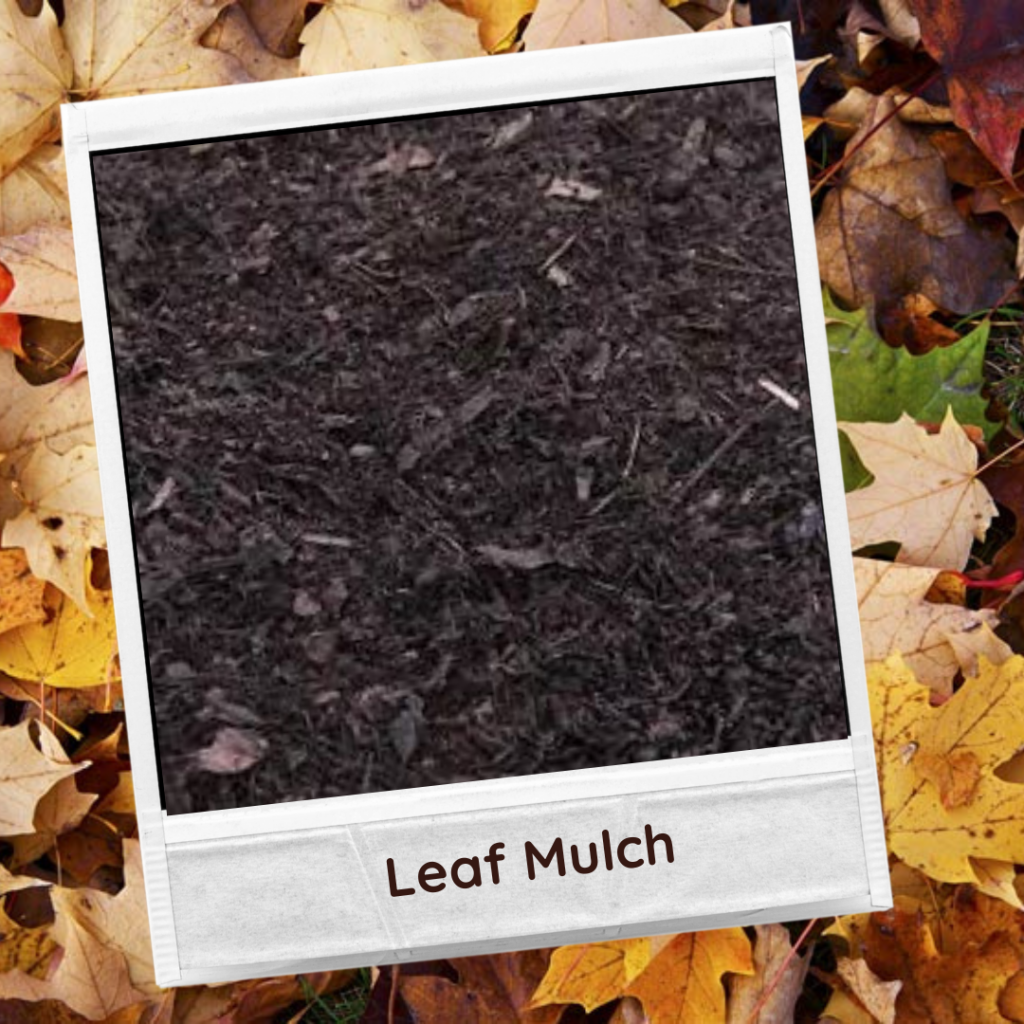
Water thoroughly after planting, ensuring soil settles around roots without air pockets. Apply a 5cm layer of organic mulch around plants, keeping it away from stems to prevent pest problems.

Growth Expectations

Hedge establishment varies significantly between species and growing conditions. Fast-growing varieties like privet or leylandii can achieve 60-90cm height annually, whilst slower species like yew may grow only 15-30cm per year.

First-year growth focuses primarily on root establishment rather than height. Expect limited vertical growth during this period, but strong root development creates the foundation for future vigorous growth. Most hedges require 3-5 years to reach effective screening height.

Caring for Your Hedge

Year One: Foundation Building

Focus entirely on establishment during the first growing season. Water regularly during dry periods, providing approximately 2.5cm weekly. Avoid fertilising newly planted hedges, which can encourage soft growth susceptible to winter damage.

Remove weeds competing for nutrients and water. Hand-weeding or careful hoeing prevents root damage that cultivation tools might cause. Monitor for pest problems or disease symptoms, addressing issues promptly to prevent establishment problems.

Years Two to Five: Shaping the Future

Year Two:
Light trimming encourages bushier growth. Remove only the soft growing tips, never cutting into older wood. This formative pruning creates the hedge’s basic shape whilst maintaining vigour.

Year Three:
Begin proper shaping, creating the desired profile. Trim sides more heavily than the top to encourage upward growth whilst maintaining density at the base. Cut evergreens in late spring after frost danger passes.

Year Four:
Establish regular trimming patterns. Most hedges benefit from two cuts annually—late spring and late summer. Create slightly tapered sides, wider at the bottom to ensure light reaches lower branches.

Year Five:
Your hedge should reach near-mature dimensions. Continue regular maintenance trimming, adjusting frequency based on growth rate and desired formality. Well-established hedges may require only annual trimming.

Professional Hedge Cutting

Once established, proper trimming maintains health, shape and density. Sharp tools produce clean cuts that heal quickly, preventing disease entry points. Hand shears provide precision for detailed work, whilst powered trimmers handle large areas efficiently.

Timing depends on species and desired formality. Formal hedges require more frequent cutting—potentially three times annually for species like privet. Informal hedges need less frequent attention, often just once yearly after flowering.

Cut in dry conditions when possible, allowing wounds to seal before wet weather arrives. Never remove more than one-third of growth in a single session, which can stress plants severely.

Benefits and Considerations

Advantages of Hedge Planting

Living boundaries provide unmatched privacy that improves annually. Unlike artificial screens, hedges become more attractive with age, developing character and supporting wildlife communities. They offer excellent noise reduction, particularly when planted in multiple rows with varying heights.

Property values typically increase with mature hedge plantings, especially native species that require minimal long-term maintenance. The environmental benefits include air purification, carbon storage, and habitat creation that supports local ecosystems.

Potential Disadvantages

Hedge establishment requires patience, with several years needed to achieve full screening. Initial costs can be substantial, particularly for large properties or premium species. Ongoing maintenance represents a lifetime commitment that some property owners find challenging.

Space requirements may limit options for smaller gardens. Mature hedges can reduce light levels in adjacent areas and compete with other plants for nutrients and water. Some fast-growing species can become invasive if not properly managed.

Legal considerations include boundary disputes with neighbours and potential restrictions in conservation areas. Research local regulations before planting, particularly regarding height restrictions and protected species.

Growing Your Garden’s Future

Planting a hedge represents an investment in your property’s long-term beauty and functionality. These living boundaries reward patience with decades of service, growing more valuable each year whilst supporting wildlife and enhancing your outdoor space.

Start planning your hedge project by assessing your site conditions and browsing local nurseries for suitable species. Consider visiting established gardens to see mature examples of different hedge types in similar growing conditions.

Begin with proper soil preparation and choose quality plants from reputable suppliers. Remember that initial care determines long-term success, so commit to regular watering and monitoring during the establishment period.

Your hedge will become a cherished garden feature, providing privacy, wildlife habitat and natural beauty for generations to come. Take the first step towards creating your own living boundary and discover the lasting satisfaction of growing something truly worthwhile.

Further Reading: The Complete Guide to Planting and Caring for a Hedge, The Silent Invader Threatening UK Gardens – Box Blight,

Follow Us on Instagram for Daily Inspiration 💚

How to Create a Formal Garden

Dreaming of a garden with elegant lines, beautiful symmetry and a timeless sense of order? A formal garden might be the perfect choice for you. These stunning spaces transform an ordinary patch of land into a masterpiece of design, offering a peaceful and structured retreat.

What is a Formal Garden?

A formal garden is defined by its structure and symmetry. Unlike the relaxed, naturalistic style of a cottage garden, a formal garden uses geometric shapes, straight lines and balanced layouts to create a sense of order and harmony. Think of neatly clipped hedges, perfectly aligned flowerbeds and pathways that lead your eye to a central feature, like a fountain or statue.

The design is often organised along a central axis, with elements on one side mirroring the other. This creates a powerful visual balance that feels both grand and calming. The goal is to impose a deliberate and artistic design onto the natural landscape, showcasing human creativity and control over nature.

A Brief History of Formal Gardens

The story of the formal garden in the UK is a journey through centuries of art, culture and changing tastes. Its roots lie in the grand gardens of Persia and the classical designs of ancient Rome, but it was in 17th-century France that the style truly flourished.

The magnificent gardens of the Palace of Versailles, designed by André Le Nôtre for King Louis XIV, became the ultimate symbol of formal garden design. These gardens were a display of power and precision, with vast avenues, intricate parterres (ornamental flowerbeds), and grand water features, all arranged in a perfectly symmetrical layout.

This French influence quickly spread across Europe and arrived in Britain, where it was adapted to suit the UK’s landscapes and stately homes. Early English formal gardens embraced this geometric style, with designers like George London and Henry Wise creating elaborate layouts for the aristocracy. Their designs featured canals, topiary and maze-like patterns that were meant to impress and entertain.

However, the 18th century brought a dramatic shift in taste. A new movement, led by designers like William Kent and Lancelot “Capability” Brown, rejected the rigid formality of the previous era. They favoured a more naturalistic style that imitated the gentle curves and rolling hills of the idealised English countryside. Formal gardens were torn up and replaced with sweeping lawns, serpentine lakes, and artfully placed clumps of trees.

But the formal style was not gone for good. The Victorian era saw a revival of geometric beds and intricate patterns, fuelled by the availability of new and exotic plants from across the British Empire. Gardeners like Sir Charles Barry, the architect of the Houses of Parliament, reintroduced formal terraces and parterres to complement their grand buildings.

Today, formal garden design continues to inspire gardeners across the UK. It offers a timeless framework that can be adapted to gardens of all sizes, from large country estates to small urban courtyards.

Key Elements of a Formal Garden

To achieve a classic formal look, you need to incorporate several key design elements. These are the building blocks that create the structure, symmetry and elegance that define the style.

  • Geometric Shapes and Clean Lines: This is the foundation of formal design. Use squares, rectangles, circles and straight lines to define your garden beds, paths, and lawn areas. The layout should be clear and deliberate.
  • Symmetry and Balance: A formal garden is often built around a central axis. This could be a path, a water feature, or a line of sight from a main window of your house. The elements on either side of this axis should be mirror images of each other, creating a pleasing sense of balance.
  • A Clear Focal Point: Every formal garden needs a focal point to draw the eye and anchor the design. This could be a statue, a sundial, an urn, a birdbath or a beautiful fountain. The paths and sightlines should all lead towards this central feature.
  • Defined Edging and Borders: Crisp, clean edges are essential. Use box hedging (Buxus sempervirens), lavender or brick edging to clearly separate paths from planting beds. This reinforces the geometric structure of the garden.
  • Limited Colour Palette: Formal gardens often rely on a simple and harmonious colour scheme. Green is the dominant colour, provided by lawns and clipped hedges. Flowers are used as accents, typically in restrained palettes of white, blue, purple or pink.
  • Repetition: Repeating plants, shapes, and architectural elements throughout the garden creates rhythm and unity. For example, you might use identical clipped topiary shapes at regular intervals or repeat the same plant combination in symmetrical beds.

How to Design Your Formal Garden

Ready to start planning? Here are the practical steps to consider when designing your own formal garden.

Step 1: Assess Your Space

Before you pick up a spade, take time to understand your garden.

  • Position: Where does the sun fall throughout the day? A sunny spot is ideal for flowering plants and classic choices like roses and lavender. A shadier garden might be better suited to a design focused on green foliage and architectural plants.
  • Environment: What is your soil type? Is the garden exposed to strong winds? Choosing plants that will thrive in your specific conditions is crucial for success.
  • Style: Think about the style of your home. A formal garden should feel like an extension of your house. A classic Georgian or Victorian home provides a perfect backdrop for a traditional formal design, but the principles can also be adapted for more modern properties.

Step 2: Define the Layout

Grab a pencil and paper and start sketching. Begin by establishing a central axis. This line should ideally connect to a key feature of your house, such as the centre of the back door or a large window. Plan your paths and beds symmetrically around this axis. Think about creating distinct “rooms” within the garden using hedges or low walls.

Step 3: Choose Your Design Features

Now for the fun part! Select the features that will bring your design to life.

  • Paths and Paving: Paths should be straight and clearly defined. Materials like gravel, brick or flagstones work well. The width of your paths should be in proportion to the size of the garden.
  • Hedges and Topiary: Hedges are the walls of your garden rooms. Boxwood is the traditional choice for low hedging, while yew or hornbeam are excellent for taller screens. Topiary (clipping shrubs into geometric shapes like balls, cones, or spirals) adds a wonderful sense of fun and structure.
  • Water Features: A simple pond, fountain or rill (a narrow channel of water) can be a stunning focal point, adding sound and movement to the garden.
  • Structures: Arches, pergolas and gazebos can add height and create a sense of enclosure. Train climbing plants like roses or clematis over them for a romantic touch.

Step 4: Plan Your Planting

Your choice of plants will soften the hard lines of the design and add colour and texture.

  • Structure Plants: These are the evergreen shrubs that form the backbone of your garden, such as box, yew and holly.
  • Accent Plants: Use flowering plants to add seasonal interest. Plant in blocks of a single colour for the greatest impact.
  • Height: Add vertical interest with standard trees (trees with a clear stem and a ball of foliage on top) or climbing plants.

Step 5: Consider Maintenance

A formal garden requires regular upkeep to look its best. Hedges and topiary will need trimming at least once or twice a year. Beds will need to be kept weed-free and lawns must be neatly mown. Be realistic about how much time you can dedicate to maintenance when planning the complexity of your design.

Top Plants for a Formal Garden

Choosing the right plants is key to creating an authentic formal garden that thrives in the British climate. Here are ten excellent choices:

  1. Box (Buxus sempervirens): The classic choice for low hedges and intricate topiary. It’s slow-growing and its small leaves allow for precise clipping.
  2. Yew (Taxus baccata): A versatile evergreen, perfect for taller hedges and larger topiary. It is dense, dark green and tolerates hard pruning.
  3. Lavender (Lavandula angustifolia ‘Hidcote’): Its silvery-grey foliage and deep purple flowers make it a wonderful choice for fragrant, low-hedging along paths.
  4. Rose (Rosa): No formal garden is complete without roses. Choose classic hybrid teas or floribundas for elegant blooms. Climbing roses like ‘New Dawn’ are perfect for arches.
  5. Hornbeam (Carpinus betulus): A great alternative to yew for hedging, hornbeam is a hardy native tree that holds onto its brown leaves through winter, providing year-round screening.
  6. Alliums: These ornamental onions produce stunning spherical flower heads on tall, straight stems, adding a modern structural element in late spring. ‘Purple Sensation’ is a popular variety.
  7. Catmint (Nepeta x faassenii): A fantastic, low-maintenance alternative to lavender, producing clouds of soft blue flowers all summer long. It’s less woody and easier to manage.
  8. Lady’s Mantle (Alchemilla mollis): With its scalloped, velvety leaves that catch water droplets and frothy lime-green flowers, this plant is perfect for softening the edges of paths and beds.
  9. Iris (Iris germanica): The sword-like leaves and magnificent, intricate flowers of bearded irises provide strong vertical accents and a touch of drama.
  10. Holly (Ilex aquifolium): A classic evergreen for structure. Variegated varieties can brighten up shady corners, and the red berries provide winter interest.

Final Considerations

Before you begin, it is worth weighing the advantages and disadvantages of a formal garden.

Advantages

  • Timeless Beauty: The classic, elegant look of a formal garden never goes out of style.
  • Structure and Order: A formal design brings a sense of calm and harmony to your outdoor space, which can be very therapeutic.
  • Year-Round Interest: The strong “bones” of the garden, created by hedges and topiary, ensure it looks good even in the depths of winter.

Disadvantages

  • High Maintenance: Keeping those lines crisp and hedges sharp requires regular and precise work.
  • Initial Cost: Establishing a formal garden can be expensive, particularly if it involves hard landscaping like paving and walling.
  • Less Wildlife-Friendly: The structured nature and limited plant diversity can make formal gardens less attractive to pollinators and other wildlife compared to more naturalistic styles.

Begin Your Garden Journey

Creating a formal garden is a rewarding process that allows you to craft a truly special outdoor space. By blending historical principles with your own personal style, you can design a garden that is both a beautiful retreat and a work of art.

Start small, perhaps with a symmetrical pair of planters or a simple geometric bed. As your confidence grows, you can expand your vision. Plan a visit to one of the many historic formal gardens in our care for inspiration and see how the masters did it. With careful planning and a little patience, you can bring the timeless elegance of formal design to your own home.

Further Reading: Creating a Cottage Garden, Creating a Perfect Coastal Garden,

Follow Us on Instagram for Daily Inspiration 💚

How to create a Tropical Garden

Imagine stepping outside your back door and being greeted by lush, vibrant foliage that transports you to an exotic paradise. With the right planning and plant choices, you can create your own tropical garden sanctuary, even in the UK’s temperate climate. A tropical garden offers an exciting opportunity to experiment with bold textures, dramatic colours and architectural plants that make a real statement. The key lies in understanding the essential elements that define tropical style and adapting them to suit your local conditions and personal preferences.

What is a Tropical Garden?

A tropical garden recreates the lush, abundant feel of equatorial regions through careful plant selection and thoughtful design. These gardens are characterised by their rich green foliage, exotic flowers and dramatic architectural plants that create a sense of being transported to far-off destinations.

The essence of tropical gardening lies in creating layers of vegetation that mimic natural rainforest environments. This includes tall canopy plants, mid-level shrubs, and ground-covering species that work together to form a cohesive, jungle-like atmosphere. The goal isn’t necessarily to replicate an authentic tropical ecosystem, but rather to capture the mood and visual impact that makes tropical landscapes so captivating.

Tropical gardens emphasise bold textures and striking leaf shapes over delicate flowers. Large, glossy leaves, dramatic architectural forms, and plants with interesting bark or stem patterns all contribute to the tropical aesthetic. The overall effect should feel abundant, slightly wild, and utterly immersive.

Essential Elements of a Tropical Garden

Understanding the key components that define tropical style will help you create an authentic-looking garden that captures that coveted exotic atmosphere.

Lush Foliage and Layered Planting

The foundation of any tropical garden is its foliage. Think big, bold leaves in various shades of green, from deep emerald to bright lime. Plants with interesting leaf shapes—heart-shaped, paddle-like, or deeply lobed—add visual interest and create the layered look that’s so characteristic of tropical environments.

Create depth by combining plants of different heights and growth habits. Tall architectural specimens form the backbone, while medium-height shrubs fill the middle layer, and low-growing groundcover plants complete the picture. This layering technique ensures your garden looks full and established, even when young plants are still developing.

Architectural Statement Plants

Every tropical garden needs at least one show-stopping architectural plant that serves as a focal point. These specimens typically have dramatic form, unusual growth habits, or particularly striking foliage that commands attention. Position these plants where they can be appreciated from multiple viewpoints and ensure they have adequate space to develop their natural shape.

Warm Colour Palette

While green dominates tropical gardens, strategic use of warm colours enhances the exotic feel. Think sunset hues—oranges, reds, deep pinks and golden yellows. These colours can come from flowers, coloured foliage or decorative elements like containers and garden ornaments.

Water Features

The sound of moving water adds another sensory dimension to tropical gardens. Whether it’s a simple bubbling fountain, a small pond, or even just water-filled containers, incorporating water elements helps create that humid, lush atmosphere associated with tropical climates.

Design Considerations for Your Tropical Garden

Successfully creating a tropical garden requires careful attention to several key factors that will determine both the initial impact and long-term success of your design.

Site Assessment and Microclimates

Start by thoroughly evaluating your garden’s conditions. Note which areas receive full sun, partial shade or deep shade throughout the day. Identify any microclimates—sheltered spots that stay warmer, areas that remain moist longer, or exposed locations that experience more wind.

Understanding your site’s drainage patterns is equally important. Many tropical-style plants prefer well-draining soil, while others thrive in consistently moist conditions. Map out these different zones so you can match plants to their preferred growing conditions.

Environmental Factors

Consider your local climate’s limitations and opportunities. In the UK, most truly tropical plants won’t survive winter outdoors, but many subtropical and hardy exotic plants can create similar visual effects while tolerating cooler temperatures.

Wind exposure is particularly important for tropical gardens, as many large-leaved plants can suffer damage from strong winds. Plan to create windbreaks or position vulnerable plants in naturally sheltered locations.

Maintenance Requirements

Be realistic about how much time you can dedicate to garden maintenance. Some tropical-style plants require regular pruning, feeding or protection during winter months. Others are remarkably low-maintenance once established.

Consider whether you’re prepared to lift tender plants for winter storage or if you prefer to focus on hardy alternatives that can remain outdoors year-round. Your maintenance preferences should strongly influence your plant choices and overall garden design.

Design Flow and Layout

Plan pathways and viewing points that allow visitors to experience your tropical garden fully. Curved paths that wind through the planting create mystery and make gardens feel larger than they actually are. Position seating areas where people can pause and appreciate particularly beautiful plant combinations or garden vistas.

Think about seasonal interest and how your garden will look throughout the year. While tropical gardens are often associated with summer abundance, incorporating evergreen plants and interesting bark or stem textures ensures year-round appeal.

Perfect Plants for UK Tropical Gardens

These carefully selected plants will help you achieve tropical style while thriving in British growing conditions.

1. Tree Fern (Dicksonia antarctica)

This magnificent fern creates instant tropical atmosphere with its enormous, lacy fronds emerging from a distinctive fibrous trunk. Hardy to approximately -5°C, tree ferns thrive in partial shade with consistent moisture. They make excellent architectural centrepieces and provide beautiful textural contrast.

2. Chusan Palm (Trachycarpus fortunei)

One of the hardiest palms available, the Chusan palm tolerates temperatures down to -15°C once established. Its fan-shaped leaves and distinctive hairy trunk immediately signal tropical style. Plant in a sheltered location with good drainage for best results.

3. Banana Plant (Musa basjoo)

Hardy banana plants produce enormous paddle-shaped leaves that epitomise tropical luxury. While the top growth dies back in winter, the plant returns vigorously each spring. Provide shelter from strong winds to prevent leaf damage.

4. Fatsia japonica

This glossy-leaved evergreen shrub produces dramatic hand-shaped leaves and tolerates a wide range of growing conditions. Extremely hardy and reliable, Fatsia provides year-round structure and works well in both sun and shade.

5. Gunnera manicata

For gardens with space and consistent moisture, Gunnera produces some of the largest leaves you’ll ever see—often reaching 2 metres across. This dramatic perennial creates incredible impact but requires protection during winter months.

6. Cordyline (Cordyline australis)

These architectural plants develop distinctive spiky crowns of sword-like leaves atop sturdy trunks. Available in green and burgundy forms, Cordylines tolerate coastal conditions and add vertical interest to tropical plantings.

7. Hardy Hibiscus (Hibiscus syriacus)

Producing large, colourful flowers in late summer, hardy hibiscus brings authentic tropical blooms to UK gardens. These deciduous shrubs are completely hardy and available in white, pink, blue and purple varieties.

8. Bamboo (Phyllostachys species)

Clumping bamboos provide instant height and create gentle rustling sounds that enhance the tropical atmosphere. Choose clumping rather than running varieties to avoid invasive spreading.

9. Canna Lily

These bold perennials produce broad leaves and exotic flowers in brilliant colours. While not hardy in most UK locations, Cannas can be lifted and stored indoors during winter or grown as annuals.

10. Acer palmatum (Japanese Maple)

Certain varieties of Japanese maple, particularly those with large or unusually shaped leaves, contribute tropical feeling while being completely hardy. Their autumn colour provides additional seasonal interest.

Tropical Garden Features to Consider

Beyond plants, several design elements can enhance your garden’s tropical atmosphere and create authentic exotic ambience.

Water Elements

Installing a water feature transforms your garden’s atmosphere instantly. Consider a tiered fountain for the soothing sound of cascading water or create a small pool surrounded by lush plantings. Even large decorative bowls filled with water and floating plants can add tropical sophistication.

Seating Areas

Create inviting spaces where you can relax and enjoy your tropical paradise. Comfortable seating positioned to take advantage of the best views encourages regular use and appreciation of your garden. Consider materials like teak or rattan that complement the tropical aesthetic.

Lighting Design

Strategic lighting extends your garden’s usability into evening hours and creates magical atmospheres after dark. Uplighting architectural plants creates dramatic silhouettes, while string lights or lanterns add festive tropical resort ambience.

Decorative Containers

Large containers allow you to grow tender plants that can be moved to protection during winter. Choose pots in natural materials like terracotta or glazed ceramics in warm earth tones that complement your planting scheme.

Pergolas and Structures

Overhead structures create defined spaces and provide support for climbing plants. A pergola draped with vigorous climbers mimics the canopy effect found in natural tropical environments.

Caring for Your Tropical Garden

Proper maintenance ensures your tropical garden remains healthy and beautiful throughout the growing season and beyond.

Seasonal Care Schedule

Spring marks the beginning of active growth for most tropical-style plants. Remove any winter protection, begin regular feeding programmes, and carry out necessary pruning. This is also the ideal time for planting new additions and dividing established perennials.

Summer requires consistent watering and regular feeding to support the rapid growth that characterises tropical plants. Monitor for pest and disease issues, which can develop quickly in warm, humid conditions.

Autumn preparation involves reducing feeding, collecting seeds from plants you want to propagate, and beginning winter protection for tender specimens. This is also an excellent time for planting hardy additions that will establish before winter.

Winter care focuses on protecting tender plants and maintaining garden structure. Mulch around plant bases, wrap vulnerable specimens, and ensure good drainage to prevent winter waterlogging.

Watering and Feeding

Most tropical-style plants prefer consistent moisture but not waterlogged conditions. Water deeply but less frequently to encourage strong root development. Mulching around plants helps retain moisture and suppress weeds.

Feed regularly during the growing season with balanced fertilisers. Plants in containers require more frequent feeding than those planted directly in the ground.

Pruning and Maintenance

Remove dead, damaged, or diseased material promptly to maintain plant health and appearance. Many tropical plants benefit from regular pruning to encourage bushy growth and prevent them from becoming too large for their allocated space.

Key Considerations Before Starting

Several important factors deserve careful consideration before beginning your tropical garden project.

Climate Limitations

Understand your local climate’s constraints and work within them rather than against them. Research average temperatures, frost dates, and typical weather patterns to make informed plant choices.

Budget Planning

Tropical gardens can be created on various budgets, but initial costs can be significant if you’re purchasing large architectural plants. Consider starting with smaller specimens that will grow into feature plants over time.

Long-term Commitment

Tropical gardens often require more maintenance than traditional British gardens, particularly during establishment phases. Ensure you’re prepared for the ongoing care requirements your chosen plants will need.

Space Requirements

Many tropical plants grow larger than typical garden plants and need adequate space to develop properly. Plan for mature sizes rather than current plant dimensions to avoid overcrowding issues later.

Advantages of Tropical Gardens

Creating a tropical garden offers numerous benefits that extend beyond simple aesthetic appeal.

The dramatic visual impact of tropical plantings creates stunning focal points and conversation pieces. These gardens provide opportunities to grow unusual and exotic plants that showcase your horticultural interests and skills.

Tropical gardens often attract diverse wildlife, including beneficial insects and birds drawn to the abundant shelter and food sources. The lush plantings create natural privacy screens and help establish distinct outdoor rooms within larger garden spaces.

Many people find tropical gardens particularly relaxing and therapeutic. The abundant green foliage and exotic atmosphere provide perfect spaces for unwinding and escaping everyday stresses.

Potential Disadvantages to Consider

Tropical gardens also present certain challenges that prospective creators should understand.

Higher maintenance requirements compared to traditional gardens can demand significant time investments. Many plants require winter protection or seasonal lifting and storage, adding to annual garden tasks.

Initial establishment costs can be substantial, particularly if you want immediate impact from larger specimen plants. Some tropical plants have specific soil or environmental requirements that may necessitate garden modifications.

In small spaces, vigorous tropical plants can quickly outgrow their allocated areas, requiring frequent pruning or replacement. Weather damage during storms can be more severe due to large leaves and architectural growth habits.

Transform Your Garden Into a Tropical Haven

Creating your own tropical garden paradise is an achievable goal that brings exotic beauty and year-round interest to any outdoor space. Start with careful planning and realistic plant choices suited to your local climate and maintenance preferences.

Focus on building strong garden bones with architectural plants and layered planting schemes that create authentic tropical atmosphere. Incorporate complementary features like water elements and appropriate lighting to enhance the overall effect.

Remember that successful tropical gardens develop over time. Begin with a solid foundation of hardy plants and gradually add more adventurous specimens as your confidence and experience grow. With patience and proper care, your tropical garden will become a stunning outdoor sanctuary that transports you to exotic destinations without leaving home.

Take the first step towards your tropical garden dream by assessing your current outdoor space and identifying the best locations for key plants. Start planning your plant list today and prepare to create your own slice of paradise.

Further Reading: Creating a Cottage Garden, Creating a Perfect Coastal Garden,

Follow Us on Instagram for Daily Inspiration 💚

Transform Your Garden into a Pollinator Paradise

Creating a pollinator garden isn’t just about adding beauty to your outdoor space—it’s about giving nature a helping hand. As pollinator populations decline across the UK, your garden can become a vital lifeline for bees, butterflies and countless other beneficial insects that keep our ecosystems thriving.

With the right plants and a bit of planning, you can transform even the smallest garden into a buzzing haven that supports wildlife whilst providing you with months of colourful blooms. Whether you’re working with a sprawling countryside plot or a compact urban balcony, there’s always room to make a difference.

Why Pollinator Gardens Matter More Than Ever

The statistics paint a concerning picture. Over the past 50 years, the UK has lost 97% of its wildflower meadows, and bee populations have declined by 13% since 2007. This dramatic loss affects more than just the insects themselves—it threatens our entire food system.

Pollinators are responsible for fertilising approximately one-third of the crops we eat daily. Without them, we’d lose apples, strawberries, tomatoes and countless other fruits and vegetables. Beyond food production, these remarkable creatures help maintain the biodiversity that keeps our natural world in balance.

Your pollinator garden becomes a crucial stepping stone in what conservationists call “wildlife corridors”—connected habitats that allow species to move, feed and breed safely across landscapes increasingly fragmented by development.

Meet Your Garden’s Future Visitors

Understanding which pollinators might visit your garden helps you choose the right plants and create the perfect environment for their needs.

Bees are perhaps the most recognisable garden pollinators. From the familiar honeybee to the impressive bumblebee and over 250 species of solitary bees, these industrious insects seek nectar-rich flowers with landing platforms. Many prefer blue, purple, and yellow blooms.

Butterflies bring graceful beauty to any garden. These delicate creatures favour flat-topped flowers where they can easily perch whilst feeding. Native species like the Small Tortoiseshell, Red Admiral and Peacock butterfly are particularly drawn to gardens with both nectar sources and host plants for their caterpillars.

Hoverflies might be less glamorous than butterflies, but they’re incredibly effective pollinators. These bee-mimicking flies prefer small, accessible flowers and are particularly valuable for vegetable gardens.

Moths often go unnoticed as nocturnal pollinators, yet they’re essential for many plants. Evening-scented flowers like honeysuckle and night-scented stock will attract these important nighttime workers.

Essential Plants for Your Pollinator Garden

Choosing the right plants forms the foundation of a successful pollinator garden. Focus on native species whenever possible, as local wildlife has evolved alongside these plants over thousands of years.

Spring Awakeners

Early-flowering plants provide crucial sustenance when pollinators first emerge from winter dormancy. Crocuses offer some of the first pollen of the year, whilst primroses and pulmonaria provide essential early nectar. Pussy willow trees become alive with bees on sunny March days.

Fruit trees deserve special mention—apple, cherry, and plum blossoms create spectacular displays whilst feeding countless insects. Even a single apple tree can support dozens of pollinator species.

Summer Abundance

Summer offers the greatest variety of pollinator plants. Lavender attracts bees, butterflies, and hoverflies whilst filling your garden with fragrance. Catmint blooms for months, providing consistent nectar supplies.

Foxgloves are magnets for long-tongued bumblebees, whilst borage offers a continuous supply of blue, star-shaped flowers that bees adore. Sunflowers provide landing platforms for larger insects and abundant pollen.

For butterflies specifically, consider buddleia (the butterfly bush), verbena bonariensis, and scabious. These plants offer the flat-topped flowers that butterflies prefer.

Autumn Sustenance

Late-season flowers help pollinators build energy reserves for winter. Asters and sedum varieties bloom well into October, whilst ivy flowers provide one of the last major nectar sources before winter arrives.

Heather covers moorlands with purple blooms through autumn, supporting specialist heather bees and other late-season foragers.

Native Wildflowers

Don’t overlook Britain’s native wildflowers. Field scabious supports over 20 butterfly species, whilst greater knapweed feeds bees, butterflies, and moths. Ox-eye daisies attract hoverflies and smaller bees with their accessible flower heads.

Wild marjoram buzzes with insect activity during summer months, and bird’s-foot trefoil serves as a food plant for several butterfly caterpillars whilst providing nectar for adults.

Creating the Perfect Pollinator Environment

Successful pollinator gardens require more than just the right plants. Consider these essential elements when planning your space.

Plant in groups rather than scattering individual plants throughout your garden. Clusters of the same species create visual impact for both you and visiting insects, making flowers easier for pollinators to locate.

Ensure continuous blooms from early spring through late autumn. Aim to have something flowering throughout the growing season, paying particular attention to the often-overlooked periods of late summer and early autumn.

Provide shelter by including shrubs, trees, or dedicated insect hotels. Many solitary bees nest in hollow stems or sandy soil, whilst butterflies need sheltered spots to roost overnight.

Include water sources such as shallow dishes with landing spots or muddy puddles. Butterflies particularly appreciate muddy areas where they can drink and obtain essential minerals.

Avoid pesticides completely. Even organic sprays can harm beneficial insects. Instead, encourage natural predators and accept that a few damaged leaves are signs of a healthy ecosystem.

Small Spaces, Big Impact

Limited space needn’t limit your pollinator support. Window boxes filled with herbs like thyme, oregano and rosemary provide excellent nectar sources whilst offering you fresh ingredients.

Balcony containers can accommodate lavender, salvia, and cosmos—all excellent pollinator plants that thrive in pots. Hanging baskets of trailing lobelia and alyssum add vertical interest whilst feeding small pollinators.

Even a single buddleia in a large container can transform a patio into a butterfly haven.

Supporting the Planet, One Garden at a Time

Your pollinator garden represents far more than a personal gardening project—it’s a meaningful contribution to global conservation efforts. Each flower you plant, each chemical you avoid using, and each habitat you create helps reverse decades of decline.

Climate change adds urgency to these efforts. As weather patterns shift and traditional habitats face pressure, garden refuges become increasingly important for species survival. Your garden might provide the crucial resources that help a local pollinator population persist through challenging times.

The ripple effects extend beyond your garden boundaries. Healthy pollinator populations improve crop yields for farmers, support bird populations that feed on insects and maintain the plant diversity that keeps ecosystems resilient.

Transform Your Garden Today

Creating a pollinator garden rewards you with months of colour, fragrance and the fascinating behaviour of visiting wildlife. Start small with a few pollinator-friendly plants and expand your efforts as you discover the joy of gardening for nature.

The planet needs every garden to become a haven for wildlife. Make yours count.

Further Reading: Transform Your Allotment into a Biodiversity Haven, Save the Bees Protect the Planet, “Why should you build a bug hotel?”

Follow Us on Instagram for Daily Inspiration 💚

Transform Your Garden Into a Butterfly Paradise

Creating a butterfly garden transforms any outdoor space into a vibrant ecosystem that supports wildlife whilst bringing endless joy to your daily life. These enchanting creatures need our help more than ever, and your garden could become their sanctuary.

Butterflies face mounting pressures from habitat loss, climate change and pesticide use. Many species that once danced through British gardens have seen dramatic population declines over recent decades. The good news? You can make a real difference by creating a welcoming haven right outside your door.

A thoughtfully designed butterfly garden provides essential resources these delicate visitors need: nectar-rich flowers for adult butterflies, host plants for caterpillars and safe spaces for shelter and reproduction. Beyond supporting conservation, you’ll discover the pure pleasure of watching these winged jewels flutter through your garden, bringing colour and movement to every corner.

Why Create a Butterfly Garden?

Supporting butterfly populations through gardening offers rewards that extend far beyond conservation. These gardens become living classrooms where children develop deep connections with nature, watching caterpillars transform through their remarkable life cycles.

Butterfly gardens attract diverse wildlife beyond their namesake visitors. Bees, hoverflies and other beneficial insects flock to nectar-rich blooms, creating a thriving ecosystem that naturally controls garden pests. Birds arrive to feed on insects and caterpillars, adding their songs to your outdoor symphony.

The therapeutic benefits prove equally compelling. Gardening reduces stress and anxiety whilst gentle butterfly watching provides peaceful moments of mindfulness. Many gardeners describe the meditative quality of observing these creatures as they visit flowers, mate and lay eggs.

Your efforts contribute to vital citizen science projects that help researchers track butterfly populations and migration patterns. Every butterfly you attract and observe adds valuable data to our understanding of these remarkable insects.

What to Consider Before You Begin

Successfully attracting butterflies requires understanding their specific needs throughout their life cycle. Adult butterflies need nectar sources from early spring through late autumn, whilst caterpillars require particular host plants for survival.

Location plays a crucial role in your garden’s success. Butterflies prefer sunny, sheltered spots protected from strong winds. South-facing gardens typically work best, though areas receiving at least six hours of morning sunshine can support many species.

Consider your local butterfly species when planning. Different regions support different populations, so research which butterflies naturally occur in your area. The Butterfly Conservation website provides excellent resources for identifying local species and understanding their specific requirements.

Water access is essential but often overlooked. Butterflies need shallow water sources for drinking and minerals. A simple shallow dish filled with wet sand or pebbles provides perfect puddling opportunities.

Timing your garden development across seasons ensures continuous nectar availability. Plan for succession planting that provides blooms from March through October, supporting butterflies throughout their active period.

Advantages of Butterfly Gardening

Creating a butterfly garden delivers numerous environmental benefits beyond supporting these charismatic insects. Native plants used in butterfly gardens typically require less water and maintenance than traditional ornamental species, making them more sustainable choices.

These gardens naturally reduce the need for chemical interventions. Diverse plantings attract beneficial insects that control pest populations, whilst healthy soil ecosystems develop through reduced chemical inputs meaning working with nature produces more resilient, beautiful gardens.

Educational opportunities abound in butterfly gardens. Children learn about life cycles, plant identification and ecological relationships through hands-on observation. Many families find that butterfly gardening becomes a shared passion that spans generations.

The seasonal changes in butterfly gardens provide year-round interest. Spring emergence of early species like Brimstones, summer abundance of Painted Ladies and Red Admirals, and autumn migrations create an ever-changing spectacle.

Disadvantages to Consider

Butterfly gardens require patience as establishment takes time. Most plants need a full growing season to mature, and building stable butterfly populations may take several years. Initial results might seem modest compared to your vision.

Caterpillar feeding can cause temporary plant damage that some gardeners find concerning. Host plants like nettles and buckthorn may look untidy when caterpillars are actively feeding, requiring acceptance of natural processes over pristine appearances.

Weather significantly impacts butterfly activity and garden success. Cool, wet summers reduce butterfly numbers and limit garden enjoyment, whilst extreme weather events can damage plants and disrupt butterfly life cycles.

Space requirements for diverse plantings might challenge smaller gardens. Supporting multiple butterfly species requires various host plants and nectar sources, which can overwhelm compact spaces if not carefully planned.

Ongoing maintenance includes allowing some garden areas to remain wild or untidy, which may conflict with neighbourhood expectations or personal preferences for neat garden aesthetics.

Best Plants for Butterfly Gardens

Buddleia (Butterfly Bush)

This classic butterfly magnet produces long, fragrant flower spikes from July through September. Purple, pink, white and yellow varieties provide options for any colour scheme. Buddleia davidii attracts Red Admirals, Painted Ladies, Peacocks, and Small Tortoiseshells in impressive numbers. Plant in full sun with good drainage. Regular deadheading extends flowering and prevents excessive self-seeding.

Lavender

English lavender’s sweet fragrance and purple spikes create perfect landing platforms for butterflies. Blooming from June through August, lavender attracts Small Blues, Common Blues, and various white butterfly species. The compact growth habit suits smaller gardens, whilst larger varieties create stunning hedges. Plant in well-drained soil and prune after flowering to maintain shape.

Sedum (Ice Plant)

Autumn-flowering sedums provide crucial late-season nectar when many other sources have finished. The flat, pink flower heads of Sedum spectabile and Sedum telephium attract Painted Ladies, Red Admirals, and Small Copper butterflies. These drought-tolerant perennials thrive in poor soils and full sun, making them excellent low-maintenance choices.

Verbena bonariensis

Tall, airy stems topped with purple flower clusters create see-through plantings that don’t block garden views. This South American native self-seeds freely whilst providing nectar from July through October. Small Tortoiseshells, Painted Ladies and Red Admirals particularly favour verbena’s small, clustered flowers.

Marjoram

Wild marjoram produces clouds of tiny pink flowers that attract numerous small butterfly species often overlooked in favour of larger, showier visitors. Blooming from July through September, marjoram supports Gatekeeper, Meadow Brown, and various skipper butterflies. The aromatic foliage adds culinary value to your butterfly garden.

Echinops (Globe Thistle)

Spherical, steel-blue flower heads create architectural interest whilst providing excellent butterfly nectar. Blooming from July through September, globe thistles attract Painted Ladies, Red Admirals, and various white butterfly species. These drought-tolerant perennials self-seed modestly and combine beautifully with ornamental grasses.

Native Wildflowers

Field scabious, knapweed and bird’s-foot trefoil provide authentic British habitat that supports native butterfly species perfectly adapted to these plants. Many commercial wildflower mixes include these species alongside others specifically chosen for butterfly attraction.

Host Plants for Caterpillars

Common Nettle

Despite their stinging reputation, nettles serve as essential host plants for Red Admiral, Small Tortoiseshell, Peacock and Comma butterfly caterpillars. Maintain a nettle patch in a sunny corner, cutting half the patch each year to provide fresh growth whilst preserving overwintering pupae.

Holly and Ivy

These evergreen plants support Holly Blue caterpillars through their complex life cycle. Spring generations feed on holly flowers and developing berries, whilst summer broods prefer ivy flowers and fruits. Both plants provide year-round structure in butterfly gardens.

Garlic Mustard

This common woodland edge plant serves as the primary host for Orange-tip butterfly caterpillars. The white spring flowers also provide nectar for early-flying adults. Allow garlic mustard to self-seed in semi-shaded areas beneath trees or shrubs.

Buckthorn

Purging buckthorn and alder buckthorn support Brimstone butterfly caterpillars, whilst the adults feed on various flowers throughout the garden. These native shrubs provide structure and wildlife value beyond their butterfly connections.

Essential Garden Features for Butterfly Support

Shelter and Overwintering Sites

Butterflies need protected areas for roosting during bad weather and overwintering as adults, pupae or eggs. Create shelter through strategic plantings of evergreen shrubs, ornamental grasses, and perennials left standing through winter.

Log piles, stone walls, and compost heaps provide additional shelter options whilst supporting other wildlife. Position these features in quiet garden corners where they won’t be disturbed during winter months.

Water Sources

Shallow puddling stations allow butterflies to drink and obtain essential minerals. Create these by filling saucers with wet sand, pebbles, or compost, keeping them consistently moist. Position multiple water sources throughout the garden, refreshing them regularly.

Small ponds with shallow edges provide larger water features whilst supporting additional wildlife. Include marginal plants like yellow iris and water mint to extend your nectar sources.

Basking Areas

Butterflies are cold-blooded creatures that rely on external heat sources to maintain body temperature. Create sunny basking spots using flat stones, bare soil patches, or south-facing walls where butterflies can warm themselves during cooler periods.

Position basking areas near nectar sources so butterflies can quickly move between warming and feeding activities. Avoid using chemical weedkillers on bare soil areas, as butterflies often contact these surfaces directly.

Avoid Pesticides

Chemical pesticides kill butterflies at all life stages, from eggs through adults. Embrace natural pest control through diverse plantings that attract beneficial insects like ladybirds, lacewings and hoverflies.

Encourage birds that consume pest insects by providing nest boxes and water sources. Many butterfly garden plants naturally repel common garden pests, reducing the need for chemical interventions.

Seasonal Management

Resist the urge to tidy your garden too thoroughly during autumn. Many butterfly pupae overwinter attached to plant stems or hidden in leaf litter. Delay cutting back perennials until March, after overwintering butterflies have emerged.

Create a cutting rotation for nettle patches and other host plants, maintaining fresh growth whilst preserving areas where butterflies may have laid eggs or pupated.

Building Your Butterfly Paradise

Start small and expand your butterfly garden gradually as plants establish and your confidence grows. Focus on creating one excellent nectar border rather than scattered plantings that may not provide sufficient resources.

Choose plants with different flowering periods to ensure continuous nectar availability throughout the butterfly season. Early-flowering species like aubrieta and honesty support spring butterflies, whilst late bloomers like Michaelmas daisies provide autumn sustenance.

Group plants of the same species together to create visual impact and make flowers easier for butterflies to locate. Single, bold drifts prove more effective than scattered individual specimens.

Consider your garden’s existing conditions and choose appropriate plants rather than fighting natural soil and light patterns. Butterflies visit healthy, thriving plants more readily than struggling specimens.

Record your observations to track which plants and garden areas prove most successful. Photography helps document butterfly visitors and can contribute to local recording schemes.

Connect with local butterfly conservation groups and garden wildlife organisations to share experiences and learn from other gardeners’ successes and challenges.

Your butterfly garden represents hope for these magnificent creatures and a gift to future generations. Every flower you plant and every butterfly you attract contributes to a more vibrant, diverse world where wildlife thrives alongside human communities.

Further Reading: Creating a Cottage Garden, Creating a Perfect Coastal Garden, How to Create and Maintain a Garden Pond, Transform Your Allotment into a Biodiversity Haven

Follow Us on Instagram for Daily Inspiration 💚

Leaf Mulch: Nature’s Ultimate Soil Enhancer

Autumn brings a spectacular display of golden, amber and crimson leaves cascading from trees. Rather than raking these fallen treasures into bags for collection, discover how to transform them into one of gardening’s most valuable resources. Leaf mulch offers an eco-friendly solution that enriches your soil whilst reducing waste.

This natural approach to garden improvement costs nothing yet delivers remarkable benefits. From moisture retention to soil enrichment, leaf mulch provides everything your plants need to thrive. Whether you’re a seasoned gardener or just beginning your horticultural journey, understanding how to harness the power of fallen leaves will revolutionise your outdoor space.

Leaf Mulch Photo set against a background of autumn colourful leaves.

What Is Leaf Mulch?

Leaf mulch consists of decomposed or partially decomposed leaves that create a nutrient-rich layer for your garden beds. Unlike fresh fallen leaves, proper leaf mulch has broken down sufficiently to provide immediate benefits to your soil and plants.

The decomposition process transforms ordinary autumn leaves into a dark, crumbly material teeming with beneficial microorganisms. These microscopic helpers work tirelessly to improve soil structure and deliver nutrients directly to plant roots.

Two main types of leaf mulch serve different purposes in your garden. Fresh leaf mulch, made from recently fallen leaves, works excellently as a protective surface layer. Aged leaf mulch, which has decomposed for several months, integrates seamlessly into existing soil to boost fertility and structure.

Benefits That Transform Your Garden

Soil Enhancement

Leaf mulch acts as nature’s slow-release fertiliser, gradually breaking down to feed your plants throughout the growing season. As earthworms and beneficial bacteria process the organic matter, they create humus that dramatically improves soil structure.

Clay soils become more workable and better-draining, whilst sandy soils gain improved water and nutrient retention. This natural soil conditioner eliminates the need for expensive commercial amendments.

Moisture Conservation

A 5-10cm layer of leaf mulch significantly reduces water evaporation from soil surfaces. During hot summer months, this natural barrier can reduce watering needs by up to 70%. Plants maintain consistent moisture levels, reducing stress and promoting healthier growth patterns.

Weed Suppression

Properly applied leaf mulch creates an effective barrier against weed germination. Existing weeds struggle to penetrate the dense layer, whilst new seeds find it difficult to establish roots. This natural weed control reduces the need for chemical herbicides and hours of manual weeding.

Temperature Regulation

Leaf mulch insulates plant roots from temperature extremes. During summer, it keeps soil cooler, protecting delicate root systems. Winter brings opposite benefits, as the insulating layer prevents deep frost penetration that can damage perennial plants.

How to Use Leaf Mulch Effectively

Application Techniques

Apply leaf mulch in layers between 5-10cm thick around plants, keeping it several centimetres away from tree trunks and plant stems. This prevents moisture retention against bark that could encourage rot or pest problems.

Spread mulch evenly across flower beds, vegetable gardens, and around shrubs. For established perennials, gently work some aged leaf mulch into the top few centimetres of soil during spring preparation.

Seasonal Timing

Autumn presents the ideal time for fresh leaf mulch application. Apply after cleaning up summer debris but before winter’s harsh weather arrives. Spring applications work well for aged leaf mulch that can be incorporated directly into planting beds.

Avoid applying fresh leaf mulch too thickly in spring, as decomposing leaves can temporarily tie up soil nitrogen as they break down.

Collecting and Creating Your Own Leaf Mulch

Collection Strategies

Gather leaves when they’re slightly damp but not sodden. Dry leaves blow away easily, whilst overly wet leaves become compacted and difficult to handle. Early morning after dew has formed often provides ideal collection conditions.

Use a rake or leaf blower to gather leaves from lawns, paths, and flower beds. Focus on healthy leaves from deciduous trees, avoiding any showing signs of disease or pest damage.

Burgon and Ball Leaf Rake photo set against a background of autumn colourful leaves.

Preparation Methods

Shredding Method: Pass collected leaves through a shredder or run a lawnmower over them several times. Smaller pieces decompose more quickly and are less likely to mat together and block air circulation.

Composting Approach: Layer whole or shredded leaves with nitrogen-rich materials like grass clippings in a compost bin. Turn regularly and maintain proper moisture levels to create high-quality aged mulch within 6-12 months.

Simple Decomposition: Pile leaves in a designated area and leave them to break down naturally. This method requires less effort but takes 12-18 months to produce usable mulch.

Important Considerations

Choose leaves from healthy trees, avoiding those from diseased plants that might spread problems to your garden. Oak, maple and beech leaves make excellent mulch, whilst eucalyptus and walnut leaves contain compounds that may inhibit plant growth.

Never use leaves gathered from roadsides where they may contain pollutants from vehicle emissions. Stick to leaves from your own property or clean suburban areas.

Advantages and Disadvantages

Key Advantages

Cost Effectiveness: Leaf mulch costs nothing to produce whilst delivering benefits equivalent to expensive commercial mulches. This sustainable approach reduces household waste whilst improving your garden.

Environmental Benefits: Using leaf mulch reduces landfill waste and eliminates the carbon footprint associated with transporting commercial mulch products. You’re creating a closed-loop system that mimics natural forest floors.

Long-term Soil Improvement: Unlike synthetic mulches, leaf mulch continuously improves soil as it decomposes. Each season brings cumulative benefits that build healthier, more fertile growing conditions.

Potential Disadvantages

Appearance Concerns: Some gardeners prefer the uniform look of commercial mulches over the natural appearance of decomposing leaves. Fresh leaf mulch can look untidy until it settles and begins breaking down.

Seasonal Availability: Leaf collection is largely seasonal, requiring advance planning to gather sufficient quantities. Urban gardeners may struggle to source adequate volumes.

Disease Risk: Diseased leaves can introduce pathogens to your garden. Careful selection and proper composting help mitigate these risks.

Initial Labour: Collecting, processing, and applying leaf mulch requires time and effort upfront, though long-term benefits far outweigh this initial investment.

Create Your Natural Garden Paradise

Leaf mulch represents one of gardening’s best-kept secrets—a free, sustainable resource that transforms ordinary gardens into thriving ecosystems. Start small with a single flower bed and experience the remarkable differences this natural approach delivers.

Embrace autumn’s generous gift and begin collecting leaves for your garden transformation. Your plants will thank you with stronger growth, vibrant blooms, and resilient health throughout the seasons. Join countless gardeners who have discovered that sometimes the best solutions come directly from nature itself.

Further Reading: Embrace Chop and Drop for a Greener Garden, How to Make Comfrey Tea: The Perfect Garden Fertiliser, Transforming Your Compost into Potting Mix

Follow Us on Instagram for Daily Gardening Inspiration 💚

How to Scarify Your Lawn

A lush, green lawn doesn’t happen by accident. Behind every pristine garden lies a series of careful maintenance practices and scarifying ranks among the most transformative yet overlooked techniques. This powerful lawn care method can revitalise tired, patchy grass and restore your outdoor space to its former glory.

Scarifying might sound intimidating, but it’s simpler than you think. With the right knowledge and tools, you can tackle this essential garden task and watch your lawn flourish like never before. Let’s explore everything you need to know about scarifying your lawn, from understanding the process to weighing its benefits and potential drawbacks.

Ready to transform your garden? Pack your gardening gloves and prepare to discover how scarifying can give your lawn the fresh start it deserves.

What Is Scarifying?

Scarifying is the process of mechanically removing thatch, moss and debris from your lawn’s surface and upper soil layer. Think of it as giving your grass a deep cleanse that reaches beyond what regular mowing can achieve.

The technique involves using a scarifying tool—either a manual rake or electric scarifier—equipped with sharp, vertical blades or tines. These cut through the lawn’s surface, pulling up dead organic matter that has accumulated over time. The process creates temporary bare patches and leaves your lawn looking rather worse for wear initially, but this apparent destruction paves the way for remarkable regeneration.

Thatch, the primary target of scarifying, consists of dead grass stems, roots, and other organic debris that forms a layer between the soil and living grass blades. While a thin layer of thatch can be beneficial, providing insulation and cushioning, excessive build-up creates problems. When thatch exceeds 12mm in thickness, it prevents water, nutrients and air from reaching the grass roots effectively.

Scarifying also tackles moss, which thrives in compacted, poorly-drained conditions. By removing moss and opening up the soil surface, you create an environment where grass can out-compete these unwanted invaders.

The best time to scarify depends on your grass type and climate. Cool-season grasses benefit from autumn scarifying, typically between September and October, when temperatures are moderate and rainfall is more frequent. This timing allows grass to recover before winter dormancy and establishes strong roots for spring growth.

Why Should You Scarify Your Lawn?

Scarifying delivers remarkable benefits that transform both the appearance and health of your lawn. Understanding these advantages will help you appreciate why this seemingly harsh treatment is actually an act of garden kindness.

Improved Air Circulation

Dense thatch creates a barrier that restricts airflow to grass roots. Scarifying removes this obstacle, allowing oxygen to penetrate the soil more effectively. Better air circulation promotes healthier root development and reduces the risk of fungal diseases that thrive in stagnant, moisture-trapped conditions.

Enhanced Water Absorption

Water struggles to penetrate thick thatch layers, often running off the surface rather than reaching the root zone where grass needs it most. After scarifying, rainfall and irrigation can soak directly into the soil, reducing water waste and ensuring your grass receives adequate hydration during dry periods.

Better Nutrient Uptake

Fertilisers and organic nutrients face the same penetration challenges as water when confronted with excessive thatch. Scarifying creates direct pathways for nutrients to reach grass roots, making your feeding regime more effective and reducing the amount of fertiliser needed to maintain healthy growth.

Moss and Weed Control

Moss indicates underlying lawn problems, typically poor drainage, soil compaction or nutrient deficiency. Scarifying physically removes existing moss while addressing the conditions that allowed it to establish. The process also disturbs shallow-rooted weeds, making them easier to treat or remove entirely.

Stimulated New Growth

The scarifying process might look destructive, but it actually stimulates grass to produce new shoots and strengthen existing root systems. This controlled stress response results in denser, more resilient turf that can better withstand future challenges like drought, foot traffic and pest pressure.

Preparation for Overseeding

If your lawn has bare patches or thin areas, scarifying creates ideal conditions for overseeding. The process opens up the soil surface, providing excellent seed-to-soil contact that improves germination rates and helps new grass establish quickly.

Plan your scarifying session when you have time to follow up with appropriate aftercare, including watering and potential reseeding of sparse areas.

What Are the Disadvantages of Scarifying Your Lawn?

While scarifying offers significant benefits, it’s important to understand the potential drawbacks before starting this intensive lawn care process. Being aware of these challenges helps you prepare properly and set realistic expectations.

Temporary Aesthetic Impact

Scarifying transforms your lawn into what might charitably be described as a battlefield. The process leaves behind piles of debris, bare patches, and a generally disheveled appearance that can persist for several weeks. If you’re planning a garden party or outdoor event, factor in recovery time when scheduling your scarifying session.

Weather Dependency

Success depends heavily on favourable weather conditions following scarification. Extended dry periods can stress the exposed grass and soil, while excessive rainfall might cause waterlogging or wash away newly sown seeds. Unfortunately, British weather rarely follows our gardening schedules, making timing a constant challenge.

Physical Demands

Scarifying requires significant physical effort, particularly when using manual tools on larger lawns. The process involves repetitive motion and can be surprisingly strenuous work. Electric scarifiers reduce the physical burden but still require careful handling and can be heavy to manoeuvre around obstacles.

Risk of Overdoing It

Enthusiastic scarifying can cause more harm than good. Removing too much material or scarifying too frequently can damage healthy grass roots and create conditions favourable to weeds and diseases. The key lies in finding the right balance, which comes with experience and careful observation of your lawn’s response.

Equipment and Cost Considerations

Professional-grade scarifying equipment represents a significant investment for occasional use. While you can hire tools, rental costs add up and you’ll need to transport and store the equipment. Manual alternatives are cheaper but require more time and energy to achieve comparable results.

Potential for Weed Invasion

The bare soil created by scarifying provides perfect conditions for weed seeds to germinate. Without prompt reseeding and careful aftercare, you might find your newly scarified lawn colonised by dandelions, plantains and other unwanted species that were previously suppressed by dense thatch.

Timing Sensitivity

Scarifying at the wrong time can set back your lawn’s recovery significantly. Late autumn scarifying might leave grass vulnerable to winter damage, while spring scarifying during active growth periods can interrupt the natural growing cycle.

Despite these potential drawbacks, most gardeners find that the long-term benefits of scarifying far outweigh the temporary inconveniences. Success lies in careful planning, appropriate timing and commitment to post-scarifying care.

Preparing for Success

Transform your scarifying experience from daunting task to rewarding garden project by preparing thoroughly. Start by assessing your lawn’s condition and choosing appropriate weather windows. Gather your tools, clear the area of obstacles, and have a post-scarifying plan ready.

Remember that scarifying is an investment in your lawn’s future health. The temporary disruption gives way to stronger, more beautiful grass that will reward your efforts for years to come. Take the time to do it properly and your garden will thank you with the lush, green lawn you’ve always wanted.

Ready to give your lawn the care it deserves? Start planning your scarifying project and prepare to discover just how beautiful your outdoor space can become.

Further Reading: Why Plastic Lawns are a Threat to the Environment, RHS Lawns

Creating a Cottage Garden

The English cottage garden represents one of the most beloved and enduring garden styles in the world. With its romantic charm, abundant blooms and seemingly effortless beauty, this gardening approach has captured hearts for centuries. Whether you’re working with a small urban plot or a sprawling country garden, you can create your own slice of cottage garden paradise.

The cottage garden style emerged from necessity rather than fashion. Traditional English cottage gardens were practical spaces where working families grew vegetables, herbs and flowers together in small plots. Over time, this practical approach evolved into a distinctive aesthetic that celebrates abundance, natural beauty and the harmonious mixing of plants.

What Makes a Cottage Garden Special?

A cottage garden is characterised by its informal, abundant planting style that appears to have evolved naturally over time. Unlike formal gardens with rigid structures and careful planning, cottage gardens embrace a more relaxed approach where plants seem to tumble and flow together in delightful harmony.

The essence of cottage gardening lies in creating maximum impact with minimum fuss. Plants are packed closely together, self-seeding is encouraged and the overall effect should feel welcoming and lived-in rather than pristine. This style celebrates the beauty of imperfection and the charm of plants growing as they naturally would.

Cottage gardens traditionally served multiple purposes. They provided food for the table, herbs for medicine and cooking, and flowers for cutting and enjoying indoors. This practical foundation still influences modern cottage garden design, where beauty and utility work hand in hand.

Understanding Cottage Garden Planting Style

The planting style in a cottage garden follows several key principles that create its distinctive look and feel. Dense, layered plantings form the backbone of the design, with taller plants at the back gradually decreasing in height towards the front. However, this isn’t applied rigidly – the occasional tall plant towards the front adds interest and breaks up any sense of formality.

Mixed plantings are essential to the cottage garden aesthetic. Flowers, vegetables, herbs, and shrubs all grow together in happy profusion. You might find roses climbing through apple trees, lavender bordering vegetable beds and self-seeded poppies appearing wherever they choose to grow.

Repetition plays a crucial role in preventing the garden from looking chaotic. Key plants are repeated throughout different areas of the garden, creating visual links and a sense of unity. This might mean planting the same variety of rose in several locations or using the same edging plant throughout your borders.

The planting should feel generous and abundant. Bare soil should be minimal, with plants encouraged to fill every available space. This dense planting approach also helps suppress weeds naturally and creates beneficial microclimates for different plants.

Choosing Your Cottage Garden Colour Palette

Traditional cottage gardens favour soft, romantic colour schemes that create a sense of harmony and peace. Pastel shades form the foundation of most cottage garden palettes, with gentle pinks, lavenders, creams and pale yellows creating a dreamy atmosphere.

White flowers play a particularly important role in cottage gardens. They help tie together different coloured plants and create highlights that catch the eye. White roses, delphiniums, and sweet alyssum are classic choices that work beautifully in any cottage garden scheme.

Don’t be afraid to include some stronger colours for contrast and interest. Deep purple delphiniums, bright red poppies or vibrant orange marigolds can add punch to your palette when used thoughtfully. The key is to use these bolder colours as accents rather than dominant themes.

Consider how colours will work together throughout the growing season. Plan for a succession of blooms that will maintain your chosen colour scheme from spring through autumn. Early bulbs might provide soft yellows and whites, followed by summer perennials in pinks and purples, and finishing with autumn flowers in warmer tones.

Essential Plants for Your Cottage Garden

The plant selection in a cottage garden should include a good mix of perennials, annuals, bulbs, shrubs and climbers. Traditional favourites include roses, particularly old-fashioned varieties with strong fragrance and romantic blooms. David Austin English roses are excellent modern choices that capture the cottage garden spirit whilst offering improved disease resistance and repeat flowering.

Herbaceous perennials form the backbone of cottage garden borders. Delphiniums provide height and drama with their towering spikes of blue, pink or white flowers. Hollyhocks create vertical interest and self-seed readily, appearing in new locations each year. Hardy geraniums offer long-flowering ground cover in various colours, whilst catmint provides aromatic foliage and attracts beneficial insects.

Annual flowers add seasonal colour and fill gaps between perennials. Sweet peas climbing up wigwams or through shrubs bring fragrance and cutting flowers. Nigella, calendula, and cornflowers self-seed readily and help create that natural, unplanned look that’s so characteristic of cottage gardens.

Don’t forget to include herbs and edible plants. Lavender provides structure, fragrance and attracts pollinators. Rosemary, thyme and sage offer aromatic foliage and culinary uses. Fruit trees and berry bushes can provide height and seasonal interest whilst contributing to your kitchen garden.

Creating the Right Environment

Cottage gardens thrive in sunny locations with well-drained soil. Most cottage garden plants prefer at least six hours of direct sunlight daily, though some shade-tolerant varieties can work in partially shaded areas. If your garden has different light conditions, embrace this as an opportunity to create varied planting schemes.

Soil preparation is crucial for success. Cottage gardens traditionally grew in ordinary garden soil enriched with compost and well-rotted manure. You don’t need perfect conditions, but improving your soil with organic matter will help your plants establish and thrive. Good drainage is particularly important, especially for Mediterranean herbs and roses.

Wind protection can be beneficial, particularly for taller plants like delphiniums and hollyhocks. Consider planting some shrubs or installing trellis panels to create sheltered microclimates within your garden. This also provides support for climbing plants and adds vertical interest.

Water access is important, especially during establishment and dry spells. Position water butts to collect rainwater, and consider installing drip irrigation for areas that need regular watering. Mulching around plants helps retain moisture and suppress weeds.

Designing Your Cottage Garden Borders

Cottage garden borders should feel generous and overflowing rather than restrained. Traditional cottage garden borders were often quite narrow due to space constraints, but they were packed with plants that spilled out onto paths and grew up walls and fences.

Plan your borders with a good mix of plant types and sizes. Include some structural plants like box hedging or lavender to provide year-round interest and framework for seasonal plantings. Add medium-height perennials as your main planting, and fill gaps with annuals and bulbs.

The edges of your borders shouldn’t be rigid. Allow plants to spill forward onto paths and self-seed where they will. This natural informality is essential to the cottage garden aesthetic. If you need to maintain clear pathways, simply edit back the most vigorous spreaders whilst leaving others to create that characteristic tumbling effect.

Consider the view from your house and main seating areas when planning your borders. Position your most beautiful and fragrant plants where you’ll see and smell them most often. Create focal points with specimen plants or garden features, but keep these simple and in keeping with the cottage garden style.

Planning Your Garden Pathways

Pathways in cottage gardens should feel like natural routes through the planting rather than formal design elements. Traditional materials work best – weathered brick, natural stone, or simple gravel create the right atmosphere. Avoid materials that feel too modern or pristine.

Width is important for both practical and aesthetic reasons. Paths should be wide enough for comfortable walking but not so wide that they dominate the garden. Around 1.2 metres works well for main paths, with narrower secondary paths creating more intimate routes through the garden.

Allow plants to soften the edges of your paths. Low-growing plants like thyme, chamomile, or alyssum can be planted between paving stones or allowed to creep across path edges. This creates that characteristic cottage garden look where boundaries between planted areas and pathways become beautifully blurred.

Consider creating different types of paths for different areas of your garden. A more formal path might lead to your front door, whilst meandering grass paths could wind through more distant areas of the garden. Stepping stones through planted areas create charming routes without requiring formal path construction.

Essential Edging and Boundaries

Traditional cottage garden edging was often practical rather than purely decorative. Low box hedges, wooden boards, or simple stone edging helped define planting areas whilst being strong enough to contain enthusiastic plants.

Box hedging remains one of the most effective edging choices for cottage gardens. It provides year-round structure, can be clipped to maintain neat edges, and creates a perfect framework for informal planting. Alternative evergreen edging plants include lavender, santolina, or small hebe varieties.

Wooden edging using reclaimed scaffold boards or rustic timber creates an appropriate cottage garden feel. Ensure any timber is treated for outdoor use and consider allowing it to weather naturally rather than painting or staining it.

For boundaries, traditional cottage gardens often featured mixed hedges rather than fences. Hawthorn, blackthorn and field maple create authentic-looking boundaries that support wildlife. If you need immediate privacy, consider planting climbing roses or honeysuckle on simple post and wire structures.

Choosing Cottage Garden Accessories

Accessories in cottage gardens should feel authentic and useful rather than purely decorative. Traditional materials like weathered timber, wrought iron and natural stone work best. Avoid anything that feels too modern or mass-produced.

Plant supports are essential functional accessories. Hazel or willow wigwams provide natural-looking support for climbing beans or sweet peas. Wrought iron obelisks suit roses and clematis, whilst simple bamboo canes can support tall perennials.

Garden tools and containers become decorative elements in cottage gardens. Traditional wooden trugs, galvanised watering cans and hand tools with wooden handles all contribute to the authentic atmosphere. Display these items in natural locations where they might realistically be used.

Consider adding some traditional garden structures like rustic arches or simple pergolas. These provide support for climbing plants whilst creating focal points and height variation in your garden design.

Creating Comfortable Seating Areas

Seating in cottage gardens should feel integrated with the planting rather than standing apart from it. Position benches and chairs where they’ll be partially enclosed by plants, creating intimate spaces for enjoying your garden.

Wooden furniture works best in cottage gardens. Weathered teak, painted timber benches, or simple rustic furniture all suit the cottage garden aesthetic. Allow the furniture to develop a natural patina rather than keeping it looking new.

Create multiple seating areas if space allows. A bench positioned to catch the morning sun, a chair tucked into an arbour for afternoon shade, and perhaps a larger seating area for entertaining all serve different purposes and encourage you to enjoy different aspects of your garden.

Fragrant plants should surround your seating areas. Position roses, lavender, honeysuckle, and other scented plants where their perfume will be most appreciated. Evening-scented plants like night-scented stock or evening primrose work particularly well near seating areas used in the evening.

Adding the Perfect Finishing Touches

The finishing touches in your cottage garden should enhance the natural beauty of your planting without overwhelming it. Simple bird baths, sundials or small statues can create focal points whilst supporting garden wildlife.

Lighting should be subtle and practical. Solar-powered lights along pathways, simple lanterns for evening dining, or fairy lights threaded through climbing plants can extend the use of your garden into the evening hours.

Water features suit cottage gardens if they feel natural and unpretentious. A simple fountain, small pond, or even a half-barrel water garden can attract wildlife and add the soothing sound of water to your garden.

Consider adding some vertical growing space with simple trellis panels or pergolas. These structures provide support for climbing plants whilst creating additional planting opportunities and visual interest.

Weighing the Pros and Cons

Cottage gardens offer numerous advantages for gardeners seeking beauty, wildlife value, and relatively low maintenance. The dense planting naturally suppresses weeds, whilst the mixed plantings support beneficial insects and create resilient garden ecosystems. The informal style means that imperfections become part of the charm rather than problems to be solved.

The abundant flowering and self-seeding nature of cottage gardens provides excellent value for money. Once established, many plants will return year after year or self-seed to create new displays. This style also works well for gardens of all sizes, from tiny urban plots to large country gardens.

However, cottage gardens do require some specific considerations. The informal style can become genuinely messy without regular maintenance. You’ll need to deadhead spent flowers, edit out unwanted seedlings, and provide support for tall plants during the growing season.

Some cottage garden plants can be quite vigorous and may overwhelm smaller or more delicate neighbours. You’ll need to monitor plant growth and occasionally divide or relocate plants to maintain the right balance.

Creating Your Own Cottage Garden Paradise

An English cottage garden offers one of the most rewarding and beautiful gardening experiences available. By following the principles outlined in this guide, you can create your own abundant paradise that provides year-round interest, supports wildlife, and gives you endless pleasure.

Start small with a single border or area of your garden, and gradually expand your cottage garden plantings as your confidence grows. Remember that cottage gardens develop their character over time, so be patient and allow your garden to evolve naturally.

The key to success lies in embracing the cottage garden philosophy of abundance, informality, and the harmonious mixing of plants. Focus on creating generous plantings with traditional cottage garden plants, and don’t be afraid to let your garden develop its own personality through self-seeding and natural growth patterns.

With careful planning and thoughtful plant selection, your cottage garden will become a treasured retreat that provides beauty, fragrance and wildlife habitat for years to come.

Further Reading: Creating a Perfect Coastal Garden, A Guide to Prairie Planting, Creating Harmony with Nature Naturalistic Garden Design

Follow Us on Instagram for Inspiration, Blogs and our latest Garden Offers 

Creating a Perfect Coastal Garden

The sound of crashing waves, the feel of sea breeze on your skin and the sight of endless horizons make coastal living truly special. But these same elements that make seaside locations so appealing can present unique challenges for gardeners. Salt-laden winds, intense sunlight and sandy soils require a different approach to garden design than traditional inland spaces.

Creating a beautiful coastal garden isn’t just about choosing the right plants—it’s about understanding how to work with nature’s forces rather than against them. The key lies in embracing the coastal environment and designing a space that thrives in these conditions whilst capturing the relaxed, natural beauty of seaside living.

Whether you’re dealing with a clifftop plot, a beachside cottage garden or simply want to bring coastal charm to your outdoor space, this guide will help you create a garden that’s both stunning and resilient. You’ll discover which plants flourish in salty conditions, how to choose materials that withstand coastal weather and design principles that capture the essence of seaside style.

Understanding Coastal Garden Conditions

Coastal gardens face a unique set of environmental challenges that don’t exist in inland locations. Understanding these conditions is the first step towards creating a thriving seaside space.

Salt Spray and Wind Exposure

The most significant challenge for coastal gardens is salt spray carried by sea winds. This salt can damage plant foliage, causing leaf burn and stunted growth in sensitive species. The closer your garden is to the shoreline, the more intense this effect becomes.

Wind exposure is equally challenging. Coastal winds are often stronger and more persistent than inland breezes, causing physical damage to plants and increased water loss through transpiration. These winds can also carry sand and debris, further stressing your plants.

Intense Sunlight and Heat

Coastal locations often experience more intense sunlight due to reflection off water and sand. This increased UV exposure can scorch delicate plants and cause rapid soil drying. The combination of salt, wind and intense sun creates a harsh environment that requires careful plant selection.

Soil Conditions

Many coastal gardens have sandy, free-draining soils that are naturally low in nutrients. Whilst this provides excellent drainage, it also means plants can struggle to retain moisture and nutrients. Some coastal areas may also have elevated soil pH levels due to shell fragments and limestone presence.

Seasonal Weather Variations

Coastal weather can be unpredictable, with sudden storms bringing high winds and salt spray further inland. However, proximity to water also moderates temperature extremes, often providing frost protection in winter and cooling in summer.

What Defines Coastal Garden Style

Coastal garden design draws inspiration from natural seaside landscapes, creating spaces that feel organic and weather-beaten whilst maintaining structure and beauty. This style embraces informality and celebrates plants that thrive in maritime conditions.

Key Design Principles

The coastal style favours naturalistic plantings over formal arrangements. Plants are often allowed to grow into their natural shapes, creating the windswept appearance characteristic of seaside vegetation. Repetition of hardy plants creates rhythm and unity whilst ensuring resilience.

Layered plantings work particularly well, with taller, salt-tolerant shrubs providing shelter for more delicate plants behind them. This creates microclimates within your garden and allows you to grow a wider range of species.

Colour Palettes

Coastal gardens typically feature colours that echo the seaside environment. Blues and whites predominate, reflecting sky and foam, whilst silvers and greys mirror driftwood and weathered surfaces. Purple and pink flowers add gentle colour without competing with the natural backdrop.

Avoid intense, tropical colours that can look out of place in temperate coastal settings. Instead, embrace the subtle beauty of muted tones that harmonise with the natural environment.

Essential Plants for Coastal Gardens

Selecting the right plants is crucial for coastal garden success. Focus on species that naturally tolerate salt, wind and sun exposure.

Salt-Tolerant Trees and Large Shrubs

Tamarisk (Tamarix) provides excellent windbreak protection with its feathery foliage and pink flowers. These hardy trees actually prefer sandy soil and salt spray, making them ideal for exposed coastal positions.

Sea Buckthorn (Hippophae rhamnoides) offers silvery foliage and bright orange berries on female plants. It’s extremely salt tolerant and provides excellent wildlife value whilst creating effective wind protection.

Pine species, particularly Pinus nigra (Austrian Pine) and Pinus pinaster (Maritime Pine), naturally thrive in coastal conditions. Their needle-like leaves resist salt damage whilst their strong root systems anchor them against wind.

Olearia species, also known as daisy bushes, produce masses of white flowers and have naturally salt-resistant foliage. They’re excellent for creating informal hedging or specimen plantings.

Hardy Perennials and Grasses

Sea Holly (Eryngium maritimum) is the quintessential coastal plant, with spiky blue flowers and deeply cut silvery foliage. It thrives in poor, sandy soils and looks spectacular in naturalistic plantings.

Thrift (Armeria maritima) forms neat cushions of grass-like foliage topped with pink or white pompom flowers. It’s perfect for edging paths or creating drifts of colour in rockeries.

Ornamental grasses such as Festuca glauca (Blue Fescue) and Stipa tenuissima (Mexican Feather Grass) add movement and texture whilst tolerating salt and drought conditions.

Catmint (Nepeta) provides long-lasting purple-blue flowers and aromatic foliage. It’s extremely hardy and attracts beneficial insects whilst deterring pests.

Ground Cover and Rock Plants

Sedum species are perfect for coastal conditions, storing water in their succulent leaves and producing colourful flowers. Sedum spectabile and Sedum ‘Autumn Joy’ are particularly effective.

Rock Rose (Helianthemum) produces papery flowers in various colours and thrives in poor, well-drained soils. It’s excellent for covering banks or filling gaps between rocks.

Thyme varieties provide fragrant ground cover and attract pollinators. Thymus serpyllum creates dense mats perfect for pathways or rock gardens.

Surfaces and Materials for Coastal Gardens

Choosing appropriate surfaces and materials is essential for creating a garden that can withstand coastal conditions whilst maintaining its beauty over time.

Gravel and Stone

Gravel is an excellent choice for coastal gardens, providing excellent drainage whilst suppressing weeds. Choose rounded beach pebbles or crushed stone in colours that complement your planting scheme. Light-coloured gravels help reflect heat and prevent soil overheating.

The main advantage of gravel is its permeability and low maintenance requirements. However, it can be challenging to walk on and may require periodic topping up as it settles or spreads.

Natural stone creates beautiful, durable surfaces but can be expensive. Choose local stone where possible to ensure it harmonises with the surrounding landscape. Sandstone and limestone work particularly well in coastal settings.

Sand and Shell-Based Materials

Sand provides an authentic coastal feel but isn’t practical for high-traffic areas as it shifts underfoot and can blow around in windy conditions. It’s better used as a decorative mulch around plants or in dedicated beach garden areas.

Crushed shell creates attractive, pale surfaces that reflect the coastal environment. It provides good drainage and gradually breaks down to improve soil structure. However, it can be sharp underfoot and may increase soil pH levels.

Decking and Timber

Hardwood decking creates elevated surfaces perfect for seating areas and entertaining spaces. Choose naturally weather-resistant timbers or properly treated softwoods. Regular maintenance with appropriate oils or stains will extend the life of timber surfaces.

The main disadvantage of timber in coastal locations is its susceptibility to salt damage and weathering. However, the natural aging process can create attractive silvered surfaces that complement the coastal aesthetic.

Borders and Planting Design

Creating effective borders in coastal gardens requires understanding how plants interact with harsh environmental conditions and designing plantings that provide mutual protection.

Shelter Planting

The most important element in coastal garden design is creating effective windbreaks. Plant tough, salt-tolerant species on the seaward side of your garden to create shelter for more delicate plants behind.

Escallonia makes an excellent informal hedge, producing glossy leaves and pink or white flowers. It tolerates severe salt exposure whilst providing year-round structure.

Griselinia littoralis creates dense, evergreen screening with attractive apple-green foliage. It’s particularly effective in milder coastal areas and can be lightly pruned to maintain shape.

Elaeagnus varieties offer silvery foliage and excellent wind resistance. Elaeagnus × ebbingei is particularly useful, providing evergreen structure and fragrant autumn flowers.

Layered Planting Approach

Behind your shelter belt, create layers of planting that gradually transition from hardy coastal species to more delicate garden plants. This creates interesting visual depth whilst providing practical protection.

Place medium-height shrubs like Hebe species and Cistus (Rock Rose) in the middle layer. These plants bridge the gap between windbreak plants and smaller perennials whilst contributing flowers and interesting foliage.

Fill the foreground with hardy perennials and ornamental grasses that can tolerate some salt exposure but benefit from the protection of larger plants behind them.

Naturalistic Planting Style

Coastal gardens look best when plantings appear natural and unforced. Use repetition of key plants to create rhythm, but vary the spacing and grouping sizes to avoid regimented appearance.

Allow plants to grow into their natural shapes rather than forcing them into unnatural forms. The windswept, slightly dishevelled appearance of coastal vegetation is part of its charm.

Colour Schemes

Build your planting schemes around a limited palette of colours that work harmoniously together. Silver and grey foliage plants provide excellent backbone planting, whilst blue, white and purple flowers add gentle colour.

Use plants with interesting seed heads and winter structure to ensure year-round interest. Many coastal plants, such as Sea Holly and ornamental grasses, look spectacular when backlit by low winter sun.

Creating Seating and Entertainment Areas

Coastal gardens need carefully positioned seating areas that provide shelter from wind whilst taking advantage of views and sunshine.

Positioning Considerations

Look for naturally sheltered spots or create protection using plantings or screens. Areas that receive morning sun but are protected from prevailing winds often work well for breakfast seating.

Consider installing windbreak screens made from natural materials like woven willow or bamboo. These provide immediate protection whilst your shelter plantings establish.

Material Choices

Teak and other hardwoods weather naturally to attractive silver-grey colours that complement coastal gardens perfectly. They require minimal maintenance beyond occasional cleaning.

Metal furniture should be made from marine-grade materials like powder-coated aluminium or stainless steel to prevent corrosion. Avoid mild steel unless it’s properly galvanised and maintained.

Stone and concrete create permanent seating solutions that improve with age. Consider built-in benches using local stone or rendered blockwork that can incorporate planters for additional interest.

Accessories and Garden Art

Carefully chosen accessories can enhance the coastal theme whilst adding personality to your garden.

Natural Materials

Driftwood makes excellent sculptural elements and can be used to create informal borders or plant supports. Large pieces can become focal points, whilst smaller pieces can edge pathways.

Beach stones and pebbles can be arranged in patterns or used to create Japanese-inspired features like dry streams or meditation areas.

Rope and nautical elements should be used sparingly to avoid creating a theme park effect. Simple rope handrails or planters can add authentic coastal character.

Weather-Resistant Features

Choose garden art and accessories that can withstand salt spray and strong winds. Ceramic and stone pieces generally perform better than metal unless specifically designed for marine environments.

Glass elements like coloured bottles or specially designed garden glass can catch and reflect light beautifully whilst being completely unaffected by salt exposure.

Advantages and Challenges of Coastal Gardening

Understanding both the benefits and difficulties of coastal gardening will help you create realistic expectations and plan effectively.

Benefits of Coastal Gardens

Frost protection is one of the biggest advantages of coastal locations. The moderating effect of nearby water means coastal gardens often experience fewer hard frosts, allowing you to grow tender plants that wouldn’t survive inland.

Extended growing seasons are common in coastal areas, with plants often continuing to grow well into autumn and starting earlier in spring.

Unique plant opportunities exist in coastal gardens. Many salt-tolerant plants are uncommon in inland gardens, allowing you to create distinctive plantings that stand out from typical suburban landscapes.

Wildlife value is often exceptional in coastal gardens, as they provide important habitat corridors for migrating birds and support specialist insects adapted to maritime conditions.

Ongoing Challenges

Plant establishment can be difficult, with young plants particularly vulnerable to salt and wind damage. You may need to provide temporary protection whilst plants establish their root systems.

Maintenance requirements can be higher than inland gardens, with regular cleaning of salt deposits from hard surfaces and furniture necessary to prevent damage.

Limited plant palette means you’ll need to abandon dreams of growing certain plants. Roses, for example, often struggle with salt exposure, whilst tropical plants may suffer from salt burn.

Seasonal storm damage is an ongoing concern, requiring regular inspection and maintenance of plant supports and garden structures.

Making Your Coastal Garden Vision Reality

Creating a successful coastal garden requires patience, planning and acceptance that some experiments may not work. Start with the hardiest, most salt-tolerant plants and gradually expand your palette as you learn what thrives in your specific conditions.

Focus on building effective shelter first—this investment in windbreak planting will pay dividends by allowing you to grow a much wider range of plants in the protected areas behind. Remember that even salt-tolerant plants benefit from some protection, especially when young.

Embrace the natural beauty of coastal conditions rather than fighting against them. The weathered, natural appearance that develops in seaside gardens has a unique charm that can’t be replicated in protected inland locations.

Your coastal garden will become a sanctuary that celebrates the dramatic beauty of seaside living whilst providing a practical, enjoyable outdoor space for you and your family. With careful planning and appropriate plant choices, you can create a garden that thrives in challenging conditions whilst capturing the essence of coastal life.

Further Reading: A Guide to Prairie Planting, Creating Harmony with Nature Naturalistic Garden Design, Garden Design with Grasses

Follow Us on Instagram for Inspiration, Blogs and our latest Garden Offers 💚

Growing Blackberries

September brings many garden treasures, but few are as rewarding as plump, juicy blackberries hanging heavy on the cane. These dark purple gems offer incredible flavour and impressive nutritional benefits, making them a must-have addition to any garden.

Fresh blackberries from your garden taste nothing like shop-bought varieties. They’re sweeter, more complex in flavour, and packed with nutrients that deteriorate quickly after picking. Plus, a single blackberry plant can produce fruit for 15-20 years, making it one of the best long-term investments you can make in your garden.

What Are Blackberries?

Blackberries belong to the Rubus genus, part of the rose family. These perennial plants produce long, arching canes that bear fruit in their second year before dying back. The plant then sends up new canes to replace them, creating a continuous cycle of growth and production.

Wild blackberries have been gathered for thousands of years across Europe, Asia and North America. Archaeological evidence shows people were eating blackberries as far back as 8,000 years ago. The Romans valued them highly, believing they could cure various ailments, whilst medieval monasteries cultivated them in their herb gardens.

Modern cultivated blackberries were developed in the 19th century, primarily in America. Plant breeders worked to create varieties with larger fruits, fewer thorns and better disease resistance than their wild cousins. Today’s garden blackberries offer all these improvements whilst maintaining the intense flavour that makes wild blackberries so special.

Growing Blackberries in Your Garden

Space Requirements

Blackberries need room to spread. Each plant requires approximately 1.5-2 metres of space along a fence or trellis system. The canes can reach 2-3 metres in height, so choose a spot where they won’t overshadow shorter plants.

A typical garden can accommodate 2-4 blackberry plants, which should provide plenty of fruit for a family. If space is limited, consider compact varieties that work well in large containers.

Best Growing Conditions

Blackberries thrive in full sun but tolerate partial shade. They prefer well-drained, slightly acidic soil with a pH between 5.5 and 6.5. Heavy clay or waterlogged soil can cause root problems, so improve drainage by adding compost or creating raised beds.

Choose a sheltered spot protected from strong winds. Blackberry canes are flexible but can snap in severe weather, especially when laden with fruit.

Planting and Care

Plant blackberries in late autumn or early spring when the soil isn’t frozen. Dig a hole twice the width of the root ball and the same depth. Add a generous amount of well-rotted compost to the planting area.

Space plants 1.5-2 metres apart and water thoroughly after planting. Apply a thick mulch around the base to retain moisture and suppress weeds.

Blackberries benefit from regular feeding. Apply a balanced fertiliser in early spring, followed by a potash-rich feed in summer to encourage fruit development. Keep the soil consistently moist but not waterlogged, especially during fruit formation.

Pruning Made Simple

Many gardeners worry about pruning blackberries, but it’s straightforward once you understand the basic principle. Blackberry canes are biennial – they grow in the first year, fruit in the second year, then die.

In late winter, cut all the old fruiting canes (those that bore fruit the previous summer) down to ground level. These will be darker and more woody than the new growth. Keep 4-6 of the strongest new canes and tie them to your support system.

During summer, pinch out the growing tips of new canes when they reach the top of your support. This encourages side shoots to develop, increasing your fruit yield.

Choosing the Right Varieties

Traditional Thorny Varieties

‘Bedford Giant’ produces large, sweet berries with excellent flavour. The canes are vigorous and thorny but very productive. This variety ripens in late August and early September.

‘Himalayan Giant’ offers massive berries and heavy crops. The thorny canes need strong support but reward you with exceptional harvests. Expect fruit from late August through September.

Thornless Varieties

‘Oregon Thornless’ produces medium-sized berries with good flavour and attractive cut-leaf foliage. The lack of thorns makes picking much easier, though yields may be slightly lower than thorny varieties.

‘Loch Ness’ combines thornless canes with excellent disease resistance. The berries are large, firm, and perfect for eating fresh or cooking. This variety crops heavily in late summer.

Compact Varieties

‘Baby Cakes’ grows just 1 metre tall, making it perfect for containers or small gardens. The dwarf canes produce full-sized berries with excellent flavour.

Each variety has its strengths. Thorny types typically offer better flavour and heavier crops, whilst thornless varieties make maintenance and harvesting much easier. Compact varieties suit small spaces but produce smaller overall yields.

Nutritional Benefits

Blackberries are nutritional powerhouses packed with vitamins, minerals and antioxidants. A 100g serving contains more vitamin C than oranges, plus significant amounts of vitamin K, manganese and fibre.

The deep purple colour comes from anthocyanins, powerful antioxidants that may help reduce inflammation and support heart health. Blackberries also contain ellagic acid, which research suggests may have anti-cancer properties.

Fresh blackberries provide natural energy from their fruit sugars whilst the high fibre content helps maintain steady blood sugar levels. They’re naturally low in calories but rich in nutrients, making them an excellent addition to a healthy diet.

Recipe Ideas and Uses

Fresh blackberries shine in both sweet and savoury applications. Eat them straight from the cane for the best flavour, or incorporate them into your cooking.

Classic blackberry and apple crumble makes excellent use of early autumn harvests. The tartness of cooking apples balances the sweetness of ripe blackberries perfectly. Add a handful of oats to the crumble topping for extra texture.

Blackberry jam captures the summer flavour for winter enjoyment. The high pectin content in blackberries means jam sets easily without artificial additives. Try adding a sprig of fresh thyme or lavender for a sophisticated twist.

For savoury dishes, blackberries pair beautifully with game, lamb, and strong cheeses. A simple blackberry sauce transforms roast duck or venison, whilst fresh berries add interest to autumn salads.

Freeze surplus berries on trays before transferring to bags. This prevents them sticking together and means you can use small amounts throughout winter. Frozen blackberries work perfectly in smoothies, baking, and cooked sauces.

Your Blackberry Journey Starts Here

Growing blackberries offers years of delicious harvests with relatively little effort. Start with one or two plants in a sunny, well-drained spot and provide simple support for the canes. Regular watering, annual feeding, and basic pruning will reward you with abundant crops.

Choose varieties that suit your space and preferences. If you’re new to growing blackberries, thornless varieties like ‘Loch Ness’ offer easier maintenance, whilst traditional thorny types like ‘Bedford Giant’ provide exceptional flavour.

Remember that patience pays off with blackberries. Your plants will establish in the first year and start producing meaningful crops in the second year. By the third year, you’ll enjoy the full potential of your blackberry patch.

Start planning your blackberry garden now. With proper preparation and the right varieties, you’ll be enjoying home-grown blackberries next September and for many years to come.

Further reading: Celebrate the Blackberry, When and How to Thin Your Fruit Trees, Grow Your Own: Best Fruits for Your Garden