How to Plant a Natural Dye Garden

Imagine creating vibrant, lasting colours for your fabrics using nothing more than the plants growing in your own back garden. From the fiery oranges of coreopsis to the deep indigos of woad, nature offers a rich palette waiting to be discovered. This ancient practice of using plants for dyeing is not only a sustainable way to colour textiles but also a deeply rewarding way to connect with the seasons and the history of craft.

A dyer’s garden is a space dedicated to cultivating plants specifically for their ability to produce natural dyes. It’s a living library of colour, where each root, leaf and flower holds the potential for transformation.

The Rich History of Dye Gardens

Long before the invention of synthetic dyes in the mid-19th century, humans relied entirely on the natural world for colour. For thousands of years, civilisations across the globe cultivated specific plants to dye their textiles, creating colours that signified everything from royalty and wealth to cultural identity. The knowledge of which plants yielded which hues was a closely guarded secret, passed down through generations of skilled artisans.

In medieval Europe, dyer’s gardens were essential to the textile trade. Woad (Isatis tinctoria) was cultivated extensively for its brilliant blue, while weld (Reseda luteola) provided a vivid yellow and madder (Rubia tinctorum) produced a range of reds. These three plants formed the cornerstone of the European dyer’s palette, capable of creating a full spectrum of colours when over-dyed. Monasteries often maintained their own extensive dye gardens, using the plants to colour vestments and create illuminated manuscripts.

The arrival of synthetic dyes in 1856, starting with William Henry Perkin’s discovery of mauveine, marked a dramatic shift. These new chemical dyes were cheaper, quicker to use, and offered a consistency that natural dyes could not always guarantee. As a result, the cultivation of dye plants dwindled, and much of the traditional knowledge was nearly lost. Today, however, there is a powerful resurgence of interest in natural dyeing, driven by a desire for sustainability, a connection to craft, and the uniquely beautiful, living colours that only plants can provide.

Essential Plants for a Dyer’s Garden

Creating a dyer’s garden is an exciting venture. Many traditional dye plants are well-suited to the British climate and others can be grown easily as annuals.

1. Madder

  • Botanical Name: Rubia tinctorum
  • Description: A sprawling perennial herb with small, star-shaped yellow flowers and whorls of lance-shaped leaves. It can grow quite unruly, so give it a dedicated space where it can spread.
  • History: Madder has been used for over 5,000 years to produce a range of red dyes. It was famously used to dye the “red coats” of the British army and was a vital crop in Europe until the late 19th century.
  • Colour & Part Used: Madder produces a spectrum of reds, oranges, and pinks. The valuable dye comes from the roots, which must be harvested after at least three years of growth for the strongest colour.

2. Weld

  • Botanical Name: Reseda luteola
  • Description: An unassuming biennial plant that forms a rosette of leaves in its first year and sends up a tall, slender spike of greenish-yellow flowers in its second, reaching up to 1.5 metres.
  • History: Weld produces one of the most lightfast natural yellow dyes available. It was highly prized in ancient Rome and medieval Europe and was used to create the beautiful yellows and greens (when over-dyed with woad) seen in historical tapestries.
  • Colour & Part Used: Weld gives a brilliant, clear lemon yellow. The dye is extracted from the entire plant—leaves, stems and flowers—harvested just as it begins to flower.

3. Woad

  • Botanical Name: Isatis tinctoria
  • Description: A biennial from the brassica family. It forms a rosette of long, blue-green leaves in its first year, followed by a tall stalk with clusters of small, bright yellow flowers in the second.
  • History: Woad is Europe’s native source of indigo dye and has a history stretching back to the Iron Age. Ancient Britons, including the Picts, were said to have painted their bodies with woad for battle. It was a cornerstone of the European textile industry until the 17th century.
  • Colour & Part Used: Woad produces a beautiful and classic indigo blue. The pigment is extracted from the leaves harvested in the first year, through a complex fermentation process.

4. Japanese Indigo

  • Botanical Name: Persicaria tinctoria
  • Description: A fast-growing annual that thrives in warm, sunny conditions. It has broad, pointed leaves and produces small, pinkish-white flowers in late summer. It is easier to grow and process for indigo than woad.
  • History: As its name suggests, this plant has been the primary source of indigo in Japan for centuries, used to dye fabrics for everything from samurai garments to peasant workwear.
  • Colour & Part Used: This plant yields a stunning indigo blue from its leaves. Multiple harvests can be taken throughout the summer before the plant flowers.

5. Coreopsis

  • Botanical Name: Coreopsis tinctoria
  • Description: Also known as Dyer’s Coreopsis or Plains Coreopsis, this is a cheerful and easy-to-grow annual. It produces masses of daisy-like flowers with yellow petals and deep red-brown centres.
  • History: Native to North America, Coreopsis was used by various indigenous peoples for dyeing. It is now a popular choice in modern dye gardens for its ease of cultivation and the brilliant colours it produces.
  • Colour & Part Used: The flower heads produce a range of rich colours from golden yellow and bright orange to deep russet and mahogany red.

6. Hollyhock

  • Botanical Name: Alcea rosea
  • Description: A classic cottage garden biennial or short-lived perennial, known for its tall, stately spikes of large, showy flowers in a wide array of colours.
  • History: While primarily grown as an ornamental, the darker varieties of hollyhock have long been used in folk dyeing traditions to create subtle shades.
  • Colour & Part Used: The deep red, purple, and near-black flowers can be used to create shades of mauve, lavender, and soft grey. The colours are beautiful but not always as lightfast as other dye plants.

7. Lady’s Bedstraw

  • Botanical Name: Galium verum
  • Description: A low-growing, sprawling perennial with fine, needle-like leaves and clouds of tiny, honey-scented yellow flowers in summer. It is a common wildflower in the UK.
  • History: A relative of madder, Lady’s Bedstraw was traditionally used to dye textiles red and to curdle milk for cheese-making. Its name comes from its use as a stuffing for mattresses, where its scent helped to repel fleas.
  • Colour & Part Used: Similar to madder, the roots of Lady’s Bedstraw produce a red dye, while the flowering tops can yield a soft yellow.

8. Dahlia

  • Botanical Name: Dahlia spp.
  • Description: A tuberous perennial beloved for its spectacular, varied flower forms and colours. They bloom from mid-summer until the first frosts, providing a late-season source of dye.
  • History: Originating in Mexico, dahlias were primarily grown for their beauty. However, dyers have discovered that their vibrant petals can also impart beautiful colours to fabric.
  • Colour & Part Used: The flower heads (specifically the petals) of yellow, orange, and red varieties can be used to produce shades of yellow and orange.

9. Onion

  • Botanical Name: Allium cepa
  • Description: The humble kitchen onion is a surprisingly potent dye source. It is a biennial plant grown as an annual for its edible bulb.
  • History: Using onion skins for dyeing is a practice rooted in frugality and tradition, found in cultures worldwide. It is one of the most accessible and reliable natural dyes.
  • Colour & Part Used: The papery outer skins of yellow onions produce a range of beautiful golden yellows and rusty oranges. The skins of red onions yield shades of khaki green, amber, and brown.

10. Marigold

  • Botanical Name: Tagetes spp.
  • Description: French and African marigolds are hardy annuals known for their pungent scent and vibrant yellow, orange, and red flowers. They are incredibly easy to grow from seed.
  • History: Marigolds have been used for dyeing for centuries, particularly in India, where they are used to create the brilliant yellows seen in celebratory textiles and are offered in religious ceremonies.
  • Colour & Part Used: The flower heads give a strong and reliable yellow to deep orange dye that is very lightfast, especially on wool.

How to Plant and Maintain Your Dye Garden

Creating your dyer’s garden follows the same principles as any other garden, with a few special considerations.

Planning Your Space

  • Sunlight: Most dye plants, including woad, weld, Japanese indigo and coreopsis, thrive in full sun (at least six hours of direct sunlight per day).
  • Soil: Good drainage is key. Most of these plants are not fussy, but they will not tolerate waterlogged soil. Amending heavy clay soil with compost or horticultural grit will improve its structure.
  • Space: Some plants, like madder, are perennials that will spread and need a permanent, dedicated bed. Annuals like Japanese indigo and coreopsis can be planted in beds or large containers.

Planting and Care

  • Sowing Seeds: Annuals like coreopsis, marigolds, and Japanese indigo are best sown indoors in early spring and planted out after the last frost. Biennials like woad and weld can be sown directly into the garden in late summer to establish before winter.
  • Watering: Water your plants regularly after planting until they are established. Once established, many dye plants are quite drought-tolerant, but they will produce more dye material with consistent watering during dry spells.
  • Feeding: Generally, dye plants do not require heavy feeding. Over-fertilising can lead to lush leaf growth at the expense of dye concentration. A light top-dressing of compost in the spring is usually sufficient.
  • Weeding: Keep your dye beds well-weeded, especially when the plants are young, to reduce competition for light, water, and nutrients.

Harvesting and Storing Your Dye Plants

The timing of your harvest is crucial for achieving the best colours.

  • Flowers (Coreopsis, Marigold, Dahlia): Harvest flower heads when they are fully open. They can be used fresh or dried for later use. To dry, spread them in a single layer on a screen or hang them in bunches in a dark, airy place. Store dried flowers in paper bags or airtight jars away from direct sunlight.
  • Leaves (Woad, Japanese Indigo): Harvest leaves for indigo before the plant starts to flower, as this is when the indican pigment is at its highest concentration. These leaves must be used fresh for the best results.
  • Whole Plants (Weld): Harvest weld just as the flowers begin to open. The entire plant can be hung upside down to dry for later use.
  • Roots (Madder): Madder roots should not be harvested until the plants are at least three years old. Dig them up in the autumn, wash them thoroughly, chop them into small pieces, and dry them completely before storing.

Using Your Plants to Dye Fabric

The final step is to transform your harvest into colour. While each plant has its specific requirements, the general process for most (excluding indigo) involves two key stages: mordanting and dyeing.

1. Mordanting Your Fabric

Mordanting is the process of pre-treating your fabric with a metallic salt, which acts as a binder between the dye and the fibre, ensuring a permanent, lightfast colour. Alum (potassium aluminium sulphate) is the most common and safest mordant.

  • Choose Your Fibres: Natural fibres like wool, silk, cotton and linen work best. Wool and silk (protein fibres) take up dye more readily than cotton and linen (cellulose fibres).
  • Process: Weigh your dry fabric. Use about 15% alum to the weight of your fabric. Dissolve the alum in hot water, then add it to a large pot of water. Add your pre-wetted fabric, heat gently for an hour, and then allow it to cool in the pot. You can use the fabric immediately or dry it for later.

2. Creating the Dyebath

  • Extraction: Chop your plant material (flowers, leaves or roots) and place it in a large, non-reactive pot (stainless steel or enamel). Cover with water and heat gently for about an hour to extract the colour. Avoid boiling, as it can dull the colours.
  • Straining: Strain the liquid through a fine-mesh sieve or cloth to remove all the plant material, leaving you with a clear dyebath.
  • Dyeing: Add your pre-wetted, mordanted fabric to the dyebath. Heat gently for at least an hour, stirring occasionally to ensure even colour. For deeper shades, you can leave the fabric to cool in the dyebath overnight.
  • Rinsing and Drying: Once you are happy with the colour, remove the fabric, rinse it in clean water until the water runs clear and hang it to dry away from direct sunlight.

A Garden of Colourful Possibilities

Planting a dye garden is an act of creation from soil to fabric. It connects you to a rich history of artistry and offers a sustainable alternative to the world of synthetic colour. The journey of watching seeds sprout, flowers bloom, and colours emerge in the dyepot is profoundly satisfying. Start small with a few pots of marigolds or a patch of coreopsis, and you will soon discover the joy of painting your world with the colours of your own garden.

Further Reading: How to Plant, Plan and Create a Witches’ Garden, How to Plan and Create a Forager’s Garden, How to make Natural Dyes

Follow Us on Instagram for Garden Daily Inspiration 🌼

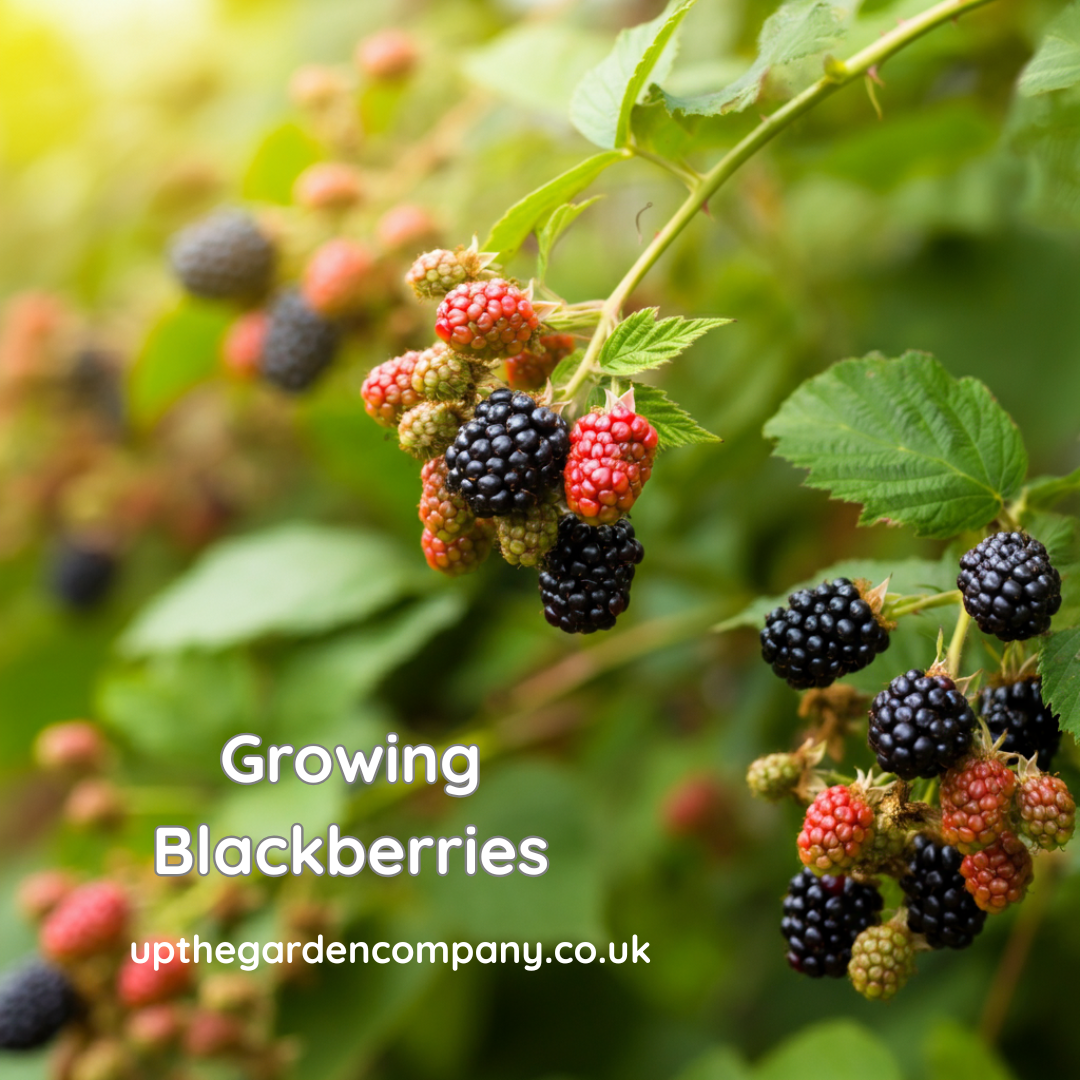
Growing Blackberries

September brings many garden treasures, but few are as rewarding as plump, juicy blackberries hanging heavy on the cane. These dark purple gems offer incredible flavour and impressive nutritional benefits, making them a must-have addition to any garden.

Fresh blackberries from your garden taste nothing like shop-bought varieties. They’re sweeter, more complex in flavour, and packed with nutrients that deteriorate quickly after picking. Plus, a single blackberry plant can produce fruit for 15-20 years, making it one of the best long-term investments you can make in your garden.

What Are Blackberries?

Blackberries belong to the Rubus genus, part of the rose family. These perennial plants produce long, arching canes that bear fruit in their second year before dying back. The plant then sends up new canes to replace them, creating a continuous cycle of growth and production.

Wild blackberries have been gathered for thousands of years across Europe, Asia and North America. Archaeological evidence shows people were eating blackberries as far back as 8,000 years ago. The Romans valued them highly, believing they could cure various ailments, whilst medieval monasteries cultivated them in their herb gardens.

Modern cultivated blackberries were developed in the 19th century, primarily in America. Plant breeders worked to create varieties with larger fruits, fewer thorns and better disease resistance than their wild cousins. Today’s garden blackberries offer all these improvements whilst maintaining the intense flavour that makes wild blackberries so special.

Growing Blackberries in Your Garden

Space Requirements

Blackberries need room to spread. Each plant requires approximately 1.5-2 metres of space along a fence or trellis system. The canes can reach 2-3 metres in height, so choose a spot where they won’t overshadow shorter plants.

A typical garden can accommodate 2-4 blackberry plants, which should provide plenty of fruit for a family. If space is limited, consider compact varieties that work well in large containers.

Best Growing Conditions

Blackberries thrive in full sun but tolerate partial shade. They prefer well-drained, slightly acidic soil with a pH between 5.5 and 6.5. Heavy clay or waterlogged soil can cause root problems, so improve drainage by adding compost or creating raised beds.

Choose a sheltered spot protected from strong winds. Blackberry canes are flexible but can snap in severe weather, especially when laden with fruit.

Planting and Care

Plant blackberries in late autumn or early spring when the soil isn’t frozen. Dig a hole twice the width of the root ball and the same depth. Add a generous amount of well-rotted compost to the planting area.

Space plants 1.5-2 metres apart and water thoroughly after planting. Apply a thick mulch around the base to retain moisture and suppress weeds.

Blackberries benefit from regular feeding. Apply a balanced fertiliser in early spring, followed by a potash-rich feed in summer to encourage fruit development. Keep the soil consistently moist but not waterlogged, especially during fruit formation.

Pruning Made Simple

Many gardeners worry about pruning blackberries, but it’s straightforward once you understand the basic principle. Blackberry canes are biennial – they grow in the first year, fruit in the second year, then die.

In late winter, cut all the old fruiting canes (those that bore fruit the previous summer) down to ground level. These will be darker and more woody than the new growth. Keep 4-6 of the strongest new canes and tie them to your support system.

During summer, pinch out the growing tips of new canes when they reach the top of your support. This encourages side shoots to develop, increasing your fruit yield.

Choosing the Right Varieties

Traditional Thorny Varieties

‘Bedford Giant’ produces large, sweet berries with excellent flavour. The canes are vigorous and thorny but very productive. This variety ripens in late August and early September.

‘Himalayan Giant’ offers massive berries and heavy crops. The thorny canes need strong support but reward you with exceptional harvests. Expect fruit from late August through September.

Thornless Varieties

‘Oregon Thornless’ produces medium-sized berries with good flavour and attractive cut-leaf foliage. The lack of thorns makes picking much easier, though yields may be slightly lower than thorny varieties.

‘Loch Ness’ combines thornless canes with excellent disease resistance. The berries are large, firm, and perfect for eating fresh or cooking. This variety crops heavily in late summer.

Compact Varieties

‘Baby Cakes’ grows just 1 metre tall, making it perfect for containers or small gardens. The dwarf canes produce full-sized berries with excellent flavour.

Each variety has its strengths. Thorny types typically offer better flavour and heavier crops, whilst thornless varieties make maintenance and harvesting much easier. Compact varieties suit small spaces but produce smaller overall yields.

Nutritional Benefits

Blackberries are nutritional powerhouses packed with vitamins, minerals and antioxidants. A 100g serving contains more vitamin C than oranges, plus significant amounts of vitamin K, manganese and fibre.

The deep purple colour comes from anthocyanins, powerful antioxidants that may help reduce inflammation and support heart health. Blackberries also contain ellagic acid, which research suggests may have anti-cancer properties.

Fresh blackberries provide natural energy from their fruit sugars whilst the high fibre content helps maintain steady blood sugar levels. They’re naturally low in calories but rich in nutrients, making them an excellent addition to a healthy diet.

Recipe Ideas and Uses

Fresh blackberries shine in both sweet and savoury applications. Eat them straight from the cane for the best flavour, or incorporate them into your cooking.

Classic blackberry and apple crumble makes excellent use of early autumn harvests. The tartness of cooking apples balances the sweetness of ripe blackberries perfectly. Add a handful of oats to the crumble topping for extra texture.

Blackberry jam captures the summer flavour for winter enjoyment. The high pectin content in blackberries means jam sets easily without artificial additives. Try adding a sprig of fresh thyme or lavender for a sophisticated twist.

For savoury dishes, blackberries pair beautifully with game, lamb, and strong cheeses. A simple blackberry sauce transforms roast duck or venison, whilst fresh berries add interest to autumn salads.

Freeze surplus berries on trays before transferring to bags. This prevents them sticking together and means you can use small amounts throughout winter. Frozen blackberries work perfectly in smoothies, baking, and cooked sauces.

Your Blackberry Journey Starts Here

Growing blackberries offers years of delicious harvests with relatively little effort. Start with one or two plants in a sunny, well-drained spot and provide simple support for the canes. Regular watering, annual feeding, and basic pruning will reward you with abundant crops.

Choose varieties that suit your space and preferences. If you’re new to growing blackberries, thornless varieties like ‘Loch Ness’ offer easier maintenance, whilst traditional thorny types like ‘Bedford Giant’ provide exceptional flavour.

Remember that patience pays off with blackberries. Your plants will establish in the first year and start producing meaningful crops in the second year. By the third year, you’ll enjoy the full potential of your blackberry patch.

Start planning your blackberry garden now. With proper preparation and the right varieties, you’ll be enjoying home-grown blackberries next September and for many years to come.

Further reading: Celebrate the Blackberry, When and How to Thin Your Fruit Trees, Grow Your Own: Best Fruits for Your Garden

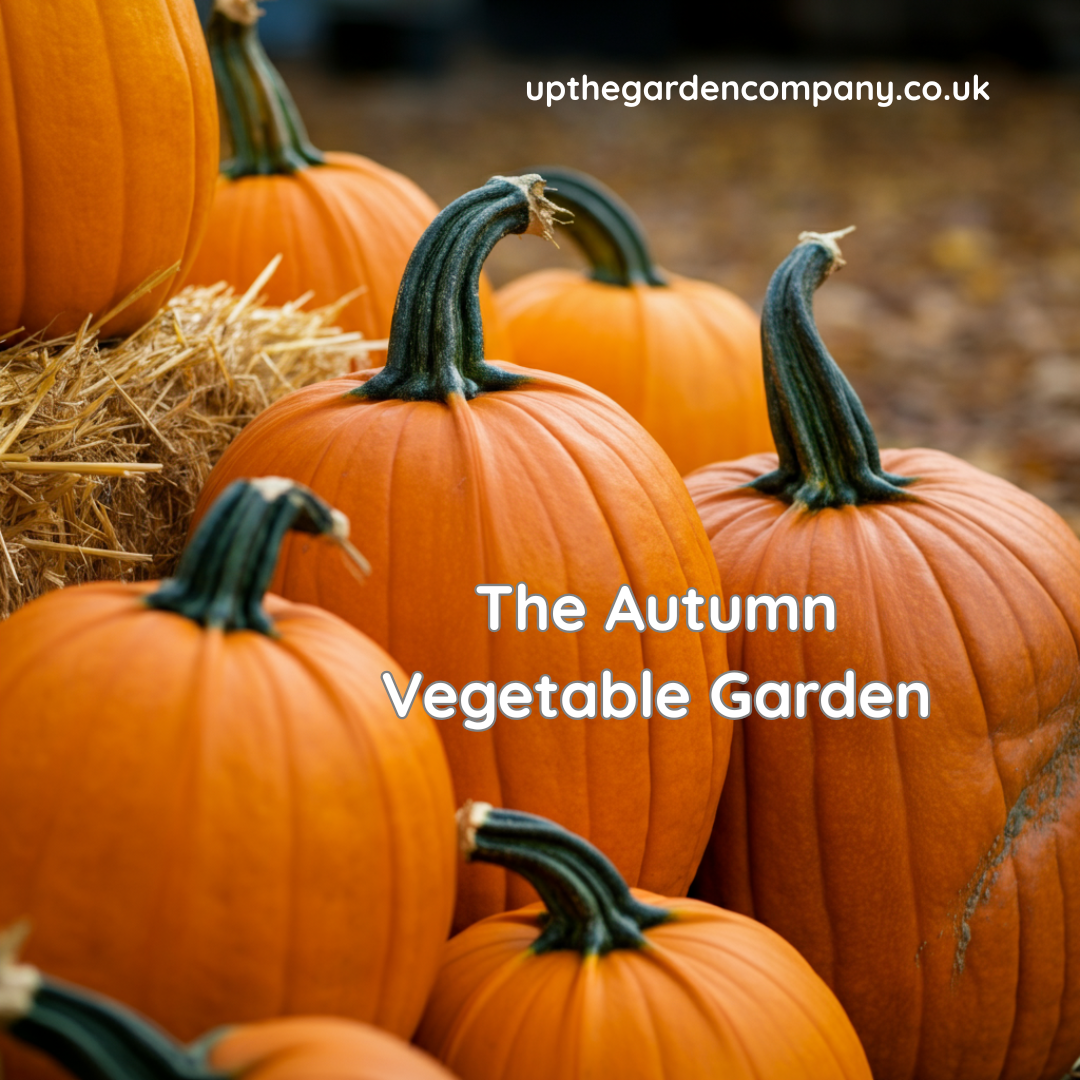
The Autumn Vegetable Garden

September arrives with cooler mornings and shorter days, signalling a shift in your vegetable garden’s rhythm. While many gardeners view autumn as the end of the growing season, experienced growers know this period offers unique opportunities for both harvest and preparation. The autumn months bring their own rewards and requirements, from gathering the fruits of your summer labour to setting the stage for next year’s success.

Understanding what happens in your vegetable garden during September and October helps you make the most of these transitional months. Your plants respond to changing daylight hours and temperatures in predictable ways, and knowing these patterns allows you to time your activities perfectly. Some crops reach their peak flavour after the first light frosts, while others need protection to extend their productive period.

The autumn garden requires a different approach than the busy planting season of spring. Your focus shifts from rapid growth to preservation, from sowing tender seedlings to protecting established plants. This seasonal transition also presents the perfect opportunity to prepare your soil and plan for the year ahead, ensuring your garden remains productive and healthy.

What’s Happening in Your Autumn Garden

Your vegetable garden undergoes significant changes during the autumn months. Daylight hours decrease steadily and this reduction in light triggers many plants to shift their energy from growth to seed production or storage. Root vegetables like carrots, parsnips, and beetroot concentrate their sugars, developing the sweet flavours that make them autumn favourites.

Soil temperature begins to drop, though it changes more slowly than air temperature. This means your soil remains warm enough to support growth well into October, particularly for cold-hardy crops. The combination of warm soil and cool air creates ideal conditions for many vegetables, reducing stress and improving flavour development.

Pest pressure often decreases during autumn, as many insects begin their winter preparations. However, some pests become more active as they seek shelter and final feeding opportunities. Slugs and snails can be particularly troublesome during mild, wet autumn weather, making vigilance important for protecting your remaining crops.

Beneficial insects also change their behaviour during autumn. Bees continue foraging on late-flowering crops like runner beans and courgettes, while predatory insects help control remaining pest populations. Supporting these beneficial creatures through autumn helps maintain your garden’s natural balance.

Autumn Harvesting: Making the Most of Your Crops

Root Vegetables and Storage Crops

October marks prime harvest time for many root vegetables. Carrots, parsnips and beetroot can remain in the ground until needed, as soil provides excellent natural storage. However, lifting and storing these crops indoors protects them from severe weather and makes access easier during winter months.

Potatoes require harvesting before the first hard frost damages the tubers. Choose a dry day for lifting potatoes, allowing them to surface-dry for a few hours before storing. Brush off excess soil but avoid washing, as this can lead to rot during storage.

Onions and garlic benefit from proper curing before storage. Lift bulbs when the foliage has died back naturally, then spread them in a warm, airy location for several weeks. Well-cured bulbs store for months in cool, dry conditions.

Brassicas and Winter Vegetables

Brussels sprouts improve dramatically after exposure to frost, developing their characteristic sweet flavour. Begin harvesting from the bottom of the stem upwards, taking firm, tight sprouts while leaving smaller ones to develop further.

Cabbages can withstand considerable cold but should be harvested before severe frosts split the heads. Red cabbages generally store better than green varieties and can often remain in the garden longer.

Leeks tolerate frost exceptionally well and can be harvested throughout autumn and winter. Earth up around the stems regularly to maintain the white portion that gives leeks their mild flavour.

Late Summer Crops

Courgettes and marrows continue producing until the first frost. Regular harvesting encourages continued production, while allowing some fruits to mature into marrows provides variety for winter storage.

Sweetcorn reaches maturity when the silks turn brown and the kernels produce a milky juice when pressed. Harvest in the morning when sugar content is highest, and use immediately for the best flavour.

Runner beans and French beans produce their final flush during early autumn. Pick young, tender pods regularly, and consider saving seeds from the best plants for next year’s crop.

Strategic Autumn Sowing

Quick-Growing Salads and Greens

September offers excellent opportunities for sowing quick-growing crops that will provide fresh harvests through winter. Winter lettuces, particularly hardy varieties like ‘Winter Density’ and ‘Arctic King’, can be sown now for winter harvests under protection.

Rocket and mustard greens germinate quickly in the residual soil warmth and tolerate cold weather well. These peppery leaves add interest to winter salads and can be harvested repeatedly as cut-and-come-again crops.

Corn salad (lamb’s lettuce) thrives in autumn conditions and provides tender leaves throughout winter. This hardy green requires no protection in most areas and self-seeds readily for future crops.

Winter Radishes and Asian Greens

Daikon radishes and other winter varieties can be sown through September for autumn and winter harvests. These large radishes store well in the ground and provide valuable fresh vegetables when other crops are scarce.

Pak choi, mizuna, and other Asian greens germinate readily in autumn’s moderate temperatures. These fast-growing vegetables tolerate light frosts and provide nutritious harvests within weeks of sowing.

Green Manures and Soil Improvement

Empty beds benefit from green manure crops that protect and improve the soil over winter. Crimson clover, winter rye, and field beans can be sown through September to prevent soil erosion and add organic matter when dug in during spring.

Broad beans sown in autumn provide an early crop next year while fixing nitrogen in the soil. Choose hardy varieties specifically bred for autumn sowing, and provide some protection during severe weather.

Essential Autumn Garden Tasks

Soil Care and Preparation

Autumn soil preparation sets the foundation for next year’s success. Add compost or well-rotted manure to beds that will remain empty over winter, allowing soil organisms to incorporate the organic matter slowly.

Dig heavy clay soils roughly during autumn, leaving large clods exposed to winter frosts. This freeze-thaw action breaks down clay particles naturally, improving soil structure without the risk of compaction that comes with working wet spring soil.

Test your soil pH during autumn when results accurately reflect the season’s growing conditions. Lime can be applied now if needed, giving it time to adjust soil pH before spring planting begins.

Plant Protection and Season Extension

Protect tender plants from early frosts using fleece, cloches or cold frames. These simple structures can extend the growing season by several weeks, providing fresh vegetables well into winter.

Earth up celery, leeks, and other crops that benefit from blanching. This process not only improves flavour but also provides some frost protection to sensitive plant parts.

Install protective barriers around brassicas to prevent pigeon damage. These birds become more troublesome during autumn as natural food sources become scarce.

Pest and Disease Management

Clear up fallen leaves and plant debris that can harbour pests and diseases over winter. Compost healthy material but dispose of diseased plants to prevent problems next year.

Check stored vegetables regularly, removing any showing signs of deterioration before they affect healthy produce. Good air circulation and consistent temperatures help maintain quality during storage.

Apply winter washes to fruit trees and inspect vegetable plants for overwintering pest eggs. Early intervention prevents problems from establishing during the growing season.

Tool Maintenance and Garden Organisation

Clean and oil garden tools before winter storage to prevent rust and ensure they remain sharp and functional. Well-maintained tools make garden work more efficient and enjoyable.

Drain and store irrigation equipment to prevent frost damage. Clean out water containers and check hoses for splits or blockages that need attention before next season.

Review the season’s successes and challenges while the experience remains fresh. Keep notes about varieties that performed well and problems that need addressing next year.

Planning for Winter and Beyond

Seed Saving and Selection

Autumn provides excellent opportunities for saving seeds from successful crops. Allow beans, peas and brassicas to fully mature before collecting seeds, then dry and store them properly for next year’s planting.

Research new varieties for next year’s garden while autumn catalogs arrive with fresh inspiration. Consider disease-resistant varieties and plants suited to your local climate conditions.

Order spring seeds early to ensure availability of popular varieties. Many suppliers offer early-bird discounts that make advance planning financially rewarding.

Structural Improvements

Plan and implement structural improvements during autumn when the pressure of daily maintenance decreases. Build new raised beds, install trellises or improve pathway access while weather remains workable.

Assess irrigation needs and plan improvements for next year’s system. Autumn installation allows testing and adjustments before the busy growing season begins.

Consider adding season extension structures like polytunnels or cold frames. These investments pay dividends by extending both ends of the growing season significantly.

Looking Forward: Setting Up for Success

Your autumn garden work creates the foundation for next year’s growing success. The vegetables you harvest now represent months of careful attention, while the preparations you make during these transitional months determine how smoothly next season begins.

Take time to celebrate your autumn harvests and the satisfaction that comes from growing your own food. Each perfectly ripe tomato, crisp apple or tender carrot represents a connection to the natural world that becomes increasingly precious in our modern lives.

The rhythm of the garden teaches patience and planning, showing how small actions taken at the right time yield significant rewards. Your autumn vegetable garden work continues this cycle, preparing for the dormant months ahead while setting the stage for spring’s renewed growth.

Keep detailed records of this year’s experiences, noting which varieties performed best and which techniques proved most effective. This information becomes invaluable when planning next year’s garden, helping you build on successes and avoid repeating mistakes.

Remember that gardening skills develop gradually through experience and observation. Each season teaches new lessons and provides opportunities to refine your techniques, making your garden more productive and rewarding year after year.

Further Reading: All About Marrows, Pumpkins – The King of the Autumn Harvest

When and How to Thin Your Fruit Trees

Fruit tree thinning is a time-honoured technique that gardeners have relied on to nurture healthier and more productive trees. At its core, it involves the careful removal of some of the young fruits from the branches. This might sound counterproductive, but the practice helps the tree focus its energy on developing the remaining fruits, resulting in larger and more flavourful produce. Think of it as a way of giving your fruit trees a bit of breathing room, allowing them to grow stronger and yield better harvests.

Introduction to Fruit Tree Thinning

Imagine your tree as an artist, sculpting fewer but more magnificent masterpieces rather than overloading itself with an abundance of small, less impressive works. By thinning your fruit trees, you’re guiding them to channel their resources more efficiently, which in turn promotes overall tree health. This method isn’t just about improving fruit size and taste; it’s also about fostering a more resilient tree, capable of withstanding the elements and supporting future growth.

Embarking on this journey might feel a bit daunting, especially if you’re new to gardening. However, with a little knowledge and practice, you’ll soon find it to be a rewarding endeavour. This community of gardeners, both seasoned and new, is here to support and inspire each other as we learn and grow together. Whether you’re tending to a small backyard orchard or just a couple of trees, the principles of fruit tree thinning remain the same. It’s a nurturing practice that not only benefits your garden but also enhances your connection to nature and the food you cultivate.

Methods for Thinning Fruit Trees

There are several approaches to thinning fruit trees, each suited to different types of trees and gardener preferences. The most straightforward method is manual thinning, which involves carefully removing excess fruits by hand. This hands-on technique allows for precise selection, ensuring that the fruits left on the tree have adequate space to grow and thrive. When using this method, it’s essential to handle the branches gently to avoid causing any damage.

For those with larger trees or those who prefer a bit of extra assistance, there are tools available to help with the thinning process. Long-handled pruners or pole pruners are particularly useful for reaching higher branches that might be out of arm’s reach. Thinning shears can also be employed to make clean cuts, minimising harm to the tree and ensuring a healthy regrowth.

Another method involves using a small, soft brush to sweep away excess fruits. This can be particularly effective for trees with smaller, more delicate fruits that might be easily damaged by hand-thinning. Whichever technique you choose, the key is to space the remaining fruits adequately, so each one has the opportunity to develop fully.

Regardless of the method, always aim to thin when the fruits are still small and before they have begun to draw too many resources from the tree. Pay attention to the tree’s natural growth patterns and be mindful of its overall health as you work. By adopting these methods, you can effectively thin your fruit trees, promoting better fruit quality and ensuring a healthier, more productive tree.

Advantages of Thinning Fruit Trees

Thinning fruit trees can greatly enhance the quality of your harvest. When fewer fruits are left on the branches, each one receives a greater share of the tree’s nutrients and energy, resulting in produce that is larger, juicier, and often more flavourful. This practice not only benefits the fruits but also supports the tree’s structural integrity. Overloaded branches are prone to breaking under the weight of too many fruits, which can cause lasting damage. By carefully removing excess fruits, you help to prevent such issues, ensuring that the tree remains strong and healthy.

Additionally, thinning plays a crucial role in disease prevention. Crowded fruits can create a breeding ground for pests and diseases, as air circulation is restricted and moisture levels can become too high. By spacing out the fruits, you improve air flow around the tree, making it less susceptible to these problems. This proactive approach reduces the need for chemical treatments, promoting a more organic and sustainable method of cultivation.

Thinning also encourages better sunlight penetration. When fruits are evenly spaced, sunlight can reach more parts of the tree, aiding in the development of fruits and the overall health of the tree. Enhanced light exposure not only helps the fruits to ripen more uniformly but also strengthens the tree’s branches and leaves.

Another advantage is that thinning can lead to more consistent yields. Trees that are not overburdened with too many fruits can produce a steady crop year after year, rather than experiencing cycles of heavy and light production. This balance allows you to enjoy a reliable supply of fruit, making your gardening efforts more predictable and rewarding.

Disadvantages and Considerations

While fruit tree thinning offers numerous advantages, there are a few potential drawbacks to keep in mind. One of the primary challenges is ensuring that you do not remove too many fruits, as this can stress the tree and potentially reduce its overall yield. Achieving the right balance is crucial; thinning too aggressively can deprive the tree of necessary energy and resources, impacting its ability to thrive.

Another consideration is the time and effort involved. Thinning can be a labour-intensive task, particularly for larger trees or orchards. It requires careful attention and a gentle touch to avoid damaging the branches and remaining fruits. For those new to gardening, the process might initially seem daunting and require a bit of practice to master.

The environmental impact of thinning is also worth considering. While it promotes healthier tree growth and better fruit quality, over-thinning can lead to unnecessary waste. To mitigate this, it’s important to plan how you will use the removed fruits, ensuring they are not simply discarded but repurposed in creative and sustainable ways.

Additionally, thinning may alter the availability of fruits for local wildlife. Birds, insects, and other animals often rely on these fruits for nourishment, so removing too many can impact the local ecosystem. It’s a good idea to observe and understand the wildlife interactions in your garden and strike a balance that supports both your harvest and the natural food chain.

Lastly, fruit tree thinning requires a certain level of knowledge and experience. Understanding the specific needs of different tree species and their growth patterns is essential for effective thinning. New gardeners may need to invest time in learning these details to avoid common pitfalls and ensure their efforts are beneficial.

Timing for Effective Thinning

Timing is crucial for successful fruit tree thinning. Late spring to early summer is generally the best period for this practice, as the fruit has set but remains small. This timing allows the tree to reallocate its energy to the remaining fruits, promoting better growth and development.

Observing your tree’s growth stages is essential. Different species and varieties may have unique timelines, so paying attention to their specific needs can make a significant difference. For instance, apple and pear trees benefit from thinning when the fruits are about the size of a marble, while stone fruits like peaches and plums should be thinned when they are slightly larger.

Weather conditions also play a role in the timing of thinning. Avoid performing this task during extremely hot or dry periods, as the tree might already be stressed. Similarly, after a heavy rainfall, the branches may be more delicate and prone to damage. Choose a mild, dry day to carry out thinning, ensuring that the tree is in optimal condition to recover and thrive.

Another factor to consider is the natural fruit drop, known as the “June drop,” which occurs in many fruit trees. During this period, trees naturally shed some of their immature fruits. It’s wise to wait until after this drop to begin thinning, as it gives you a clearer picture of how many fruits the tree can support.

By carefully timing your thinning efforts, you not only enhance the quality of your harvest but also support the overall health and resilience of your fruit trees.

Utilising Thinned Fruit

Thinned fruit can be a delightful addition to your culinary repertoire, offering both versatility and a burst of flavour. Consider making homemade jams or preserves, where even the smallest fruits can contribute to a rich, fruity spread. Smoothies are another excellent option; simply blend the fruits with yoghurt and honey for a refreshing treat.

For those who love baking, these little gems can be incorporated into pies or crumbles, adding a unique tartness that complements sweeter ingredients. Drying thinned fruits is also a fantastic way to create homemade snacks, perfect for adding to cereals or trail mix.

You can even get creative with savoury dishes. Try using thinned fruits in chutneys or sauces to pair with meats and cheeses, providing a delightful contrast of flavours. By finding these innovative uses for your thinned fruit, you’ll not only reduce waste but also discover new and enjoyable ways to savour the fruits of your labour.💚

Further Reading: RHS Fruit Thinning, Grow Your Own – The Best Garden Fruits, The Ultimate Guide to Storing your Fruit Harvest

Grow Your Own: Best Fruits for Your Garden

Introduction to Fruit Gardening

Fruit gardening is not only enjoyable but brings the added benefit of having fresh, home-grown produce. Regardless of the size of your garden, you can cultivate a variety of fruits that are both delicious and nutritious. Additionally, growing your own fruits means you can ensure they are free from harmful chemicals, making them a healthier choice for you and your family. With a bit of planning and care, your garden can become a vibrant source of fresh fruits throughout the growing season.

Strawberries: Sweet and Juicy Delights

Strawberries are a must-have in any garden, celebrated for their incredibly sweet and juicy taste that children and adults alike adore. These bright red berries are not only a treat for the taste buds but also a powerhouse of nutrition. Rich in vitamin C, antioxidants and dietary fibre, strawberries can boost your immune system and improve digestion.

When it comes to growing strawberries, they do have specific needs. They thrive best in well-drained soil and a sunny location. Adequate sunlight ensures the berries develop their characteristic sweetness. Keep the soil consistently moist but avoid waterlogging, which can lead to root rot.

Strawberry plants are prone to pests, so you’ll need to keep an eye out for unwanted visitors. Use netting to protect the fruits from birds and consider organic pest control methods to keep insects at bay. Straw is often used as a mulch to keep the berries clean and deter weeds.

Plant strawberries in rows or in containers, making sure to space them adequately to allow good air circulation, which helps prevent mould. Regularly remove runners (the long stems that grow out from the main plant) to concentrate the plant’s energy on producing fruit.

By giving strawberries the care and attention they need, you’ll be rewarded with a plentiful supply of delicious, home-grown fruit.

Rhubarb: A Unique Addition

Rhubarb brings a distinctive, tangy flavour to both sweet and savoury dishes. Its vibrant red stalks are not only eye-catching but also packed with nutrients like vitamins K and C, calcium and potassium. Plant rhubarb in a sunny spot with plenty of space for its large leaves to spread out. This perennial plant requires well-drained soil and benefits from regular watering, especially during dry spells. Be sure to avoid waterlogging, as this can cause the roots to rot.

Rhubarb can take a couple of years to establish itself before you start harvesting. When it’s ready, pull the stalks gently from the base rather than cutting them. Remember, only the stalks are edible; the leaves are toxic and should be discarded.

Winter protection is crucial for rhubarb. Apply a thick layer of mulch or compost around the base of the plant to insulate it against frost. This will help ensure a robust plant that produces well year after year. Prune any flowering stalks that appear, as allowing the plant to flower can reduce the vigour of the stalks. With the right care, rhubarb can be a standout feature in your garden, providing you with delicious stalks for crumbles, jams and more.

Berry Bounty: Gooseberries, Raspberries and Blackberries

Gooseberries, raspberries and blackberries each bring their own delightful flavours and are fantastic additions to your garden. Gooseberries are known for their slightly tart taste, making them perfect for pies and preserves. Raspberries offer a sweet yet tangy flavour that is simply irresistible fresh or in desserts. Blackberries, with their deep, rich taste, are ideal for jams and smoothies.

These berries are nutritional powerhouses, packed with vitamins, minerals and antioxidants. They support heart health, boost the immune system and help reduce inflammation.

When growing these berries, space is important as they need room to spread. Trellises or supports are useful for raspberries and blackberries, helping to keep the plants upright and making harvesting easier. Regular pruning is essential to remove old canes and encourage new growth, which leads to higher yields.

Ensure the soil is well-drained and rich in organic matter. Water consistently, especially during dry periods, but avoid overwatering as this can lead to root issues. Mulching around the base of the plants helps retain moisture and suppress weeds.

Keep an eye out for pests and diseases, and use organic methods for control whenever possible. With a little effort, you’ll be rewarded with a bountiful supply of delicious berries.

Currants: Red, Black and White

Currants, available in red, black, and white varieties, are a delightful addition to any garden. Each type offers a unique taste experience: red currants are tart and tangy, black currants have a robust, sweet flavour and white currants are milder and slightly sweet. These small berries are nutritional powerhouses, brimming with vitamin C and iron, making them a healthy choice for your garden.

When planting currants, choose a cool, well-drained soil and ensure they get some shade during the hottest part of the day. Mulching around the plants helps retain moisture and suppress weeds, contributing to healthier growth. Regular pruning is vital, particularly in late winter or early spring, to remove old wood and encourage new shoots. This practice not only boosts yield but also improves air circulation, reducing the risk of disease.

Currants are relatively low-maintenance but do keep an eye out for pests and diseases. Using organic pest control methods can help keep your plants healthy without resorting to harmful chemicals. With proper care, your currant bushes will reward you with a generous harvest of delicious and nutritious berries, perfect for jams, jellies and fresh eating.

Classic Choices: Apples and Pears

Apples and pears are timeless favourites in any garden, known for their versatility and rich flavours. Whether you prefer the crisp bite of an apple or the juicy sweetness of a pear, these fruits cater to a range of tastes and culinary uses. Apples come in numerous varieties, from the tartness of Granny Smiths to the sweetness of Gala. Pears also offer diversity, with varieties like the buttery Conference or the aromatic Comice.

When growing apples and pears, it’s important to provide ample space for each tree to ensure good airflow and reduce the risk of disease. Both types of trees thrive in well-drained soil and benefit from full sun exposure. Regular pruning is essential, particularly in late winter, to remove dead or overcrowded branches and to encourage healthy growth.

Pollination is another key factor for a good harvest. Planting multiple varieties can improve cross-pollination, leading to a more bountiful yield. Watering should be consistent, especially during dry periods, but be careful not to overwater, as this can lead to root issues. Mulching around the base helps retain moisture and suppress weeds.

With proper care and attention, your apple and pear trees will reward you with delicious fruit that can be enjoyed fresh, baked, or preserved.

General Tips for a Fruitful Garden

Planning is key to a successful fruit garden. Assess your space and sunlight availability before deciding which fruits to plant. Group plants with similar water and light needs together to make care more manageable. Regularly water your plants, but ensure the soil has good drainage to prevent root rot. Fertilise your garden with organic matter to boost soil fertility and support healthy growth. Keep an eye on pests and diseases, using organic control methods whenever possible to maintain a healthy environment. Proper spacing between plants promotes good air circulation, reducing the risk of fungal issues. Mulching helps retain moisture and keeps weeds at bay, so consider applying a layer around your plants. Regular pruning is also essential to encourage new growth and improve fruit yield. By following these tips, your garden will flourish with a variety of delicious fruits.

Conclusion: Reaping the Rewards

Embarking on the journey of growing your own fruit garden offers countless rewards. Beyond the obvious benefit of having fresh, nutritious produce at your fingertips, fruit gardening allows you to connect with nature and learn new skills. Each step, from planting to harvesting, brings its own satisfaction, making the entire process incredibly fulfilling.

The variety of fruits you can cultivate ensures there’s always something exciting to look forward to. Whether you’re picking sweet strawberries, tart gooseberries or crisp apples, the pleasure of tasting home-grown fruit is unmatched. Plus, you have the assurance that your produce is free from harmful chemicals, offering a healthier option for you and your family.

Another advantage is the opportunity to share your bounty. There’s a special joy in gifting a jar of homemade raspberry jam or a freshly baked rhubarb crumble to friends and neighbours. It not only fosters community spirit but also allows others to experience the fruits of your labour.

Of course, fruit gardening does require time and effort, but the rewards far outweigh the challenges. With patience, care and a bit of planning, your garden will flourish, providing a steady supply of delicious fruits season after season. So, why not give it a go? The journey is as rewarding as the destination, and the fruits of your labour will be a testament to your dedication.

Further Reading: How to Grow Goji Berries, How to Grow Strawberries: A Guide to Sweet Success, How to Grow Grapes in the UK, A Guide to Growing Figs in the UK, A Guide to Growing Rhubarb, A Guide to Storing Your Fruit Harvest, A Guide to Raspberry Canes: From Planting to Pruning, Grow Your Savings The Smart Way Leverage Your Garden to Combat Rising Food Prices, The Joy of a Freshly Picked Home-Grown Tomato, The Importance of Growing Your Own Food

How to Grow Radishes

Radishes are one of the easiest and most rewarding vegetables to grow, making them perfect for children, families and beginner gardeners alike. Whether you’re a home cook looking to add fresh crunch to your meals or simply want to try your hand at gardening, radishes are a fantastic place to start.

This guide will provide everything you need to know—from when and how to plant radishes to caring for them and harvesting your crop. Let’s dig in and get growing!

How to Grow Radishes
Image of radishes with leaves - freshly harvested.

What Are Radishes and Why Should You Grow Them?

Radishes are root vegetables known for their crisp texture and peppery flavour. Typically small and round with red skin and white flesh, they can also come in a variety of shapes and colours, including pink, white, purple and even black!

Nutritional Benefits

Radishes are packed with nutrients, making them a healthy and colourful addition to your meals. They are rich in vitamin C, which supports a healthy immune system, and contain antioxidants that help fight inflammation. They’re also low in calories and high in fibre, aiding digestion.

Uses for Radishes

Radishes aren’t just for salads! Slice them thinly for a crunchy sandwich topping, pickle them for a tangy snack or roast them for a mellow, earthy treat. You can even eat the green tops; sautéed radish leaves make a delicious addition to soups or pasta dishes.

Now that you know the benefits of radishes, let’s talk about how to grow them in your own garden.

When and Where to Sow Radishes

Radishes are fast-growing, which makes them perfect for those who love quick results. Here’s what you need to know about timing and location when sowing radishes in the UK.

  • Best Time to Sow: You can start sowing radish seeds in March when the soil begins to warm up. The growing season lasts until August, so you can enjoy a steady supply by sowing seeds every two weeks for continuous harvests.
  • Ideal Conditions: Radishes thrive in well-drained soil with plenty of sunlight, though they can tolerate light shade, especially in hotter months to prevent bolting (premature flowering).
  • Speed of Growth: Radishes are ready to harvest in as little as three to four weeks, making them perfect for beginner gardeners eager to see results quickly.

How to Prepare the Vegetable Bed

Before planting your radishes, you’ll need to prepare the space to ensure they grow strong and healthy roots.

  1. Clear the Space: Remove any weeds, rocks or debris from the area where you’ll be planting.
  2. Loosen the Soil: Use a hand fork or rake to loosen the soil to a depth of about 15cm (6 inches). Radishes prefer light, crumbly soil that allows their roots to grow easily.
  3. Add Compost: Mix in a layer of compost to enrich the soil with nutrients and improve its texture. Avoid adding too much fertiliser, as it can encourage leaves at the expense of the root.

How to Sow Radish Seeds

Planting radish seeds is straightforward, but taking a little care during this step can make all the difference in the quality of your harvest.

  1. Mark Rows: Using a stick or the edge of a hoe, make shallow furrows around 1cm deep and space them about 15cm apart.
  2. Plant the Seeds: Sprinkle the seeds thinly along the furrow, aiming to leave around 2-3cm between seeds. This prevents overcrowding, which can lead to misshapen radishes.
  3. Cover and Water: Gently cover the seeds with soil and lightly pat it down. Water the area thoroughly, but avoid over-saturating. Keep the soil consistently moist, especially in dry weather.

Caring for Your Radish Plants

Radishes are generally low-maintenance, but they still need a little attention to thrive.

  • Thin the Seedlings: Once the plants are a few centimetres tall, thin them out to leave around 5cm of space between each plant. This ensures each radish has enough room to grow into a full, healthy root.
  • Keep the Soil Moist: Water regularly to keep the soil consistently moist. Dry soil can make radishes tough and woody. However, be careful not to overwater, as waterlogged soil can cause root rot.
  • Weed Regularly: Weeds compete for nutrients and sunlight, so remove them promptly to give your radishes the best chance to grow.

Tips for a Successful Harvest

Harvesting your radishes at the right time ensures they’re tender and crunchy rather than tough and woody.

  • Check the Size: Most radishes are ready to harvest when their tops are about the size of a marble, or maybe a small golf ball. Check the seed packet for specific guidance.
  • Harvest Promptly: Don’t leave your radishes in the ground for too long, as they can become pithy and lose their flavour.
  • Store Carefully: Keep freshly harvested radishes in the fridge, where they’ll stay crisp for up to a week. Wash off any dirt, and if you’re not using the tops, remove them before storing.

Bonus Advice for Growing Radishes

  1. Companion Planting: Radishes grow well alongside carrots, lettuce and beans. Their quick growth can also help mark slow-germinating rows of crops, making them an excellent companion plant.
  2. Try Different Varieties: Experiment with different types of radishes to discover new flavours and colours. Long white daikon radishes and black Spanish radishes are just a couple of unique options.
  3. Start Indoors: If it’s still too cold to plant outdoors, try sowing radishes in small pots indoors to get a head start on your growing season.

Grow Your First Radish Crop Today

Radishes are a beginner-friendly crop that brings quick rewards, making them ideal for families, children and anyone new to gardening. With their vibrant colours and versatile uses, they’re bound to brighten both your plate and your garden.

It’s time to grab a packet of radish seeds, roll up your sleeves, and get planting! Whether you’re teaching little ones about gardening or simply looking to explore growing your own food, radishes are the perfect vegetable to start with. Happy growing!

Further Reading: The Benefits of Growing your own Vegetables

Try our Grow Your Own Kits at Sow It Grow It and Feast!

How to Grow Broad Beans in the Spring

Spring is a magical time for gardeners, and there’s nothing quite like the satisfaction of growing your own vegetables. One of the easiest and most rewarding crops to cultivate during this season is broad beans. Whether you’re a seasoned grower or just starting your gardening adventure, this guide will take you step-by-step through everything you need to know about planting, caring for, and harvesting broad beans this spring.

What Are Broad Beans?

Broad beans, also known as fava beans, are a staple in vegetable gardens and kitchens. These hardy legumes are loved for their nutty flavour, versatility in cooking, and their ability to enrich the soil they grow in. Broad beans typically grow on compact plants with sturdy stems, adorned with vibrant green pods filled with plump seeds. They’re not only delicious but also a joy to grow, making them a perfect option for those eager to “grow their own.”

What is Their Nutritional Content?

Broad beans aren’t just a delight for your garden, but they’re also packed full of nutrition. They are an excellent source of plant-based protein, fibre and essential vitamins such as folate and vitamin B6. They’re also rich in minerals like iron, potassium and magnesium, supporting overall health. Including home-grown broad beans in your diet adds a wholesome, nutrient-packed element to your meals.

Can You Sow Broad Beans in the Spring?

Yes, absolutely! Spring is a wonderful time to sow broad beans. While many gardeners sow their seeds in autumn, spring sowing has its perks. The warmer soil temperatures in spring encourage faster germination, meaning your plants will establish themselves in no time. If you missed the autumn sowing window, don’t worry; you can still enjoy a plentiful harvest by planting as soon as the risk of frost has passed (typically March to May, depending on your location).

Why Do Some People Sow Broad Beans in Autumn?

You might be wondering why some gardeners choose to sow broad beans in the autumn instead of spring. Autumn sowing allows the plants to establish deep roots before entering winter dormancy. This can result in an earlier harvest the following year, sometimes as much as a month ahead of spring-sown crops. However, autumn-sown plants are more exposed to the elements, requiring good winter protection to survive cold snaps. It’s a choice that depends on your gardening goals and climate.

How to Sow Broad Beans in Spring

Step 1: Prepare for Sowing

Start by selecting a hardy, reliable variety such as ‘Aquadulce Claudia’ or ‘Green Windsor.’ If sowing in early spring, try to use larger seeds, as these tend to perform better.

Plant the seeds directly into the ground or begin indoors in small pots. Broad beans like well-drained, fertile soil, so consider enriching your soil with compost or well-rotted manure. Aim to sow seeds around 5cm deep and roughly 20cm apart. If planting in rows, leave 60cm between rows to allow space for growth.

Step 2: Transplanting to the Vegetable Patch

If you started sowing your seeds indoors, seedlings will typically be ready to move outdoors after 3–4 weeks, once they have formed a few sturdy leaves. Choose a sunny, sheltered spot for the best results. Broad beans thrive in soil that has good drainage and is slightly alkaline, so a bit of lime can help if your soil is acidic.

Step 3: Companion Planting

To make the most of your garden space, pair broad beans with companion plants like spinach, marigolds, or lettuce. These plants grow well close together without competing for nutrients, and marigolds, in particular, repel pests like aphids. This combination creates a harmonious mini-ecosystem that benefits all your plants.

How to Care for Broad Beans

General Care

Broad beans are relatively low-maintenance but love a little attention. Keep the soil consistently moist, especially during dry spells, and mulch your plants to retain moisture. Regular weeding is crucial to prevent competition for nutrients.

Protecting Against Pests

Sadly, pests like blackfly and slugs can damage your bean plants. To deter blackfly, pinch out the growing tips of the plants once they’re about 15cm tall. Slugs, on the other hand, can be kept at bay with organic slug pellets or by sprinkling crushed egg shells around the base of your plants.

Supporting Your Plants

Broad beans can grow tall and heavy, so support them with stakes or string to prevent them from toppling over. Insert stakes at both ends of the row and tie string across them to form a boundary for the stems to lean against. This simple step ensures your plants stay strong and upright.

When Will They Be Ready for Harvest?

Broad beans are typically ready to harvest 12–16 weeks after sowing, depending on weather conditions and variety. You’ll know they’re ready when the pods are green and plump but still soft. Start picking the lower pods first and work your way up. Harvesting regularly encourages more pods to grow, so keep an eye out for new growth.

How to Store Broad Beans

To enjoy your beans for as long as possible, you can store them in a few different ways:

  • Fresh: Broad beans will keep in the fridge for 5–7 days. Store them in a breathable bag to maintain freshness.
  • Freezing: If you’re growing a bumper crop, blanch the beans for 2–3 minutes in boiling water, then plunge them into an ice bath before freezing. This method preserves their colour, flavour, and nutrients.
  • Drying: Want long-term storage? Allow the beans to dry completely on the plant, then shell and store them in airtight containers.

Your Spring Broad Bean Adventure Awaits!

Growing your own broad beans in the spring is a rewarding and accessible gardening project that brings joy to both your garden and your dinner table. From sowing seeds and nurturing plants to savouring the final harvest, every step is an opportunity to connect with nature and enjoy the fruits of your labour.

Now that you’re equipped with the knowledge to grow broad beans like a pro, it’s time to get started! Grab some seeds, prep your soil, and watch your garden come to life.

Happy gardening!

Further Reading: The Incredible Benefits of Growing Your Own Food, No-Dig Gardening, The Principles of Organic Gardening

For Daily Inspiration Follow Us on Instagram, Pinterest and Twitter

Edible Flowers: A Feast for the Eyes and the Palate

Edible flowers are transforming the way we think about food, bridging the gap between beauty and flavour. For foodies, home gardeners and those who love natural, healthy ingredients, edible flowers offer a new, colourful way to elevate dishes, drinks and even desserts. These blooms are far more than just decorative – many of them pack surprising health benefits, unique flavours and bring joy to every bite.

Ornate Framed Picture of Edible Flowers.

What Flowers Are Edible?

When it comes to edible flowers, the variety is astounding. From well-known culinary staples like courgette flowers to elegant lavender, the possibilities are endless. But it’s essential to know which flowers are safe to consume, how to prepare them and what each bloom brings to your plate. Here’s a list of some of the most popular and versatile edible flowers to inspire your culinary adventures.

1. Nasturtiums

Bright, peppery and vibrant, nasturtiums add a splash of colour to salads.

  • Edible Parts: Flowers and leaves.
  • Benefits: Rich in vitamin C and antioxidants, nasturtiums have immune-boosting properties.
  • Preparation: Use raw in salads or as a garnish for soups and savoury dishes.
  • Recipe Idea: Nasturtium Pesto – Blend flowers and leaves into pesto for a peppery twist on the classic.

2. Saffron (Crocus)

Saffron, made from the stigma of the crocus flower, is the world’s most precious spice. Saffron crocus, known scientifically as Crocus sativus, offers the delicate threads of saffron we all know and love—but did you know it takes around 150 flowers to produce just one gram? 🌸✨ These beauties bloom in autumn and are surprisingly easy to grow.

But here’s a gentle reminder—Crocus sativus isn’t to be confused with the autumn crocus (Colchicum autumnale), a different plant that’s toxic. Always double-check names before planting!

  • Edible Parts: Stigma (threads).
  • Benefits: Contains antioxidants and is thought to lift mood and support heart health.
  • Preparation: Safely use the dried threads by steeping in warm water or milk before adding to recipes.
  • Recipe Idea: Saffron Risotto – Infuse saffron in broth for a rich golden hue and luxurious flavour.

3. Sunflowers

Beyond their seeds, sunflower petals are edible and offer a mild nutty flavour.

  • Edible Parts: Petals and buds (unopened).
  • Benefits: High in vitamins like E and a great source of antioxidants.
  • Preparation: Steam the buds like artichokes, or sprinkle petals over salads.
  • Recipe Idea: Sunflower Bud Caprese – Use steamed sunflower buds in place of mozzarella for a unique twist.

4. Lavender

Lavender’s distinctive aroma makes it a standout in desserts and drinks.

  • Edible Parts: Flowers.
  • Benefits: Known for its calming effects and stress relief properties.
  • Preparation: Use sparingly to avoid an overpowering flavour; great dried or fresh in recipes.
  • Recipe Idea: Lavender Lemonade – Infuse lavender flowers into a simple syrup for a fragrant summer drink.

5. Violets

These charming blooms bring a sweet, floral note to your creations.

  • Edible Parts: Flowers.
  • Benefits: High in vitamins C and A, violets can help support immunity.
  • Preparation: Use fresh on cakes or crystallise them with sugar for decoration.
  • Recipe Idea: Violet-Infused Honey – Steep violets in honey to drizzle over yoghurt or toast.

6. Hibiscus

Vivid red hibiscus flowers are tart and tangy, perfect for beverages and desserts.

  • Edible Parts: Petals.
  • Benefits: Rich in antioxidants and known for lowering blood pressure.
  • Preparation: Brew dried flowers into tea or use fresh petals in salads.
  • Recipe Idea: Hibiscus Iced Tea – Brew petals with mint and lime for a refreshing cooler.

7. Courgette Flowers

Stubby and bright, courgette flowers are a culinary favourite.

  • Edible Parts: Flowers.
  • Benefits: Low in calories, high in nutritional value, and a great source of fibre.
  • Preparation: Stuff and fry for best results.
  • Recipe Idea: Ricotta-Stuffed Courgette Flowers – Fill with ricotta, batter and lightly fry.

8. Lilac

Lilacs offer a delicate, slightly bitter floral note to food and drinks.

  • Edible Parts: Flowers.
  • Benefits: High in antioxidants and a subtle aroma that promotes relaxation.
  • Preparation: Add to salads, sprinkle on desserts, or infuse into syrups.
  • Recipe Idea: Lilac Sugar Cookies – Infuse sugar with lilac blossoms for floral sweetness.

9. Dandelions

Often overlooked as a weed, dandelions are packed with nutrients and flavour.

  • Edible Parts: Flowers, leaves, and roots.
  • Benefits: Known to support digestion and liver health.
  • Preparation: Use fresh flowers in salads, or fry for a crispy snack.
  • Recipe Idea: Dandelion Fritters – Dip flowers in batter and fry for a tasty treat.

10. Elderflowers

Famous for its use in cordials and syrups, elderflower delivers subtle, sweet floral notes.

  • Edible Parts: Flowers.
  • Benefits: Contains antioxidants and immune-boosting properties.
  • Preparation: Infuse in syrups, cordials, or desserts.
  • Recipe Idea: Elderflower Cordial – Combine the blossoms with sugar, lemons and water for a refreshing syrup.

11. Rose

Rose petals are not only beautiful but add a sweet, floral taste to your dishes.

  • Edible Parts: Petals.
  • Benefits: High in vitamins C and A, along with calming properties.
  • Preparation: Use to make rosewater or add fresh petals directly to your recipes.
  • Recipe Idea:
    • Rose-infused Cream – Add rose petals to cream for a fragrant dessert topping.

How to Use Edible Flowers Safely

Before using edible flowers, keep these tips in mind:

  • Know What’s Safe: Not all flowers are edible; research thoroughly or consult a reliable source. Only consume flowers that are clearly marked for culinary use.
  • Avoid Chemicals: Use flowers that are organic and free of pesticides or chemicals.
  • Prepare Properly: Rinse gently with water to remove any dirt, bugs or residue, and trim away non-edible parts like stems or pistils.

Bring Nature to Your Table

Edible flowers are more than just decorative—they’re an invitation to experiment, taste, and explore. Whether you’re surprising dinner guests with nasturtium-studded salads, infusing syrups with lavender, or topping cakes with sugared violets, these blossoms bring a feast for both the eyes and the palate.

Take the plunge into this delightful culinary world. Start small, try growing some of your favourites at home, and discover just how much edible flowers can elevate your table.

Which flower will you try first? Share your culinary creations and kitchen adventures with us! ☀️

Further Reading: The Incredible Benefits of Growing Your Own Food, Why Growing Your Own Food Has Never Been More Important

A Guide to Growing Figs in the UK

Picture this—a quiet moment in your garden, the sun kissing your skin, and the sweet scent of ripe figs wafting through the air. Growing figs in the UK might sound like a Mediterranean daydream, but with the right know-how, you can bring this vision to life in your own garden.

Image:  Regal Picture frame with photo of fig Plant.

How to Grow Figs in the UK

Figs are surprisingly hardy and can thrive in many corners of the UK with a bit of TLC. Start by choosing a sunny, south-facing spot in your garden or patio—figs love warmth. Plant them in well-draining soil mixed with compost to ensure their roots don’t sit in water. If you’re tight on space, don’t worry! Figs grow beautifully in large containers, making them ideal for courtyards or balconies.

A key tip for UK growers is to restrict their root growth, which encourages better fruit production. You can achieve this by planting your fig tree in a pot that sits in the ground or by using brick rubble or slate to line the planting pit, limiting root spread.

Selecting the Best Fig Variety

Not all figs are created equal—some varieties are better suited to Britain’s climate than others. Look for types like ‘Brown Turkey’, celebrated for its hardiness and deliciously sweet fruit, or ‘Brunswick’, which copes well with cooler conditions. For those with smaller gardens, the compact ‘Little Miss Figgy’ is an excellent choice. Whichever variety you choose, ensure it has been bred for cooler climates to maximise your success.

Caring for Your Fig Plant

Figs reward attentive care with their abundant harvest. Regular watering is essential during dry spells, especially for potted plants, but beware of overwatering, as it can lead to root rot. Feed your fig with a balanced fertiliser in early spring and again in midsummer to boost growth.

Pruning will keep your fig tree in tip-top shape. Cut back any damaged branches in winter, once the tree is dormant. Aim to maintain an open structure, which helps sunlight reach the fruits and prevents fungal diseases.

How Figs Develop and When They Ripen

Watching figs develop is a gardener’s joy. It begins with tiny green buds that gradually swell into plump fruit. Be patient—figs can take months to mature! Depending on your variety, you can expect to start harvesting from late summer to early autumn.

The fruit only ripens on the tree, so don’t pick them too early. A ripe fig will be soft to the touch, have a sweet aroma and may ooze a drop of nectar from its base.

The Fascinating World of Fig Pollination

Here’s where it gets really interesting—figs are pollinated in a way that feels closer to science fiction than gardening. Tiny wasps called fig wasps play a crucial role in pollination, but most UK-friendly varieties like ‘Brown Turkey’ are self-pollinating, so you won’t need to worry about wasps. However, their development is still fascinating and reminds us of nature’s ingenious complexities.

Common Fig Diseases and How to Prevent Them

Unfortunately, fig trees can sometimes fall victim to pests and diseases. Keep an eye out for fig rust, which causes yellowing leaves or scale insects, which can sap your tree’s vitality. Regularly inspect your plant, prune any diseased sections, and ensure good airflow around the branches to reduce the risk of infection. Potted figs are less susceptible to soil-borne diseases but should still be monitored for signs of stress.

Propagating Your Fig Tree

Want to grow even more figs? It’s easier than you might think! Figs can be propagated through cuttings. Simply take a 20–30cm hardwood cutting from your tree in winter, plant it in a container with moist compost, and keep it in a sheltered spot. Before long, you’ll have a new fig tree to expand your garden—or gift to a fellow fig lover!

Getting Creative With Figs and Their Leaves

The possibilities are endless with your fig harvest. From fresh figs paired with goat cheese or prosciutto to homemade fig jams and tarts, their versatile sweetness makes them a favourite in the kitchen. You can even use fig leaves to infuse stews, soups, or syrups for a subtle, nutty flavour.

Your fig leaves can also be used as eco-friendly wraps for grilling fish or meat, adding aroma and reducing waste. Talk about making the most of your plant!

Why Grow Figs?

Figs are more than just a beautiful addition to your garden. By growing them, you’re getting closer to nature, reducing the carbon footprint of imported fresh fruit, and enjoying the unbeatable taste of homegrown produce. Their ornamental beauty and luscious fruit will make your garden feel that little bit more Mediterranean, right here in the UK.

Are You Feeling Inspired?

Now’s the perfect time to plant your first fig tree and kickstart your fig-growing adventure! Picture picking your very own fresh figs and tasting the results of your dedication. What are you waiting for? Happy gardening, and may your fig trees flourish! 🌱

Further Reading: RHS Growing Figs, The Incredible Benefits of Growing Your Own Food, How to Plan and Create a Forager’s Garden

Gives Chillies Their Kick

If you’re a spice lover, you’ve probably felt the fiery heat of a chilli. Whether it’s the satisfying tingle on your tongue or the beads of sweat forming on your forehead, chillies are undeniably exciting. But have you ever wondered what makes them so spicy? What’s the science behind that irresistible kick? Let’s peel back the layers of this fascinating fruit (yes, chillies are technically fruits!) and explore what sets your taste buds alight.

What is it about chillies?

Chillies derive their heat from a compound called capsaicin, which is predominantly found in the white membranes holding the seeds rather than the seeds themselves. Capsaicin is a natural defence mechanism for the plant—while mammals, including us, find it spicy, birds are immune to the heat, allowing them to eat chillies and disperse the seeds far and wide. Clever, right?

Not all chillies are created equal, though. The heat level of a chilli is measured on the Scoville Scale, ranging from mild bell peppers to the tear-jerking Carolina Reaper. Capsaicin tricks your brain into believing your mouth is on fire, triggering a unique sensory experience.

Why are chillies good for us?

Beyond their fiery charm, chillies pack a ton of health benefits. Capsaicin is celebrated for its anti-inflammatory and pain-relieving properties. It also boosts metabolism, making it a popular choice for those looking to spice up their meals and their fitness goals.

Research has shown that diets rich in spicy foods may improve heart health, reduce cholesterol, and even extend your lifespan. Chillies are also loaded with essential vitamins like Vitamin C and Vitamin A, keeping your immune system in top shape. It’s not just about the kick—it’s about kicking your health up a notch too!

The Burning Sensation – What’s Really Happening?

If you’ve ever eaten a fiery chilli and felt like your mouth was under attack, you’re not alone. Capsaicin binds to receptors in your mouth called TRPV1 receptors, which are responsible for detecting heat and pain. The result? Your brain thinks your tongue and lips are literally burning, even though no physical harm is being done.

But it doesn’t stop there. Capsaicin doesn’t just stay in your mouth—it can trigger a whole-body response. You might experience stinging lips, watery eyes, a runny nose and even a sweat-drenched forehead. These are all symptoms of your body trying to cool itself down from what it perceives as a “threat”. It’s biological drama at its finest.

Why Does Our Body React Like This?

Your body’s reaction to chillies is a primal defence mechanism. When capsaicin hits your TRPV1 receptors, your brain sends out warning signals. Adrenaline is released into your system, dilating blood vessels and kicking your sweat glands into overdrive.

But there’s good news for spice lovers—this chilli-induced chaos also triggers a release of endorphins and dopamine, your body’s “happy” chemicals. This is why some people find eating spicy food addictive; you’re chasing that euphoric, adrenaline-fuelled high.

How to Overcome the Heat

Got a little too ambitious with your chilli intake? Don’t worry—we’ve got you covered with these foolproof remedies to tame the spice!

  1. Dairy to the Rescue

Capsaicin is oil-based and water won’t wash it away. Instead, reach for a glass of milk, a dollop of yoghurt or even some cheese. The protein casein in dairy binds to capsaicin molecules, helping you cool down.

  1. Bread or Rice

Starches like bread, rice or crackers can absorb some of the capsaicin, taking the heat off your tongue. Plus, a bite of bread is a far gentler way to recover than frantically chugging water!

  1. Sweet Relief

Sugar and honey can help counteract the fiery attack by offering a sweet contrast to capsaicin’s heat. Drizzle some honey or munch on a sugar cube for quick relief.

  1. Acidic Foods

Squeeze a bit of lemon or lime juice onto your tongue. The acidity helps neutralise capsicum oil and dials down the burn.

  1. Know Your Limits

If you’re still building up your spice tolerance, start small. Work your way up the Scoville Scale as your taste buds acclimate to the heat.

Chillies—More Than Just Heat

Love them or fear them, chillies are more than just a fiery thrill. They hold a fascinating blend of science, health benefits and culinary possibilities. Next time you dice up a fiery jalapeño or sprinkle a pinch of cayenne into your dish, remember you’re not just spicing up your meal—you’re indulging in a botanical marvel.

Inspired to experiment with your own chilli plants? Why not try growing them yourself? Not only will you get the freshest heat possible, but you’ll also gain a deeper appreciation for these fiery fruits. Happy cooking, and more importantly—happy spicing!

Grow Chillies with SowItGrowItandFeast!

Further Reading: Spicy Evolution: A Dive into Chilli’s History 🌶️, Troubleshooting Chilli Problems